Hot 4 Hybrid – Coloring with Copic Markers
Hey There! Jen Tapler here with the final installment of my digi stamp coloring series and this time I’m going to talk about alcohol based markers – the most popular of which are Copic Markers. This coloring medium is probably the most intimidating of them all, mostly because people just don’t know what the heck they are. So I’m going to start by giving a little general information about Copics before I get into how I use them. But first I want to tell you all that I am absolutely NOT a Copic expert! I would definitely still consider myself a beginner with these markers. I am NOT a Copic Certified Instructor, so this is an informal post with general information only. There are lots of formal classes out there, both online and in scrapbook and art supply stores by REAL experts who are actual certified instructors and if this medium interests you I would highly recommend (albeit with lots of jealousy as nothing like that is available here on Maui!!) you look into something like that. But, if you just want to play around and have another coloring technique at your disposal, Copics are lots of fun and really ANYONE can use them – it just takes practice to get the hang of them!
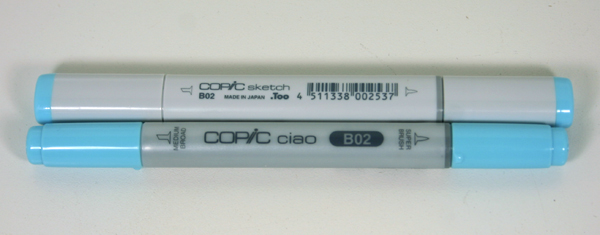
So are you wondering what a Copic marker is? Copics are permanent, alcohol based markers with refillable ink and replaceable nibs that come in over 330 colors. Oh, and they aren’t cheap. Copic markers are highly blendable and you can even buy empty markers and mix refills to create your own custom colors. These are the markers most often used by Manga / Anime artists. There are different sizes available, the most common being the Sketch and Ciao markers:
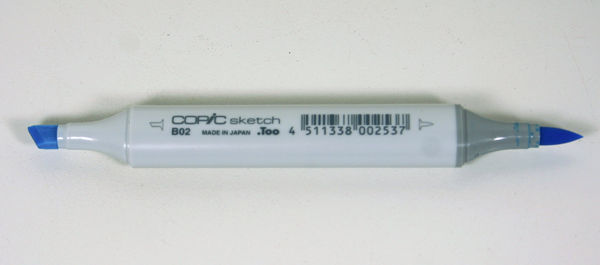
The only difference in these two markers is the amount of ink they hold and the price. The Sketch marker holds more ink so it will last a bit longer before needing to be refilled, and is therefore more expensive. They are slightly cheaper on the U.S. mainland and online, but here in Hawaii a single Sketch marker costs me about $6.00 and a Ciao marker will run me about $3.95. Like I said, these are not cheap markers!! But the finished results are definitely worth it! Both the Sketch and the Ciao markers have 2 tips – a chisel nib and a brush nib. I use the brush nib almost exclusively in my coloring.
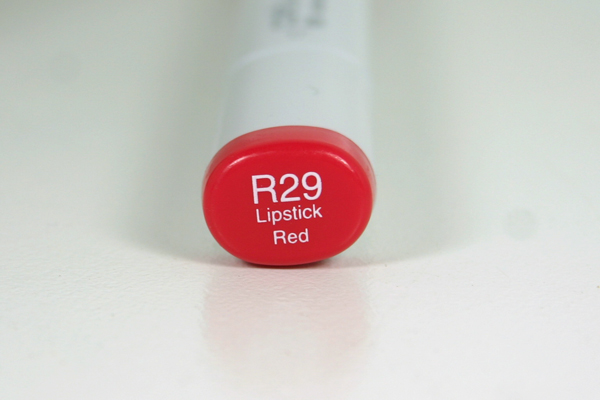
Now, the thing that most people struggle with initially is understanding the Copic Color System. Once you have a firm grasp on that, you will be much happier with the results you get when blending and will be better prepared when shopping to start building your Copic Collection. Each Copic Marker color is given a Color Name as well as a corresponding Letter and Number Combo:
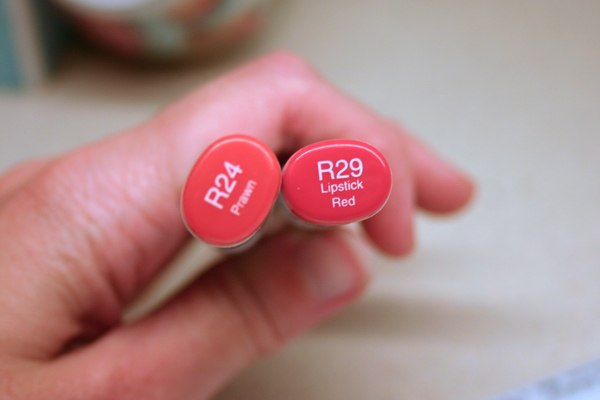
The Letter(s) is the Broad Classification that indicates the Color Type (in this case R for Red). The first number is the Intermediate Classification – the color number within the Color Type, given a value of 0-9 (sort of like what kind of red it is – a “coral” red, a “salmon-y” red, etc – at least, this is the way I see it). And finally, the last number is the Specific Classification / Brightness Number that indicates the intensity of color and is given a value of 0-9. I have found that for blending purposes, it is best to blend with markers that are in the same Broad Classification AND the same Intermediate Classification, but of varying intensities. For example, if I’m coloring something red – I will pick out the R “family” (as I like to call it) that I want to use, then I’ll go with the lightest and the darkest (the lowest and the highest number in that last digit of the Color Name Code) markers I have in that “family”. For example, In the R20’s, the lightest marker I have is R24 and the darkest I have is R29. I also have R26, but I really only NEED 2 markers to blend, so I go with R24 and R29.
Clear as mud? Hopefully that will make more sense as we move along.
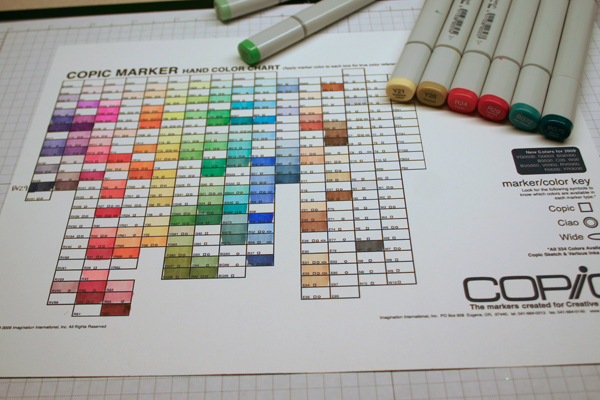
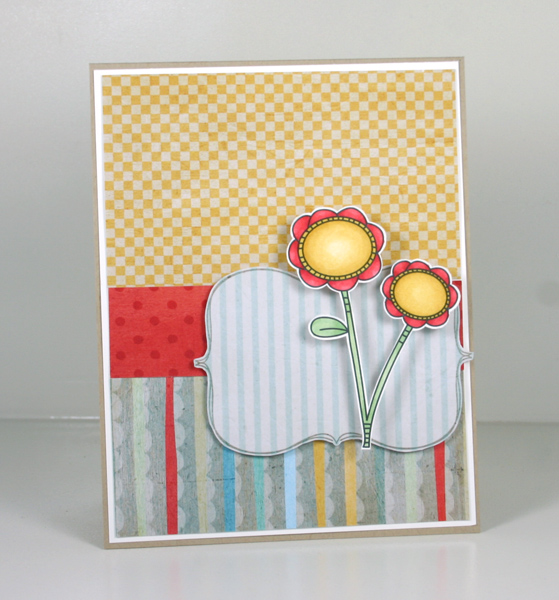
Now, when I’m coloring digital stamps, obviously the first thing I do is print out my stamps. Then I print out the papers I want to work with on my project and start to pick out the markers that match those papers. For the sample project I’m showing you today I used a stamp from Lauren Grier’s Funky Garden stamp set and printed papers from her Forever Moments kit. I use a Copic Marker Color Chart that I printed from the Copic Website and colored in with the markers I own to match my markers to my papers.
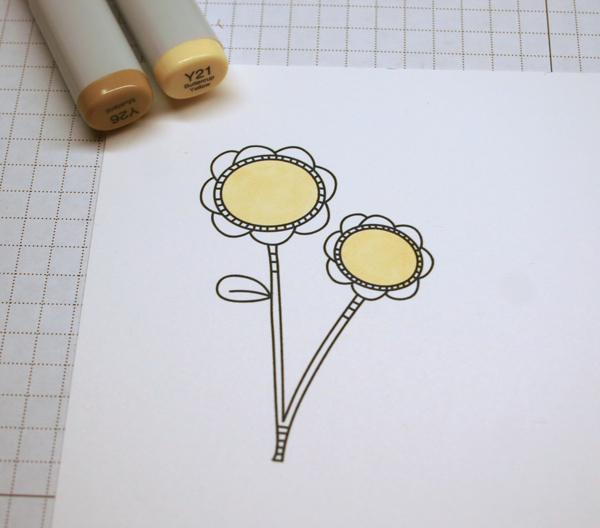
Once I’ve picked out the markers that are the best matches, I then pick out either a shade lighter or darker for each one to use for blending. As a beginner, I find it easiest to work with just 2 markers for blending for each color, but sometimes I’ll use 3 or even 4 depending on how much depth I want. I typically start by coloring in an area with the lightest shade first (please remember that I am NOT a Copic Certified Instructer, this is just the method that I’ve found works best for me):
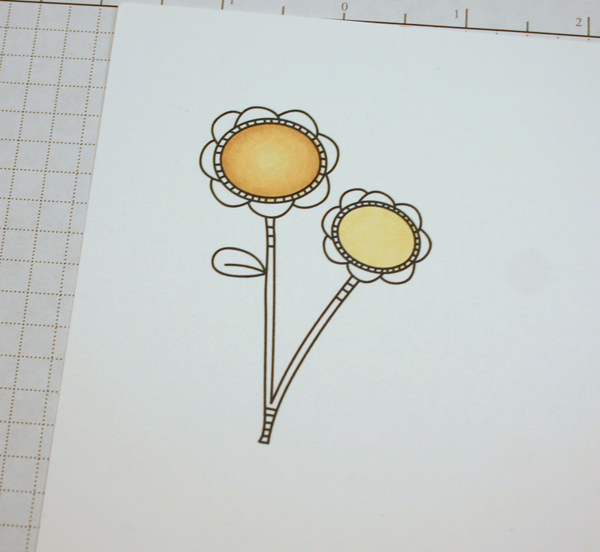
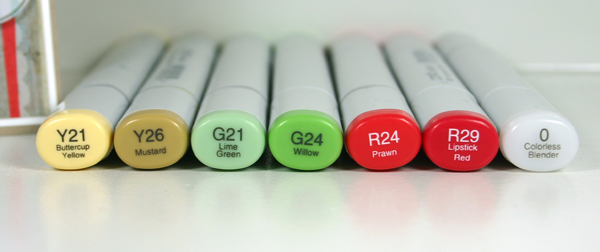
So for this sample I colored in the flower center with Y21 first. Then I went back in with Y26 and in small, overlapping circles added in the darker color around the outer edge for some depth. Once I lay down my darker color where I want it, I then go back with my lighter marker and blend it in so you don’t get any type of line from the darker marker, blending towards the center. Keep in mind, the more you go over an area with ink, the darker it will be. So I put down very little color in the very center of the flower. Below you can compare the difference between the larger flower which has been shaded and blended and the smaller flower which only has the Y21 first layer.
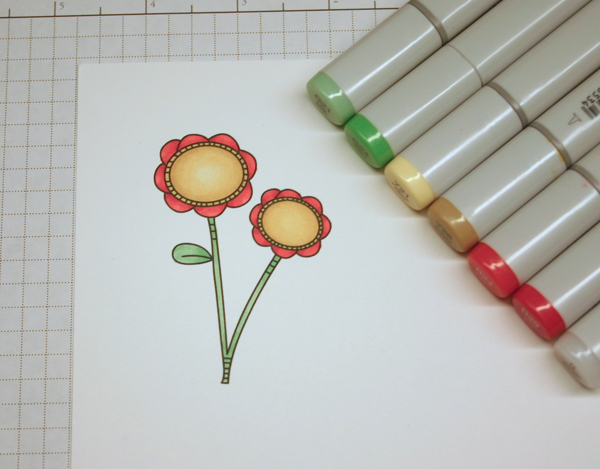
I then use this same technique to shade and blend with the remaining colors, usually starting with the lightest and working towards the darkest. I always use the lighter shade to do the actual blending. Here’s a look at the completed stamp once I was done coloring:
And finally, you can see the image on my finished project:
I used a total of 7 markers on this image, including my Colorless Blender which is used to remove color to lighten an area or add highlights.
So there you have it, some VERY basic information about Copic Markers and a simple example of how I use them on my projects and with digital stamps. I have found that watching video tutorials is much more informative and I’d encourage you to do a quick YouTube search for Copic Marker Tutorials if you’re interested in learning more – there are literally thousands of videos posted by very talented papercrafters. Keep in mind when they talk about rubber stamps and the types of ink that won’t bleed with alcohol based markers – you don’t have to worry about that with digital stamps!! I have never had a problem with my inkjet printer ink bleeding with Copic Markers as long as I let it dry for about 5 minutes after printing before I start coloring!
Well, that about wraps up my Coloring Series! (if we’re all really nice we might be able to talk Sara into doing a Coloring with Chalks or Pastels post. I don’t have chalks though, so I can’t help you with that one!). I hope you all have found some new and fun ways to use those fabulous digital stamps in the Shoppe!


LauraM said...
on June 9th, 2010 at 10:26 am
That is awesome I just wish I could get my card to come out good.
sally said...
on June 9th, 2010 at 11:40 am
you are a genuis!! thanks soo omuch for this explanation! I have several of these but had no idea about the numbers and letters. yay!!
la said...
on June 9th, 2010 at 12:22 pm
very cool chick! I actually.. didn’t know there was anything special about them other than being expensive hahah..
Felicia said...
on June 9th, 2010 at 6:09 pm
I would love to get them just can’t afford them
Laurie J said...
on June 9th, 2010 at 10:33 pm
Thanks so much for the lesson. Now that I know these basics, I’m going to have to try it out.
beckie said...
on June 10th, 2010 at 11:22 pm
I LOVE this Jen, thanks so much!! I’ve never used copic markers before! awesome!!
chilali said...
on June 18th, 2010 at 9:17 pm
Thanks so much! I’ve been curious about your markers and how you use them; your art is always adorable.
Michele said...
on August 30th, 2010 at 4:55 am
Where in Hawaii do you buy your copic markers from?
Jen Tapler said...
on September 10th, 2010 at 12:50 pm
Michele – there was a store on Oahu that used to sell them and I would sometimes pick them up if I was over there. There is nowhere on Maui to buy them though, so now I mostly order online. Dick Blick art supplies is pretty cheap, but a lot of smaller specialty stores will have good sales sometimes, so I try to shop around before ordering. PM me and I will try to hunt down the name of that store on Oahu.
Annette J. said...
on August 15th, 2011 at 5:57 am
Hi. I am just learning about Copics. I wanted to know if there was a brand of printer that they worked best with. I want to print out vintage images and fill in the color, and put color on top of printed out images. Can this be done? Help!