How To Save Your Facebook Timeline
Hi Everybody!!! Heather here to share how to save your Facebook timeline layouts and photos so they don’t show up blurry and grainy. For some reason they look ok on our computers and then when we upload them to Facebook, Facebook does a number on the quality and they become grainy and not as nice looking as the original. I received these instructions from one of my Facebook friends and they turned out awesome for making our timeline photos and layouts better quality, so I thought I would share them here for you.
Step By Step Instructions:
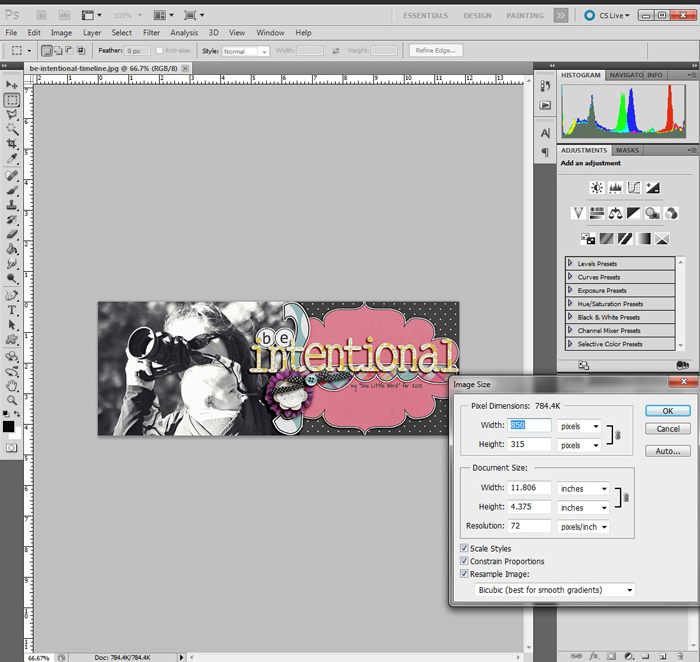
1. Change dpi to 72 (Janet’s templates are already 72dpi): (Image → Image Size (Ctrl+Alt+I) and change the bottom number to 72 dpi… not the pixels
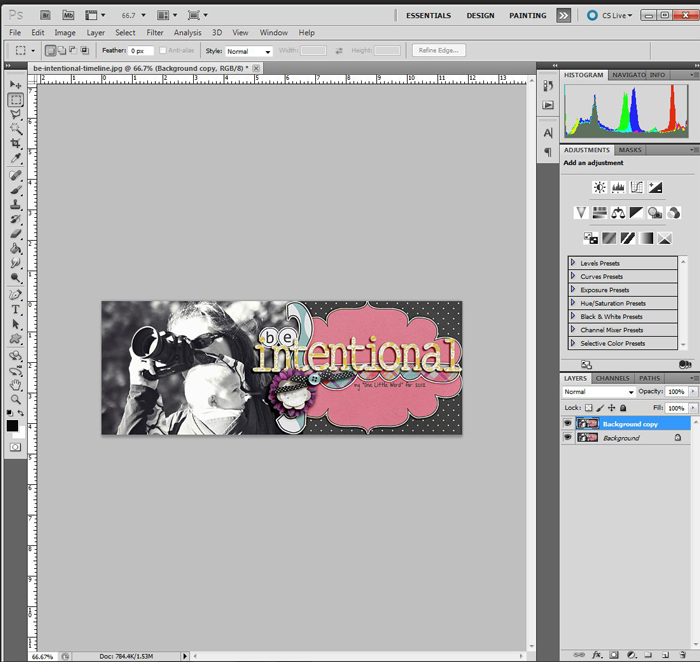
2. Flatten it: (Layer → Flatten Image)
3. Duplicate layer (Layer → Duplicate Layer)
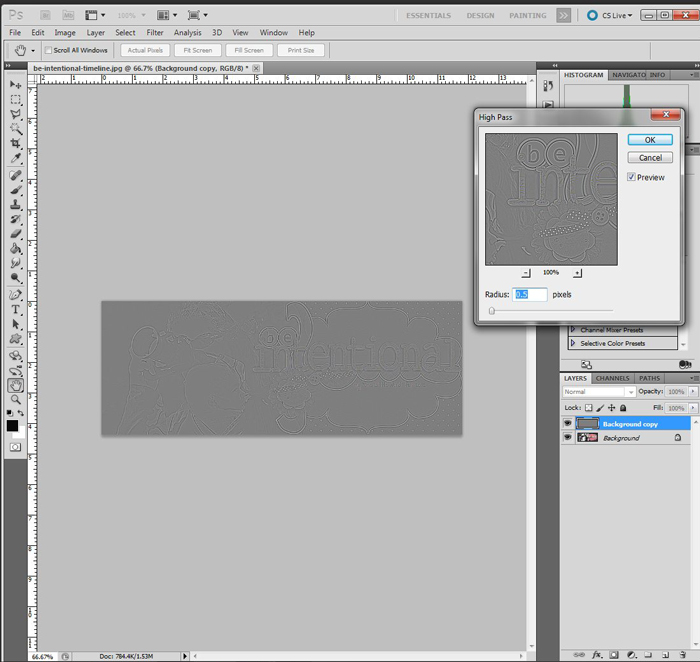
4. Run high pass filter at .5 on the top layer (it will be gray): (Filter → Other → High Pass)
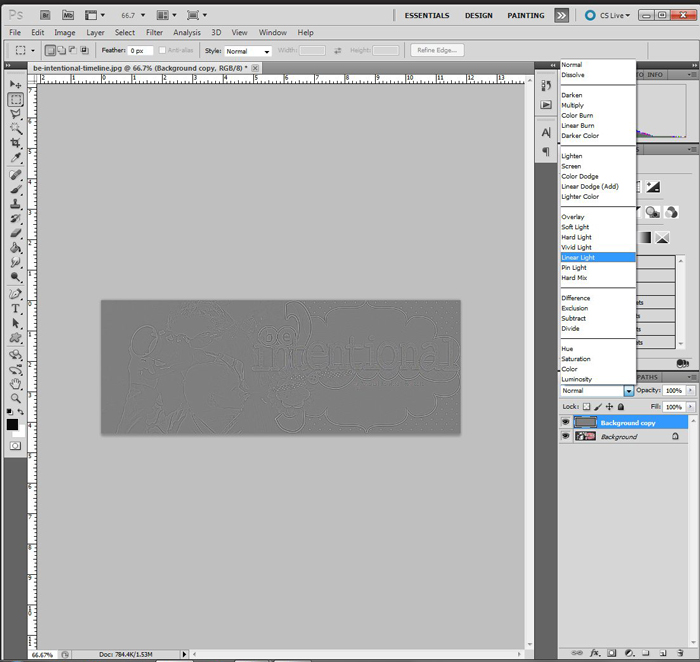
5. Change the blend mode to linear light on that top layer
6. Flatten again
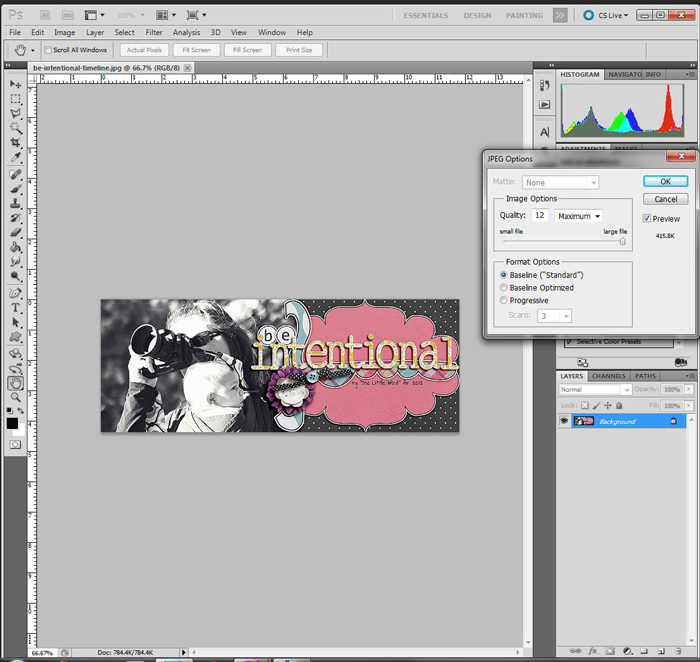
7. Save at 100%
8. Upload to Facebook and Voila!!!
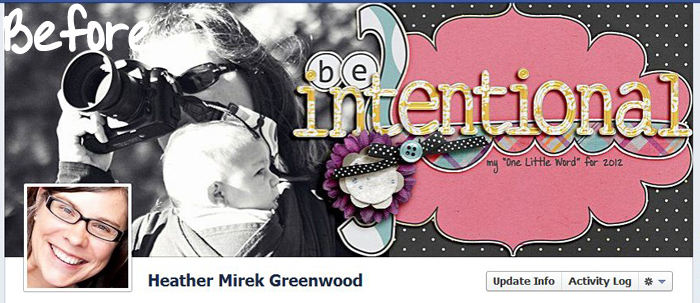
Here is what a timeline picture would look like before doing this high pass filter save:
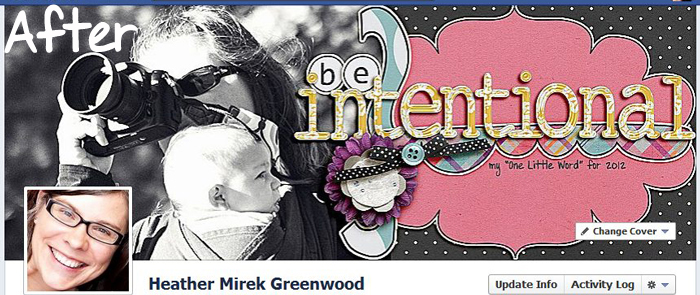
and here is what a timeline picture would look like after doing the high pass filter:
It’s a subtle difference but you can see that everything looks much more sharp and brighter in the second one and you can see the texture in the paper on the journal mat.



Dianne Rigdon said...
on March 30th, 2012 at 4:55 pm
Awesome! Love this!
A helpful hint said...
on April 11th, 2012 at 7:19 pm
Also – make sure the width of the timeline image is atleast 851px – the 1 extra pixel makes a difference and will blur the image. Otherwise, it will be stretched a pixel —
Cheers