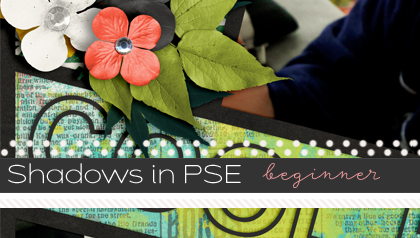
Basic Shadowing Techniques: Layer Styles
Sheri (SeattleSheri) here, starting a series of shadow techniques. This tutorial was developed in Photoshop CS5, but may be adapted to other versions.
First, let’s get familiar with Layer Styles. If you understand how to manipulate styles, it will allow you create shadows that fit your needs.
Enable your layer style by either selecting a predefined layer style from your Styles Palette or by “adding a layer style” from the bottom of your Layers Palette.
So let’s explore the many features within the Layer Style that will help you get just the right shadow. For purposes of this tutorial, my comparison shadow will always be with the following settings shown below: Multiply, Opacity 75, Distance 15, Spread 0 and Size 15.

1. Blend Mode The can be used to change the look of the style. Common blend modes for shadows are multiply and linear burn. You can see that there is virtually no difference between multiply and linear burn against a light background, but a stark contrast against a dark background.

2. Opacity controls how dark your shadow is. Depending on your background you may need to adjust this. Lighter colored backgrounds will require a higher opacity than darker colored backgrounds. For contrast, you can see how the samples look against different backgrounds.

3. Angle controls your light source and how the shadow is cast. This should be adjusted to your preference. I like my light source to come from the upper right, so I work with a 30 to 40 degree angle. You’ll noticed a line guide within the circle that shows you the angle.

4. Use Global Light Source is the function that allows you to ensure the shadows are at the same angle, so you don’t need to manually manipulate each. There may be instances where you do not want a particular shadow to match the rest of your items. In that case, simply uncheck the box and set your angle for that layer accordingly. In the sample above, you see that I’ve placed two flowers on the same canvas with opposing light sources.
5. Distance is the how far the shadow reaches beyond the item you are applying the shadow to. The shorter the distance, the closer to the background the item will appear.

6. Spread is density of the shadow that controls how far the darkest part of your shadow reaches.

7. Size adjusts the spread of the pixels that make up the shadow. Spreading the pixels essentially applies an effect similar to gaussian blur. This can control how close something appears to the light source.

8. Quality is made up of several components — contour, anti-alias and noise. Admittedly, I don’t use this feature, as my preference is to maintain the default contour and 0% noise. You can adjust these setting and use the preview to see their impact on the style.
9. Preview is a great feature that will show you how the changes you make to layer styles will look. It takes some of the guess work out of adjusting your styles.
10. New Style is a perfect way to set up new styles to be added to your style palette and therefore reused in the future! Simply click New Style and name your style and it’s on your style palette for future use. The default is to place new styles in chronological order, so they will always appear last on the palette.
Installing layer styles
To install a layer style. Go to your Style palette and click on the arrow in the upper right corner to enable your palette options. Select Load Styles and navigate to where you’ve saved your style file. File names will have an .asl extension in Photoshop. Navigate back to your style palette and you should see the new styles. Many times, multiple styles will be included in one .asl file.

Applying styles to multiple layers
If you have a unique style that you haven’t saved as a new style, you can apply it to multiple layers by right clicking on the layer name within the layer palette, selecting Copy Layer Style, going to the layer(s) you want to apply it to and simply right clicking and selecting Paste Layer Style.
I hope you’ve enjoyed learning about layer styles!

Tutorials by Sweet Shoppe Designs » Shadowing Acrylic and Plastic said...
on March 1st, 2012 at 5:23 pm
[…] grab of my settings box when playing with the shadows of my transparent layers, please refer to Sheri’s Tutorial About Shadowing to understand what all these settings […]
Tutorials by Sweet Shoppe Designs » Scrap Like a Sugarbabe: SeattleSheri said...
on September 15th, 2012 at 1:02 am
[…] bottom of the canvas. For more information on this technique, you can look at my shadow tutorials HERE. Step 10: In all honestly, journaling is commonly an afterthought for me. I sincerely wish […]