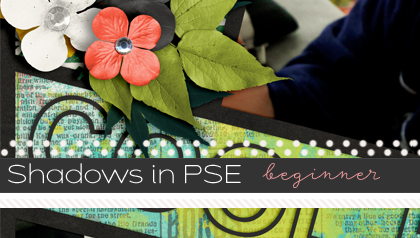
Shadowing Acrylic and Plastic
Hey everyone! Traci comin atcha with some tips and tricks on shadowing Acrylic, Slip Ins and other clear items in Photoshop and PSE!
Photoshop Tutorial
Shadowing transparent elements can be tricky. You can’t shadow them with the typical “multiply mode” as it adds a dark cast to your transparency and makes them look less realistic. You also shouldn’t leave it without a shadow because it looks like little more than a weird semi transparent box over your layout, so here are my techniques for shadowing. I’ll be using my Slip Ins as an example, but the same applies to any transparent element.
My preferred method is to use a “color burn” or “linear burn” blend mode on the shadow as it brings some of the color back to your elements and photos underneath the Slip In, while still maintaining the integrity of the transparency. See the examples below (you can see what the different settings do to the paper layer by checking out the paper underneath the half-circle cut out:
Transparency shadow on “Multiply”:

Transparency shadow on “Linear Burn”:

Transparency shadow on “Color Burn”:

As you can see, it’s a personal preference, you can really use linear burn or color burn effectively, just make sure you play around with the settings to find a level of definition in the transparent element vs. color trueness in the paper layer that you like.
Here’s a screen grab of my settings box when playing with the shadows of my transparent layers, please refer to Sheri’s Tutorial About Shadowing to understand what all these settings mean!

Example of shadowed Slip Ins with the blend mode of the shadow set to “color burn”:

Photoshop Elements Tutorial – Acrylic
To shadow acrylic in PSE, it’s a little more complicated, but not too bad! You’ll need 2 copies of your transparent element.
Top layer: Leave it as is.
Bottom layer, you’ll want to change it to black, shadow it and change the blend mode as follows so that it essentially becomes “invisible” with a shadow:
- Edit → Fill Layer: Contents: Use → Black, Blending Mode → Normal, Opacity → 100% and make sure the “Preserve Transparency” box is checked
- Click on your paint bucket tool (shortcut = K) and make sure your foreground color is black
- Click your paint bucket on the transparent element… this will turn it completely black.
- Go to your layers palette and change the blend mode to “Difference”
- Shadow this layer as normal
Photoshop Elements Tutorial – Slip Ins
To shadow Slip Ins in PSE, you need to add one more step and one more layer!
You’ll need 3 layers of the flattened slip in…
Top layer: normal blend mode, opacity somewhere between 50-75% (not too light that you lose the details in the overlay)

Middle layer: linear burn mode, opacity 100%

Bottom layer:

- Add your shadowing fx to this layer and this layer only… you’ll see it go dark through the whole slip in and the next steps will change that but still keep your drop shadow…
- Edit → Fill Layer: Contents: Use → Black… Blending: Mode → Normal, Opacity → 100% and make sure the “Preserve Transparency” box is checked

- click on your paint bucket tool (shortcut = K) and make sure your foreground color is black… and click your paint bucket on the slip in… this will turn it completely black
- go to your layers palette and change the blend mode to “Difference”


Liz said...
on March 2nd, 2012 at 12:09 am
What a great tutorial! Thank you!
grambie said...
on March 7th, 2012 at 3:31 am
Thank you for including PSE options in your tutorial. I love acrylics and plastics elements, but was hesitant in using shadows. As I stated before, I am so glad that I receive your newsletter which is so informative. HUGS!!
Free Rounded Corner Mats for Project Life! | Traci Reed Designs said...
on January 23rd, 2013 at 12:53 am
[…] you’d like to learn to use the Slip Ins, I have a tutorial […]
Jenna said...
on February 21st, 2013 at 6:43 pm
Wonderful tutorial! Thank you!