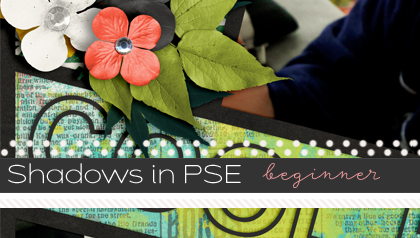
Using the Distort>Wave Feature on Shadows in Photoshop
Hi sweet shoppers! I thought today I would show you a quick and easy way to make your shadows look more realistic on background papers.
For the purpose of this tutorial, I’ll use a card I made for my niece who recently broke her leg. I used Bumps & Bruises by Heather Roselli. The shadows we are going to work on, are the ones beneath the blue, white and red squares of paper. OK, let’s get into it:
1. Create your layout as normal, and apply whatever shadow settings you usually use.

These are the default shadow settings I use for background papers. I like to use an outer glow (tinted a similar hue as the paper) to help define the opposite edge:


Step 2. In the layers palette, hover over the fx symbol on your selected layer, and right click. Select “Create layers”.

Your palette should now look like this, with paper, outer glow and drop shadow as separate layers:

Step 3. Select the drop shadow layer in your layers palette
Step 4. From the top toolbar, select Filter>Distort>Wave.

Step 5. Apply the following settings and click OK. Adjust opacity to your liking.

(Note: You can see a preview in the pop up box of how the shadow will distort, as you adjust settings. Play around and see what works for you. I tend to keep the distortion fairly small. If you don’t like the result, Ctrl Z will revert it back to how it was prior to the filter, and you can adjust settings and try again).
Step 6. Click on the ‘outer glow’ layer on your palette. Select the move tool, then use the keyboard arrows to nudge that layer slightly so the opposite edge is more defined. Because I use a 45 degree light source, I nudge my outer glow layer one tap up and one tap to the right.
Step 7. Apply steps 2-6 on other layers or elements as desired.
This is how my shadows look after using the wave filter on the blue, white and red layers. The changes are subtle, making the paper look like it is slightly wavy, or lifted off the paper.

Here’s an up close comparison:

And the overall end result:

So there you have it. Easy shadow warping. You can use this feature to distort papers, elements, rasterized text….whatever you want really. You don’t have to limit it just to shadows. Have a play and let me know how you get on.

Tracyfish said...
on August 22nd, 2012 at 11:30 am
This is just so cool! Can’t wait to try it!
Laurie Book said...
on August 22nd, 2012 at 12:12 pm
I just tried this out and it is awesome, Jacinda!! Thank you so much for sharing this fab tutorial!!
annie said...
on August 22nd, 2012 at 5:16 pm
Thank you! I The wave feature, I was familiar with, and I like your ideas on how to use it. But I have completely missed that I could make layers from FX. Duh! What a cool thing to learn, thank you! Also love your idea on the outer glow.
heathergw said...
on August 22nd, 2012 at 6:47 pm
ok… that is way too cool!!! Totally going to try this next time!!!
Jordan Carroll (mommy2boyz) said...
on August 24th, 2012 at 12:17 am
Oh, this is perfect! I’ve been wondering how to do this! Thank you!!
Kim (Freckles) said...
on August 31st, 2012 at 4:14 pm
Oh, this is awesome, Jacinda! It looks so much better! I’m going to try this. Thanks for sharing!
Pammy Yates said...
on December 29th, 2012 at 5:11 am
I love this tut! Can’t wait to try it out!
Tutorials by Sweet Shoppe Designs » Scrap Like a Sugarbabe: Maria Lacuesta said...
on May 26th, 2013 at 8:13 am
[…] shadow tricks involves the wave filter to distort both my drop shadow and outer glow layers. Jacinda’s awesome tutorial has step by step instructions. I used this technique to create the paper stack in So Fairy […]
Anne-Marie said...
on March 10th, 2017 at 10:49 am
Thankyou I learnt something new and I think it will be very useful to me.