How-To: The Scalloped Christmas Tree Layout
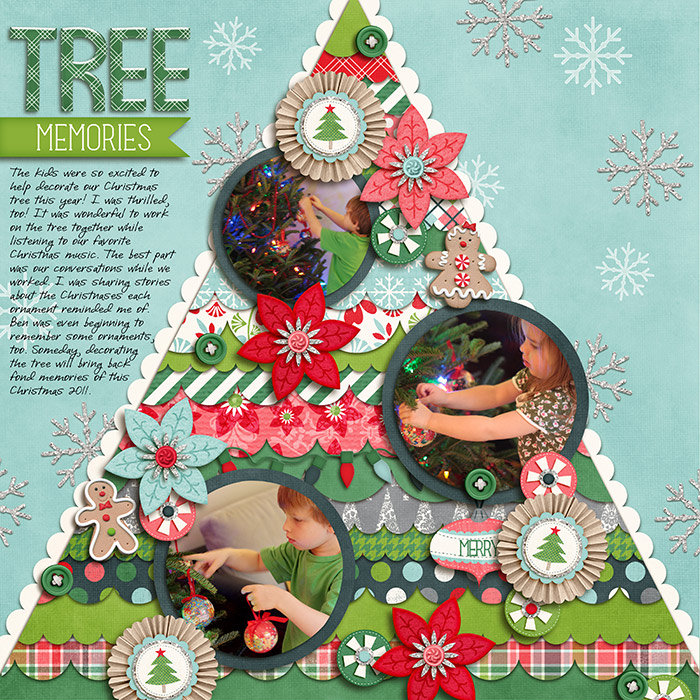
My recent Christmas Tree layout was such a fun page to make… it took some time and tweaking, and it turned out so much better than I even expected! I love when that happens! I had a few people mention they’d love to see me make a template of it… so I decided to talk you through how to create one of your own! Layering different sized scalloped papers over a background or cut-out shape gives such a lush effect to any page. It’s a simple concept & a nifty thing to learn how to do on your pages.
In this tutorial I will teach you how to make your own scalloped edged papers, how to mask effects using layer masks, and how to create scalloped edges on paths.
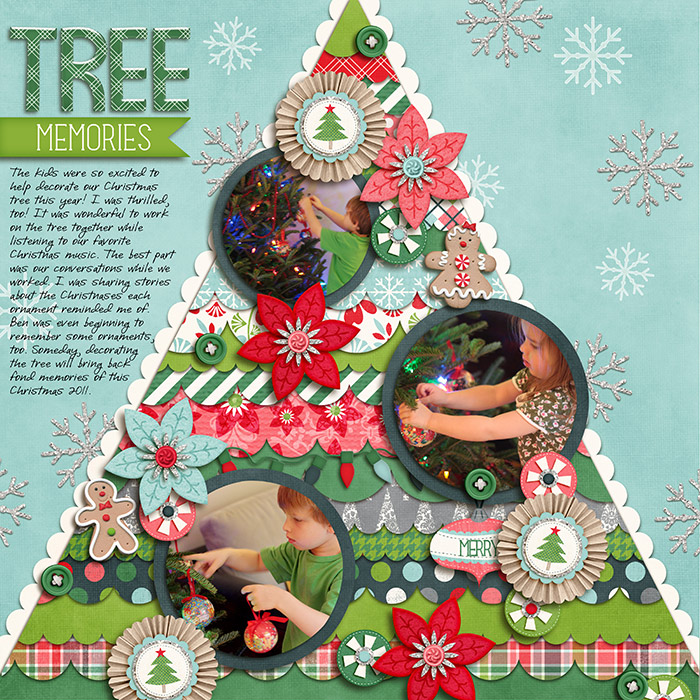
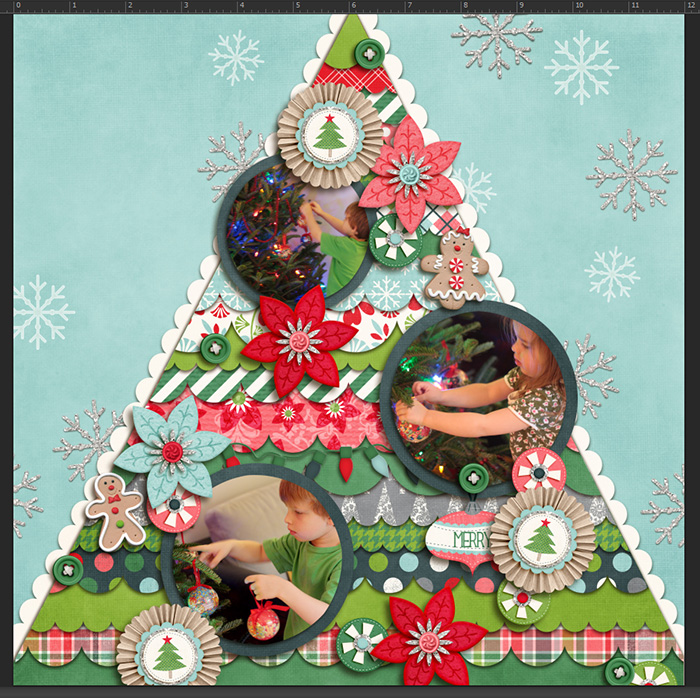
Here’s The Page:
Here’s How To Make It:
I start my page by opening a new 12×12 inch, 300 dpi document. I’m working in Photoshop CS6, however all of these techniques should be do-able in older versions. I started this page with a kit in mind (A Merry December by Jady Day Studio and Meghan Mullens) and decided I wanted to make a Christmas tree from all of those yummy papers to showcase some of the photos of my kids decorating the tree last year. My tree is built by creating lots of different sized scallop strips.
Making Your Own Scalloped Papers:
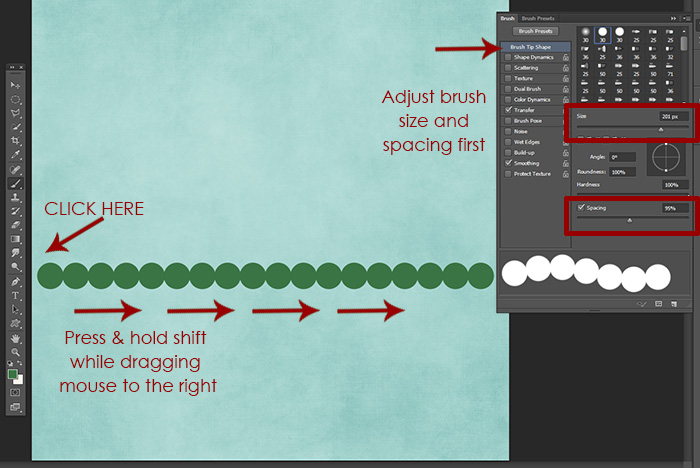
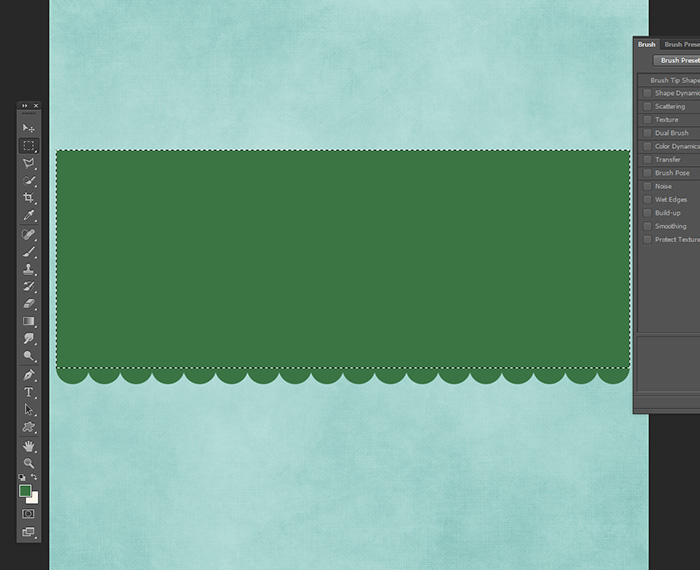
First, select the brush tool and select Brush Tip Shape in the palette. Choose the round brush with hard edges, then select the size you want each bump of the scallop to be. For this one I chose 201 pixels, a nice medium-size. Then (this is the trick) adjust spacing to separate each circular stroke of the brush. This is what creates the scalloped effect. I adjust it to somewhere around 95% so that the circles are just touching with no gaps in-between.
Once you have your settings ready, grab your brush tool and create a new layer on your layout. Start your brush over to the left hand side of the page, push and hold the SHIFT button on your keyboard and click and drag your brush over towards the right side of the page with your mouse. You should now have a nice straight row of circles that are slightly connected.
Now I have to create the “paper” above the decorative edge I just made. Go to your tools and select the Rectangular Marquee Tool. On the same layer as my circles, I eyeball it with the cursor and start my rectangle at the center left edge of the left hand circle and drag up and over until the tops of all the circles are covered and there is a nice area above them of solid paper. Fill the shape with the same color as the scalloped circles you just made. Now you have a solid piece of paper with a decorative edge. 
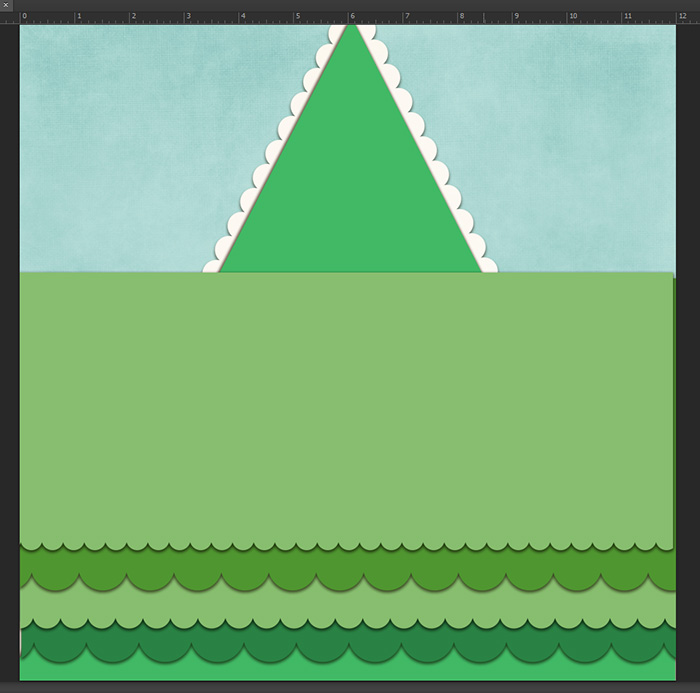
Repeat this method above to create 4-6 different sized scallop edge papers. Just adjust the size of your brush to make small ones and large ones. Make them different colors so it will be easy to see them when you start to layer them. Now set aside your scalloped papers for a little later. Either turn off visibility or drag them into a folder in your layers palette titled “scallops”. We’ll get back to them in a bit.
Drawing The Tree Shape:
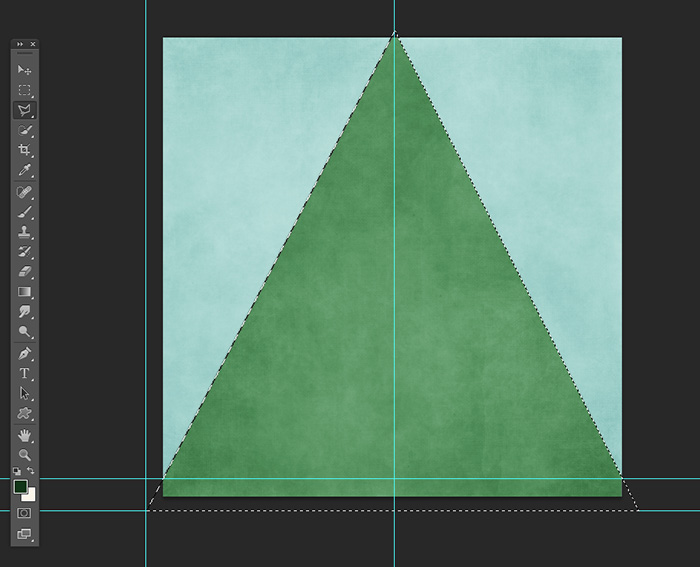
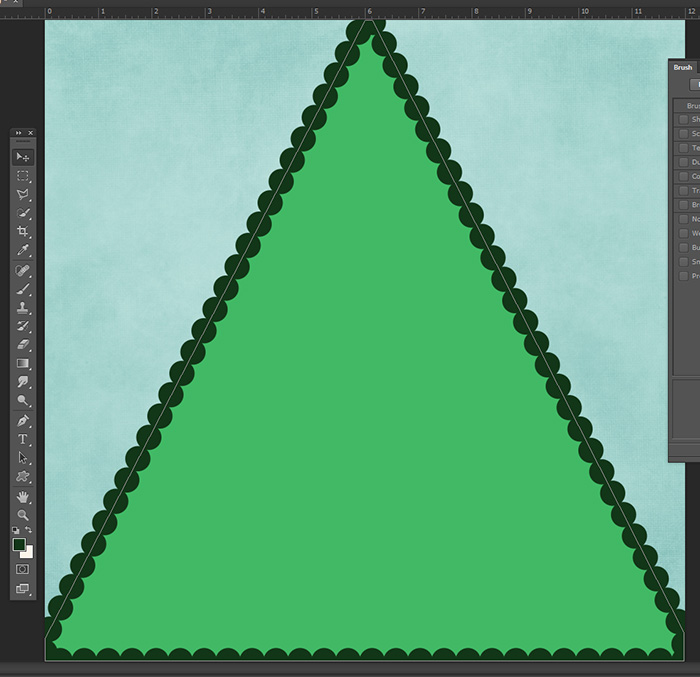
As you can see above, the tree begins with a triangle shape I drew using the Polygonal Lasso tool. I zoomed out from my canvas and pulled some drop lines from my ruler to help guide me. Then I filled the shape in a new layer. This is my inner tree mat.
Creating A Scalloped Edge On A Path:
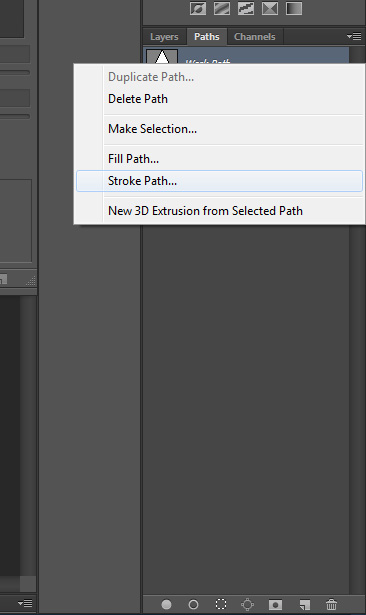
First, go to your brush tool again like you did when we made the scallops. Change your brush settings in the same way, except make the size of your brush smaller, I set mine around 142 pixels. Now, switch back to your selection tool (either the lasso or marquee). Right click on the tree shape you just made in the layer palette and Select Pixels so the tree is selected. With the tree selected, hover your mouse over the tree and right click, select Make Work Path, as shown below.
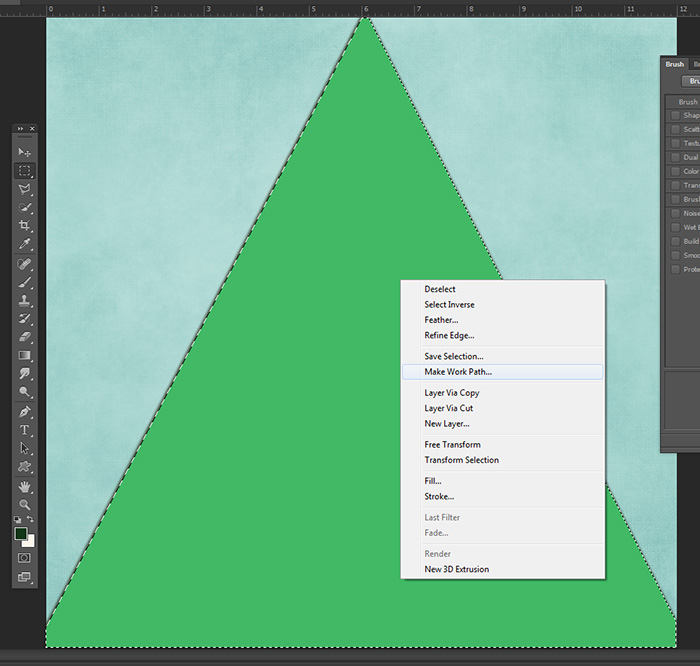
In the pop-up box that comes up just select OK. Now go to your Paths in the layers palette (see below) and click on the new Work Path you created to select it. Right click on it and choose Stroke Path.
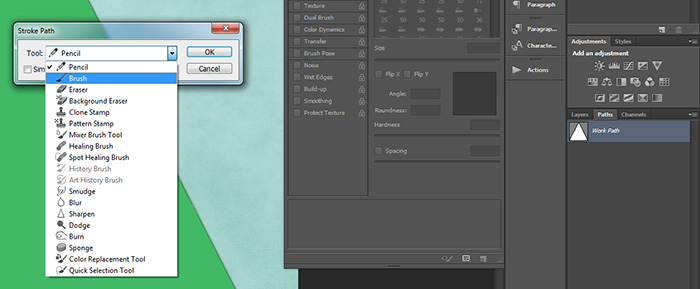
In the Stroke Path pop-up window select Brush from the drop-down menu and select OK.
All of the settings you just put in on the brush palette (spacing & size) as well as the foreground color in your toolbar will be automatically applied to your path. Ta-da!!!
Now just drag your scalloped outline behind the inner tree mat so it peeks out from behind the tree shape. I made my scalloped edge white to make the tree pop. Now, let’s move on! The next step will be layering all those pretty scalloped papers on the tree. Remember I told you to set them aside? Time to turn those layers back on…
Layering Papers Over A Shape Using Layer Masks:
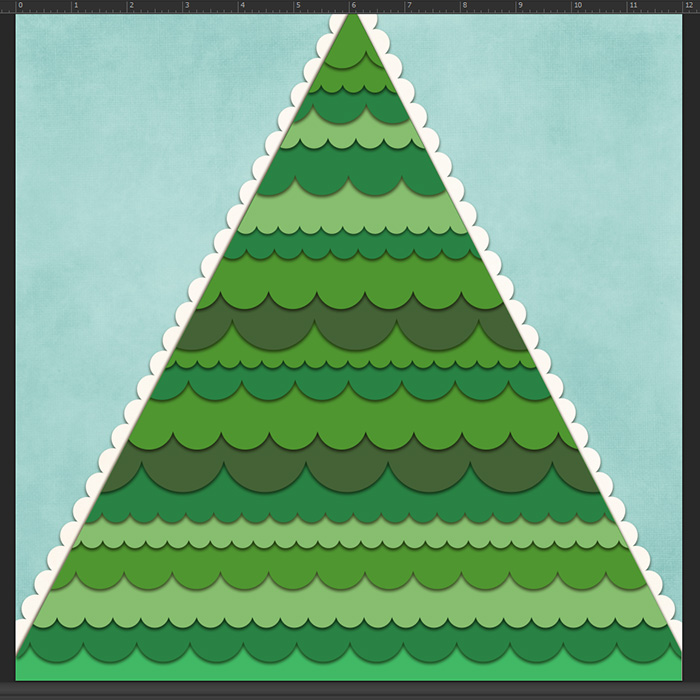
Start by arranging your large scalloped pieces over the inner tree mat. I made copies of my different sizes of scallops and changed their colors so I could see them better. In total I used 18 scalloped papers on the tree. Once you have the whole area covered in scallops it’s time to clip! (FYI: In my examples, I have my shadows already on my papers. It was important for me to make sure I had the settings right. My scallops have shadows angled at 90 degrees, straight overhead. My embellishments, inner tree mat & outer tree scallops, and photos on top of the tree will be angled at 45 degrees.)
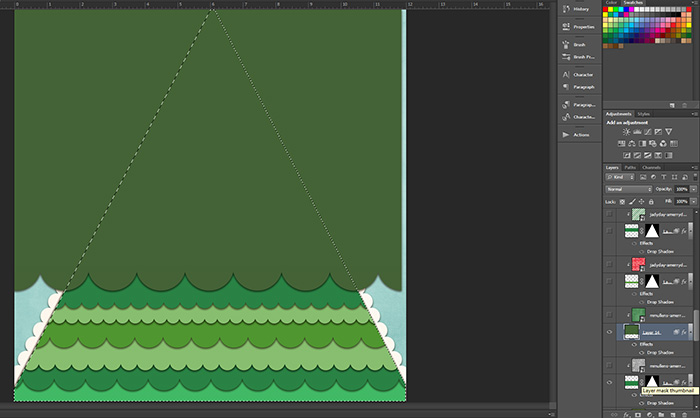
First, Select Pixels on the layer with your inner tree mat.
Then, go to the layer with the scalloped paper you want to clip and select that layer.
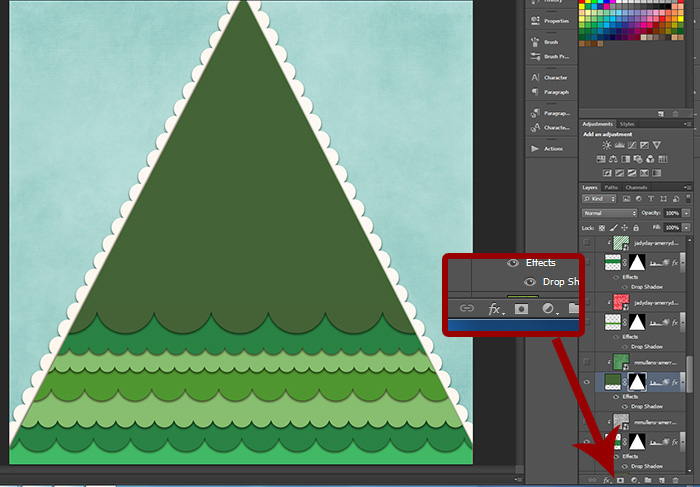
Finally, at the bottom of the layers palette click the icon with the white rectangle with a circle cut-out inside (Add Layer Mask).
Masking Effects Using Layer Masks & Styles
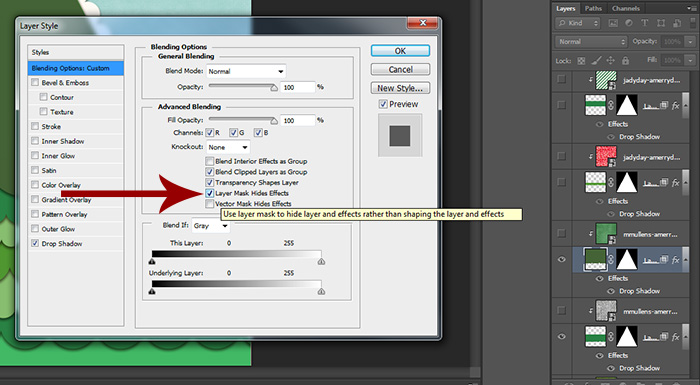
Now we have to tweak with this layer mask we just made. We’re going to make it knock out the drop shadow on each scalloped layer from going outside of the inner tree mat shape onto the white scallops. That way, there’s only a single shadow showing around the tree. Without this Layer Mask effect, the shadows from all these many layers will overlap into a big thick dark line down the sides of the tree. Let’s do it… first double click on the layer to get to the Layer Style panel.
On the Layer Style panel under Advanced Blending, check the box next to Layer Mask Hides Effects and click OK. Now repeat this step for every scallop!!! See you in a few minutes!!! LOL!
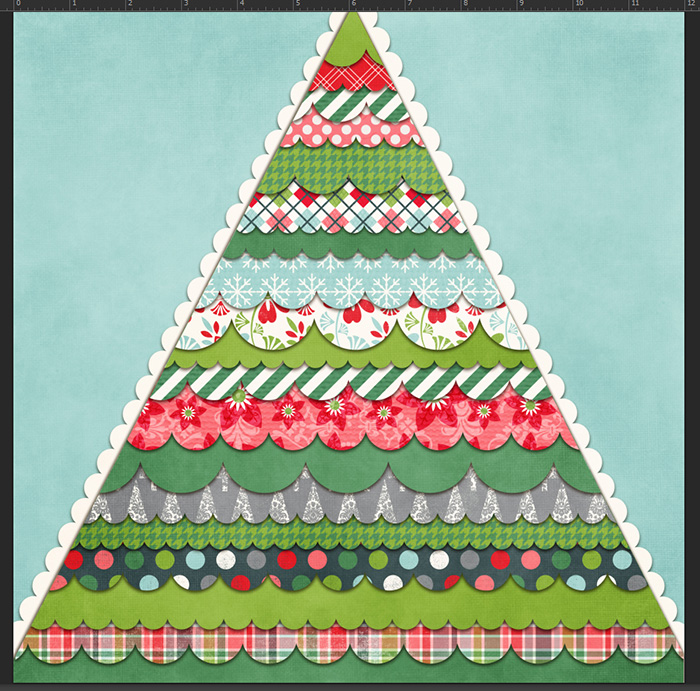
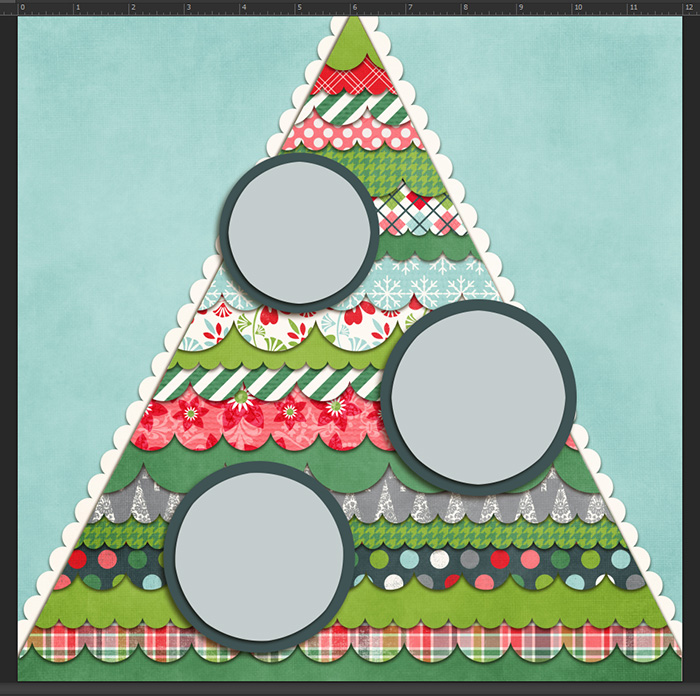
After you finish you will have a thing of beauty! Admire your work, then start adding your papers from whatever kit(s) you choose. I tried to keep mine mostly shades of green with solids to keep it from getting too busy and some reds and multi-colored patterns mixed in.
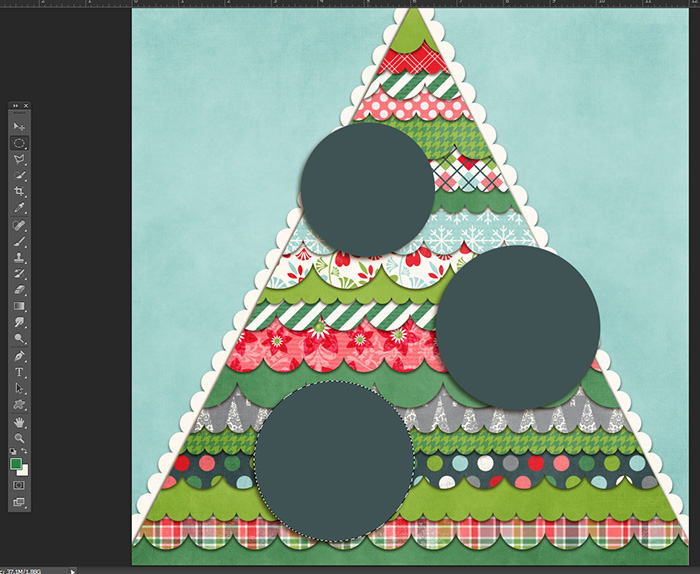
Above these layers, make some circles with the Elliptical Marquee Tool for your photos. Hit the Shift and Alt button while dragging your mouse to keep your circle perfectly round and to make the circle surround the point where you started it. I created two circles, one small and one medium (which I duplicated).
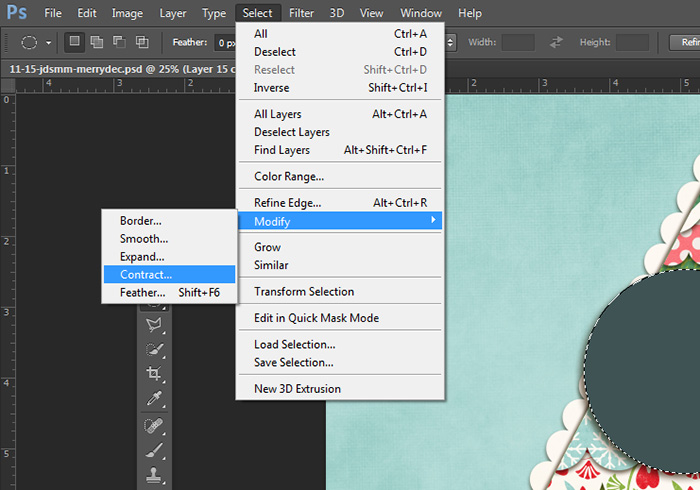
To make the photo a separate circle on the inside you can select the outer mat, then go to Select > Modify > Contract.
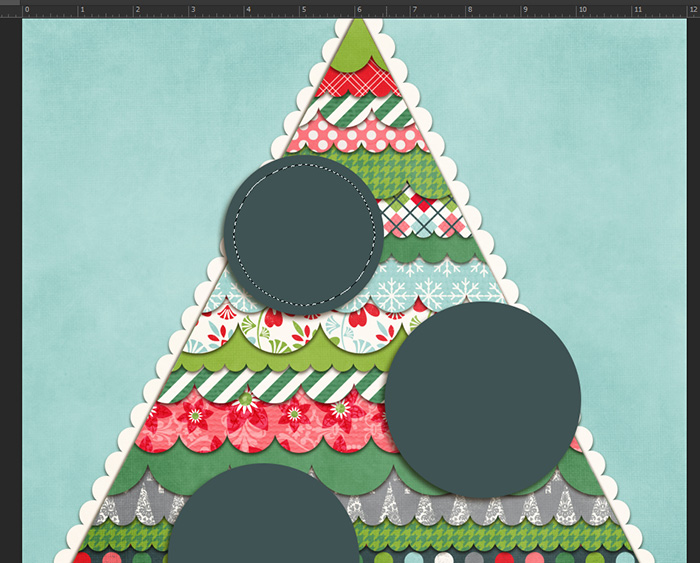
I made my shape contract by about 50 pixels and this is my new selection for my photo.
I filled the shape in a layer above the larger circle. Repeat for all of the circles. Sometimes, the circles end up with a bit of a wonky shape with slightly flattened sides. It kinda bugs me… LOL! I usually hand-draw the layers of circles with the Marquee tool and align them visually. BUT… for this tutorial, I’m showing you the easy way (for once!).
Now comes the fun part. HEY WAIT! That wasn’t fun what we just did? O_o Eh… maybe kind of. 😉 This part is even better. Add photos and carefully embellish your tree. With all of those paper layers you don’t need much. Make it purty! I love the poinsettias in Meg & Yari’s kit. I even added some happy little snowflakes over the background paper.
Now add the title… you could put it anywhere, but I chose to put mine in the upper left. It seemed like a logical place. A short title… Hm, “Tree” seemed to do just fine! And I love it when I find a bit of word art that can help me out with my titles, so the little banner with “memories” worked perfectly underneath. Then, I drew a path with my pen tool for the journaling and it was FINISHED!!!! Yaaaaaay!!!!
Ok, so now that you’ve read through and either A: tried to do it and succeeded, OR… B: Tried to do it and started throwing things at your computer screen, OR… C: Laughed. How do you feel about just downloading the template and calling it a day? 😉 Now everyone can be happy!
Here’s the template for you:
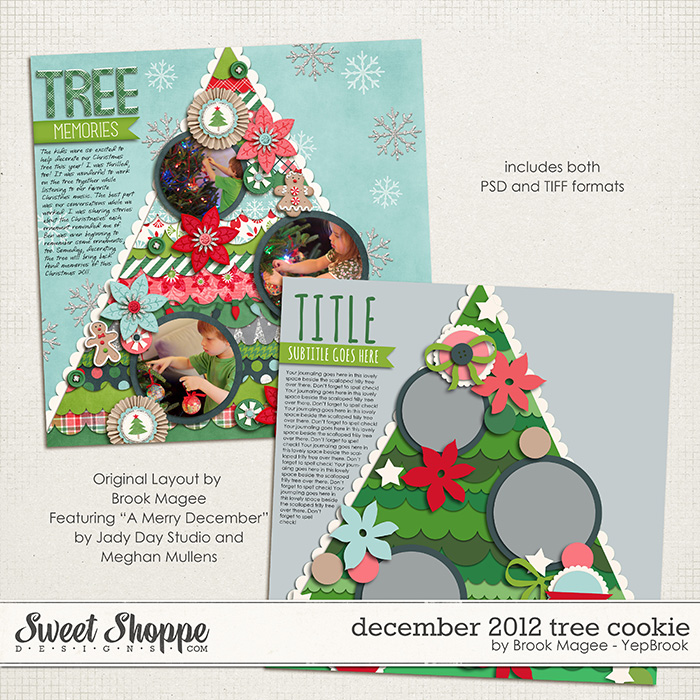
(Click Image to Download)
Thanks for following along! I hope you’ve learned something new to try on your pages. If you have any questions, feel free to head over to the forums to find me. 
Happy Scrapping!!!
-Brook Magee (YepBrook)
Taracotta7 said...
on December 6th, 2012 at 3:21 am
Genius! Thank you so much! Can’t wait to try it! Thanks for the template also! You are a rockstar!
celeste said...
on December 6th, 2012 at 12:22 pm
“Hit the Shift and Alt button while dragging your mouse to keep your circle perfectly round and to make the circle surround the point where you started it.”
Um hello didn’t know about ALT – great tip.
Fantastic tutorial Brooke thanks for sharing the template!
heathergw said...
on December 6th, 2012 at 1:43 pm
you are AMAZING my dear!!! Awesome tutorial and cookie <3
Robin(CA Dreamer) said...
on December 6th, 2012 at 5:16 pm
Thank you so much for the tutorial and template too!
Tracie (TracerM) said...
on December 8th, 2012 at 6:31 pm
Thank you so much! I loved your layout the first time I saw it and wished it was a template. You are an amazing scrapper!
Cherry said...
on December 10th, 2012 at 1:28 am
I really love it!
pimslady said...
on December 21st, 2012 at 9:44 pm
Waw, amazing and so beautiful!!
Thank you for sharing your talent!!