Scrap Like A Sugarbabe: Heather Greenwood, Part II
 Well, it’s been a year and a half since I did my Scrap Like A Sugarbabe tutorial, and while I still like to use patterned papers, I’ve definitely gone through some major growth in my scrapping and scrapping style since then. When people ask me what my style of scrapping is or what style I like best, I honestly don’t know how to answer because I do it all and love it all. When I see new things emerge, I like to give it a try and see where it takes me… it doesn’t always come easy but I’m really enjoying the process of learning and growing. I used to crank out pages and pages and tons more pages a week and have recently really slowed down and enjoy the process more. I think with pocket page protector style, it makes it easier for me to slow down. Every week I’m able to summarize the weeks and write down all that happened or my favorite quotes and add in some pictures from the week. That leaves me satisfied that I don’t have to create a page for every memory I want to record, and spend more time playing. I’m not saying that the pocket pages are for everyone, but for me it’s perfect. Since I’m doing hybrid pocket pages this year, it’s helped me in my need to get messy. As a homeschooling mama, though, I’ve become very busy… which has left less time for cranking out so many pages.
So, I’m going to share a little bit about each style I enjoy doing and a little bit about my workflow during the week.
Digital “Scrappy” Layouts
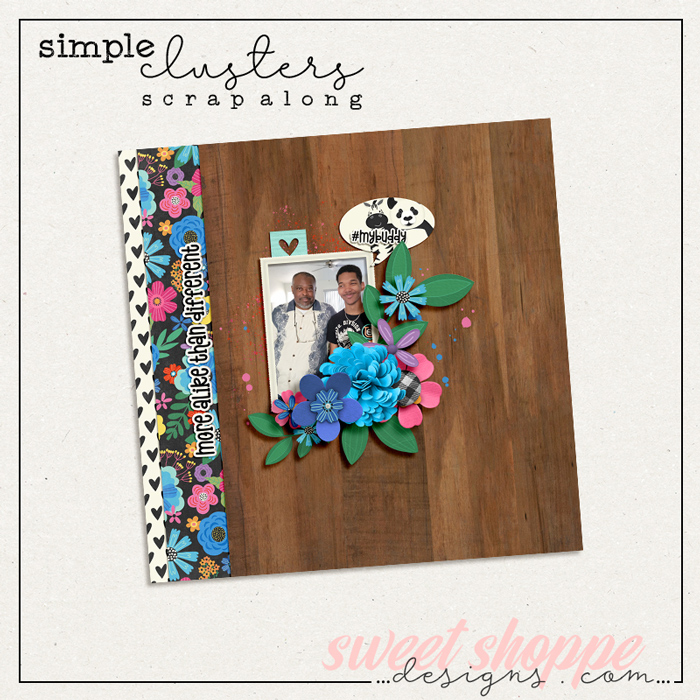
This would be what my first Scrap Like A Sugarbabe tutorial talked about… I still love me some patterned papers… I still am growing in this style too in that I am working more at tweaking my shadowing and watching the trends. This is my current favorite layout that really showcases some of my favorite trends and tweaking my shadowing…
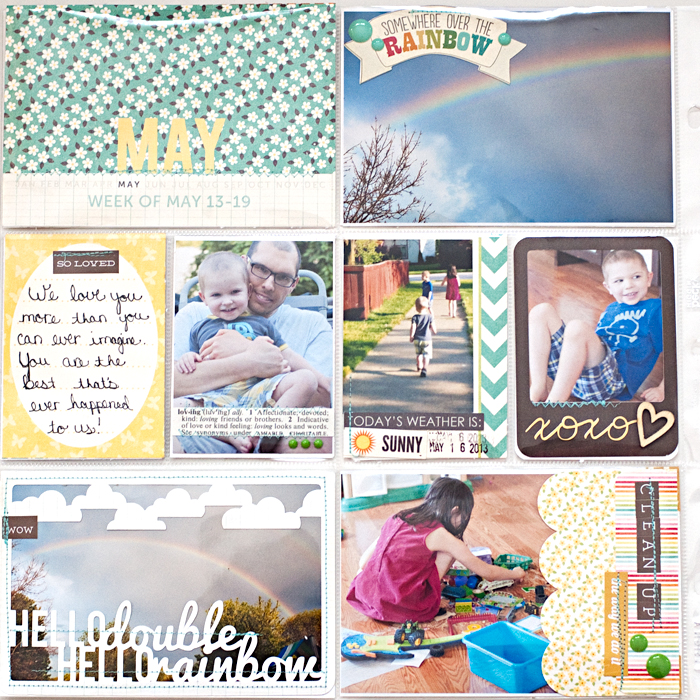
Pocket Page Protectors
I do this weekly, last year I did it digitally, but this year I’m doing hybrid. To me, it’s like 4×6 and 3×4 mini layouts and I love being able to capture so much from the week into two page protectors. I’ve made it a point to really make my pages still look like “me” and showcase the things I love with is memory keeping, being creative and journaling. I use my Silhouette Portrait with the Designer Edition software and it literally has shaved off a ton of time cutting out labels and cards… now I just use the print and cut option and print all my cards and elements out and have the Silhouette do the rest of the work. I have cutting file I created that has 4 – 3X4 cards, and with the Designer Edition, I literally just drag the card or paper I want to cut into that cut file and fits it in there perfectly for printing and cutting… It still has some space left over for me to add some elements or labels and do a trace so that it will cut them out too. I then print it on my computer and cut it with the Silhouette. So very easy and I don’t loathe my trimmer or scissors anymore… and it makes super intricate cuts which I can’t do nicely myself, even with a x-acto blade.
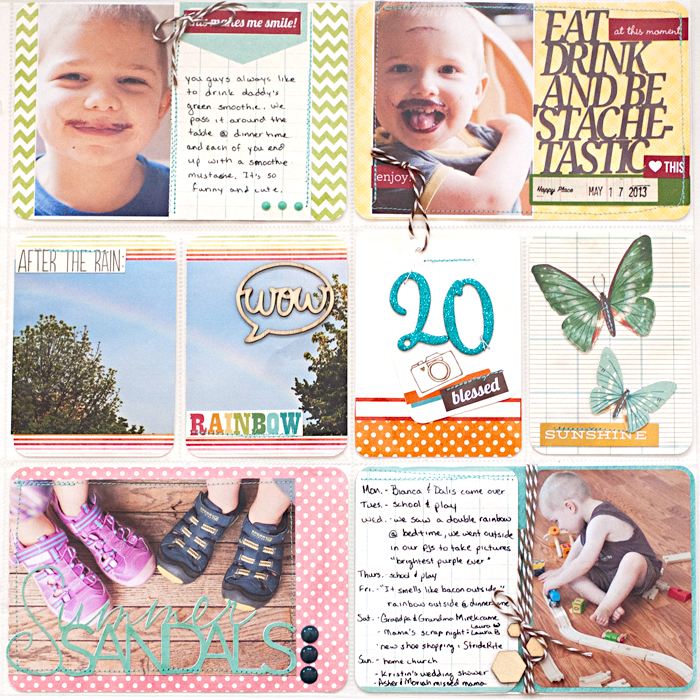
I shared these pages in my tutorial about welding fonts in Silhouette Software to create your own word-art… and I basically cut everything on these two pages with my Silhouette… Yes, I cut those butterflies with the Silhouette and the fact that it cut the antenna so well, seriously sold me on how awesome this machine really is, LOL…
Mixed Media
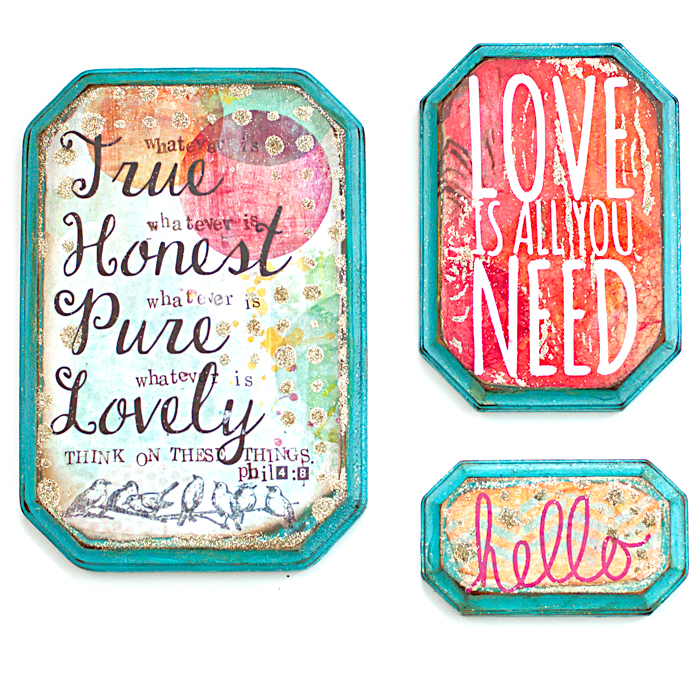
This is one of my favorite styles… I love adding paint and different sorts of media to my pages. I’ve recently even gotten into collage and paper piecing and even doing some hybrid mixed media… My most favorite mixed media project was the wall art I did for my bathroom.
1. To create these pieces, I first bought some wood plaques from Hobby Lobby (you can find them at any craft store for pretty inexpensive. I then painted them turquoise and sanded down the edges to help with the worn look. I then took some brown “walnut stain” ink and rubbed it along the areas of the exposed wood. After that dried I used some gold metallic ink to those same areas to just add a bit more oomph.
2. I then printed out some of the papers on plain white printer paper and printed out some paint splotches and stamps on clear sticker paper
3. I tore up the papers into pieces and using Mod Podge adhered them to the wood plaques and sanded the edges and put on another coat of Mod Podge to seal it.
4. I loosely handcut the paint splotches and stamps… I didn’t need to be neat with it since it was clear sticker paper. Do not use Mod Podge though or you will smear the ink. I took them outside and sprayed a sealant on them, twice and let them dry before moving on.
5. I then used some of my embossing ink pads and stencils to ink some textures on them. I used a “sticky” embossing powder and heated it up to make it sticky so I could add some glitter to the top.
6. I went into my Silhouette Software and did a trace around some word art from the shoppe and also used some fonts by Darcy and cut them out on vinyl and adhered them to the plaques.
7. Using some alphabet stamps and some permanent stamping ink, I completed the rest of the words on the big plaque.
8. I then threw on a coat of Mod Podge again to give it some texture and rubbed it a little bit with the gold ink just to blend it a bit.
9. After that was dry, I took them outside again and sprayed two layers of the sealant on it again since I knew they would be hanging in a bathroom and Mod Podge and humidity are not friends… this made it less sticky to the touch too.
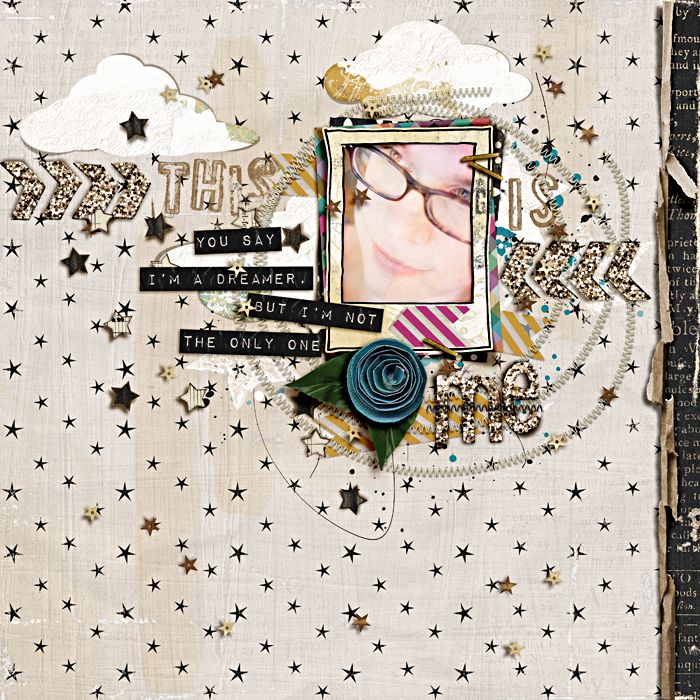
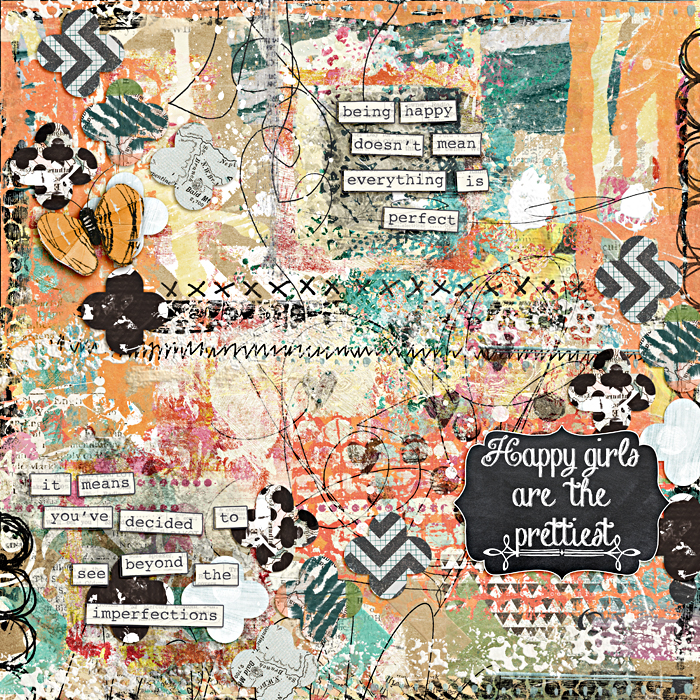
Art Journaling
I sometimes wonder what took me so long to dive into doing art journaling… it’s so therapeutic for me and if I’m doing it digitally, there isn’t a mess to clean up afterwards, lol… I just love blending papers and using brushes to “paint with paper” and using quotes to say what I’m trying to say. I don’t always have to do emo pages either, sometimes I just want to express how blessed and happy I am, or a good quote that’s really moving me at the time. I want to encourage everyone to give art journaling or mixed media a try. There is a difference in that art journaling is more “flat” in the elements you use and really focuses on saying something. Mixed Media tends to use some of the more 3D elements like flowers and leaves and is more like a scrappy layout that also uses some of the art journaling products like paints and rub-ons and ephemera and makes the background “messy” but is more about telling the story vs. sharing an emotion or mood. Here’s one of my favorite art journal pages:
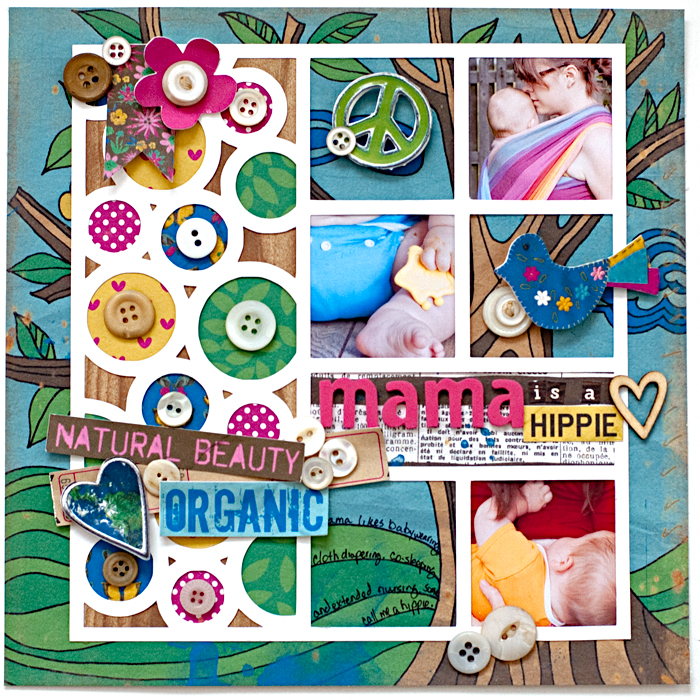
Hybrid
Lastly, I’m a HUGE fan of hybrid scrapping… It really brings in the best of both world for me, being able to get messy and touch and feel the paper, yet using digital supplies that I can use over and over and over again. I do my weekly pocket pages in the hybrid format and I’ve been working on baby books and December Daily and other albums in the hybrid format and have recently fell head over heals in love with the Sweet Mail Exchange we’ve been doing here at the Sweet Shoppe. I’ve also really enjoyed doing other great projects with Mari’s cutting files and Heather’s DIY templates. I recently made a recipe card envelope with one of Heather’s templates for me to store all my green smoothie recipes. I love having it right by the Vitamix ready for me to pick out which recipe I’m going to use that morning. I also really love the 8×8 layouts I’ve recently completed for my youngest DS’s baby album. I think this one is my fave…
My Workflow
I don’t like falling behind so I’m really adamant about staying on top and on schedule with these weekly pocket pages. Throughout the week I am writing down a summary of our day as well as writing down any fun quotes the kids say or anything special that happened that day. I spend just a couple minutes at the end of the day writing about it in my planner. I also download all the pictures I’ve taken with my dSLR or iPhone onto my computer. On Sunday or throughout the week, I open up Lightroom 5 and import all the photos. I then add any photos I really really like and want to print to the “Quick Collections”. I do this by pressing “b” on my keyboard. I then go through those pictures in the Quick Collection and edit and crop them if needed in the “Develop” module. I then open up the “Print” module and there I have 4×6 templates set up that will give me a nice border for whatever size prints I want. I start with the 4×6 template and any photos I want in that size I highlight and then just double check them to make sure they look ok and then “print to file”. I then take those pictures out of the Quick Collection so that I don’t accidentally repeat pictures… I do this by pressing “b” on the keyboard for each of those photos. I then open up the 3×4 template and do the same thing… highlight the photos I want that size and then double check them and “print to file”. Lastly I open up the 2×2 template and highlight all the instagram photos and do the same thing. I also have 2×3, 3×3 and 4×4 templates set up for me to do the same thing if I want other sizes to print my photos at. Doing this all in LR has seriously shaved off hours of my prep for printing!!!! On Monday, I send the photo files off to Costco and pick them up in the evening when grocery shopping. I then spend some time on Monday evening and Tuesday evening finishing up by printing and cutting everything in Silhouette Software and adding the finishing touches and journaling. This leaves me the rest of the week to create any other layouts I want to create during the week… and since some of the photos have been edited, I can just open them up in Photoshop and start scrapping digitally or hybridly or just let off some steam or excitement and do an art journal page.