How to partially color a b&w photo
Hi everyone! Kim here and today I’m going to show you how you can color an accent in a black and white photo. This is a neat technique that is often used to put emphasis on certain details in the photo. And it’s actually quite simple to do!
Let’s get started!
1. Open a photo in your photo editing software. I’m working with Photoshop. Pick a photo with something in it that you want to put emphasis on.
I’m using this photo :
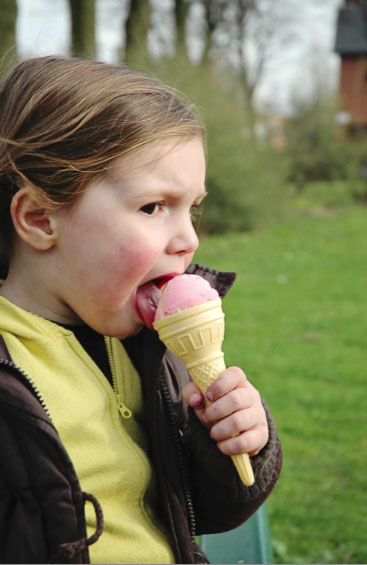
2. Decide on the part you want to color. I want to scrap a page about my daughter’s love for icecream (it’s an old photo but I’m still catching up!) so in this photo I want the icecream to be colored while the rest of the photo is black and white.
3. Duplicate your photo. In Photoshop you do this by going to Image/duplicate.
4. Turn one of the two photos black and white. You can do this by using your favorite action, or by going to Image/Adjustments/Black and White in Photoshop. If you use an action, make sure to flatten your image afterwards.
5. Drag the other photo – the one in color – on top of the black and white one. Hold the shift key while you drag and drop to make sure they align! You now have two layers: the bottom layer contains your black and white photo and the top layer contains your color photo.
6. Now we’re going to add a layer mask to the TOP layer. You can do this by clicking on this symbol in the bottom of the layer palette: ![]()
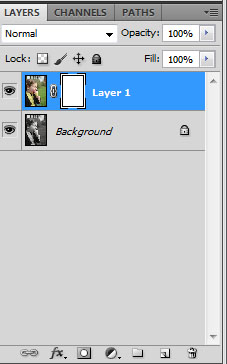
7. This is how our layer palette looks like now:
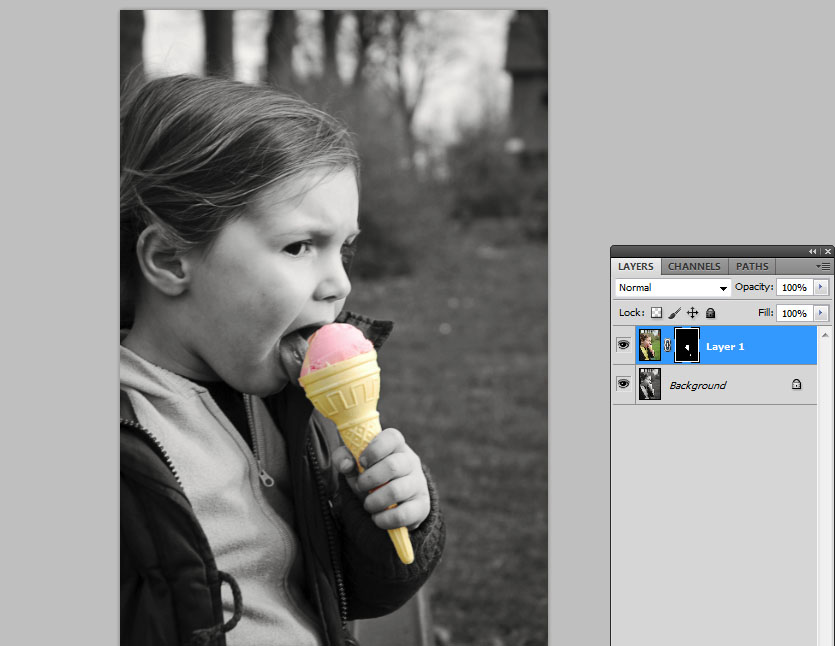
8. Select the layer mask by clicking on it in the layer palette (the white box next to the photo). Click on the paint bucket and fill your layer mask with black. This will hide the top photo. You will now see the black and white photo in your canvas.
9. Select your paint brush, pick white as your foreground color and set the hardness of the brush at 90 %. Depending on the size of the part of the photo you want to color, set your brush size to something not too big.
10. With the layer mask still selected, start painting back the colors in the spot of your choice. If you cross the lines or make a mistake, select black as your foreground color to paint over the mistakes. This will hide them again. Decrease your brush size for working on the edges. Work small parts at a time. Zoom in pretty close to work on small details and to check if your edges don’t look wonky.
Here’s what my photo looks like now:
11. Flatten you photo. Tadaa!  You’re now ready to scrap it!


Wendy said...
on March 31st, 2013 at 1:23 pm
Thanks, I was looking for this tip, so time ago.
Tamara said...
on January 30th, 2014 at 9:23 pm
Great tutorial, thanks 1