Editing Your Photos with Textures
Today I am going to walk you through creating amazing photo edits using photo overlays. It’s a very quick and easy way to add a little extra creative oomph to your pictures.
My instructions are given using Adobe Photoshop, but really I think they can be translated to a wide variety of programs. As long as you can work with layers and do basic things like blending, use an eraser or paintbrush tool, you should be good to go!
I’ll be using some of my favorite textures from my Enchanted Overlay set. I really just love playing with these!

The simplest way to working towards a great edit with a texture is to use the eraser tool on the texture. I often find that a texture is a little too much to handle on someone’s skin in a photo, so I like to decrease the appearance just on their skin.
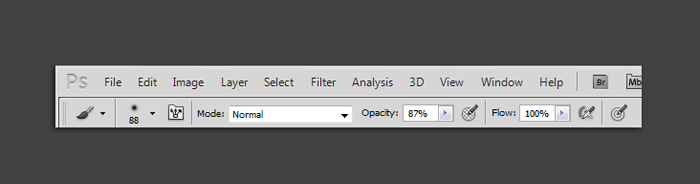
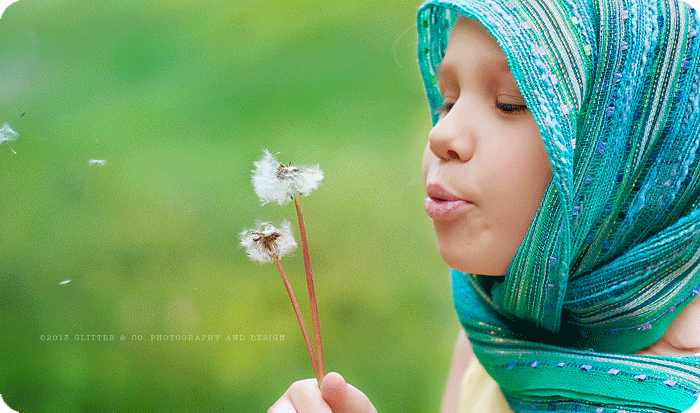
I achieved the edit above in just a few easy steps. First, place your desired texture over your photo. You might have to scale it a bit to fit how you prefer. Then choose your blending mode for your texture. In this case, I chose overlay. Next, you want to grab your eraser tool, and if your program allows it, decrease the opacity some. How much will all depend on what your tastes are.
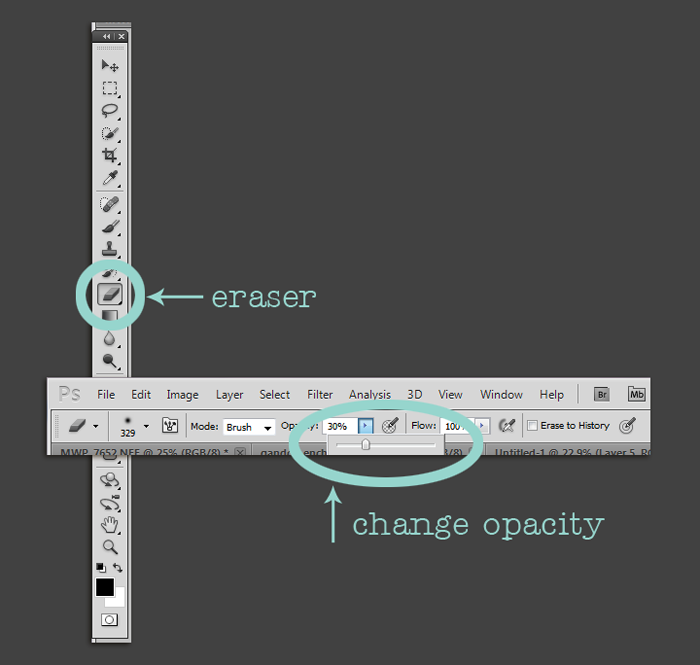
Use the eraser to remove some of the texture from their skin as desired. It works best if you have a soft round brush shape selected.
The next step was to do a levels adjustment to add a little extra pop. In my book, there is no going wrong with a little extra pop! I do this by adding an adjustment layer. With the adjustment on a separate layer you can easily turn effects on or off, or even mask off parts of the effect from areas of your image. But that’s a topic for another tutorial I think!
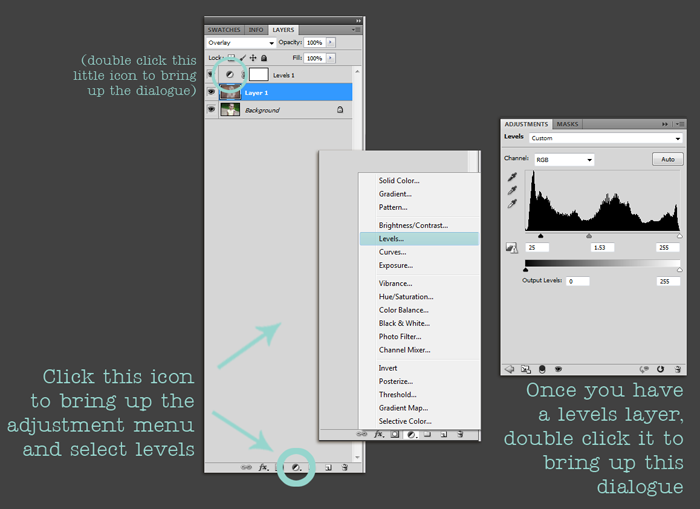
Drag the sliders for the levels adjustment as you see fit. Have fun and experiment! After these few small tweaks, I was done with my photo! See how the texture added some nice coloring to my photo?
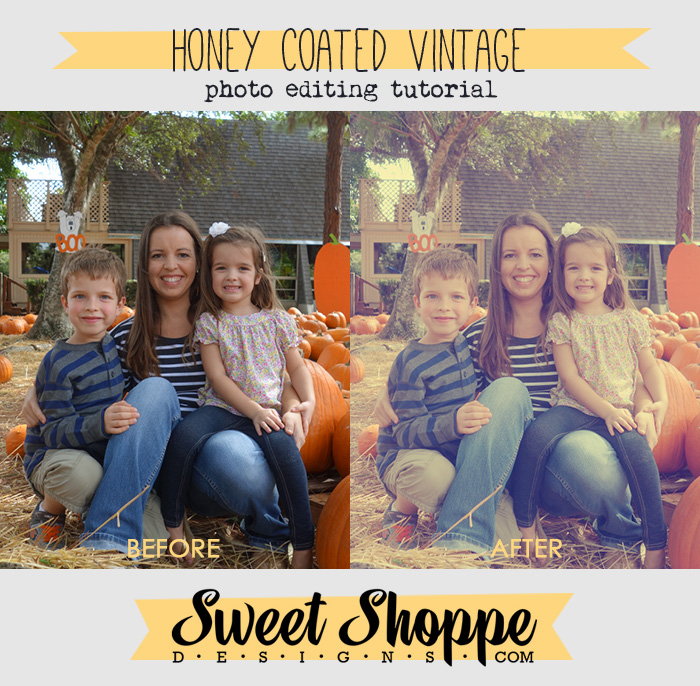
The next way I like to play with textures is just as easy. Only this time instead of the eraser, we’ll use the paintbrush tool.

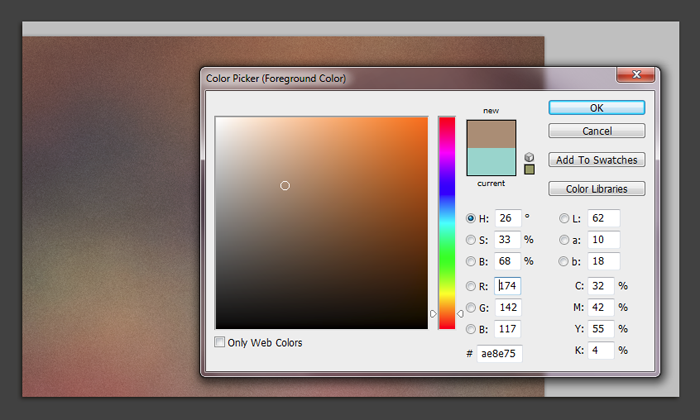
The first thing I did was before I placed my texture over my image, I used the color picker to choose a neutral color that was present in the texture itself. Then I proceeded to bring in the texture over my photo. I changed the blend mode to overlay and decreased the opacity to 80%. However, don’t be afraid to play with different blend modes!
The next step was to choose a soft round paint brush. You can play with the opacity of your brush as well!
With my soft brush selected, I carefully painted over the subject of the photo. This keeps the coloring that comes along with the texture, but smooths out the actual texture on the skin. It makes for a really nice effect.
All I did after that was a levels adjustment again and my photo was done. Super simple right?

I hope this has been helpful and you will be well on your way to becoming a texture pro. You know what else would be fun? Try out some of your awesomely textured digiscrap papers as textures!
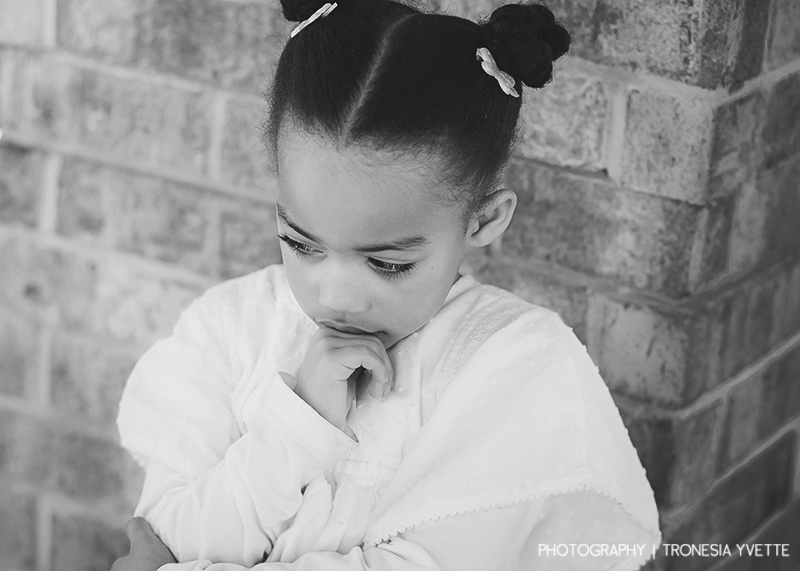
But most of all, experiment and have fun. I’ll leave you with some inspiration to help motivate you into playing more with photo textures and overlays!


ginny said...
on June 15th, 2013 at 9:02 am
Very cool technique- I will definitely be giving it a try! Thanks so much!!
Tracy Brewer said...
on June 17th, 2013 at 11:00 am
WOW. !!! so quick and easy to do. Plus have to say what a difference they make as well. So many tips and tricks to learn and so little time to learn them in. Thanks for these great tips here. Have to give this a try and let you know how it went. keep up the great work. Oh yeah what wonderful photo’s these above shots are. Take care !!