All in the Details: Macro Photography
The one thing that makes memory keeping so special is being able to tell the stories. We all have hard drives full of photos of our beautiful families in everyday life and special events. We create our layouts to show others these moments now and in the future. Photography will always be an important part of it. I love seeing a non-photo page that is well written and full of history, but I also like to ‘see’ the story. I have hundreds… thousands.. of photos of my family. Most are candid and some are posed because they spot me with the camera, but I feel like there are times that I miss the little things. What about the details? Did I get a photo of dinner made by my mom? Did I get a shot of the outfit my daughter picked out? Did you get a photo of your son’s cleats after baseball practice? All of these little things add to the story even more. That is where macro photography comes into play. According to the Merriam-Webster dictionary, macro photography is defined as the making of photographs in which the object is either unmagnified or slightly magnified up to a limit often of about 10 diameters. In other words, an up-close photograph of your subject.
For my experiment today with macro photography, I had the following on hand:
– my DSLR with 50 mm f/1.4 lens
– macro filters (purchased online for $12)
– colorful cardstock papers & tape
– school supplies (pencils, crayons)
– my iPhone 5 with a flashlight app
Now, a disclaimer: you do not need a DSLR for macro shots. They are just really close-up photos and most point-and-shoot cameras have the option available. Look for this symbol (![]() ) on your camera’s dial, which represents macro. Once your camera is in this mode, it will allow you to get closer to your subject and focus. I will be using my 50 mm f/1.4 lens for this along with the macro filters that screw onto the lens. Now, there are macro lenses for certain cameras. I am just experimenting so I decided to go with an option that suits me.
) on your camera’s dial, which represents macro. Once your camera is in this mode, it will allow you to get closer to your subject and focus. I will be using my 50 mm f/1.4 lens for this along with the macro filters that screw onto the lens. Now, there are macro lenses for certain cameras. I am just experimenting so I decided to go with an option that suits me.
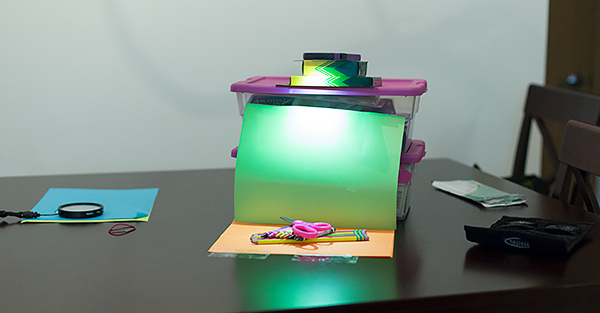
Okay, first thing – Be mindful of your lighting. My photos were taken on my dining table with the all of the lights on and I used a flashlight app on my phone to get rid of the shadow from the overhead light showing up on my background (the cardstock paper). Every time I was ready for a shot I sat my camera on the table to lessen the amount of camera shake. My shutter speeds will be pretty low and my f/numbers will be f/3.5 or more. Here is a quick shot of how I set this up:
The first couple of shots I tried just lining up the pencils and bounding them together with a rubber band. I was in front of them and shooting at an angle. This is what I got:
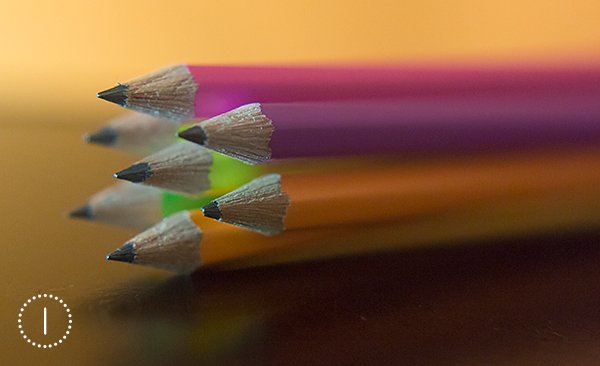
My settings in manual on these two photos:
- Shutter Speed: 1/100 s
- Aperture: f/4
- ISO: 2500
Also notice that in photo 2, hardly any of the pencils are in focus. Only the one to the far right is in the line of focus. For me, I like my macro photos to have at least one area of ‘clear’ focus. This photo just makes it seems accidental. There can be creative expression in a blurred photo but it should be done with intent.
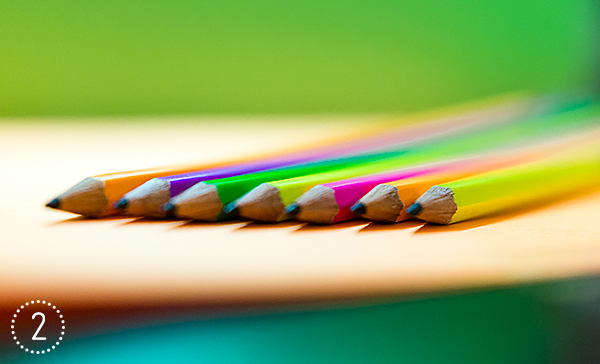
On the next shot, I decided to add in a few things and change my setting from manual mode to aperture priority mode. The aperture is your f-stop number and it will determine how much light will get through your camera’s lens. An aperture of f/1.4 is large; the opening of the lens when the shutter is released is very wide and will let in a lot of light. Whereas an aperture of f/11 is smaller since the opening of the lens is more narrow and will let in less light. So, when your camera is in aperture priority mode, it is going to make this function automatic and choose the f-stop number for you depending on the ISO that you have chosen.
For the below photo, I chose the ISO of 400 and the camera chose a shutter speed of 1/15s (very slow) and a f-stop of 3.2.
Final edit:
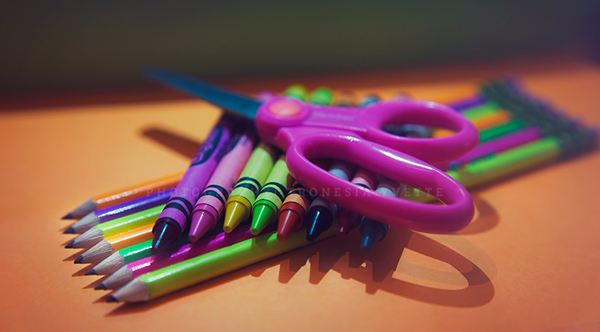
I definitely like this last photo much better than the first two and can definitely see it being a part of my school pages for my daughter. I hope that this post will inspire you to experiment with macro photography or capture more photos of the details that make each day special to you.
Lenore said...
on September 21st, 2013 at 11:23 am
Good little tutorial, I too like some macro photos – they can be interesting background pages, muted down a bit so they don’t dominate your layout in digital scrapbooking.
Brenda Bates said...
on September 25th, 2013 at 12:36 pm
Very nice tutorial on macro photography and examples.