ABRacadabra – using ABR files
Hey scrappers, Heather here with another painty yummy tutorial for you. I’m actually going to expand on this great getting started: using brushes tutorial by the lovely and super talented SugarBabe Sheri. For a long time I was using the .pngs in the files for the stamps, but a few months ago, I started loading the ABR files and found that it was just much quicker to work with them this way and was wondering what took me so long and I encouraged some other girls to use it and they said the same thing… so I’m hoping this will encourage more scrappers to use them too.
I have a few things I’d like to encourage you to do with your brushes to make them easy to find.
– put them all in one folder so that when you want to load a set you don’t have to search all over your folders for them to find the one you want…
– if you find a few sets that you tend to use over and over again, I’d encourage you to actually install them in your presets/brushes folder with in Photoshop for easy access to your favorites. My folder is huge because I tend to use them so much, LOL.
OK, so let’s get started, I’m using PSCS5 for my screenshots but you can do many of these things in PSE too (at least I was able to do them in PSE6 and PSE9)…
Loading a Brush
First, I opened a solid paper that I’m going to paint all over and do all sorts of fun stuff for you to see and clicked on the new layer button in my layers palette. I like to paint on separate layers in case I want to make some changes and don’t want to have to start all over again or go back in my history to remove the paint on my paper layer…
1. choose the brush tool in my tools palette
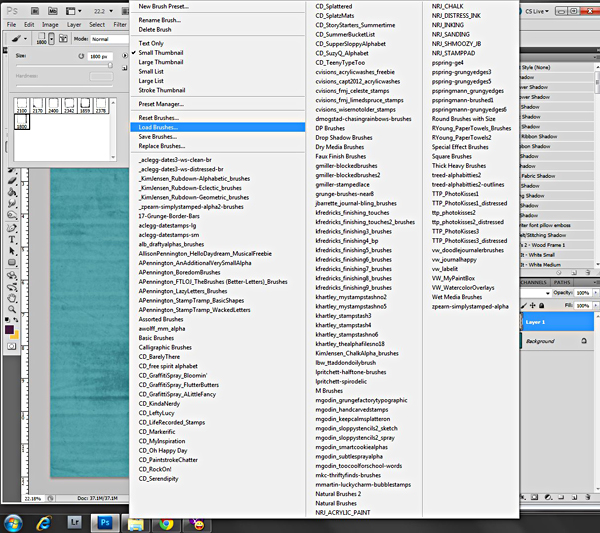
2. at the top, choose the little arrow next to the current selected brush and a menu will show up
3. click on “load a brush”
4. find and open the .abr file whereever you have it saved and it will add the brushes to the bottom of your brush selections…
NOTE: if you find that you’re using certain brushes over and over again, you might want to install them into your presets/brushes folder within PS… I know for Windows 7, I find that folder at C: Program Files/Adobe/Adobe Photoshop CS(whatever version you have)/Presets/Brushes… and I copy the ABR file into that folder, easy peasy and then I have them easily accessible instead of having to find my brushes folder each time I re-open PS. I don’t recall if you can do this with PSE though, from what I remember it wasn’t an option to install them, so you’ll have to re-load them each time you open PSE again, so I would encourage you to put all of them in one big folder of ABR files so that when you want to load them you aren’t searching all over for them and can find them all easily in one spot.
Using Your ABR file to Paint or Stamp
after you’ve loaded the brushes you’ll select the one you want to use… you’ll see an outline of the stamp and it’s size and click on the paper whereever you want it to be… this will show up the color of your foreground color, if you’re brushing on seperate layers, you’ll be able to change the colors of each of your brush strokes if you would like.
NOTE: to resize your brush before clicking, use the bracket keys “[ and ]” to make it bigger or smaller, you’ll see the outline of the stamp so you can easily see what size you’d like it it be before clicking… you can also resize like normal if you have the move tool selected and see the transform box.
In this screenshot I’ve used Krystal’s My Stamp Stash No. 6
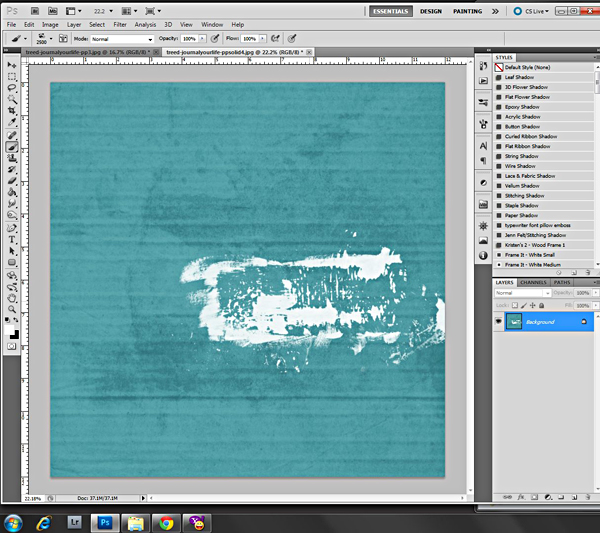
oops… I forgot to paint on a new layer, you definitely want to paint on a new layer in case you want to make changes later on :)
Using Your ABR Files To Create a Mask
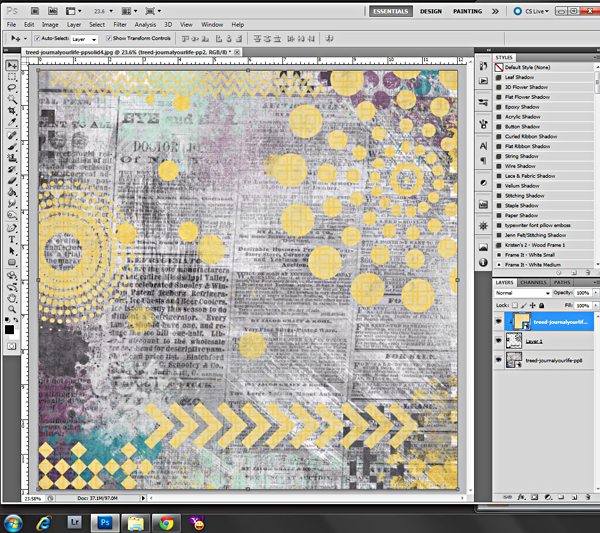
Just like in my previous tutorial about painting with paper, you can do the same thing with your brush tool, the fun thing is you can build up your paint on one layer instead of pulling in several PNGs, so if you want to only use one paper to paint with you only clip to the one layer of paint vs. clipping the paper several times to several PNG layers.
1. You have to make sure you definitely paint on a separate layer otherwise you won’t be creating a mask to clip your paper to.
2. Paint your layer however you want…
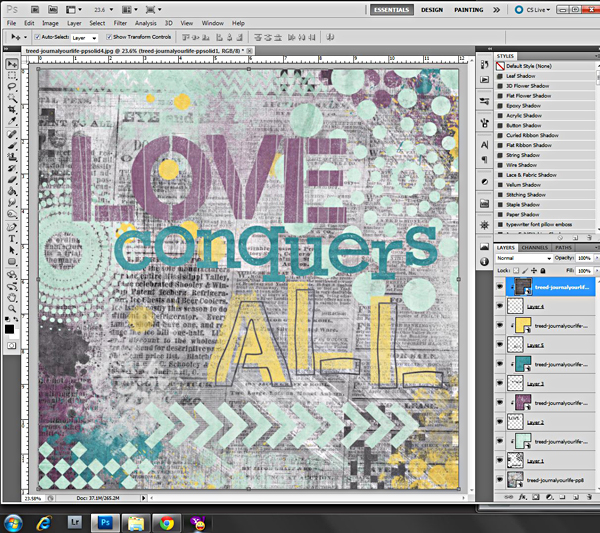
In this screenshot I’ve used Penny’s Brushed 1
3. Clip your paper to the paint layer… VIOLA!!!
4. if you want to paint with several different papers then make sure you have a separate layer for each paper you want to use… so I used one paper/color/layer for Penny’s Brushed 1 stamps, another paper/color/layer for Zoe’s Simply Stamped Alpha and another paper/color/layer for Traci’s Alphabitties 2 Alpha – You can see that I have 5 different layers that I clipped paper too
Angling Your Brush
Those of you that used to do paper scrapping, do you remember when it was a big trend to distress ink all of our edges? Well, I’m going to show you how you can do that by turning the brush around…
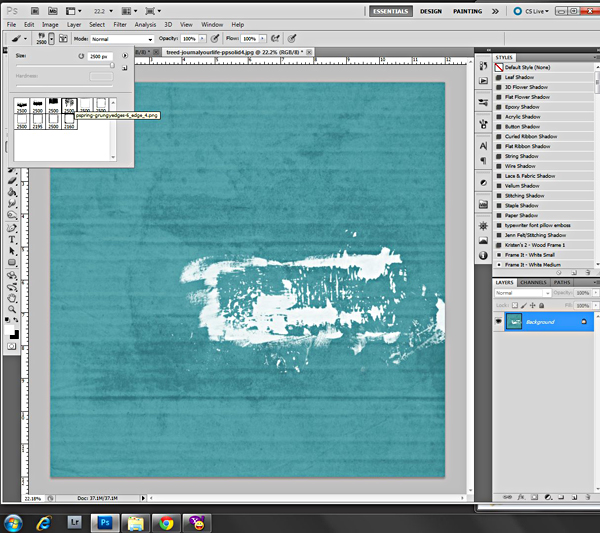
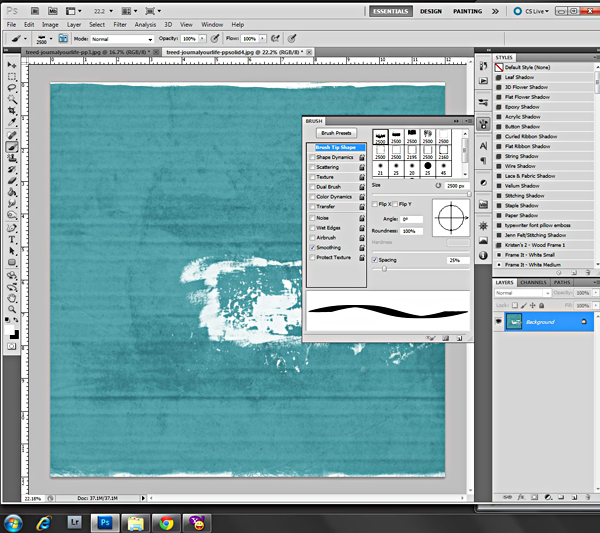
1. after creating a new layer to paint on… pick a nice long straight inky edge brush, Penny has a couple in her new Grungy Edges 6 coming to SSD this weekend, 9/22
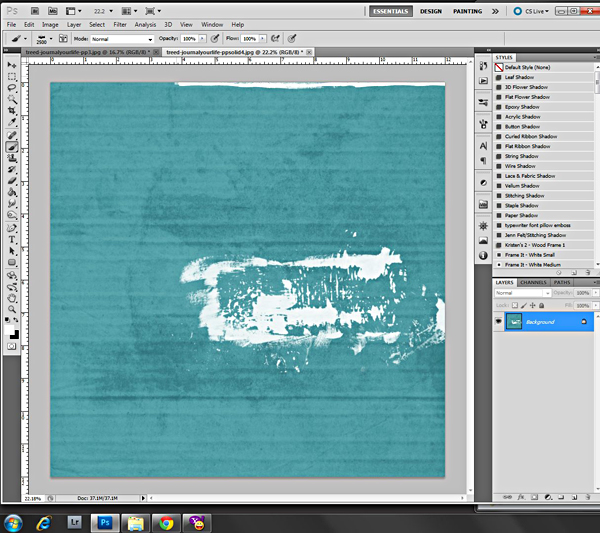
2. stamp along the top and bottom edges of your paper
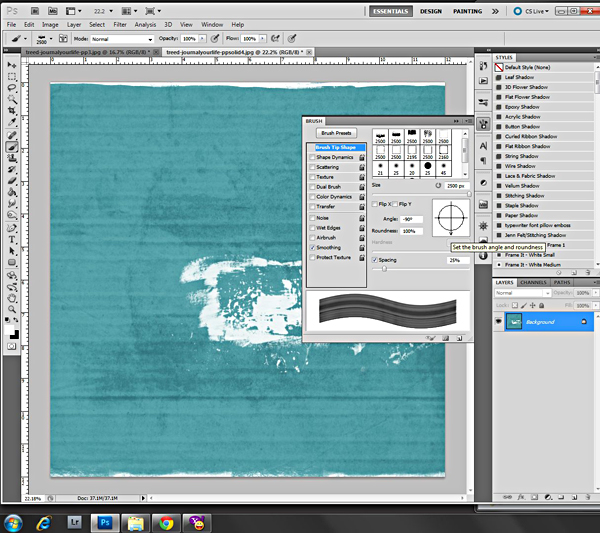
3. after inking the top and bottom edges, you’ll want to turn your brush 90 degrees, to do that you’ll click on the little brush bucket next to the selected brush and your menu will pop up
4. at the bottom of the menu you’ll see a box that shows what the brush looks like and above that is a circle with arrows, you’ll change the angle to 90 or -90 degrees there either manually or by turning the arrow in the circle to the desired angle you want your brush and you’ll see it change in the lower box and when you hover over the paper you’ll see the outline change to the desired angle…
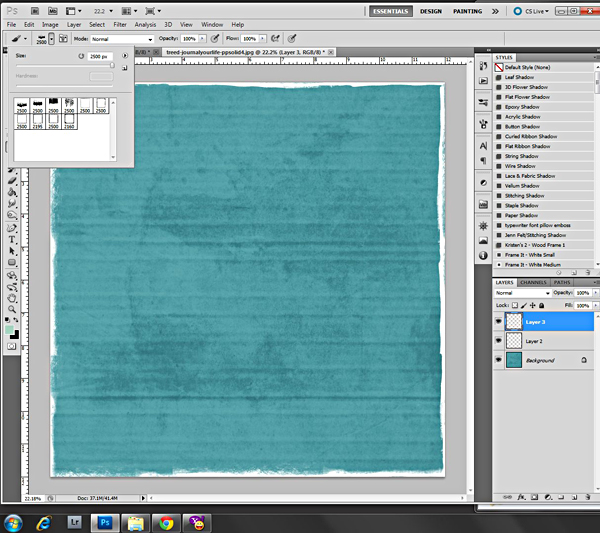
5. stamp on the left and right edges of the paper to get the desired look you want…
Scattering Your Brush
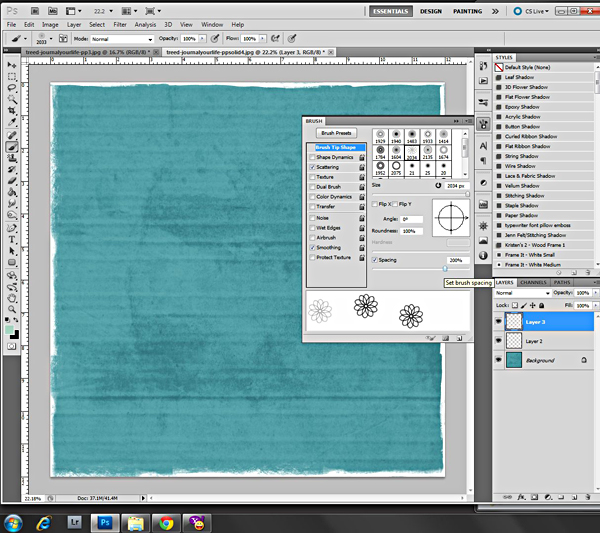
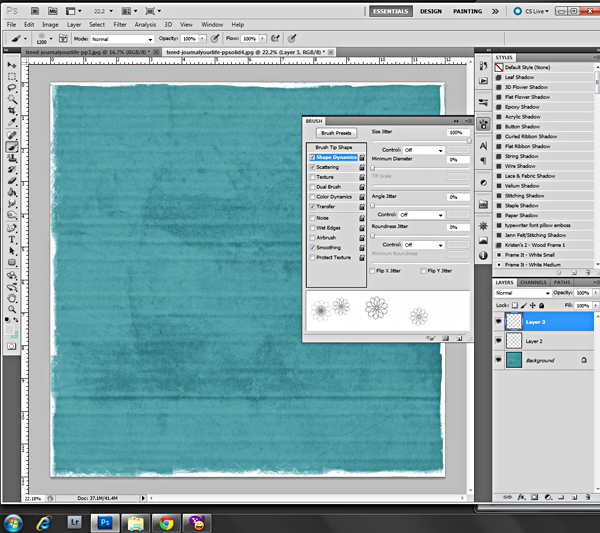
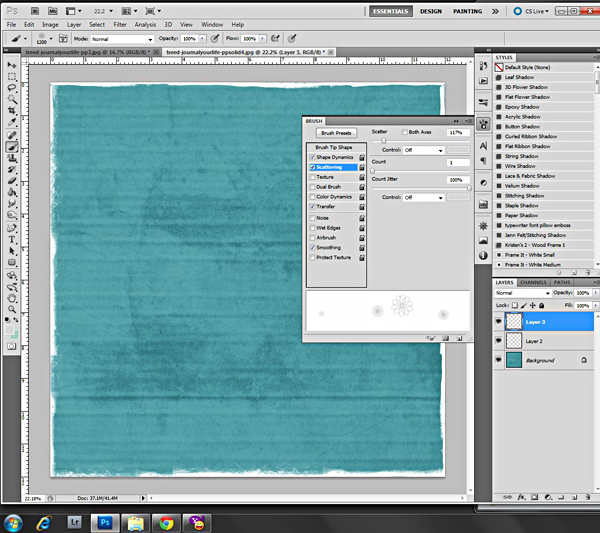
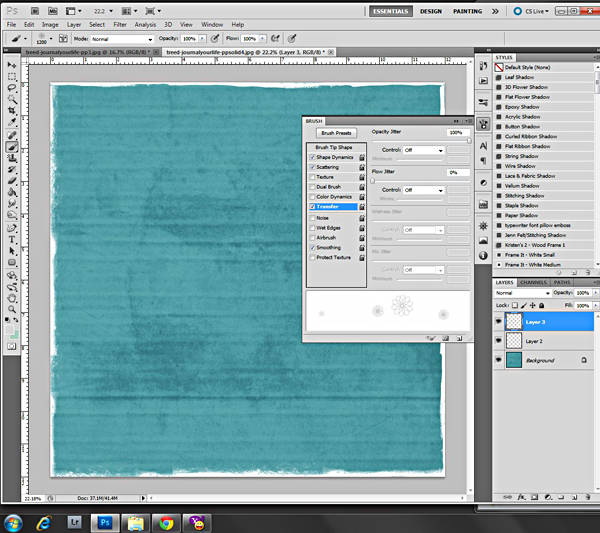
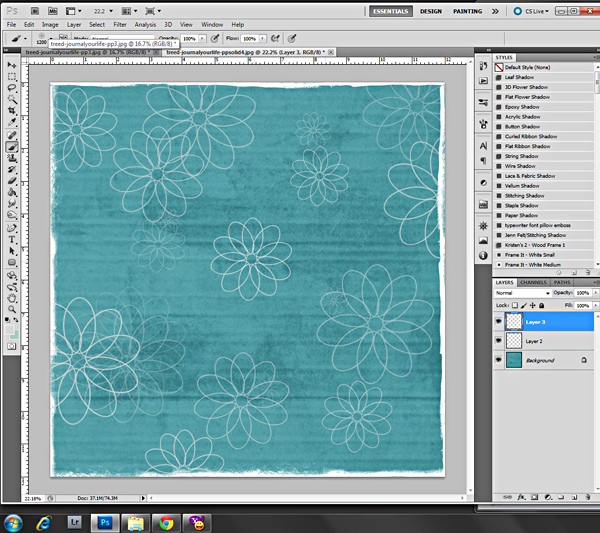
Next I’m going to show you that you can change around some other fun things besides just the angle of the brush to create some cool effects… After changing some of the jitter and opacity numbers, I went back to my new layer and clicked and dragged and the flowers showed up several times in different sizes and opacities… have fun playing with these different boxes and just look to find something you like, playing on a new layer will make it easy to delete if you don’t like the outcome  To show this, I’m using Libby’s Spiro-delic…
1. I chose the spiro brush that I wanted to use and resized it a bit smaller since I didn’t want them to be super huge… then I opened the brush menu again on the left you’ll see some boxes of categories you can change… (remember that you can see the changes made at the bottom of the menu)… the screenshots below show you some of the settings I changed… feel free to just play around with these settings until you see something you like…
Lastly, I clicked down and then while holding my mouse button down I just moved my mouse around and around the screen watching the spiros show up all scattered and in different opacities and was so much fun… after I’d gotten several on the paper, I did little clicks here and there to fill in the empty spaces and my settings automatically continue to make the changes… so cool and sooooo much fun to play with this feature… I do believe you can do this in PSE but the settings aren’t as wide of a variety but I know you can change jitter and opacity and spacing and stuff like that so even you PSE users have fun experimenting with them 
Using Your ABR Files as an Eraser or to Make Cut-Outs
Lastly, you can use them as erasers to grunge up your edges or to use like a cut out… You can use the eraser tool and load your ABR exactly like you did above with the brush tool, only under the eraser tool instead of the brush tool… then you’re see your outline just like you do with the brush tool and you’ll click on your paper just like a brush… You can only erase something that’s already there so you won’t be able to erase on a new layer like you can add a brush… so you’ll need to first simplify or rasterize your paper layer or element or whatever it is you’re wanting to erase. You could even erase from a paint layer you made, like if you wanted to erase a butterfly stamp from the edge of your paint or something like that… to demonstrate this I wanted a more solid stamp so I’m going to use Traci’s Subway Stamps to make a cut out and added another paper over my background paper…
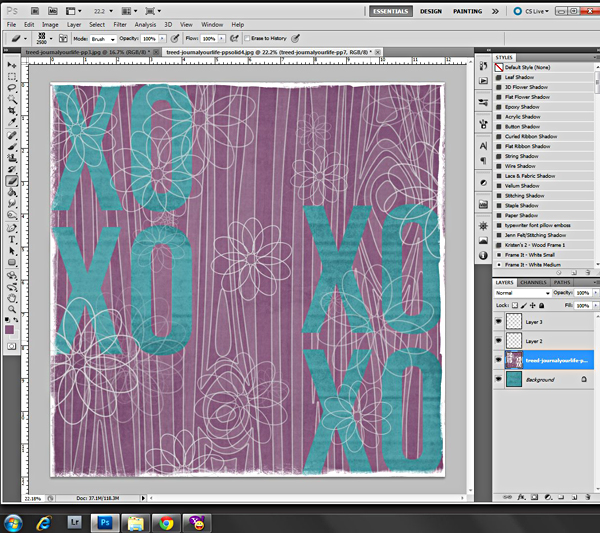
1. first I rasterized (simplified in PSE) the purple paper then choosing the eraser tool and at the top bar clicking on the arrow and loaded in the subway stamps and chose the XOXO stamp…
2. I clicked it in the upper left corner and the lower right corner, and you can see the background paper showing through…
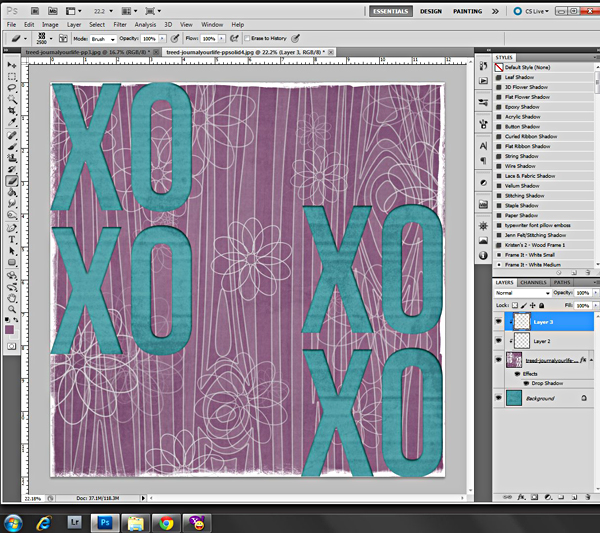
3. I then put a drop shadow on the purple paper and clipped the paint layers to the purple paper to make it look like I literally cut it out…
Using Layer Masks to Paint
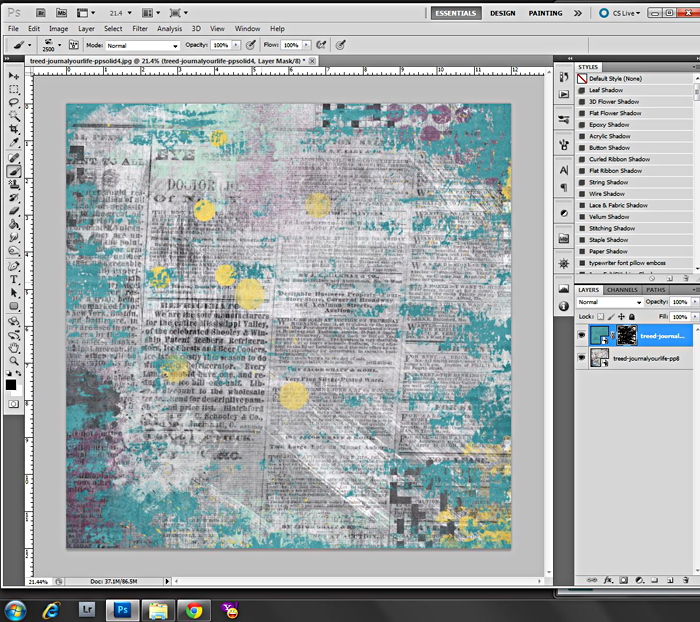
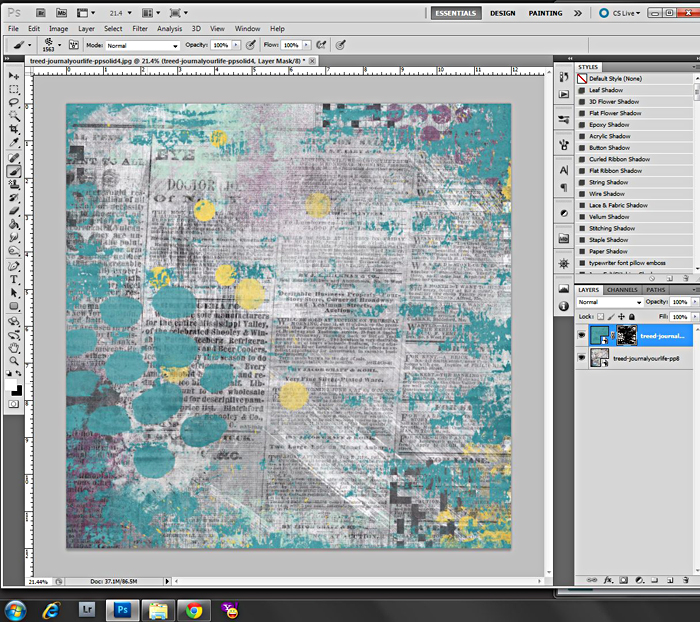
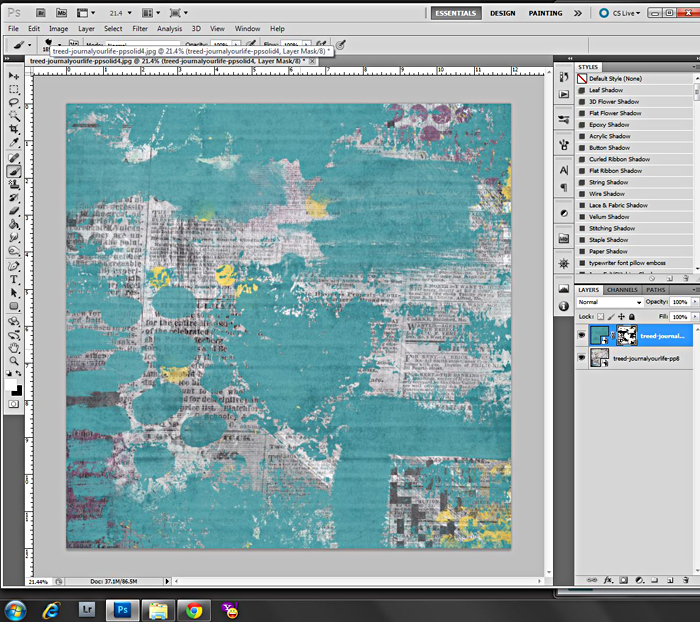
The other way you can “erase” that is more forgiving of mistakes and you can go back over to change would be to create a layer mask (for PSE users, this can only be done in PSE9+) on your paper or whatever layer you’re wanting to “erase” from and then with black as your foreground and using the brush tool you paint to do the erasing… this is technically hiding instead of erasing and therefore is more freeing and forgiving than actually using the eraser tool since you won’t be losing anything and if you wanted to bring back some of the original paper you can switch back to white in your foreground and paint back the area you want back. This also allows you to angle your brush because the eraser tool doesn’t give you that option. I’m going to demonstrate this with two papers and Krystal’s My Stamp Stash No. 6…
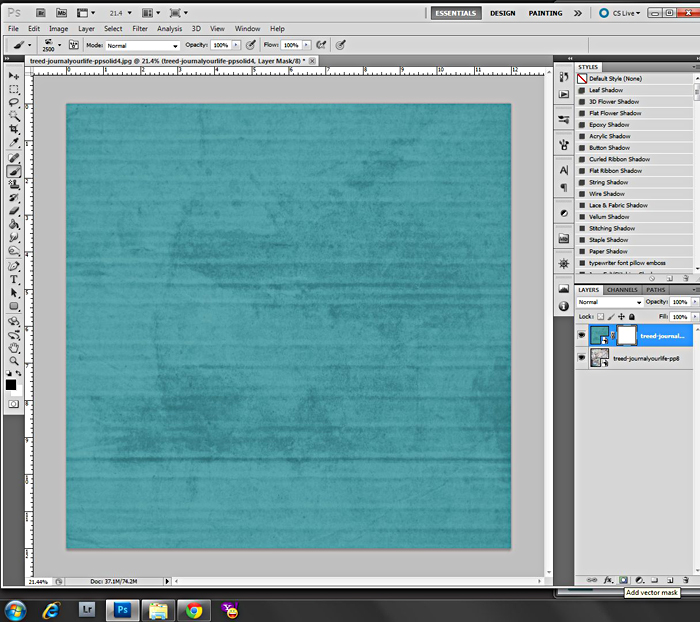
1. While the top layer is highlighted in your layers palette, click on the “add layer mask” icon at the bottom of your layers palette, it’s the square with the circle in it. You’ll see a white box show up next to your paper thumbnail.
2. Make sure your foreground color is black, you can type “d” on your keyboard to easily have black become your foreground color
3. Choose the brush tool and choose the brush you’d like to use
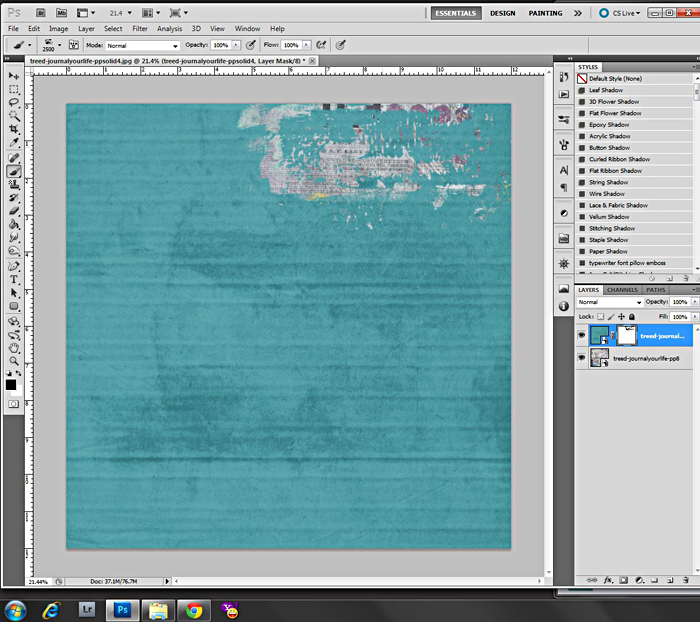
4. Click anywhere on your canvas and you’ll see it cut out or erase the brush from your layer…
It’s not technically erased but is hiding, so that if you go too far, you could always come back and bring some of it back…
5. Switching the foreground color to white you can paint back (un-hide) some of the layer you want to bring back
I hope you find this tutorial helpful and has helped feed your stamp/brush addiction like it has mine, lol. The fun of digital painting is the fact that we don’t have to get messy and we can do so much with it, even more than I’ve shown you here… Have fun and I can’t wait to see your layouts using these techniques!!!

Tutorials by Sweet Shoppe Designs » Hidden Journaling On A Digital Layout said...
on October 27th, 2012 at 7:23 pm
[…] use a brush stamp as an eraser – see this tutorial on using .abr files as an eraser, be sure to rasterize or simplify your text first and then choose […]
Dalis said...
on November 15th, 2012 at 2:08 am
Girl this is awesome, I always forget I can “erase” with the brushes.
— dalis
Art Journaling 101: Products To Get You Started | Traci Reed Designs said...
on November 25th, 2012 at 12:16 pm
[…] ABRacadabra – using ABR files […]
Pammy Yates said...
on December 29th, 2012 at 5:17 am
Thanks for the tut! I still don’t use brushes much. But I’m getting more comfortable with them and really like the papers I end up with when I use them. I can use this tut for a reference when I need it.
5 Ways To Incorporate Digital Goods Into Your Project Life | Traci Reed Designs said...
on April 2nd, 2013 at 10:18 pm
[…] over which to write, so I could see it better. If you don’t know how to use digital brushes, we have a great tutorial at SSD to get you […]