Layout Background Lighting
Sheri (SeattleSheri) here to share how I give my layouts a little pizazz with a quick and easy tip on adding background lighting. This tutorial was created in Photoshop CS5, but may be adapted to other version and/or programs. The basic idea is to create an illusion of light under the main area of your page.
Step 1:
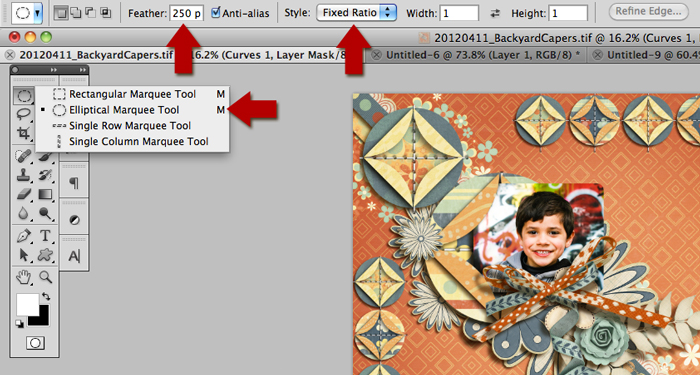
Select your elliptical marquee tool either from your toolbar by selecting the “M” key. Update the feather option to 250 px and make sure you have your style set to fixed ratio 1:1, as shown below. Click on your paper layer and draw a circle with the marquee tool. You should see a circle of marching ants when you are done
Step 2:
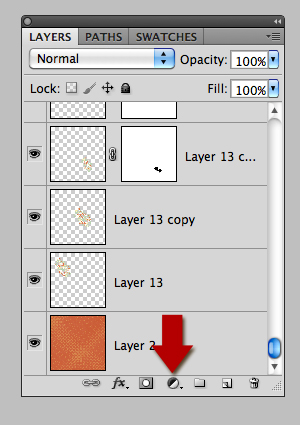
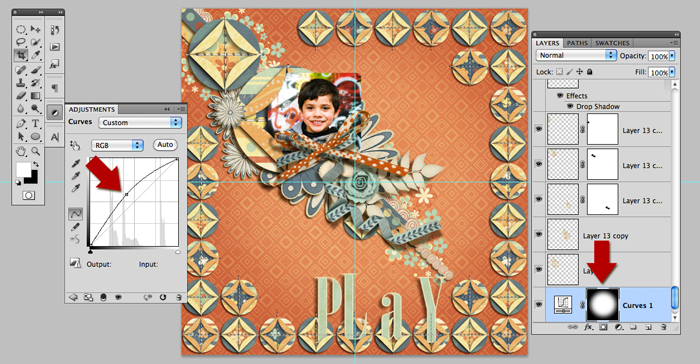
While having your bottom most layer highlighted, go to your layers palette and select the adjustments menu as show below. The intention of this step will be to insert an adjustment layer directly above your background paper. If you are working with a program that doesn’t have adjustment layers, simply select the background paper.
Step 3:
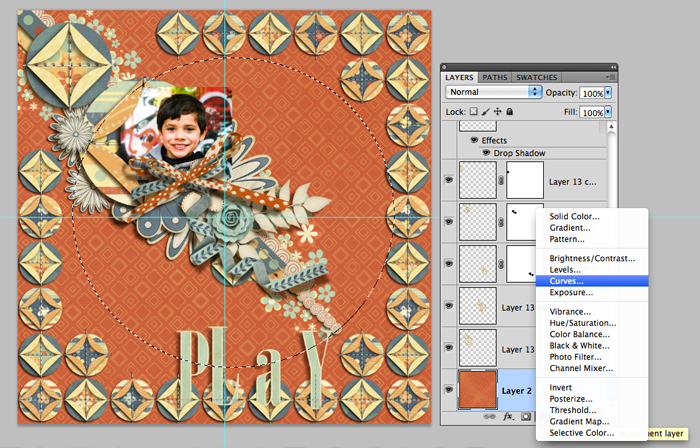
Select curves.
Step 4:
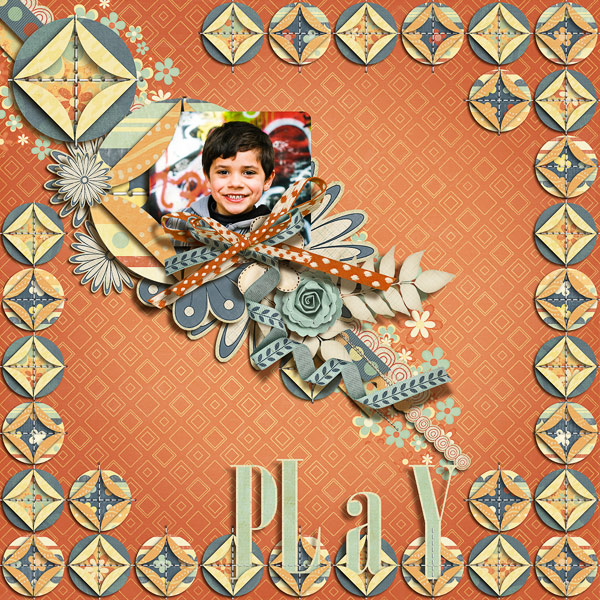
Now drag the middle of the curve toward the upper left hand corner. By using an adjustment layer, you are allowed the flexibility to adjust this as necessary. Notice the adjustment layer within your layers palette.
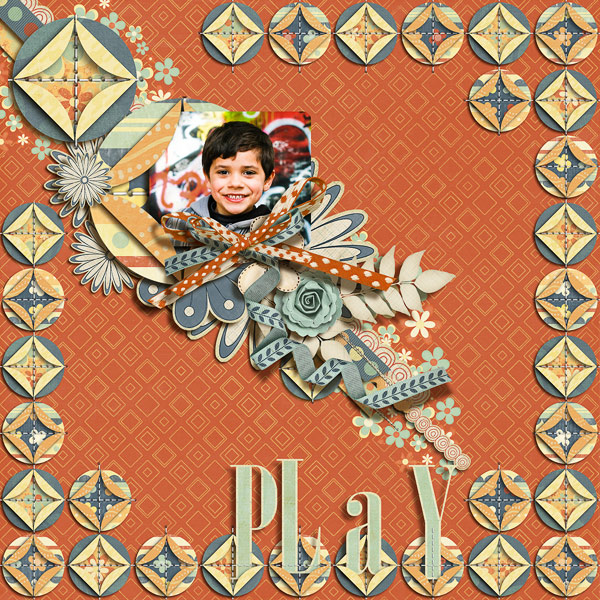
Before:
After:
Play around with the shape and brightness of your lighting as appropriate! Happy scrapping!

jill dinkel said...
on April 15th, 2012 at 2:41 am
I’ve always wondered how you did this! Thanks
Heather Greenwood said...
on April 22nd, 2012 at 12:02 am
Oh my gosh, that’s so easy, I had no idea it was this easy… thanks for another awesome tutorial Sheri!!!
Laurie said...
on April 24th, 2012 at 7:51 pm
Love this! Thank you for sharing!
A note for those who are new to their software – in Step 1, you will need to draw out your shape after selecting your tool, before going on to Step 2. Once you have your marching ants marchin’ to their shape, then your ready to go on to Step 2.
It might be obvious to some to do this, but we have all been new at one time and sometimes the obvious isn’t so obvious when learning
Tutorials by Sweet Shoppe Designs » Scrap Like a Sugarbabe: SeattleSheri said...
on September 15th, 2012 at 1:01 am
[…] so I’ve used the curves tool to achieve this lighting affect. Check out my tutorial on this HERE. Step 8: Now it’s time to start decorating! I love text paths and brush work. […]