How To: Link Images Easily with IMGUR

Hi everyone. I thought I’d come share a quick tutorial on where to host your images and how to link them up in your forum posts. Many times, links are broken when we use private sites like Google accts, Dropbox, FB albums etc. and this results in the Staff & other members not being able to see the image(s) in the thread. You can see it because you were the original poster but the rest of us get the dreaded “broken link” visual. (like the image below)

When you’re playing along with our This or That Challenges and need to post your full-size completed tracker card or you want to share those photos & images in our awesome games for SSD birthdays, iNSD, DSD…etc., then image hosting is the best option. But hosting on private sites won’t always give us scrappers the best or easiest results. Image hosting is also a great option for your signatures and/or other images you might want to share but don’t want to upload to our public gallery.
So I wanted to stop in and give you all the easiest and quickest way to host your images for use in the forum threads and posts you create. Pretty much all of the Babes here use IMGUR. It’s easy to upload and even easier to link into your posts. You can keep all of your uploads hidden like I do or public if you choose. Just create your account and then follow the steps below. Like most sites, there’s a couple of ways to get the same results so I’m going to give you both. Sound like a plan? Great 
When you want to add new image(s) you’ll use the green new post button in the left corner of your screen (or) you can upload images from the right corner using your green profile name button.
[option A]

[option B]

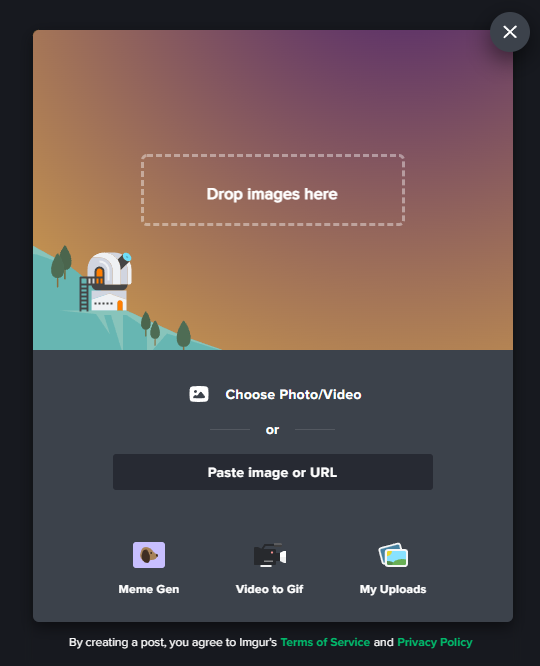
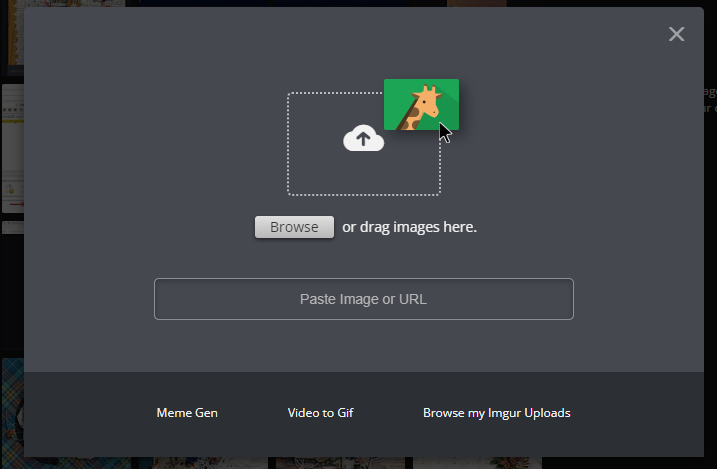
Option A will take you to an upload screen. Where you can add one image or multiple if you like. Your screen should look like this:
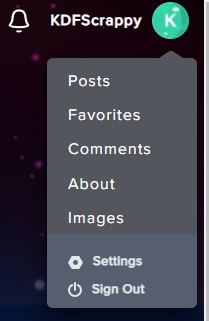
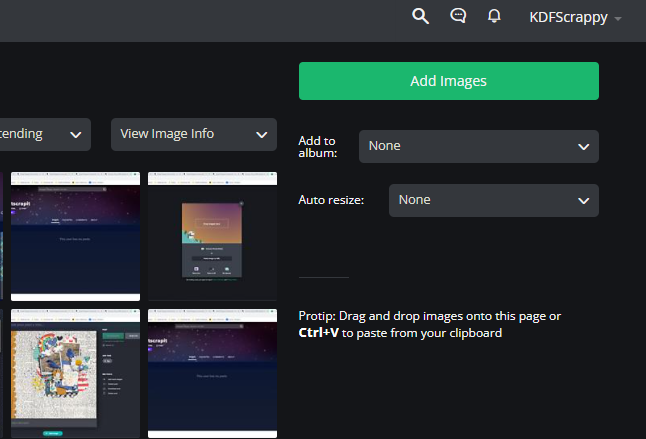
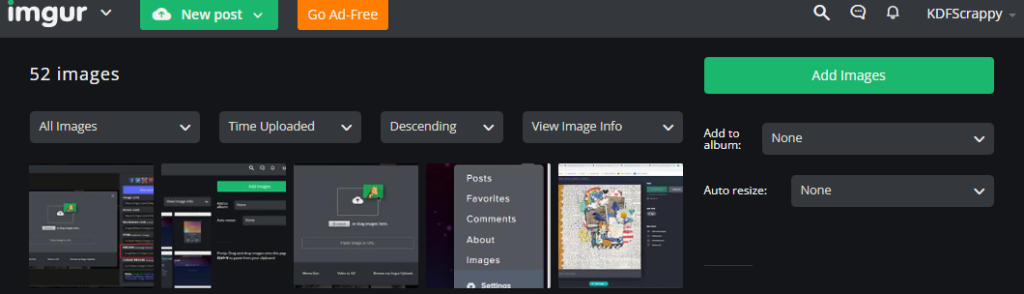
Option B you will need to click on your green profile button and then click Images in the drop down menu. This will take you to a page with all of the images you’ve ever uploaded. Then you will need to click the Add Images button at the top of the page. Should look something like these screens:
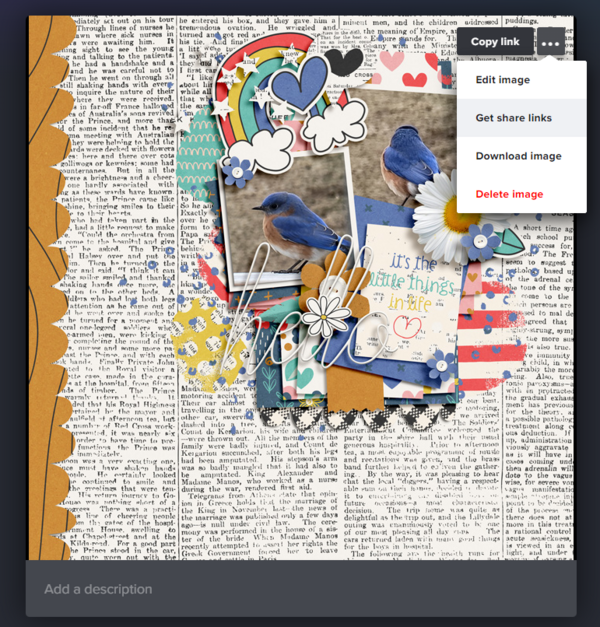
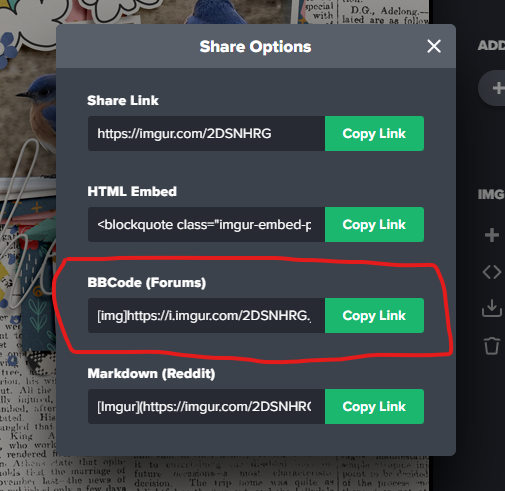
Option A is about as easy, as easy can get, just drag your image(s) right on top of the screen upload from there. Once it uploads Option A will allow you to hover in the top right corner of your image. You should see a copy link button and three dots. Choose the 3 dots to open a drop down and choose get share links. Now you just click the green copy link button for the third one down, BBCode Forums.
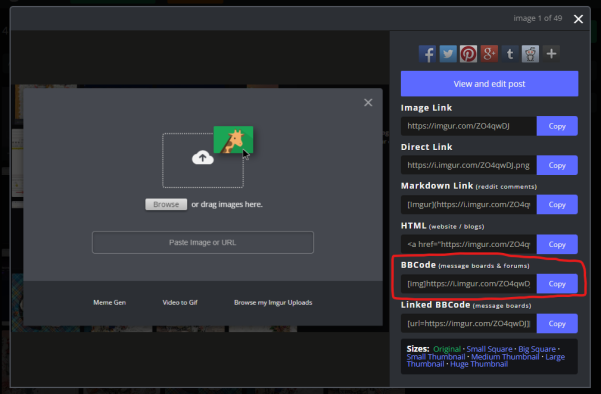
Option B is just as easy and you can still drag images right on top of your screen or browse your PC files. Once uploaded it will take you back to your main Images screen that we saw above to add images. Option B will allow you to choose which of your images you want to get a link for. Click the image you want to see & it will “pop-up” on your screen. On the right hand side will be a menu of links for the different platforms. Now you just click the blue copy button next to the BBCode.
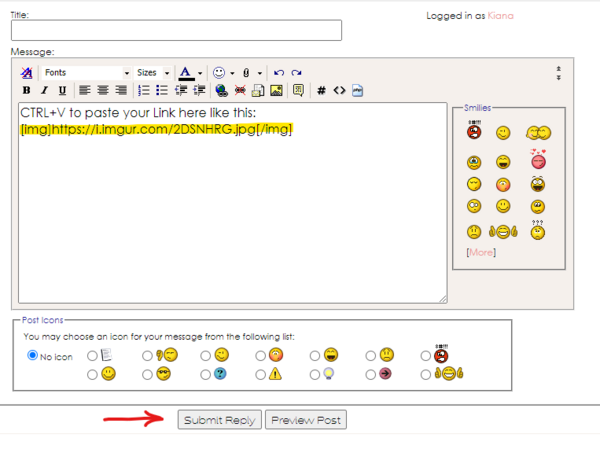
Now that your link is copied using whichever option you like best (I use option A by the way) then all you have to do is come back to your forum post here at SSD and paste it into your post/reply. No extra code needed!!! You don’t even have to use the “image” icon in the editor box. That’s it, hit the submit reply button to post.
Voila! Now your image(s) will be hosted, linked and viewable for All of us to see. I hope this helps you and of course, if you’ve got questions feel free to post them in the forum or message me.


Angie Key said...
on March 12th, 2022 at 7:42 pm
Fantastic tutorial, Kiana!!!
Kiana Fitzpatrick said...
on March 13th, 2022 at 5:09 am
Thank you Angie