One Template, Twelve Ways with Connection Keeping
It’s the last week of the month (how did that happen?!?) which means it’s time for “One Template, Many Ways”. In this series, we dig into the myriad ways you can use a single layered digital scrapbooking template to create unique and fun layouts for your family’s albums.
This month, we’re excited to showcase a template by Kelly of Connection Keeping. Kelly isn’t just a designer; she’s a consummate memory-keeper, and uses her own designs in a Project 52 style (with one two-page spread per week for each of the 52 weeks in the year). In her Template shoppe, you’ll find what she calls her “Catch Up Templates”: a grid-based or pocket-style page designed to help you catch up quickly on your pocket-style projects. They include all sorts of layered elements including labels, fasteners, stitching, flair, confetti, stamps, and all sorts of word art. Whether you simply add photos and call it a day or customize the heck out of the template, the choice is yours.
For today’s post, Kelly gave us access to her brand-new set, Catch Up Templates 07, which will be part of this week’s new releases on Friday March 27th.
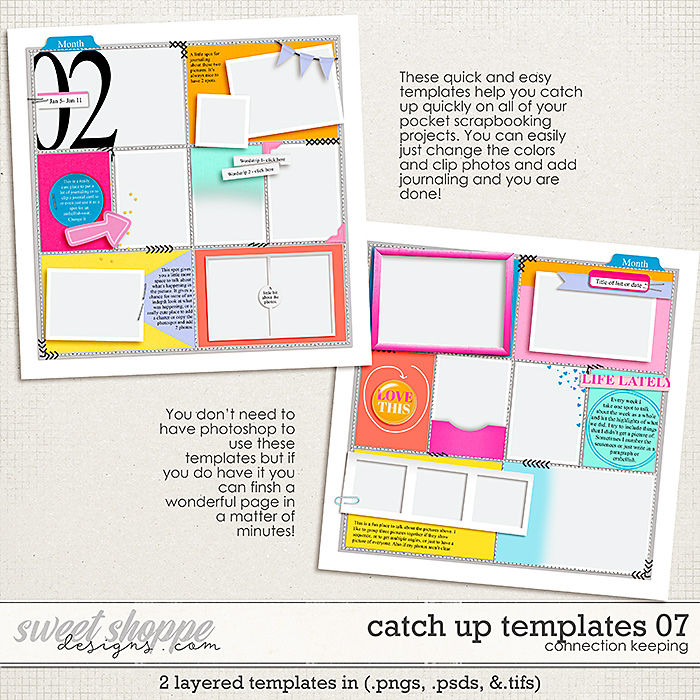
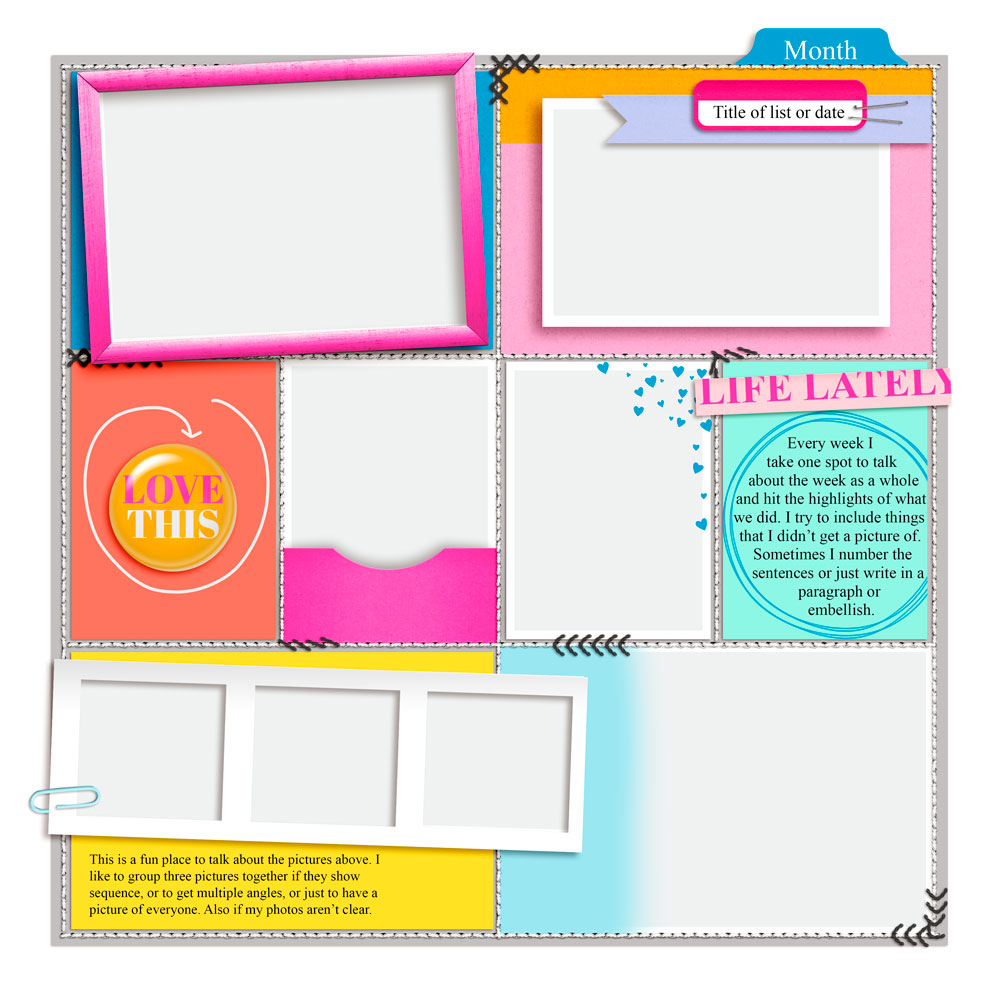
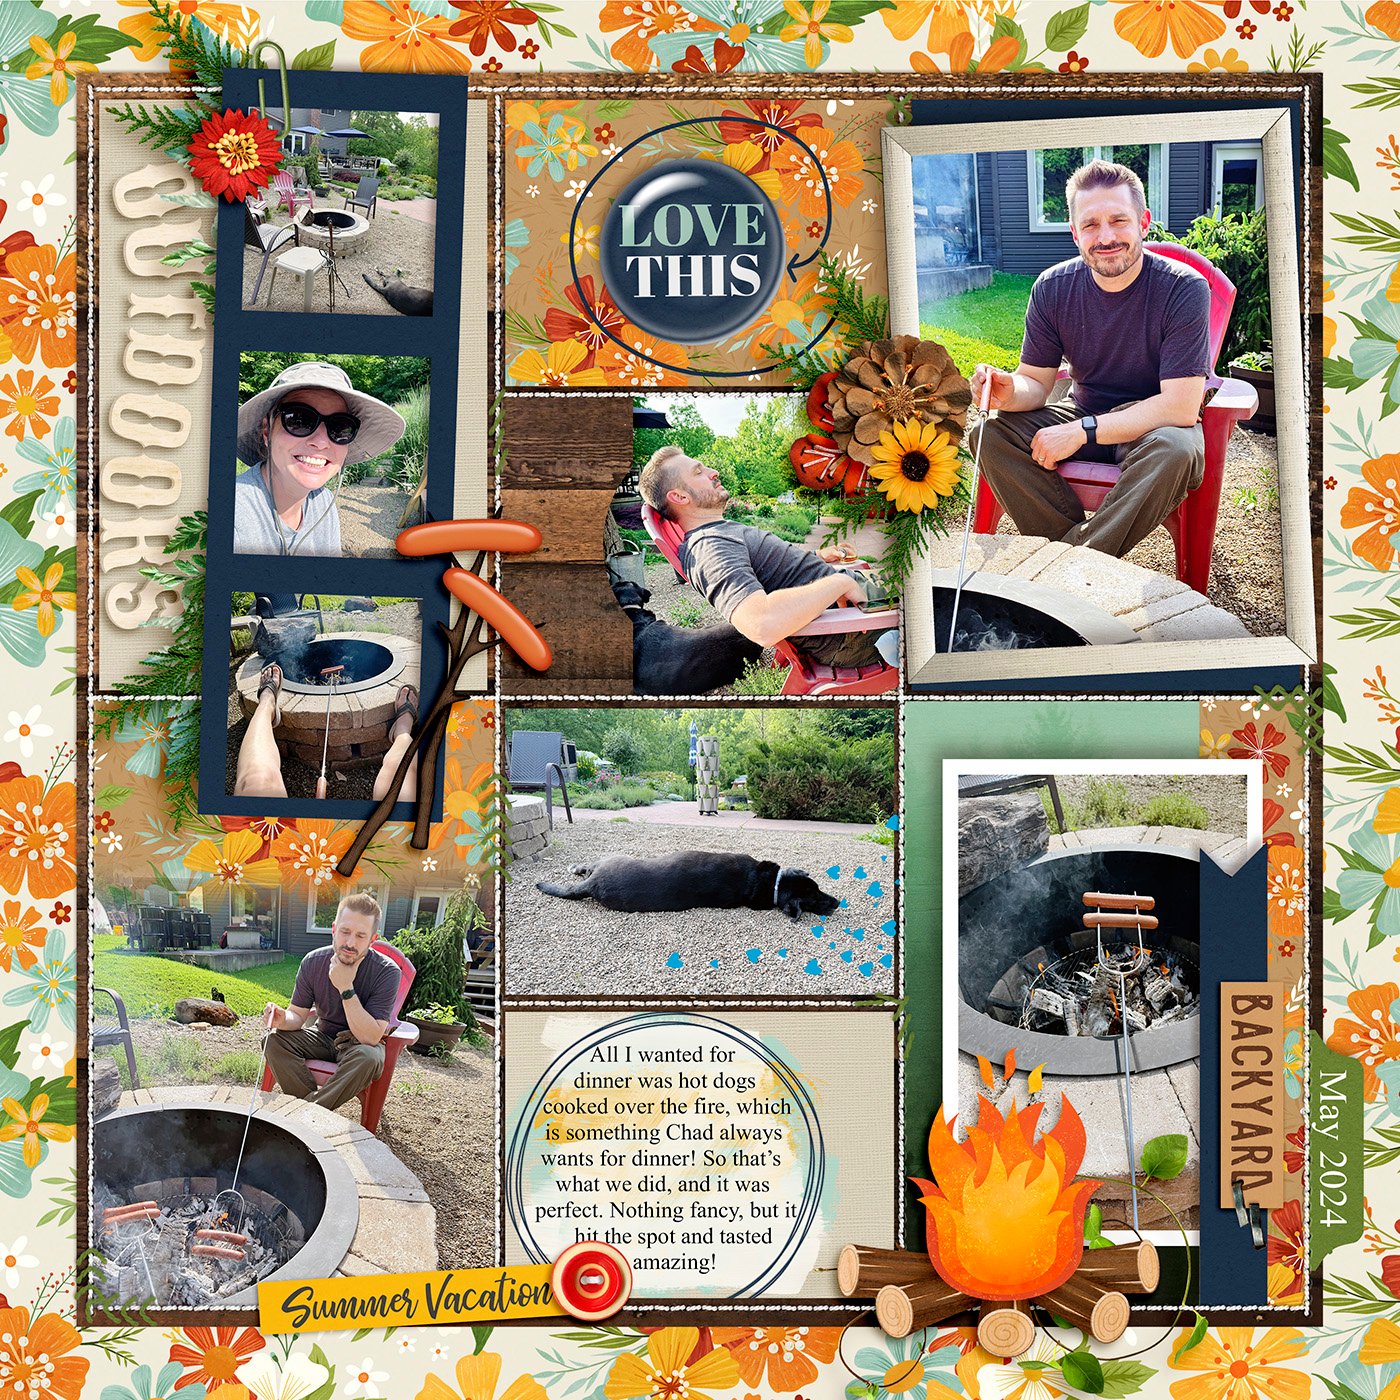
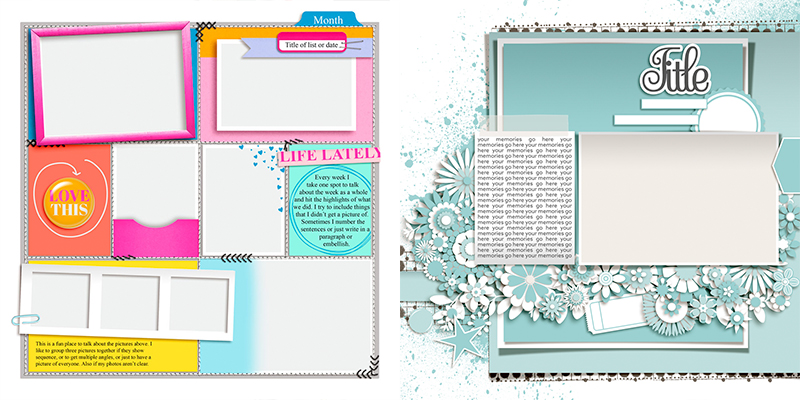
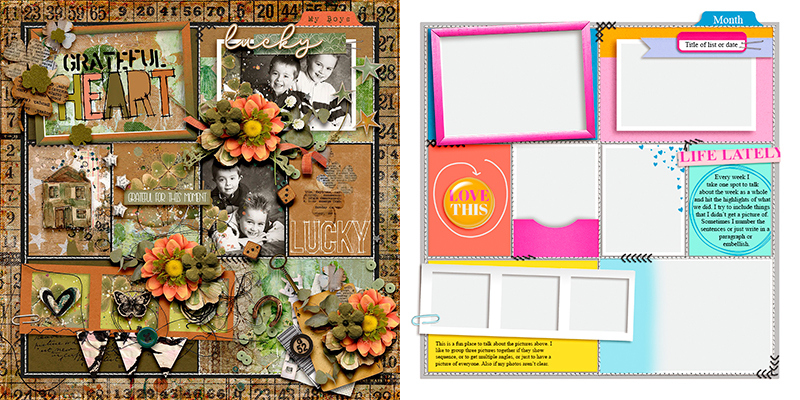
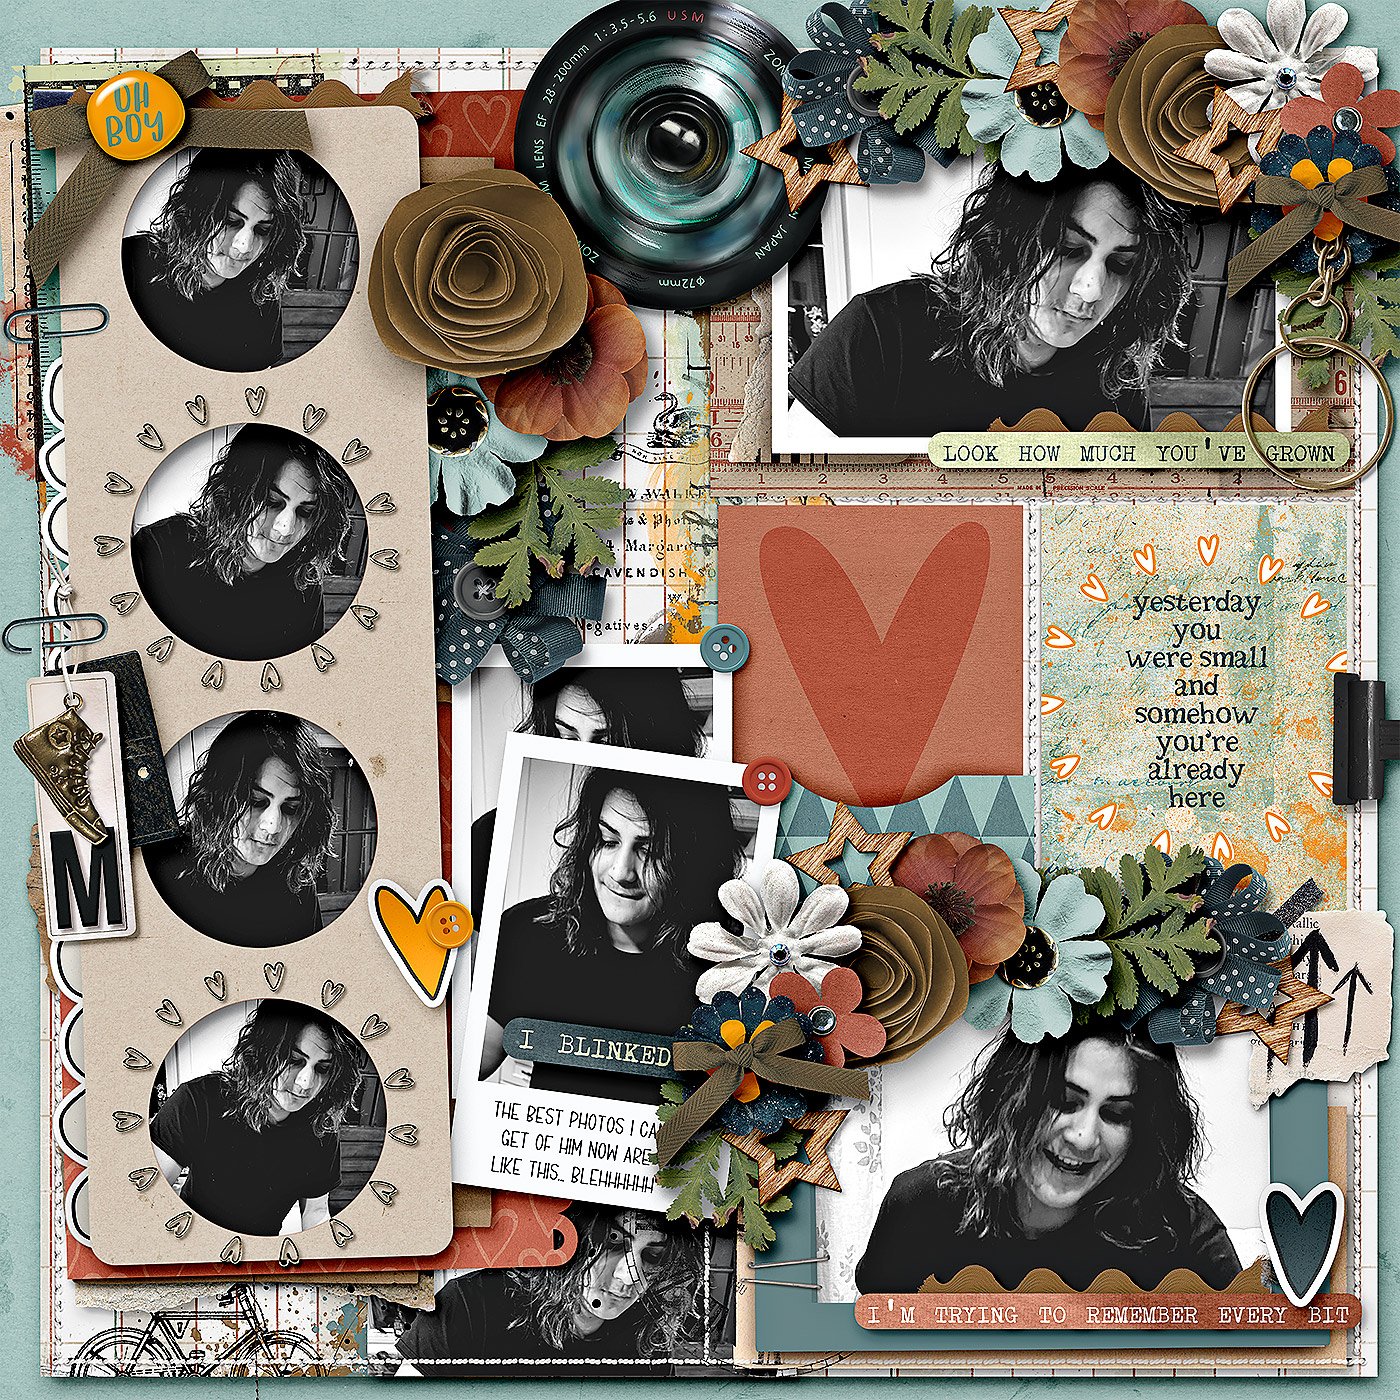
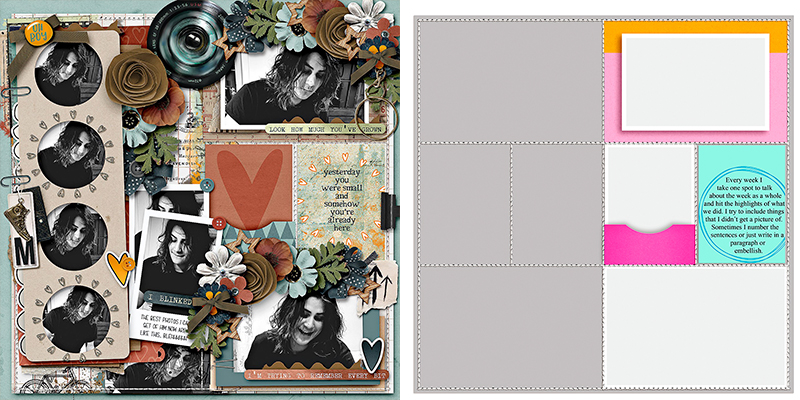
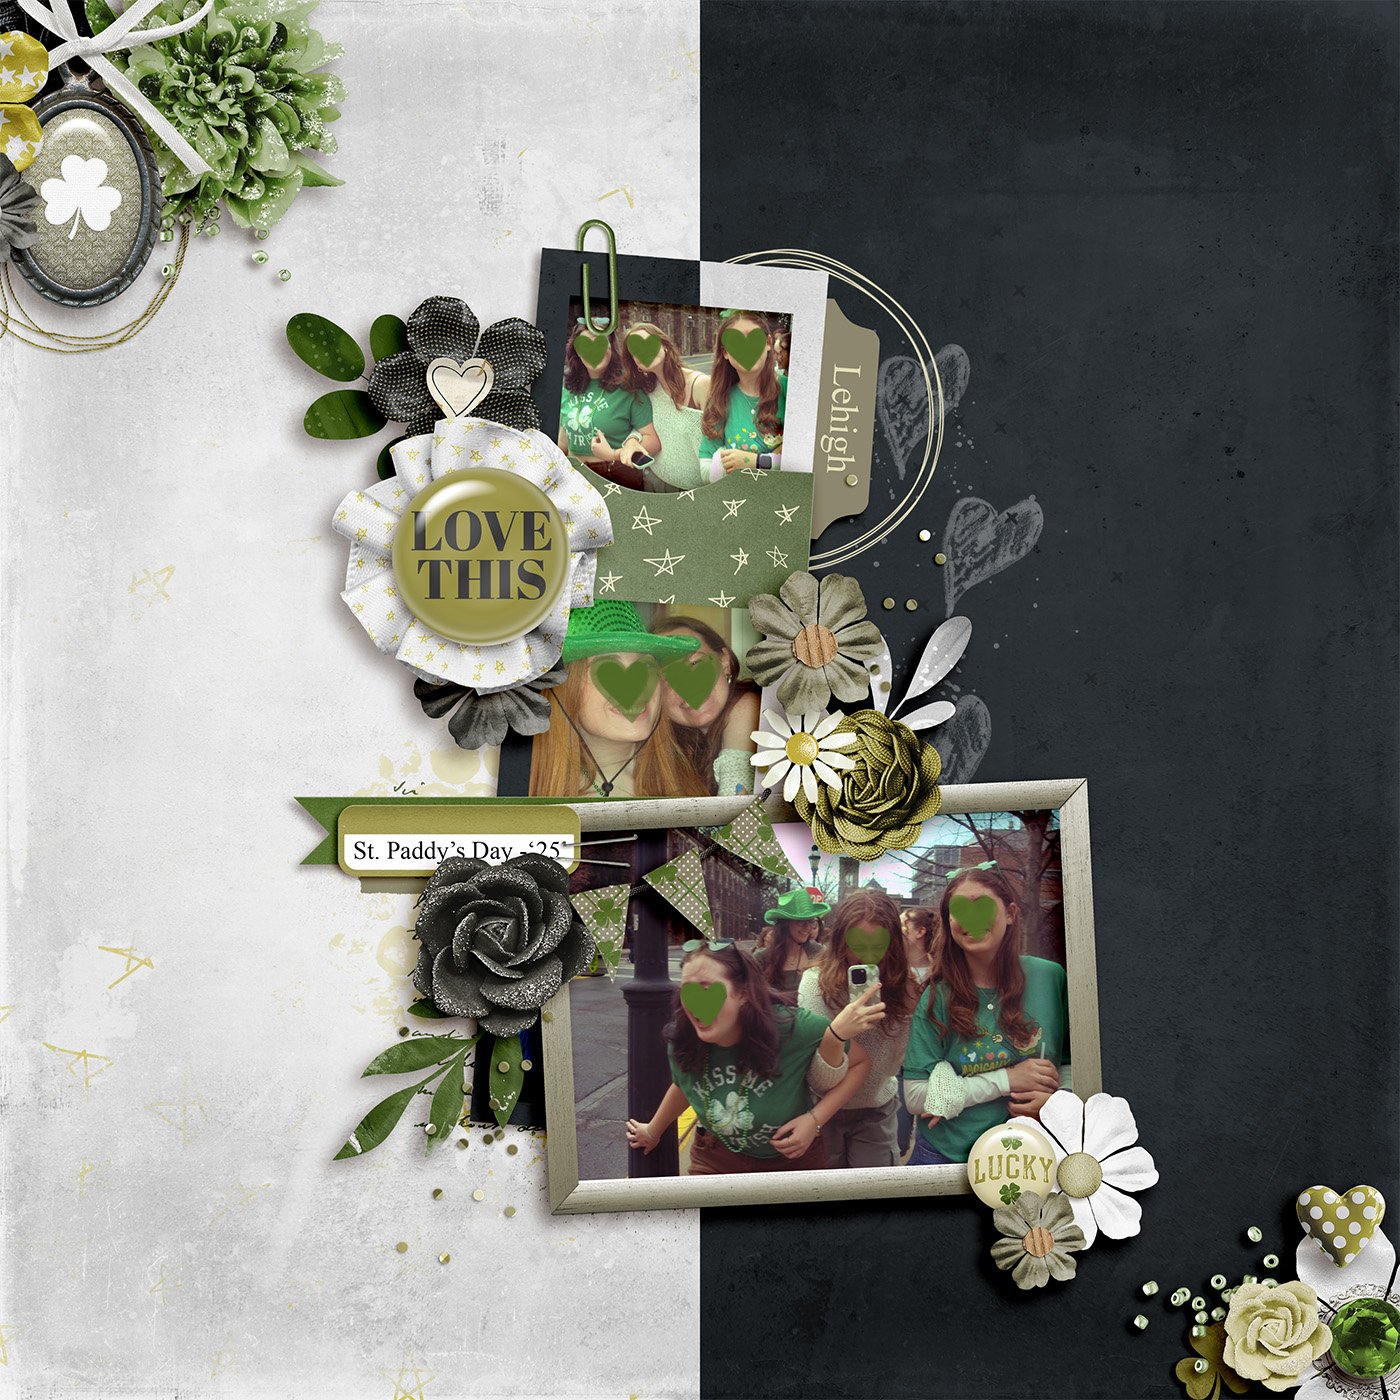
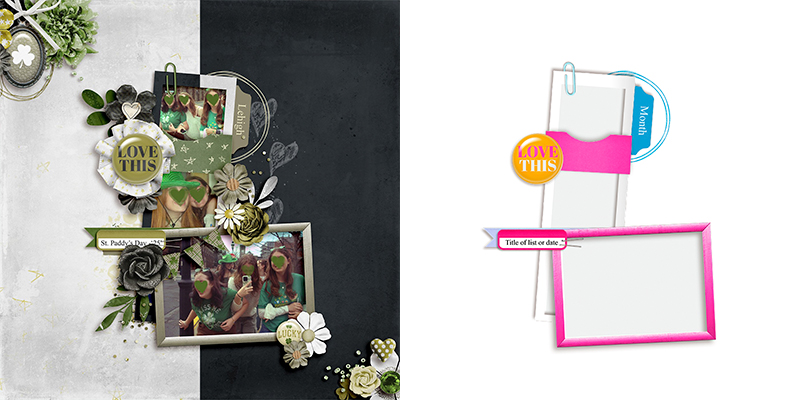
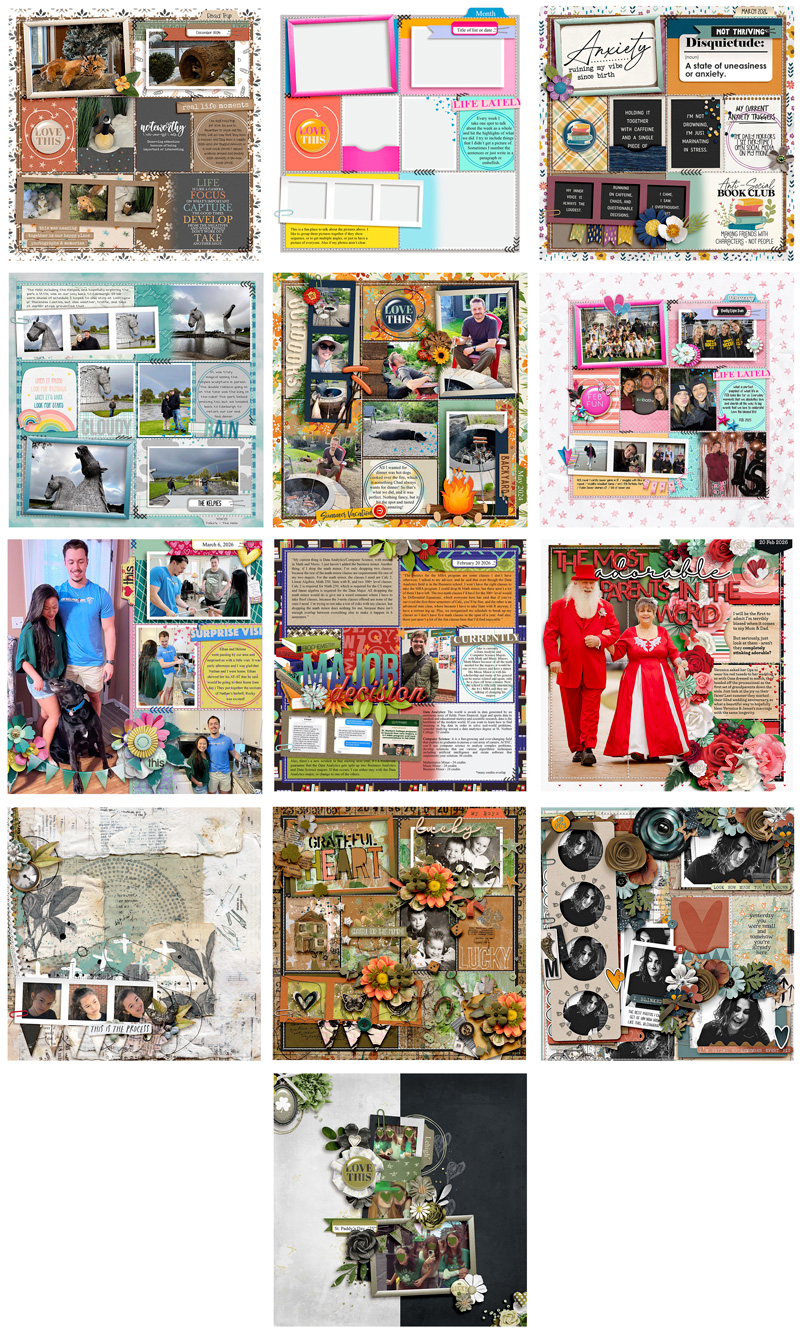
I challenged the SugarBabes to work with the template in the lower right corner. It features eight masks for photographs along with a three-dimensional frame, layers of paper strips and labels, a blended gradient mask, a dimensional pocket, and a fully-customizable piece of flair. You’ll also find several fasteners and lots of stitching on the template.
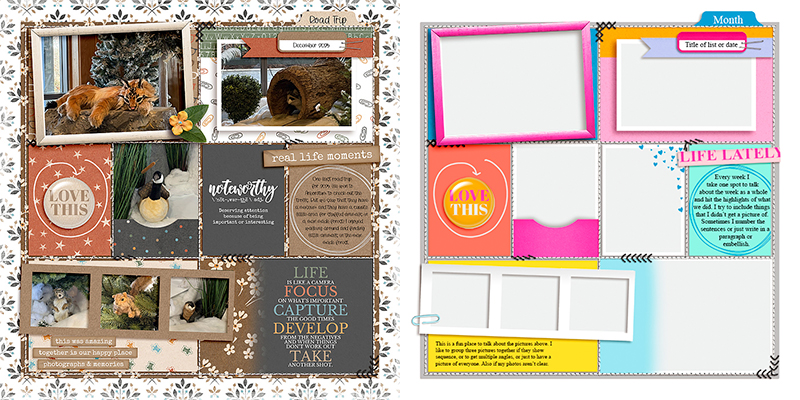
Our creative team had a lot of fun putting this template through its paces as they used it as the starting point for a dozen different unique layouts. Of course, every layout created with a template will look different when used with different digital scrapbooking kits and supplies, but there are additional techniques you can employ that result in even more uniquely lovely layouts. With some of these pages, you won’t believe they’re based on this same template until we get into the breakdown!
So pour yourself a mug of something sweet and get ready to enjoy a heaping helping of creativity!

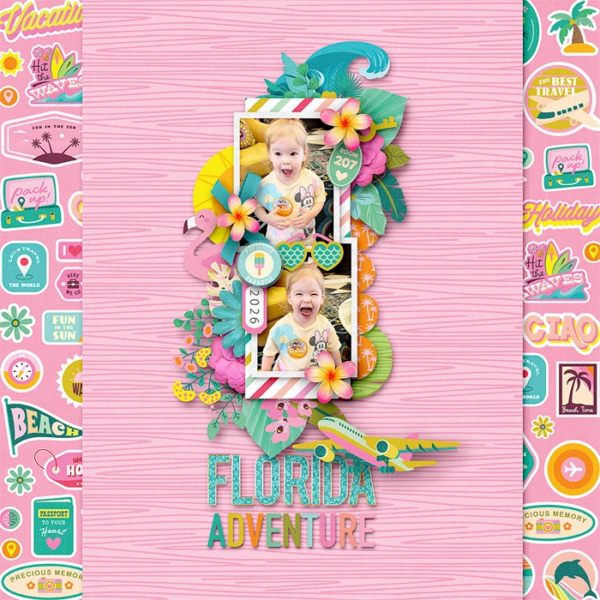
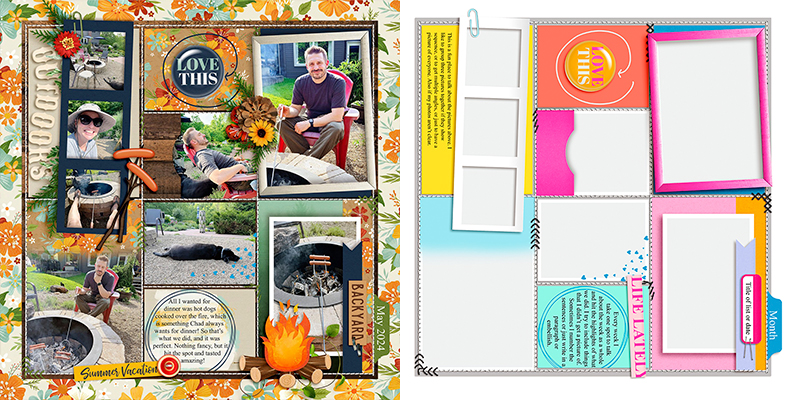
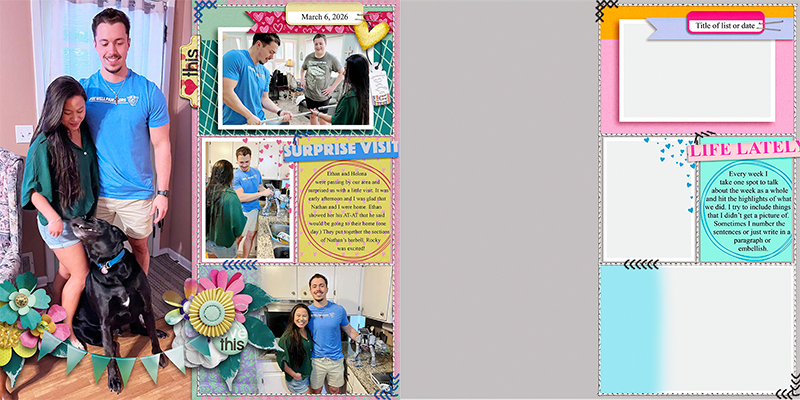
Sugar Babe Cherry starts us off by using the template exactly as-is. She clipped photographs and journaling cards to the corresponding masks, added patterned papers and finished it off with elements from her chosen kit. It’s a quick and easy scrapbook page, all thanks to this template!

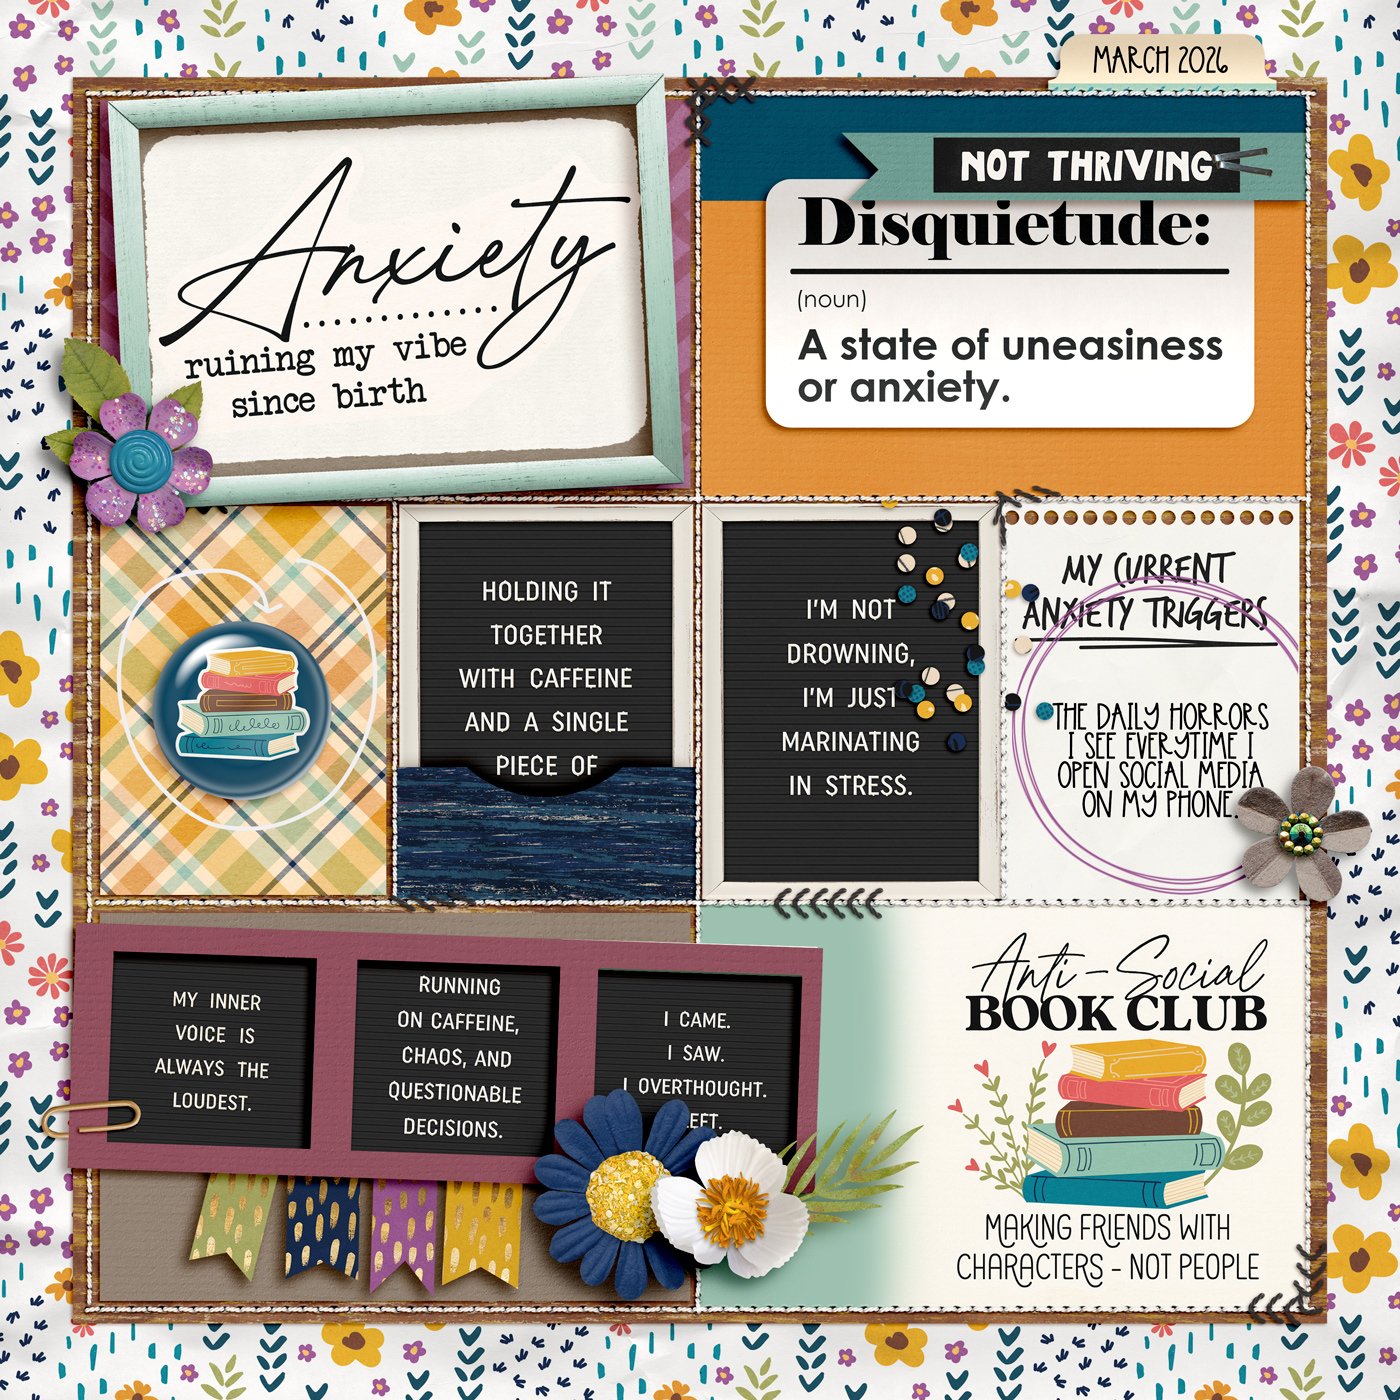
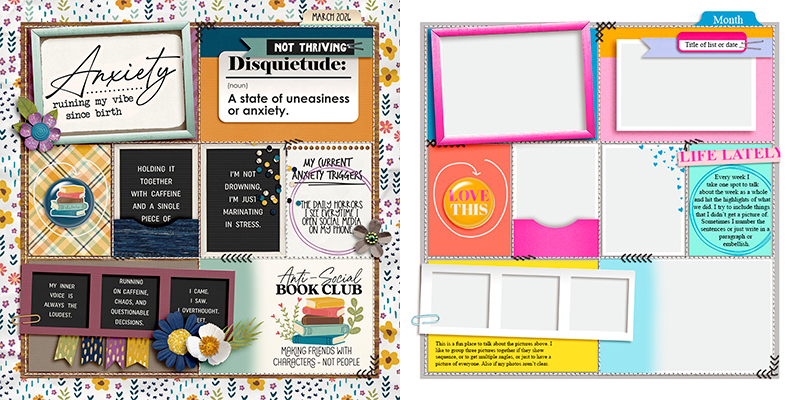
Sugar Babe Carrie demonstrates how you can make use of this template even if you’re making a photoless layout. By filling all the photo masks with journaling cards and word art, Carrie was able to create a quick layout that conveyed her current state of mind.

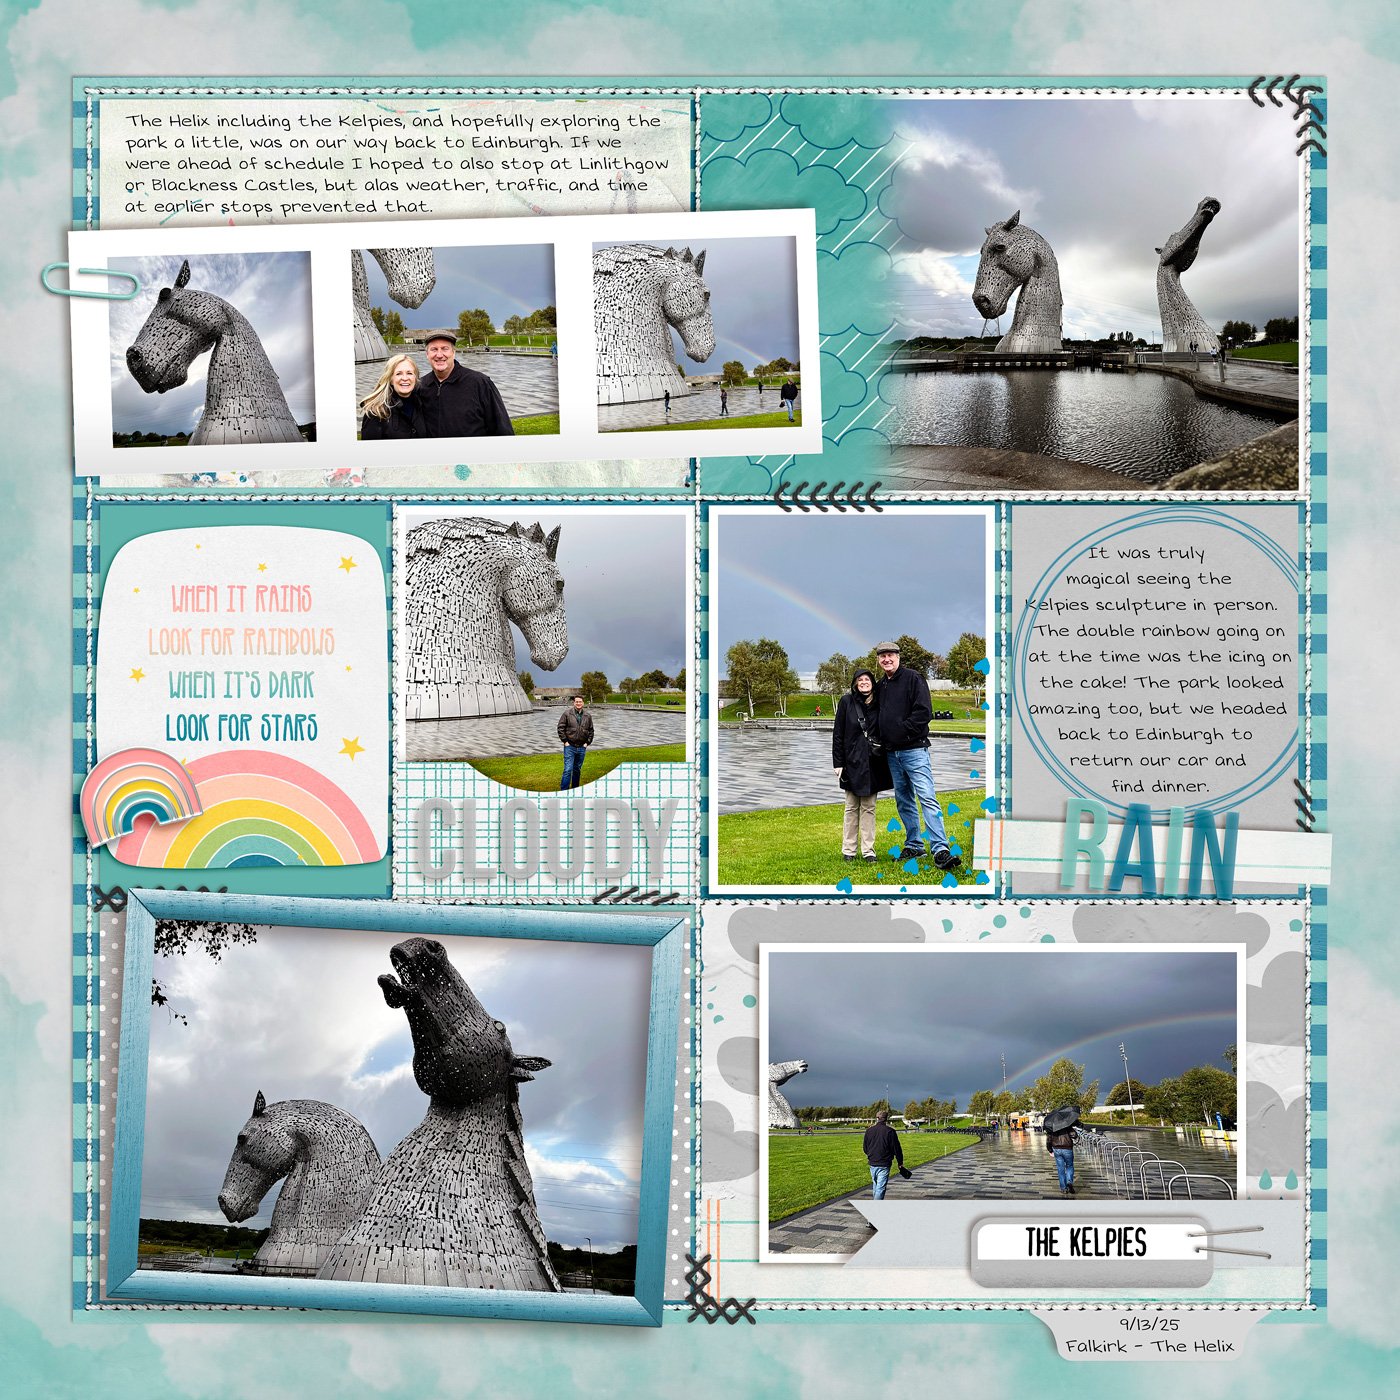
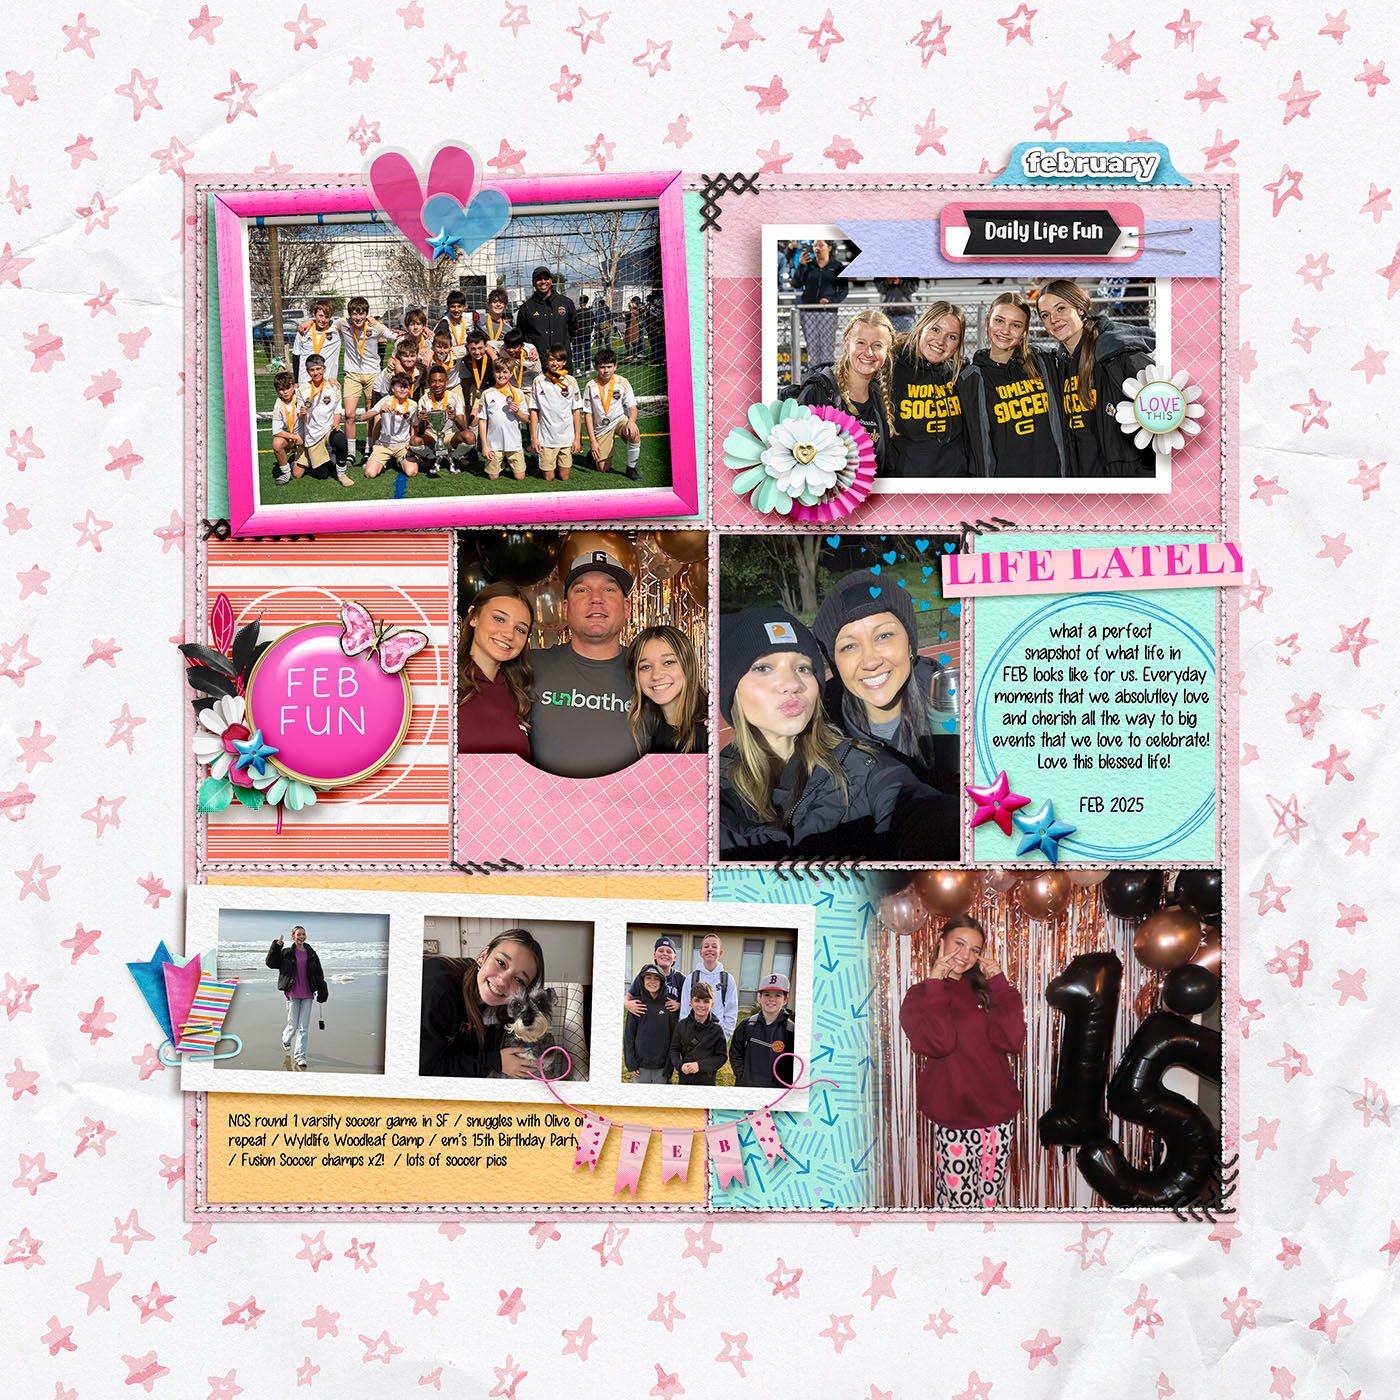
Sugar Babe Krista P. shows off a great option to re-use a template in your album: give it a flip! For her layout, she flipped the template vertically. This moved the three-wide photo strip to the top of the page and placed the dimensional photo frame at the bottom. When you’re wanting to get multiple uses out of a single template, this is a fantastic way to do it.

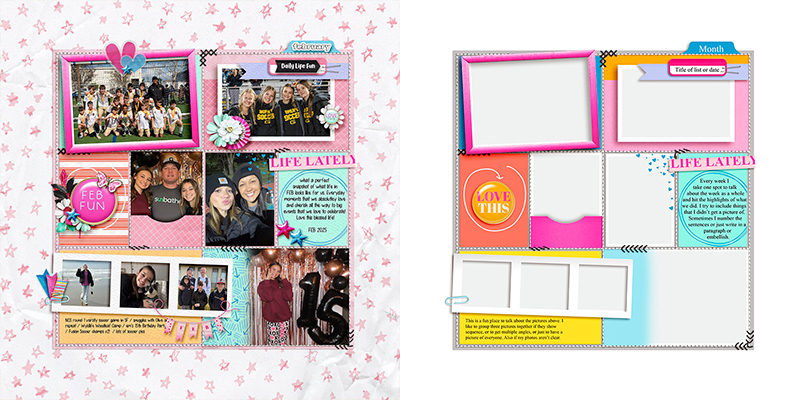
Sugar Babe Ally demonstrates a spin on the original template … by literally spinning or rotating it 90-degrees clockwise. Now instead of a 3-photo strip that runs horizontally across the page, it runs vertically. Notice also that her large photo spaces are now fit for portrait-oriented shots. When your images are in the opposite orientation of the template you’re working with, remember this technique and give it a spin.

If you love whitespace and wide margins, you’ll definitely want to check out this layout by Sugar Babe Krista L. Just because a template starts off a certain size doesn’t mean it needs to stay that way! Krista shrunk the template to give it wider margins, which allows her adorable background paper to really stand out.

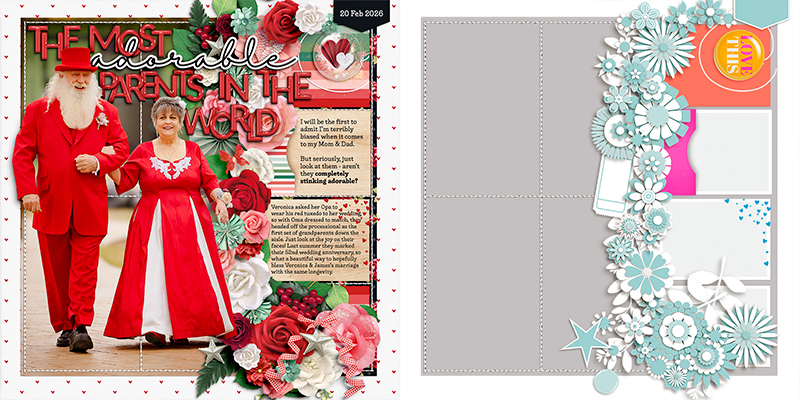
If you’re a fan of big photographs, this technique from Sugar Babe Charlene is one you’ll want to try. She isolated just the right half of the template and used the left half of her canvas for a 6″ x 12″ photograph. This allowed her to really show off that fun photo while still making great use of the template and several of its elements.

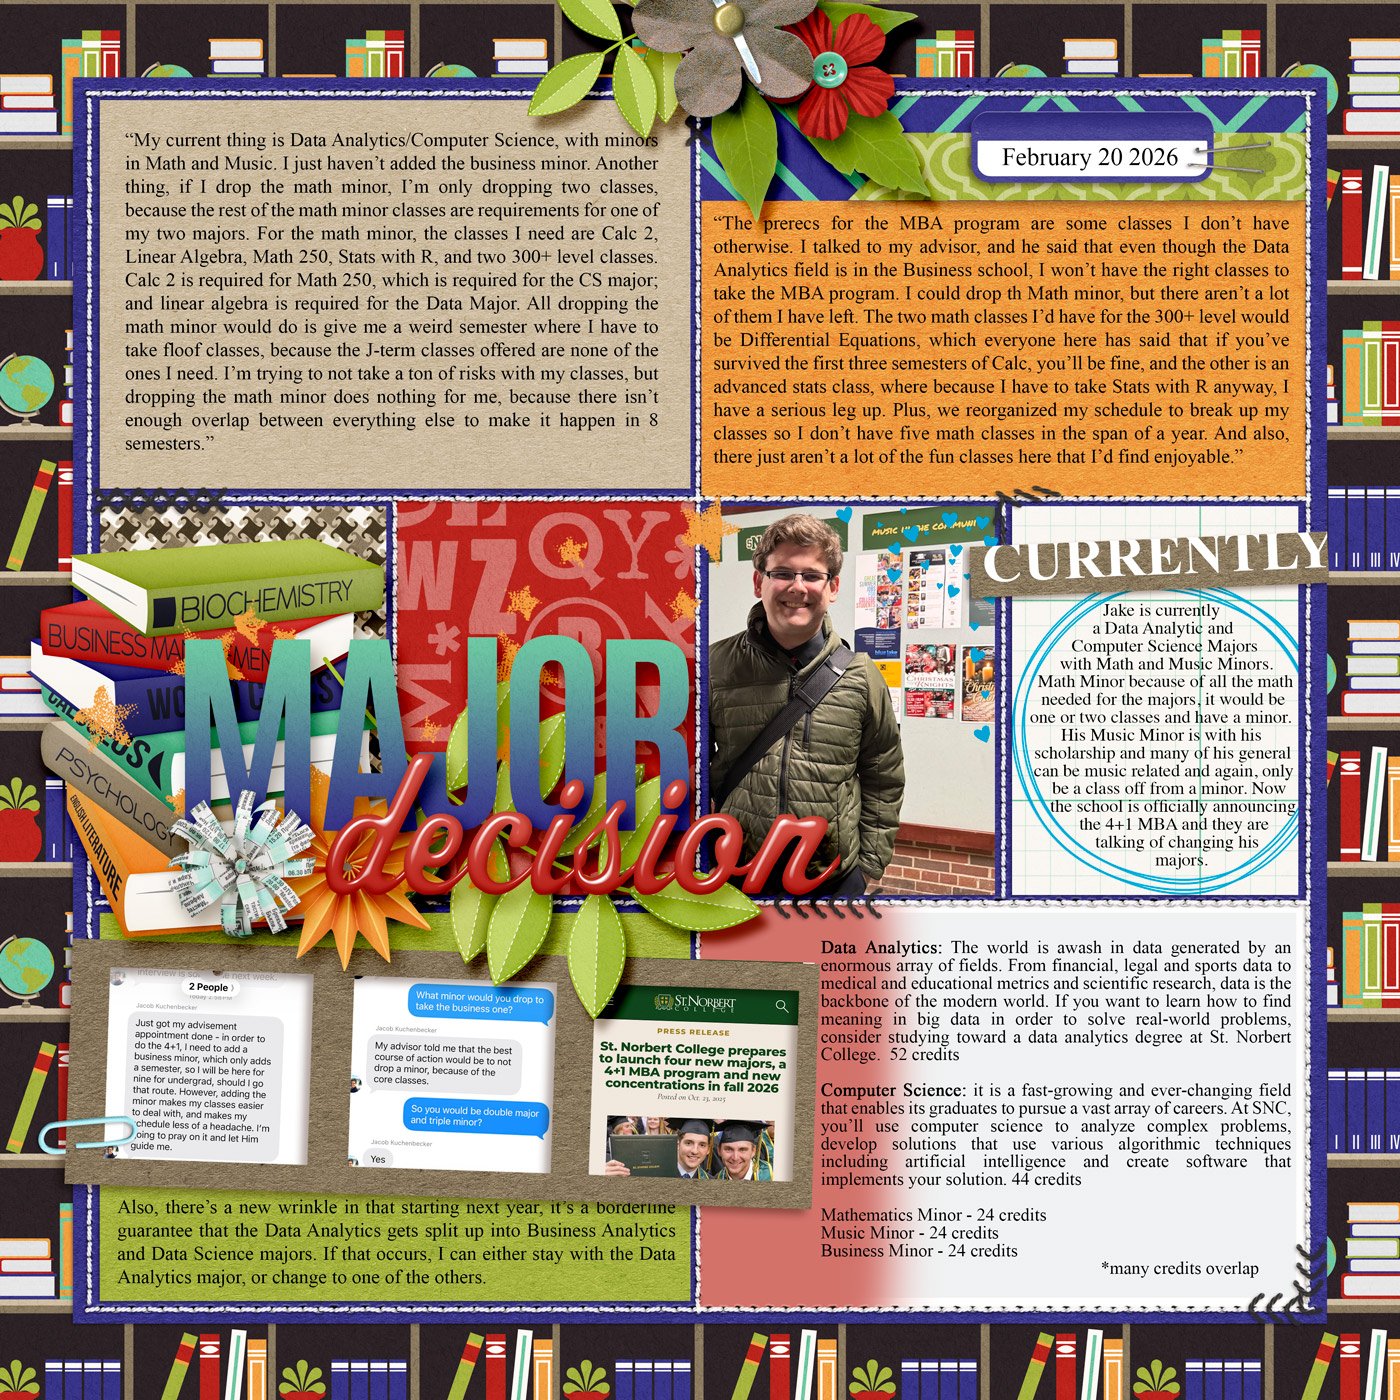
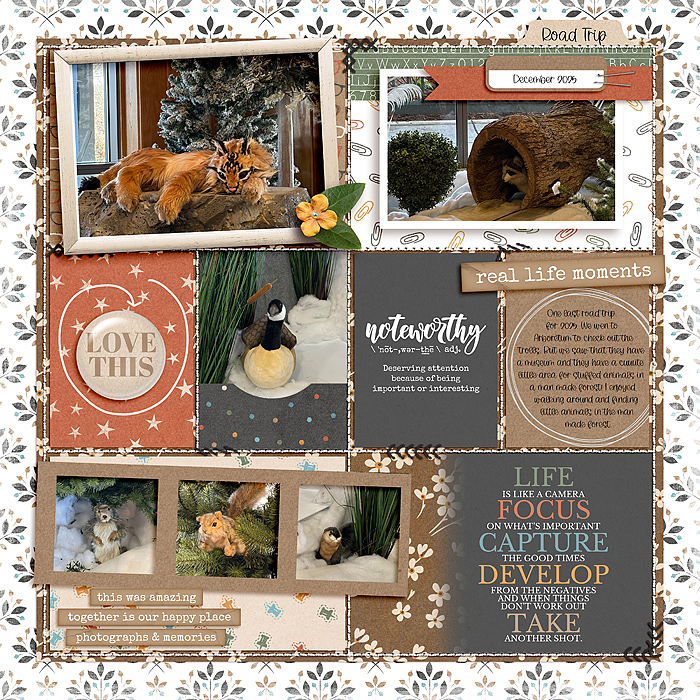
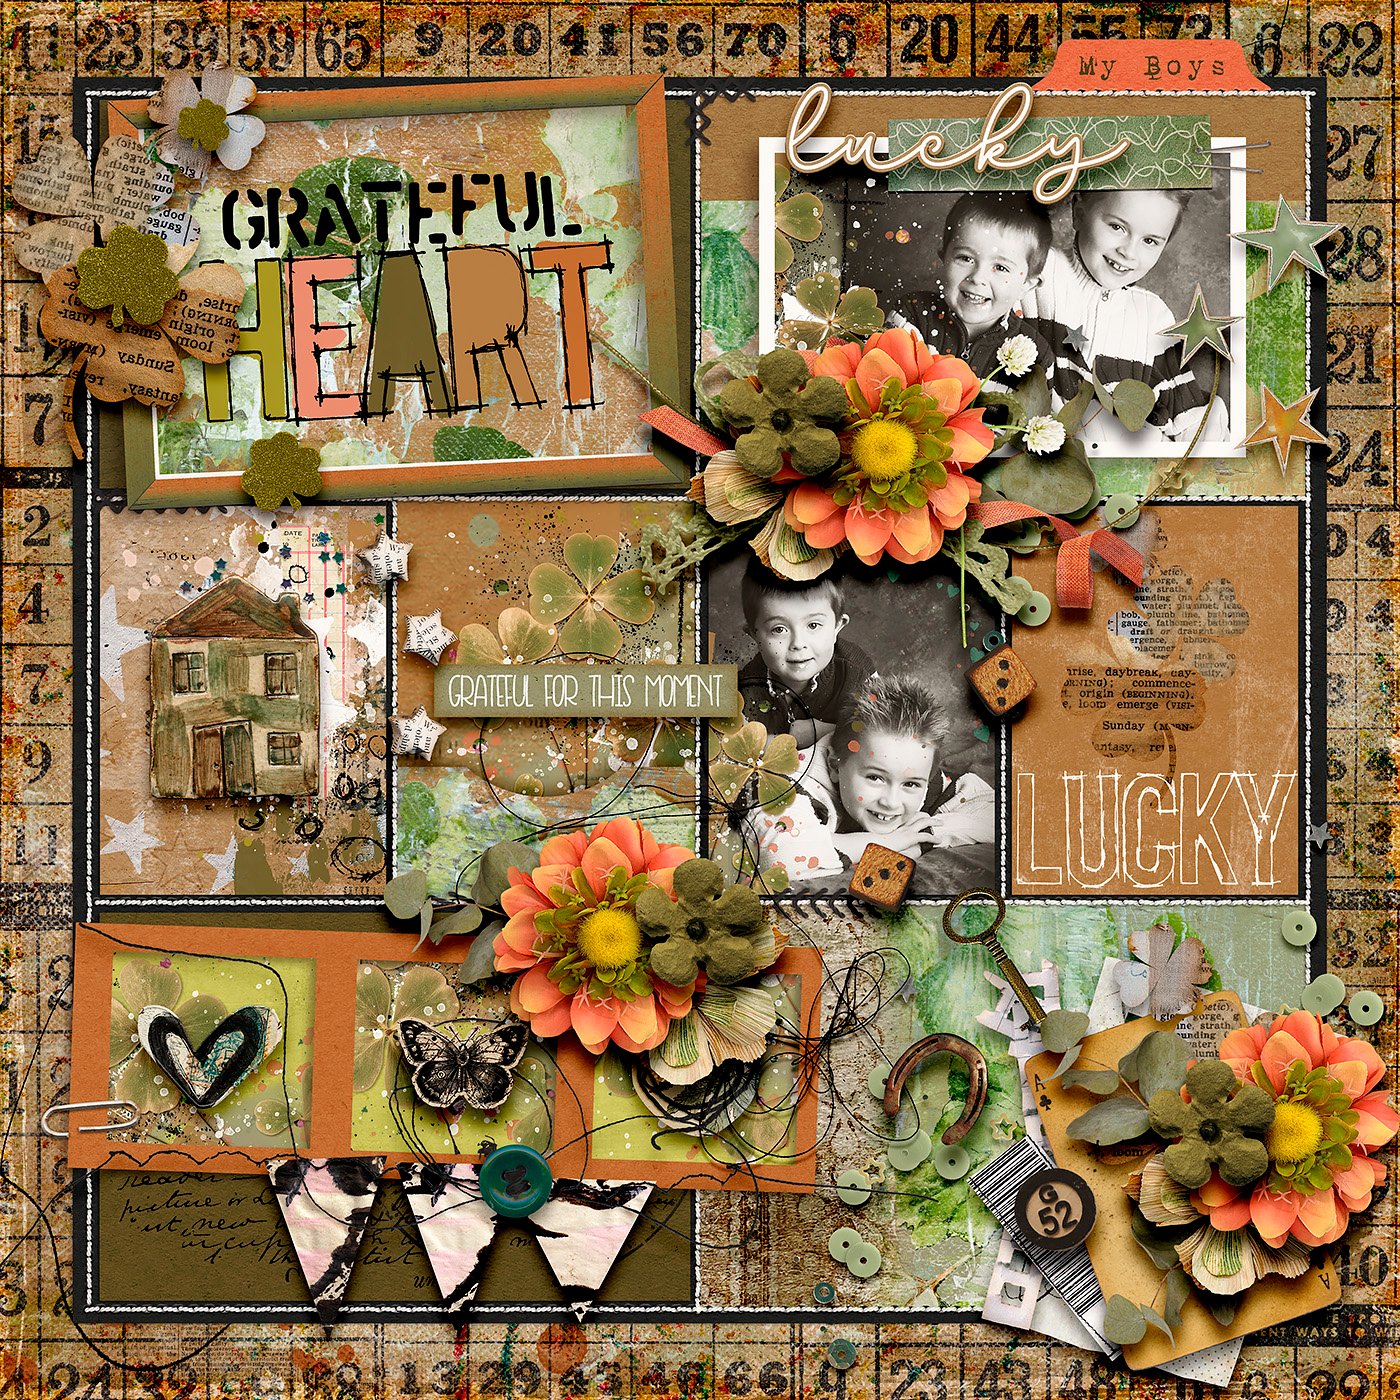
If you’ve got a lot to say, a grid- or pocket-style template can be your friend, as demonstrated here by SugarBabe Rebecca in her journaling-heavy layout. Each individual block of this type of template can be used for a section of journaling. It breaks up longer segments of text, making it significantly easier to read. It’s also a good way to play with different blocks of colored paper as Rebecca shows in her layout above.


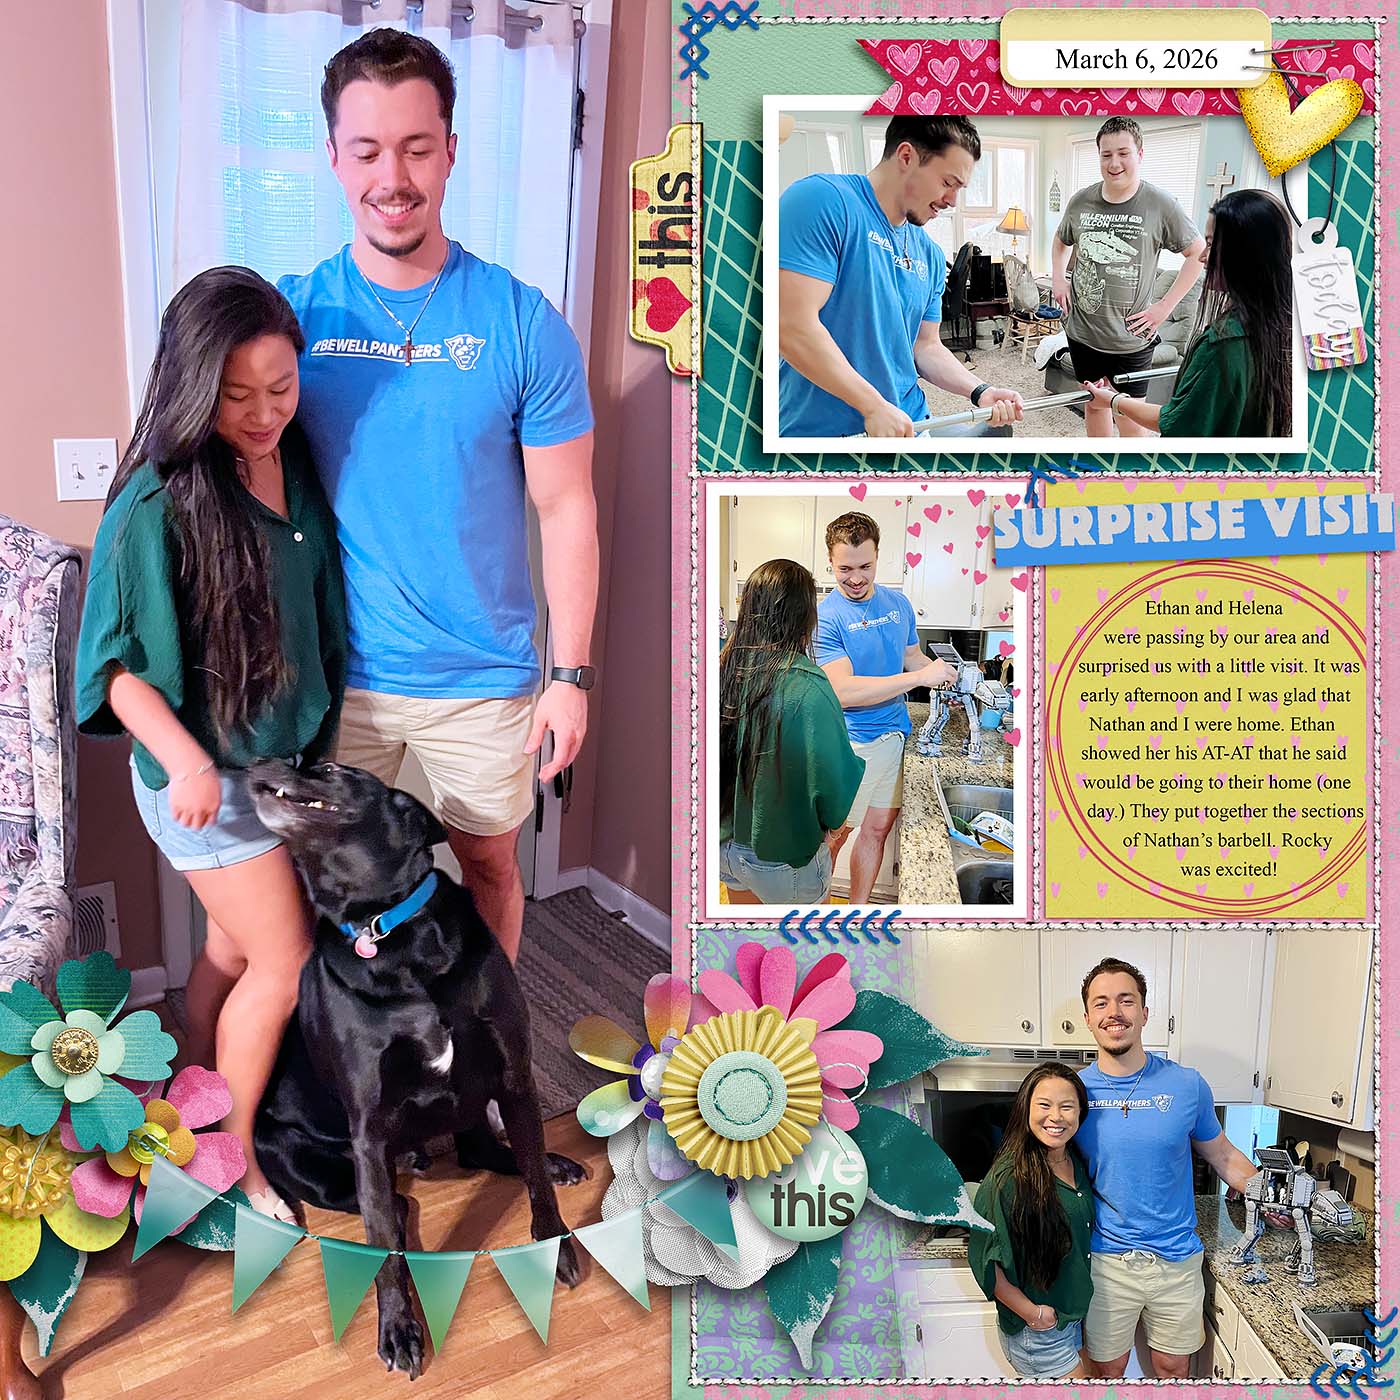
I had the pleasure of working with Kelly’s template this month and opted to stretch it even further by mixing it with another template. This is one of my favorite techniques for getting maximum value from my templates! I mixed Kelly’s template with one from Bring on the Happy by Fiddle-Dee Dee Designs.
I started by rotating Kelly’s template 90-degrees clockwise. Then, I isolated the pockets in the center column, using the rest of the space for a large photograph. Next, I hid all the layers in the Fiddle-Dee-Dee template for the photo, journaling, and foundational paper pieces. With the remaining layers selected, I first rotated them 90-degrees counter-clockwise and then flipped them horizontally. Combine the two in a new canvas, add a few layer masks, and voila!

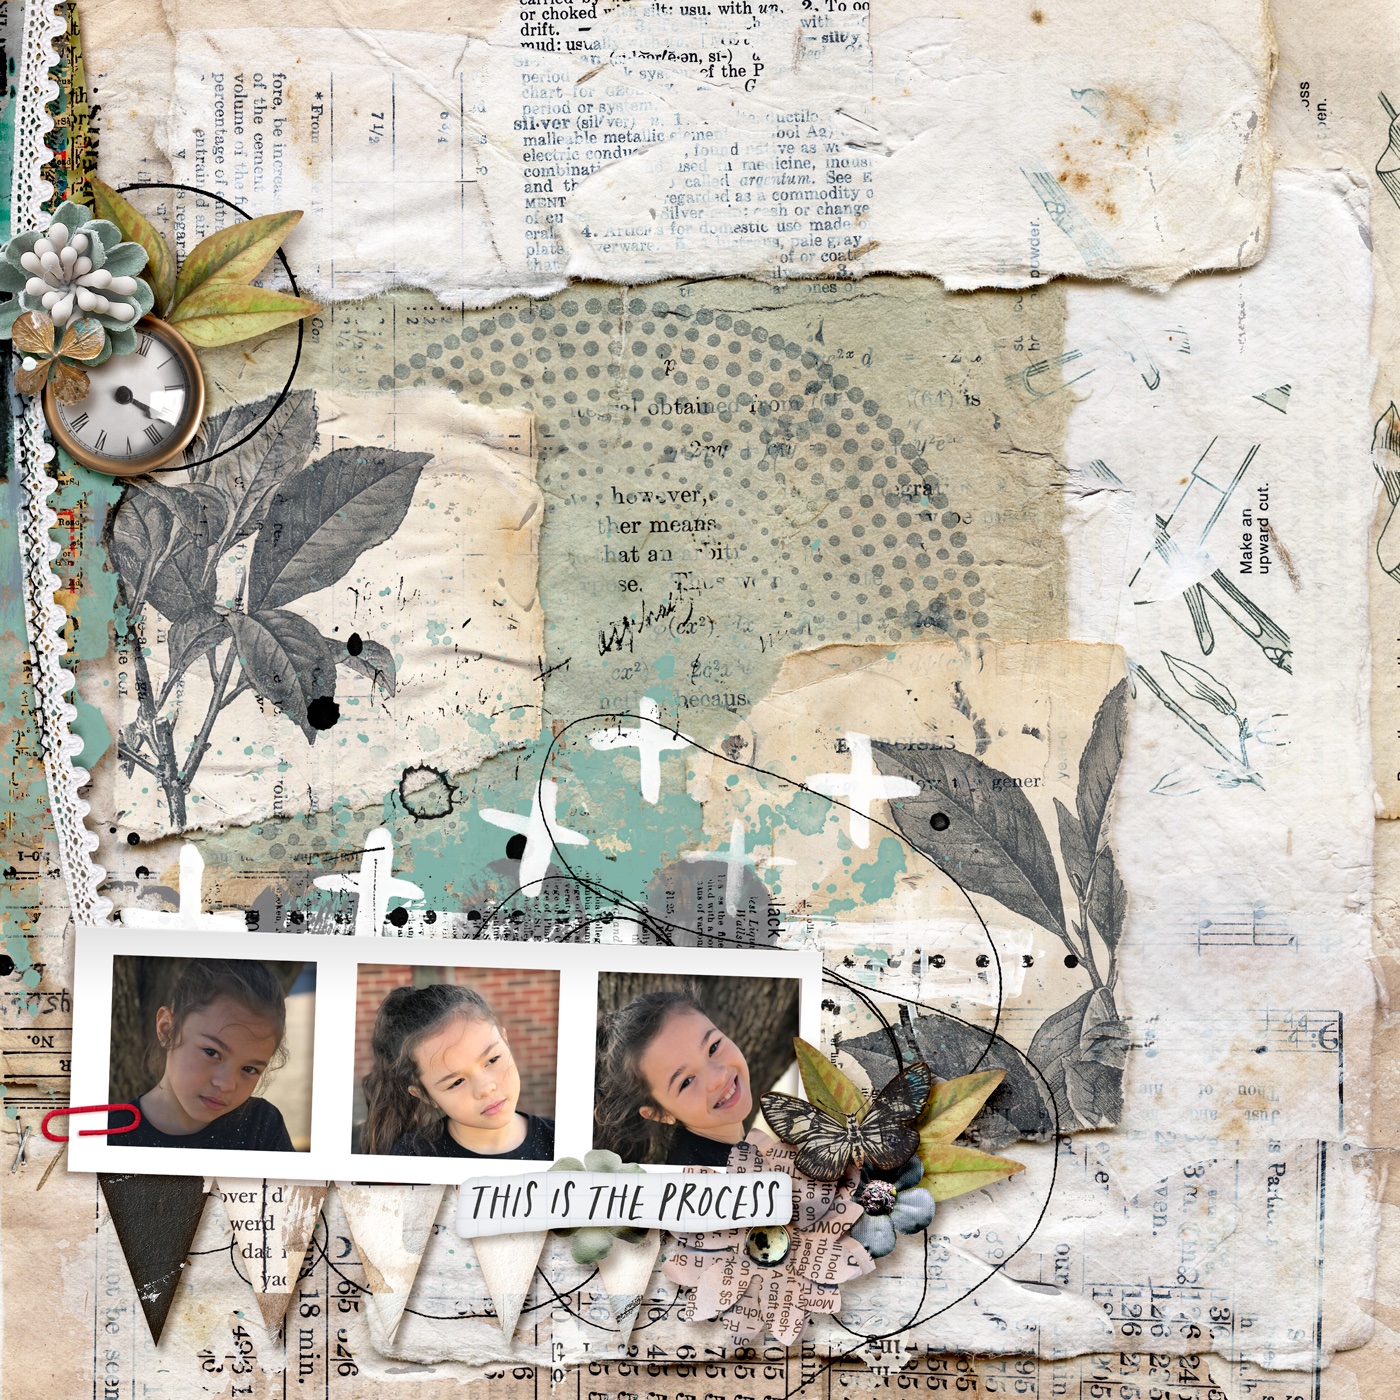
SugarBabe Evelyn shows us that even the most minimalist layout can make use of template elements! She opted to use the three-photo strip and its paperclip as the starting point for her layout. By building up the background with papers and multimedia-style layers, she created a layout that’s a true thing of beauty!

Speaking of multimedia elements, SugarBabe Heather demonstrates how you can use this style of template to create an art journaling layout. When you mix your photographs with papers, paint, and other mixed media elements, you can use any template as a starting point for your art journaling.

SugarBabe Mary decided to “go rogue” and really play with the elements of Kelly’s template. By hiding some layers and shifting around others, she was able to get maximal use out of the template as a starting point for this gritty teenage-friendly layout.

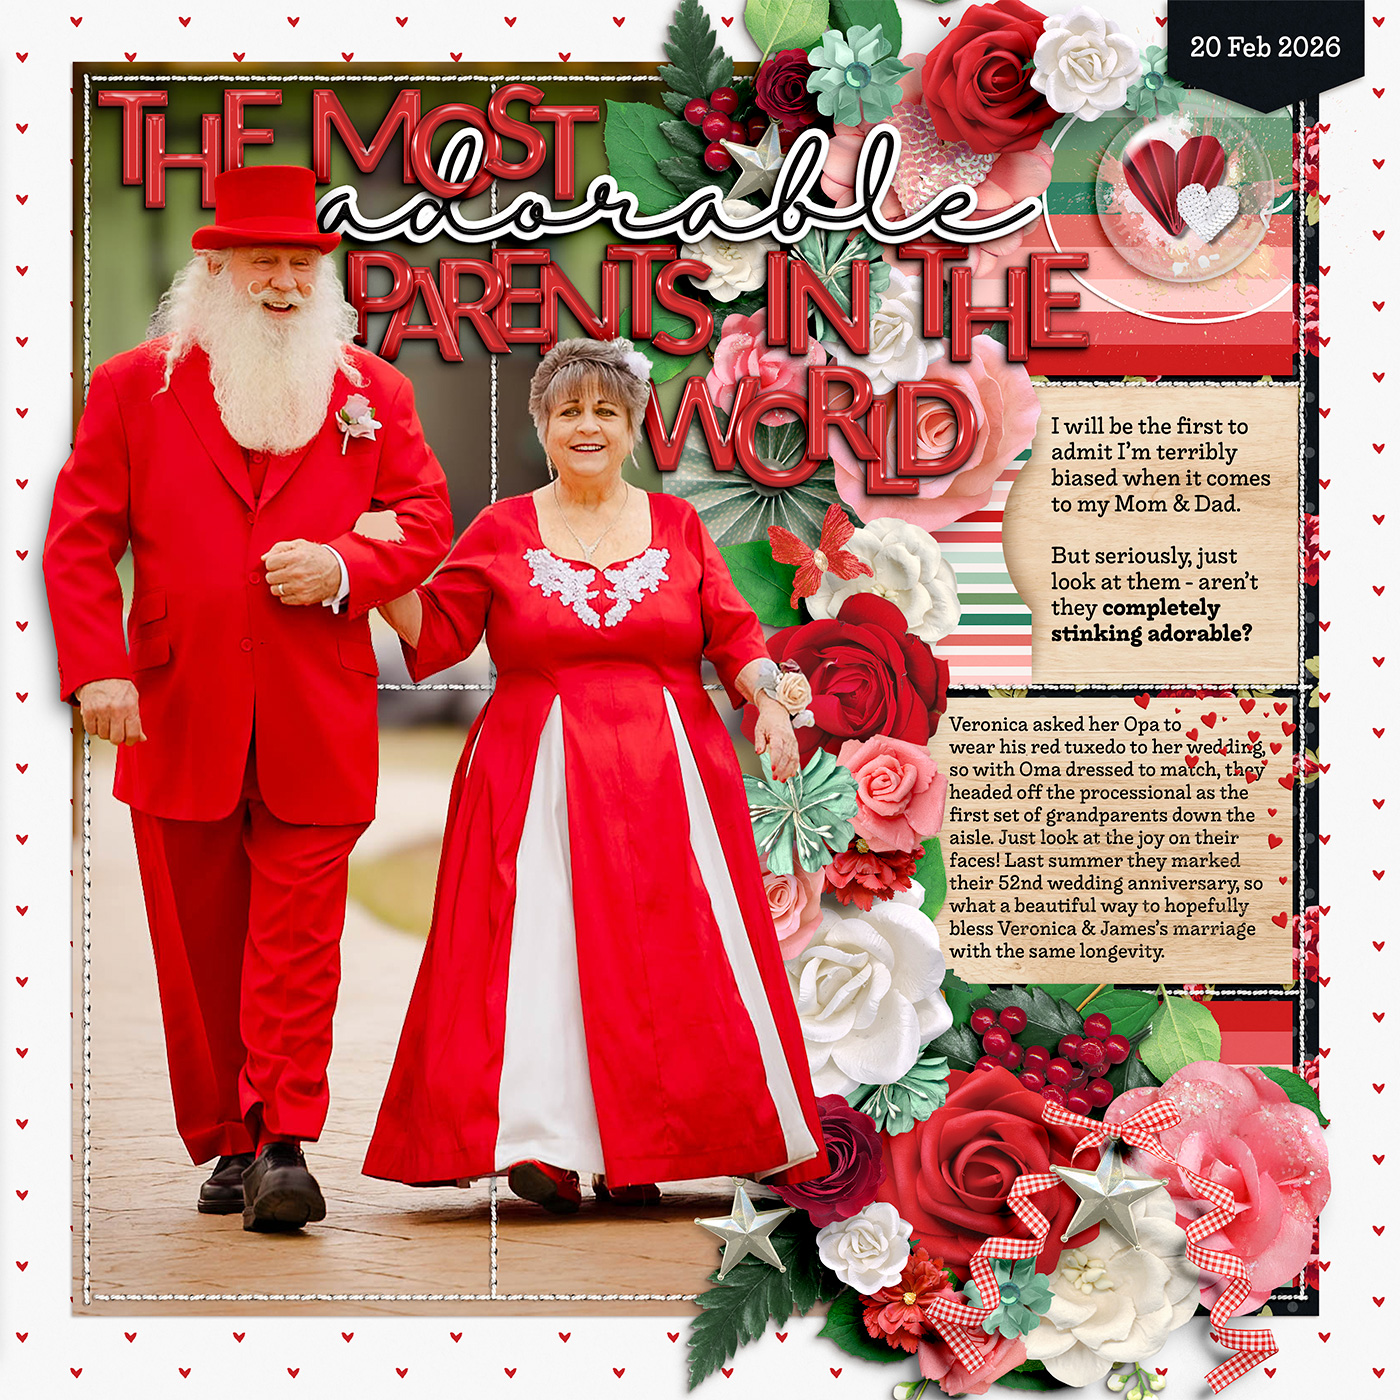
As an extra-special treat, we get to finish off this month’s post with a layout from the template’s designer, Kelly! She writes, “I was inspired by Mary and Evelyn’s awesome layouts,” and she opted to go rogue, too. Kelly “…used the elements from the template: single frame, triple frame, pocket, tab, flair, wordstrip, banner, and circle. Then [she] used the other template in the pack for the confetti and the banner.”
And that rounds out our post for this month – one layered template, twelve uniquely lovely digital scrapbook layouts!
Layered digital scrapbooking templates are a fantastic tool for your memory-keeping toolkit. Whether you use them as designed or simplified; change the page theme or go completely artsy; fill your photo masks with paper, journaling cards, word art or journaling; spin, flip, or mirror the template; zoom in to focus on part of the template or zoom out to add whitespace and margins … layered page templates make the perfect starting point for your next scrapbook layout!
Be sure to keep an eye on the Shoppe for Friday’s new releases and pick up this super versatile template pack from Kelly of Connection Keeping. You won’t want to miss it!