Using Templates in Paint Shop Pro X3
I want to preface this tutorial by saying that I am NOT a tutorial writer-I feel like I’m leaving a ton out and not teaching you as well as you should be taught. If you have any questions please feel free to PM me here through the forum-I will attempt to help you as much as I can.
I have been scrapping with some version of PSP since I started scrapping. I stared with 9 and have upgraded periodically through the years. I have been using PSP X3 for about 5 months now. There are things about it that I love and things about it that I don’t love so much-but overall I’ve been happy with the upgrade from X2.
OK the first thing you need to do when using a template in PSP is navigate to the folder that your template is in-I do this using the Widows viewer as opposed to the Browse feature that is standard in PSP-I find it easier since my files are kept according to a very regimented system.
I open up the template and immediately resize it because I scrap 8X8 and most templates are 12X12. I should also mention that the only file extension that is recognized in PSP is PSD format. I toss out the TFF and PNG files that are included in most template sets.
Here is what my screen looks like at this point.
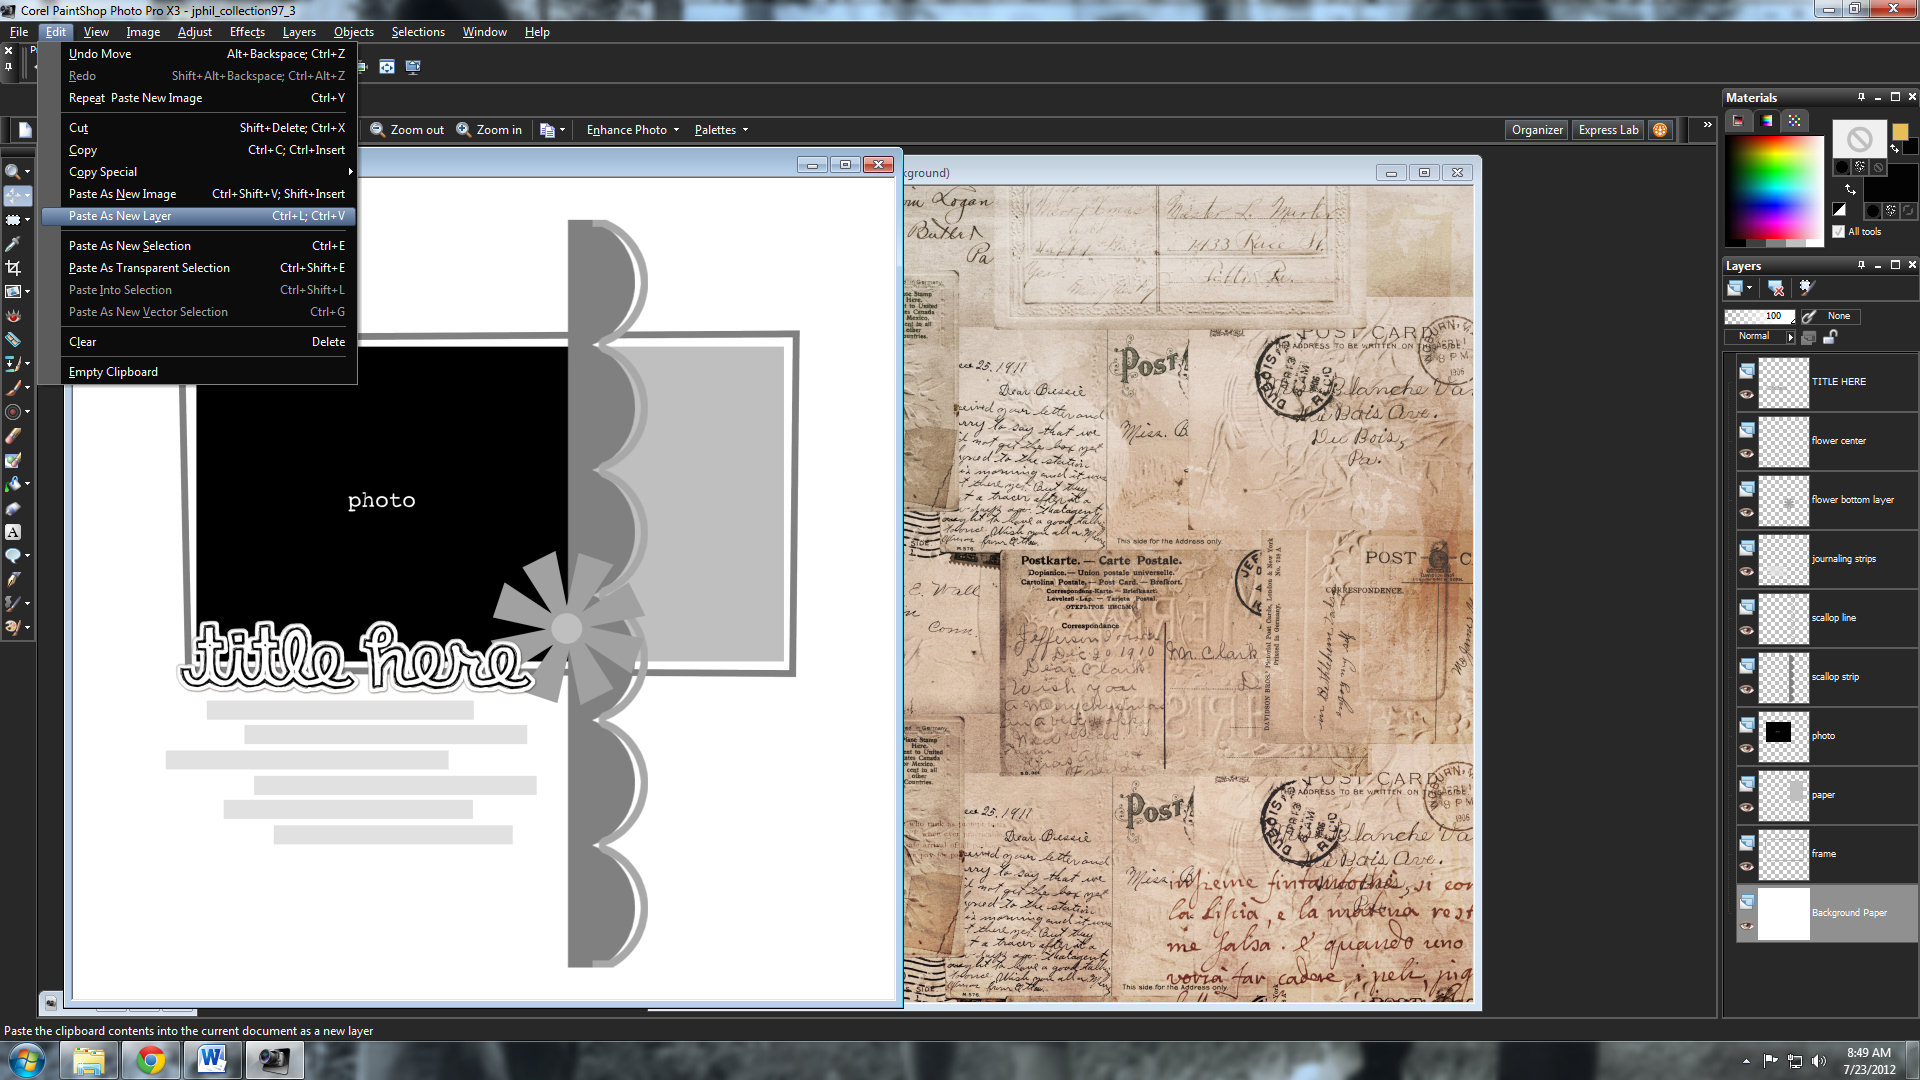
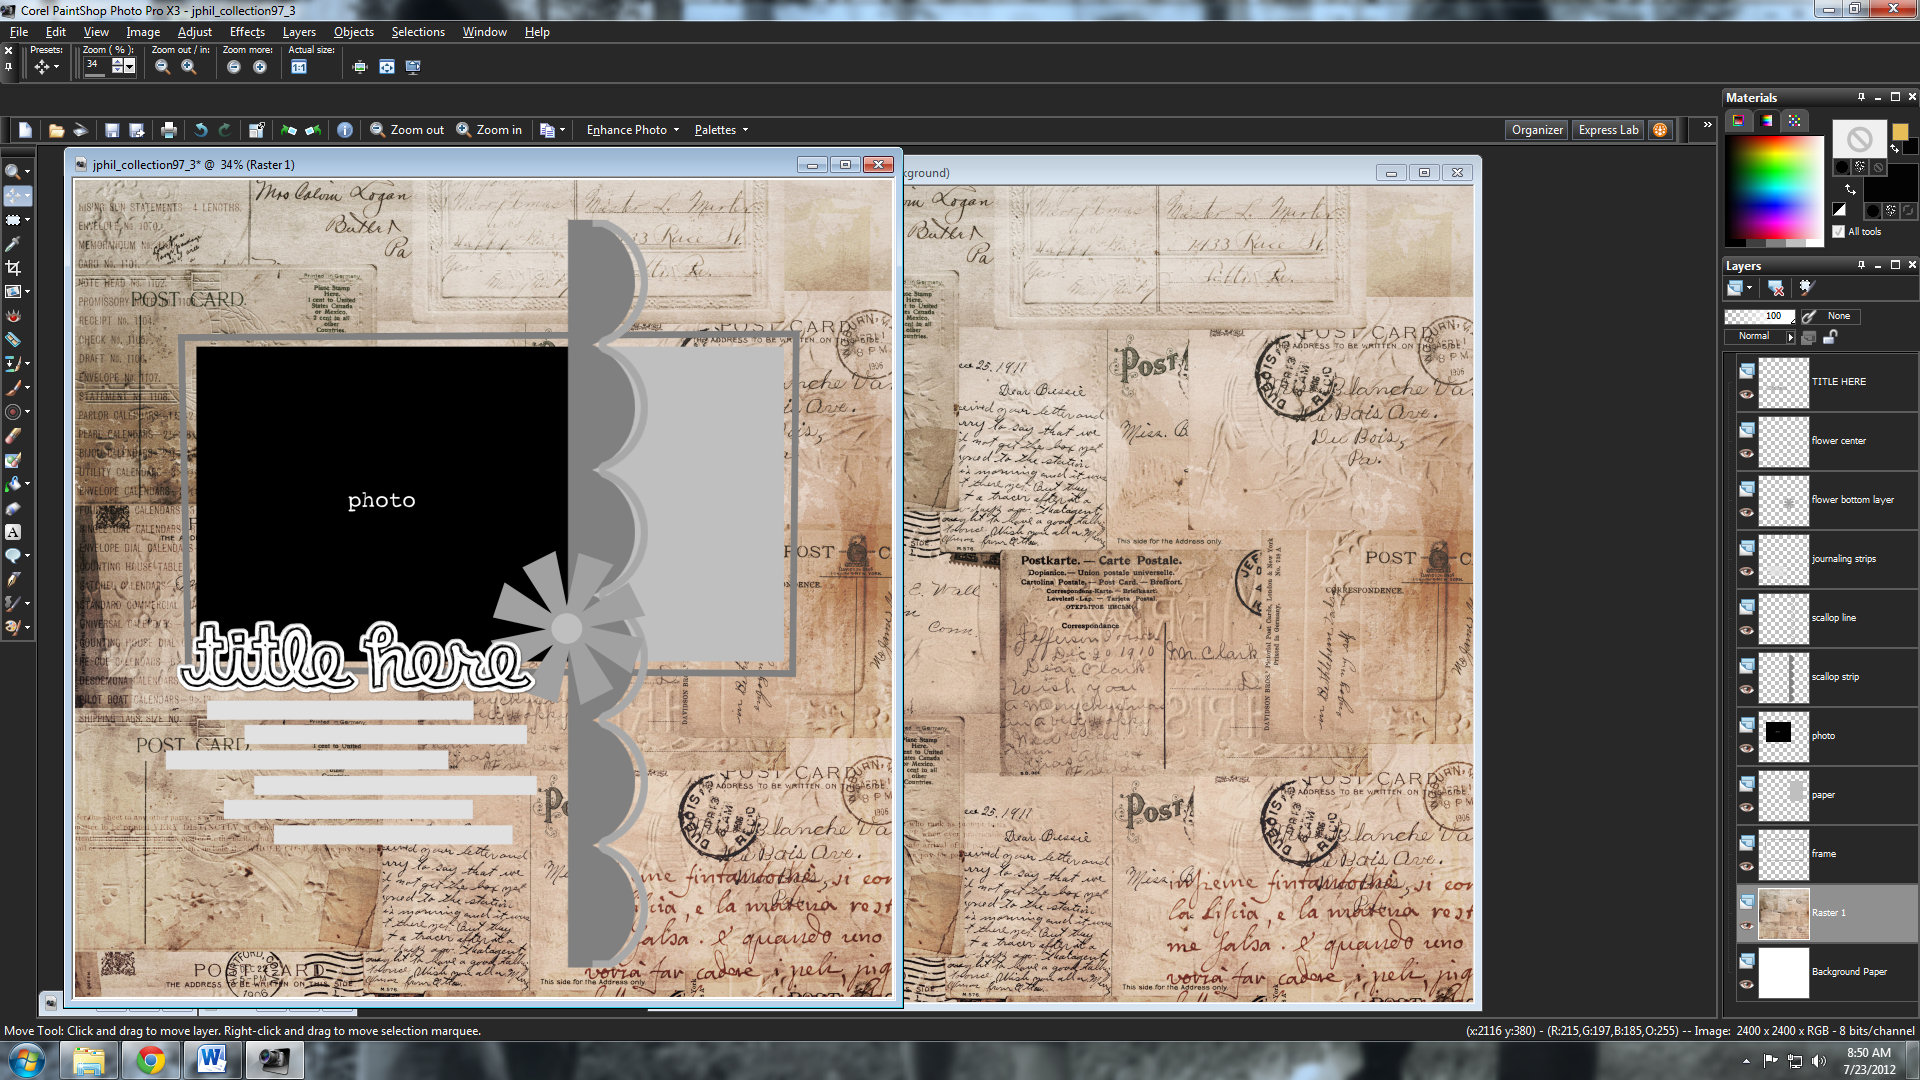
The next thing I do is pick a Background paper-I open that in PSP and resize as well- I drop that onto the bottom layer above the guide paper in the template. That is an easy step because it won’t need to be cut at all. The Next three visuals are my steps in adding the bg paper…
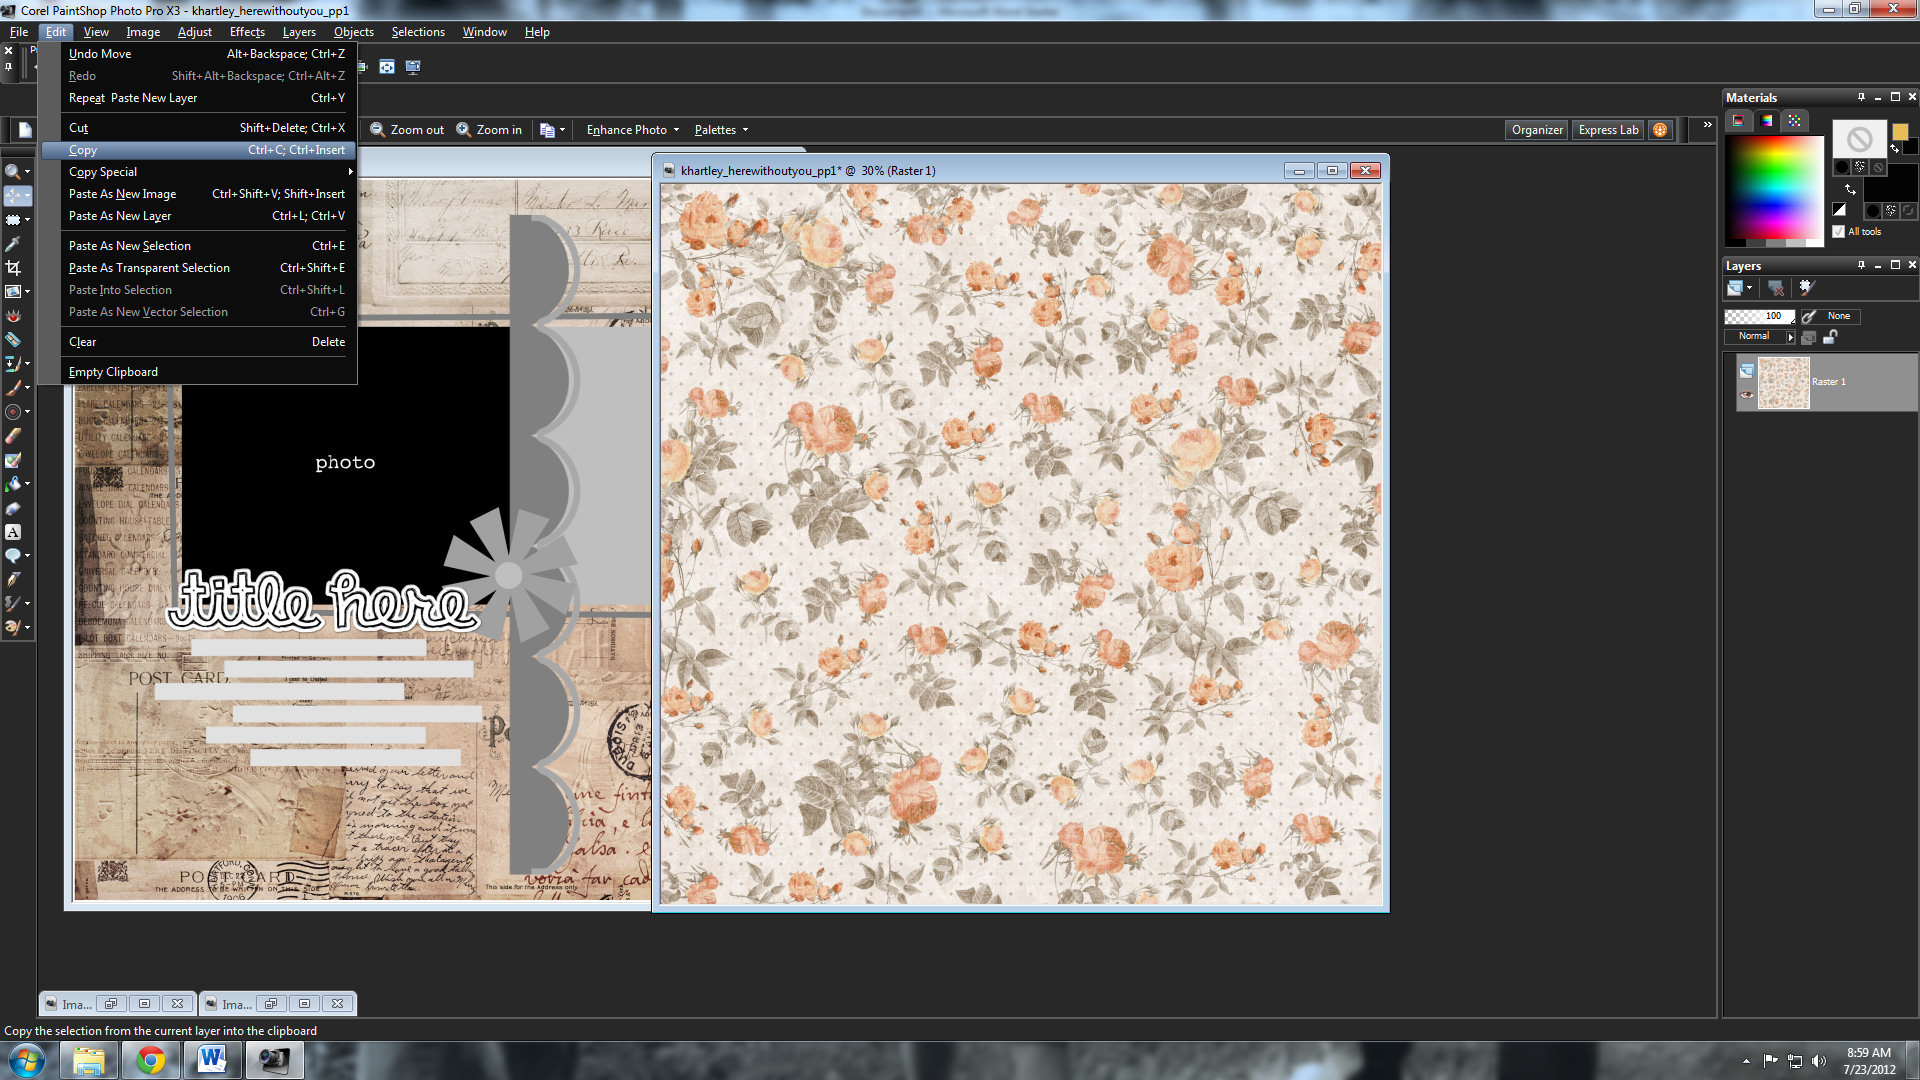
My paper is open in PSP (and resized to 8X8), I copy it
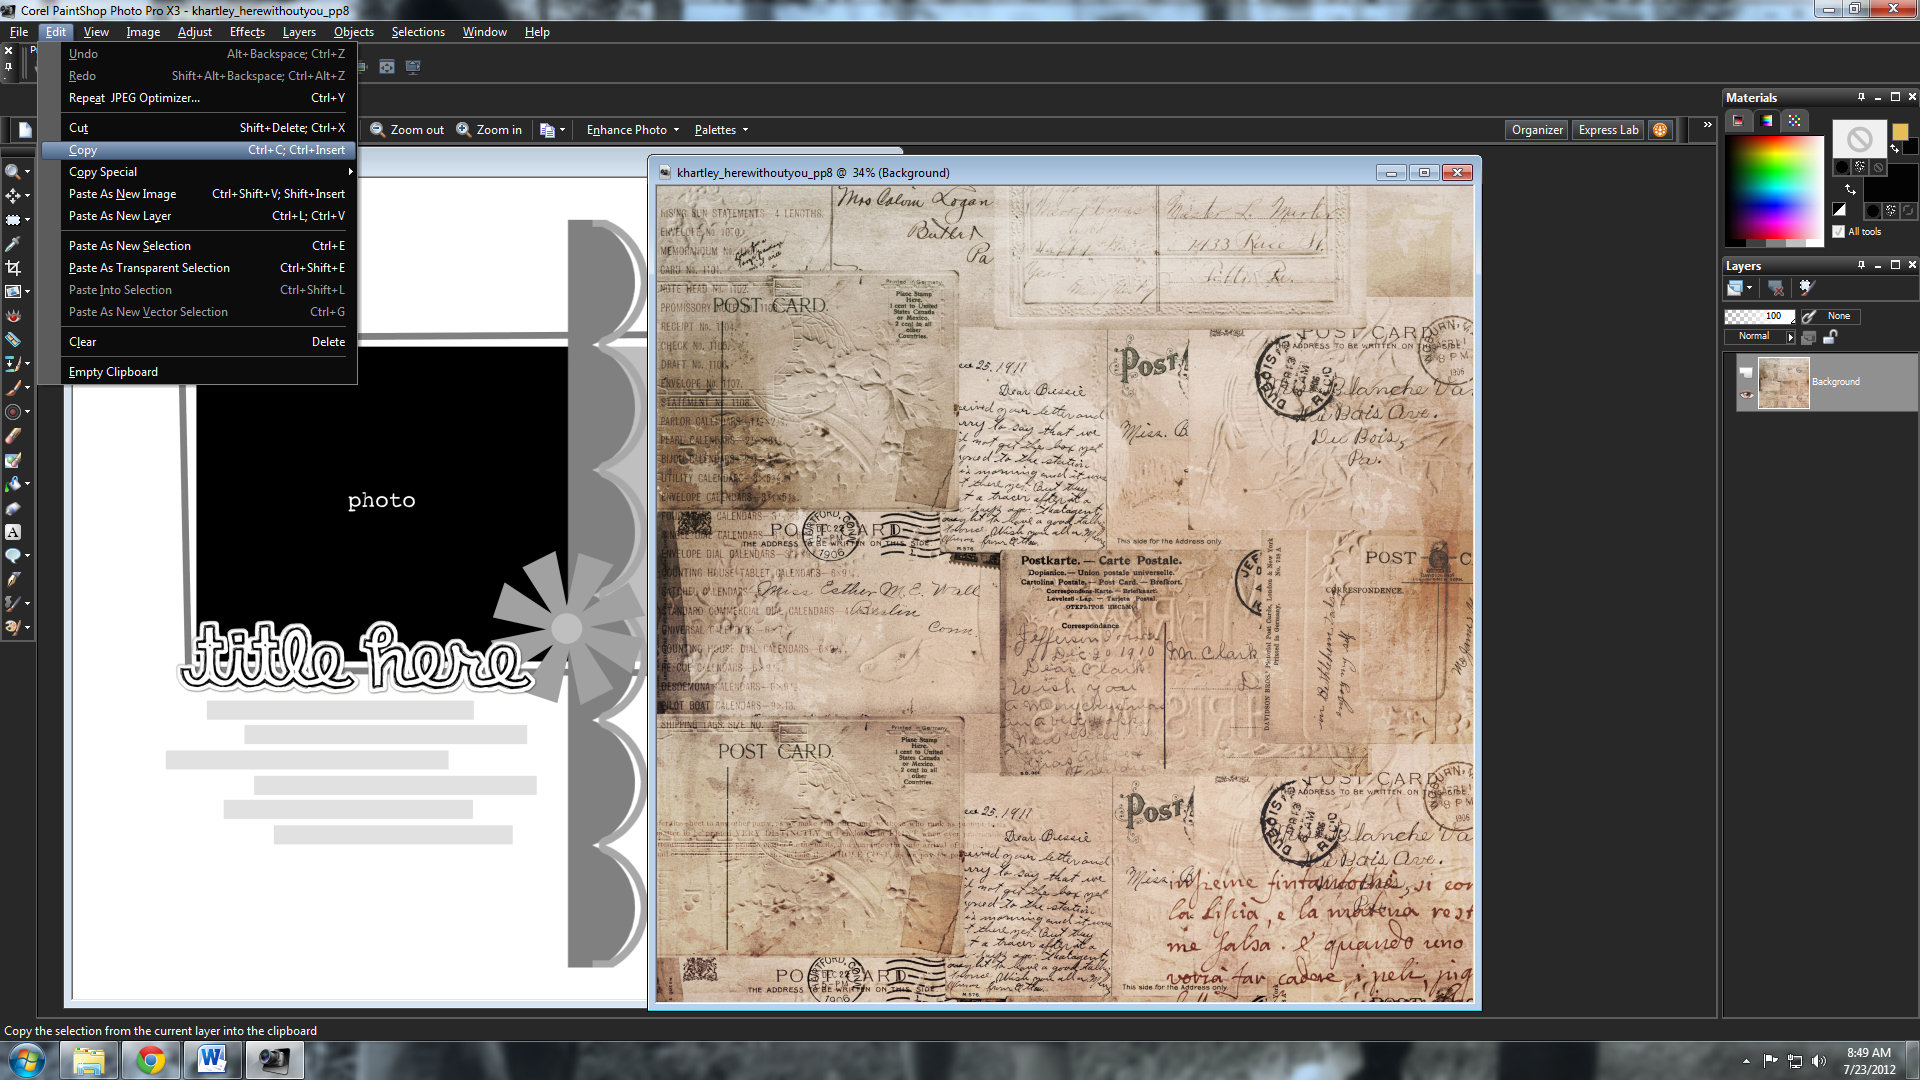
Then paste it as a new layer above the guide paper in the template
and now this is what I have-my template with the main bg paper in place and ready to go.
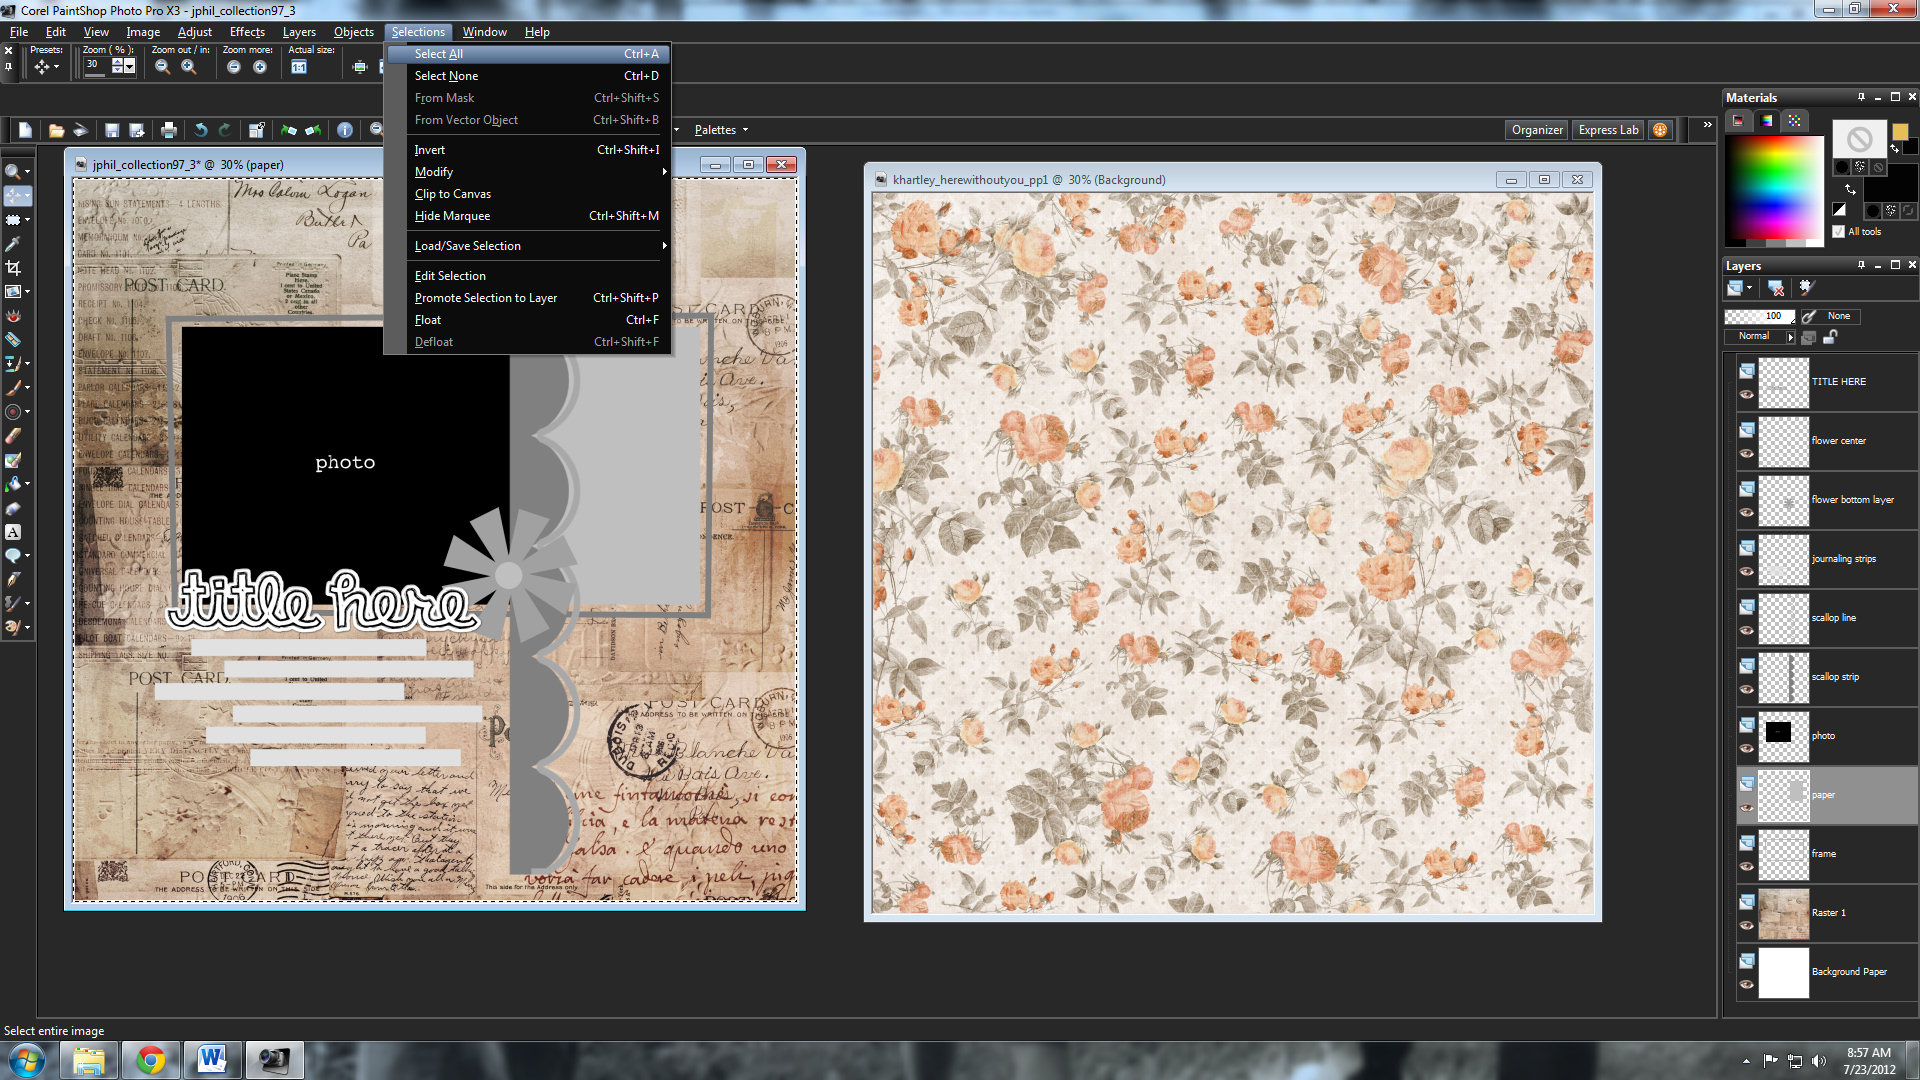
Next step is adding the accent papers. To do that I open the paper of my choice in PSP-resize it to 8X8 and do the following steps in order.
Make sure that the shape layer is selected in the layer palette on the right side of your program. Select all-it looks like this
Then float the selection:here is your visual
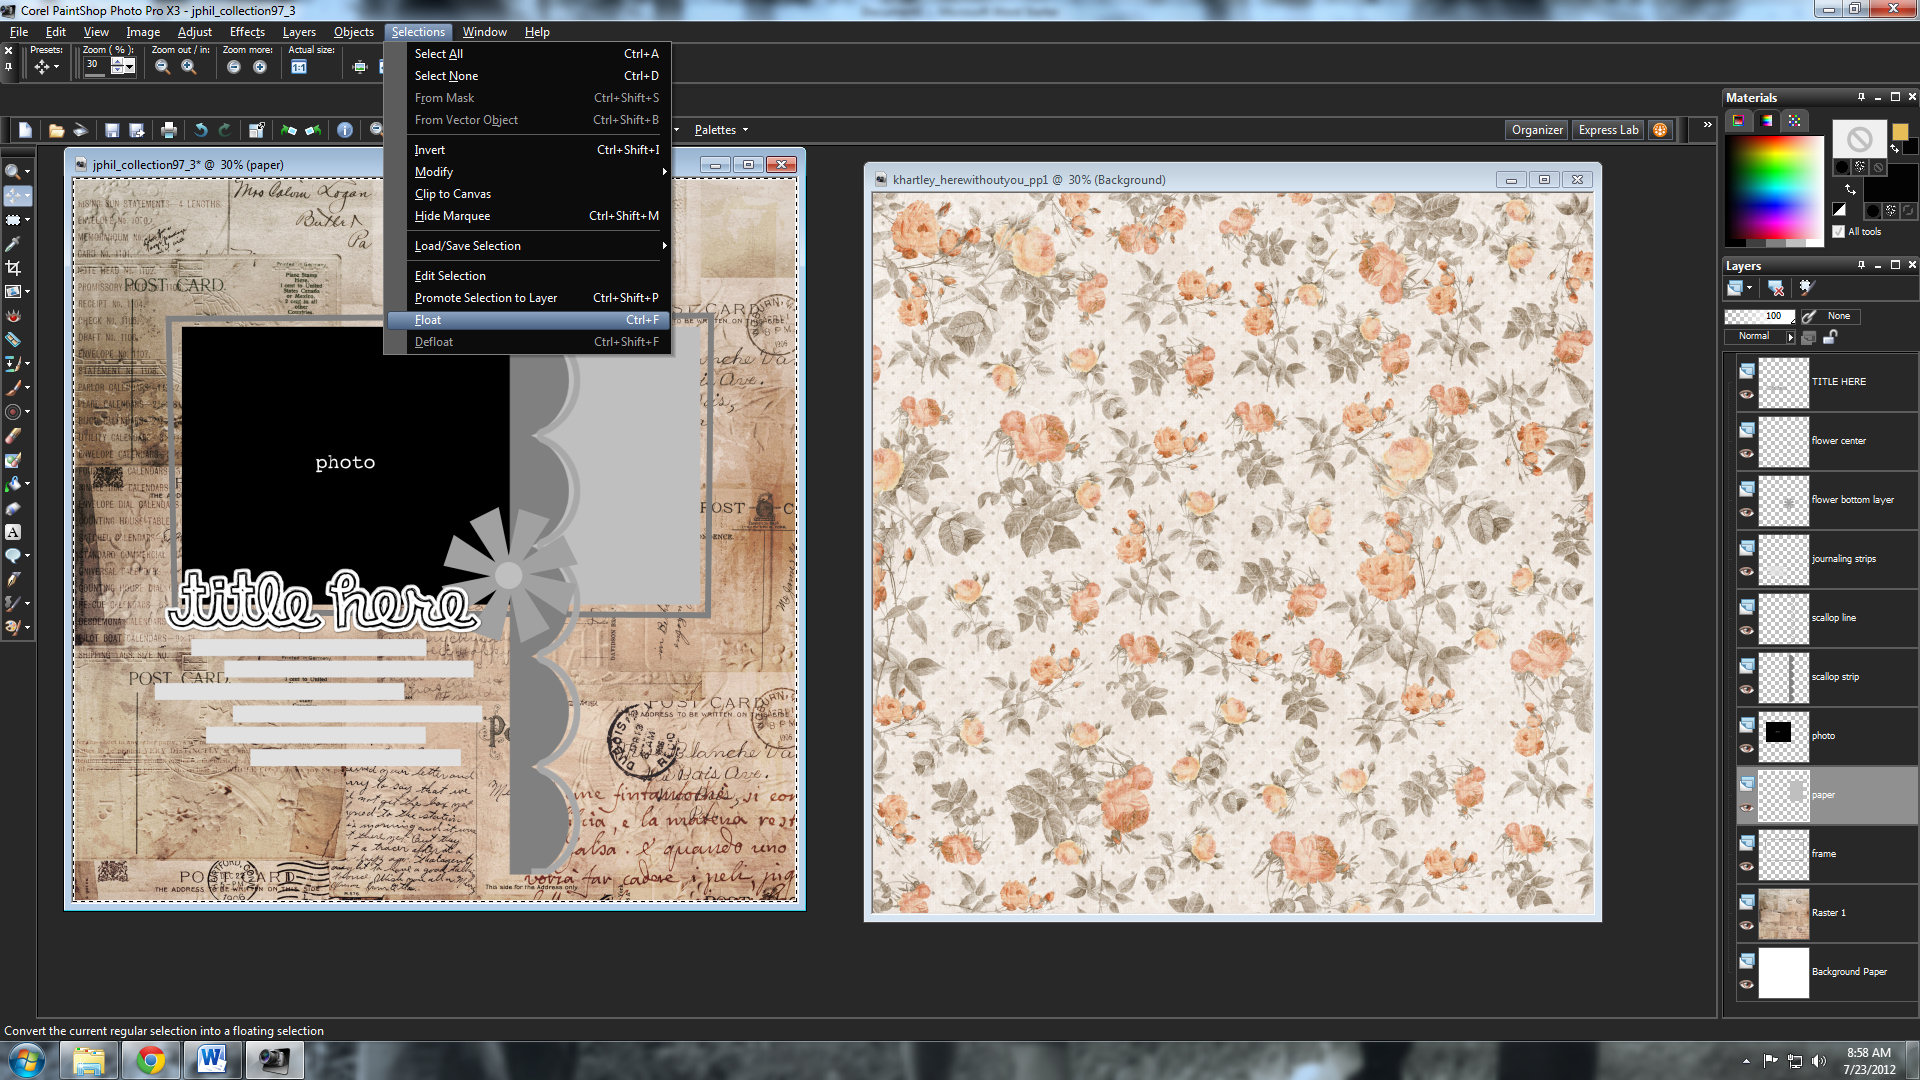
Next Defloat that same selection…check it out-you will have marching ants around the selection only at this point-the area you want the paper to actually be.
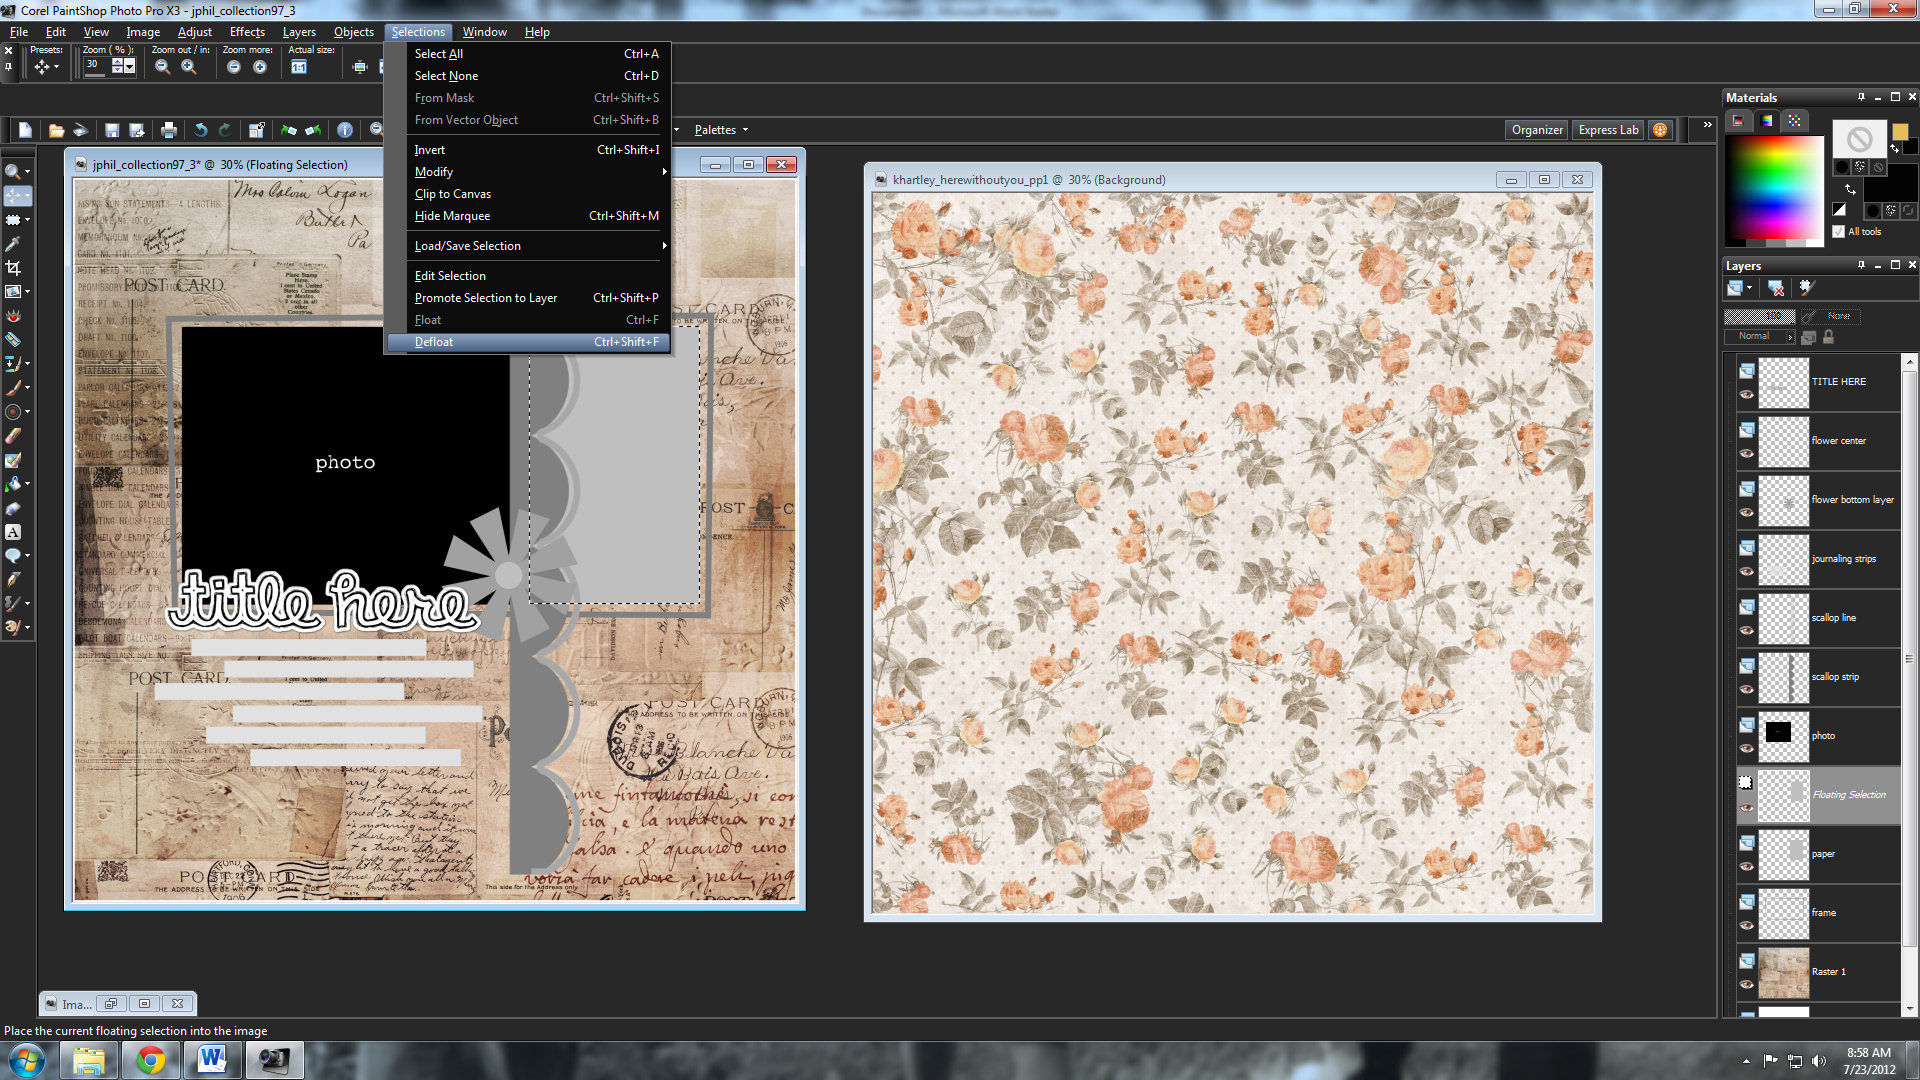
At this point I copy the paper that I’m going to use in this selection and add it as a new layer to the template.
Paste as new layer on your template
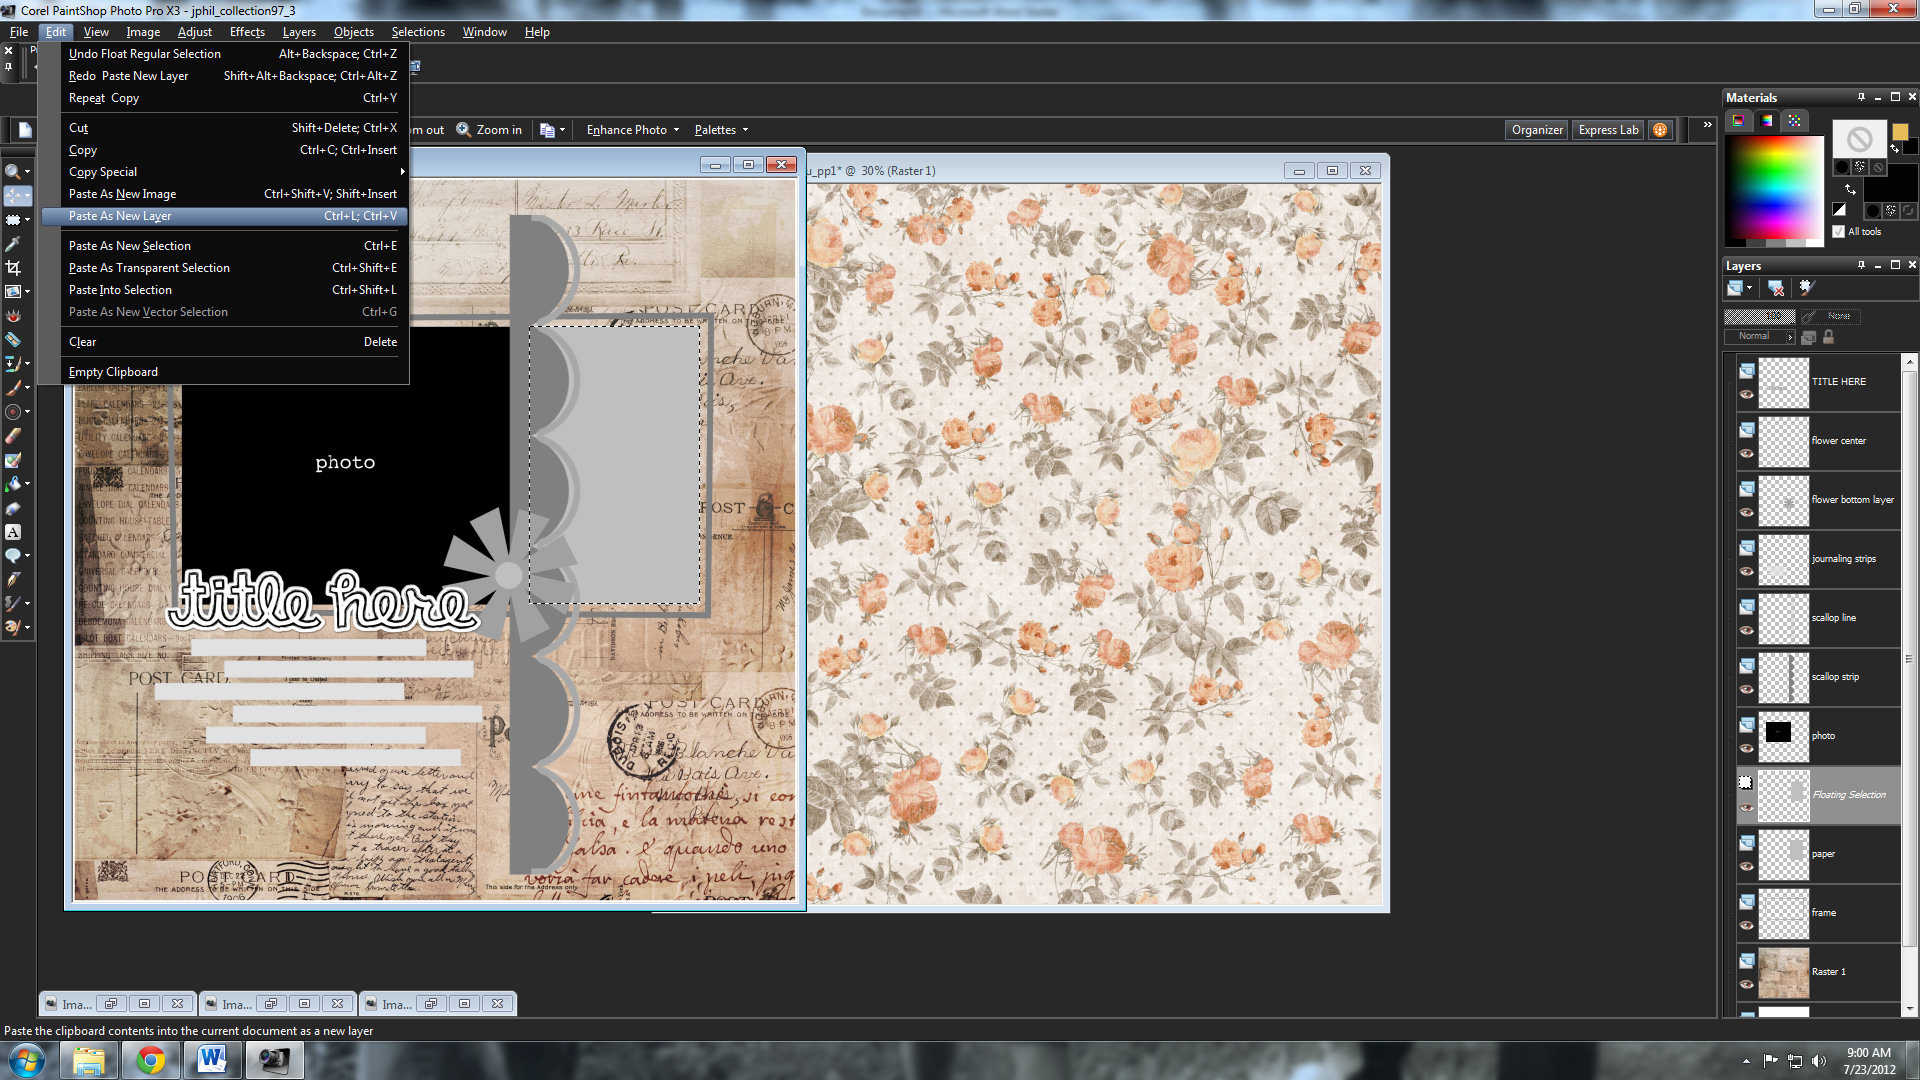
Now-invert that defloated selection…as seen below
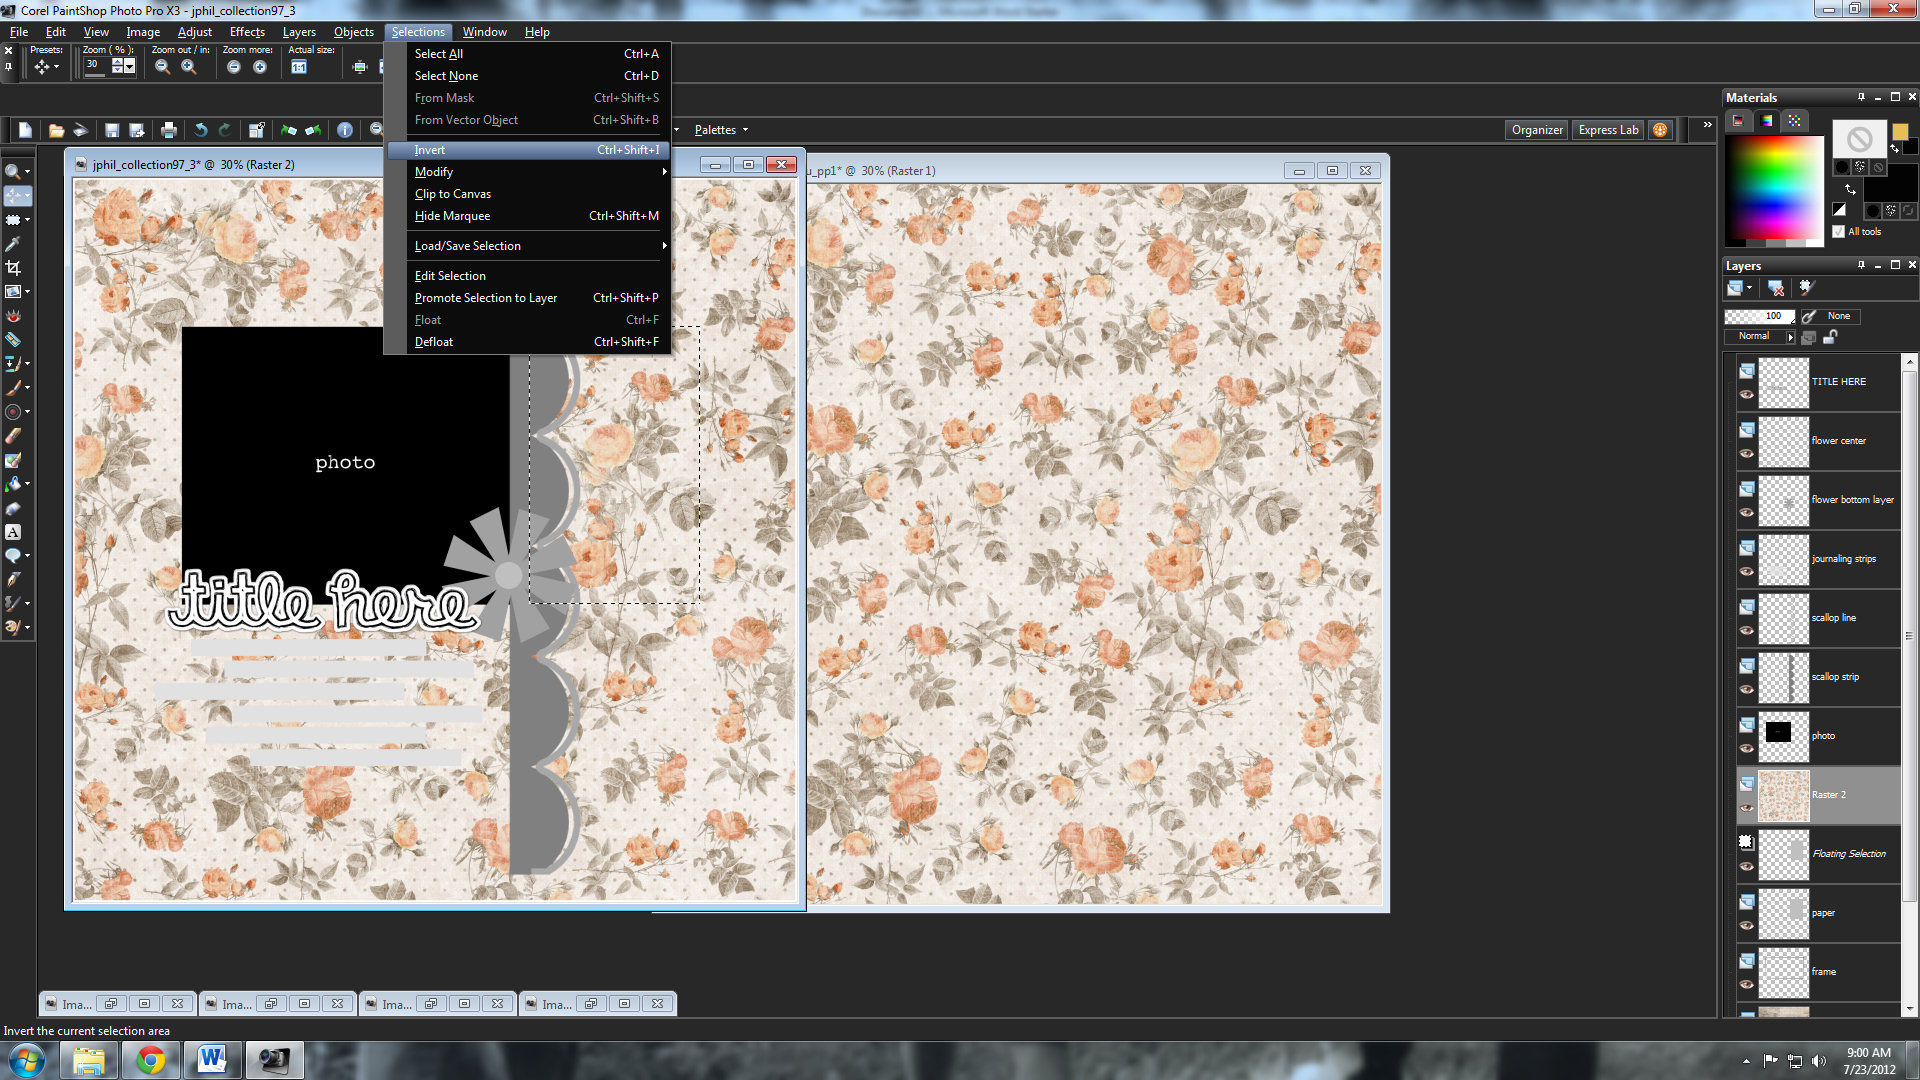
Make sure you are on the correct layer in your layer palette-check out the graphic below-You should be on the layer of paper you just pasted.
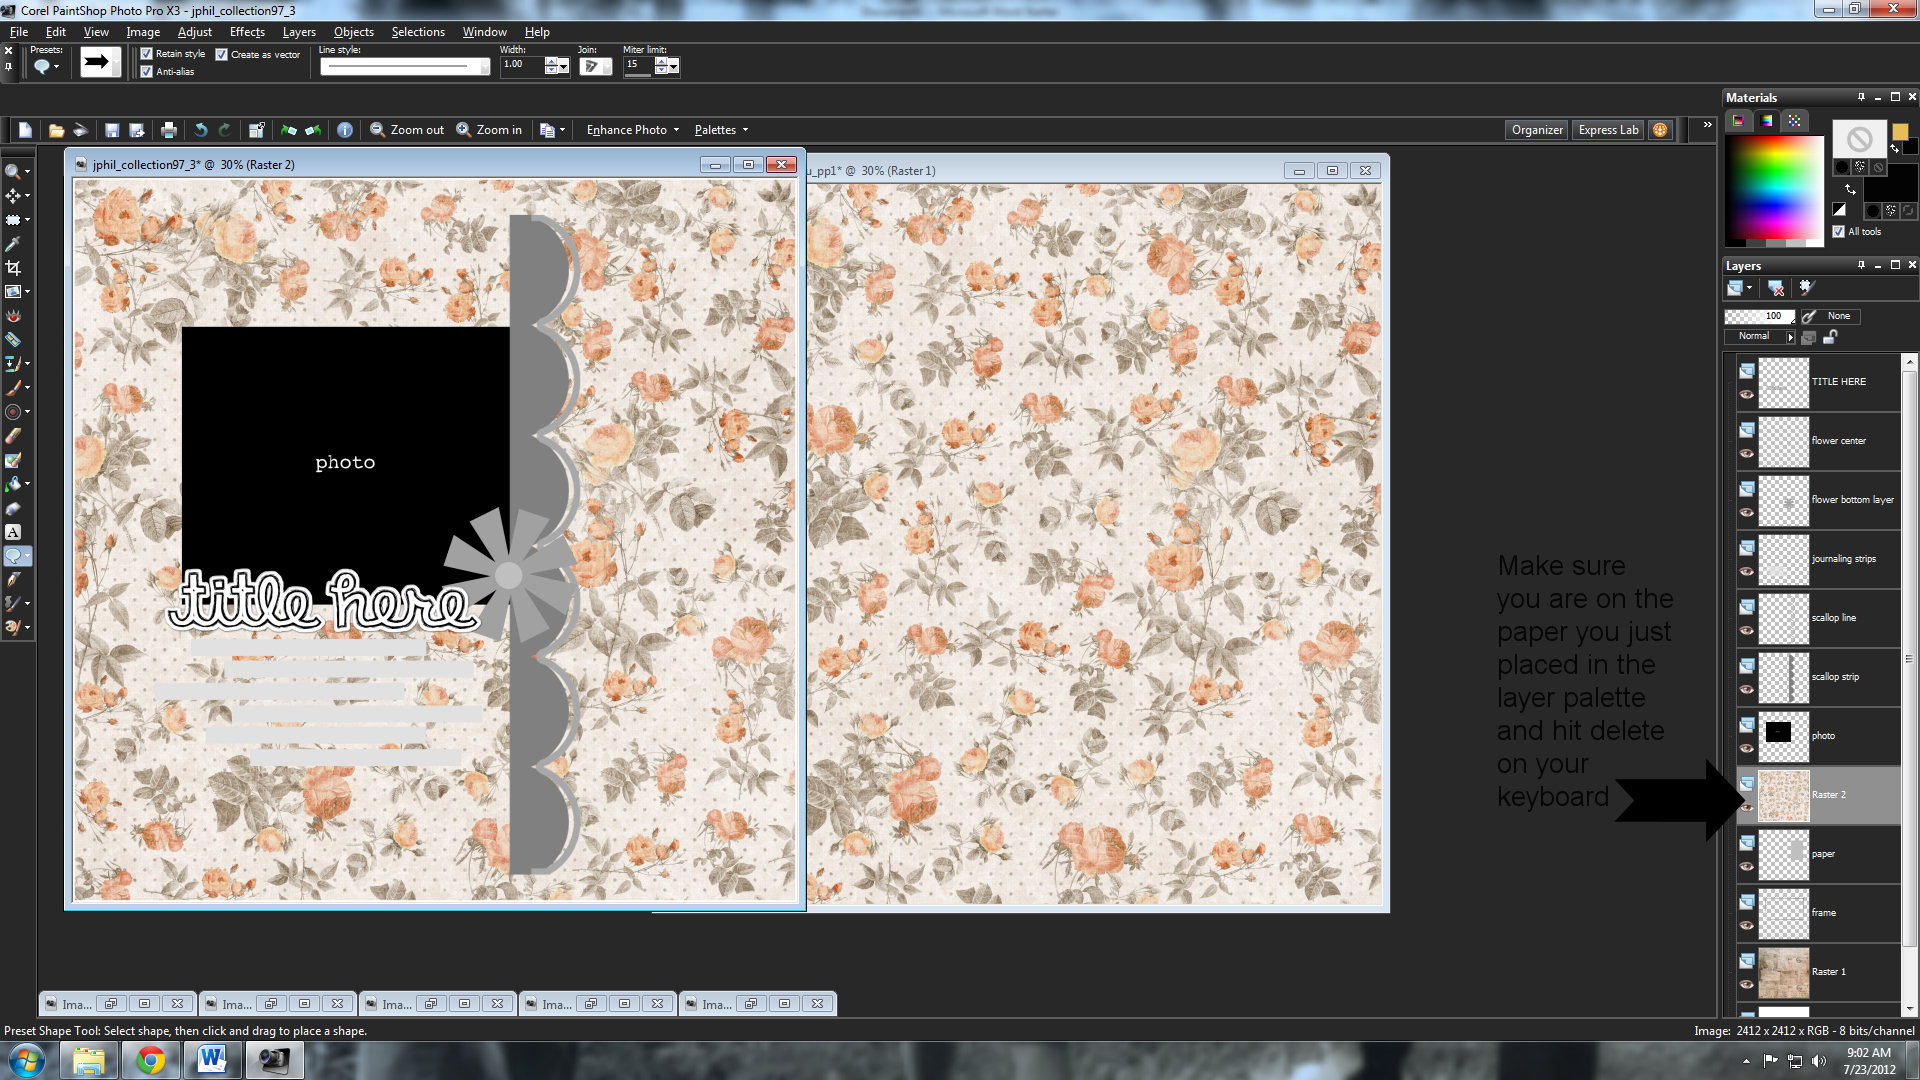
Now hit delete on your keyboard and BAM! this is what you have now…
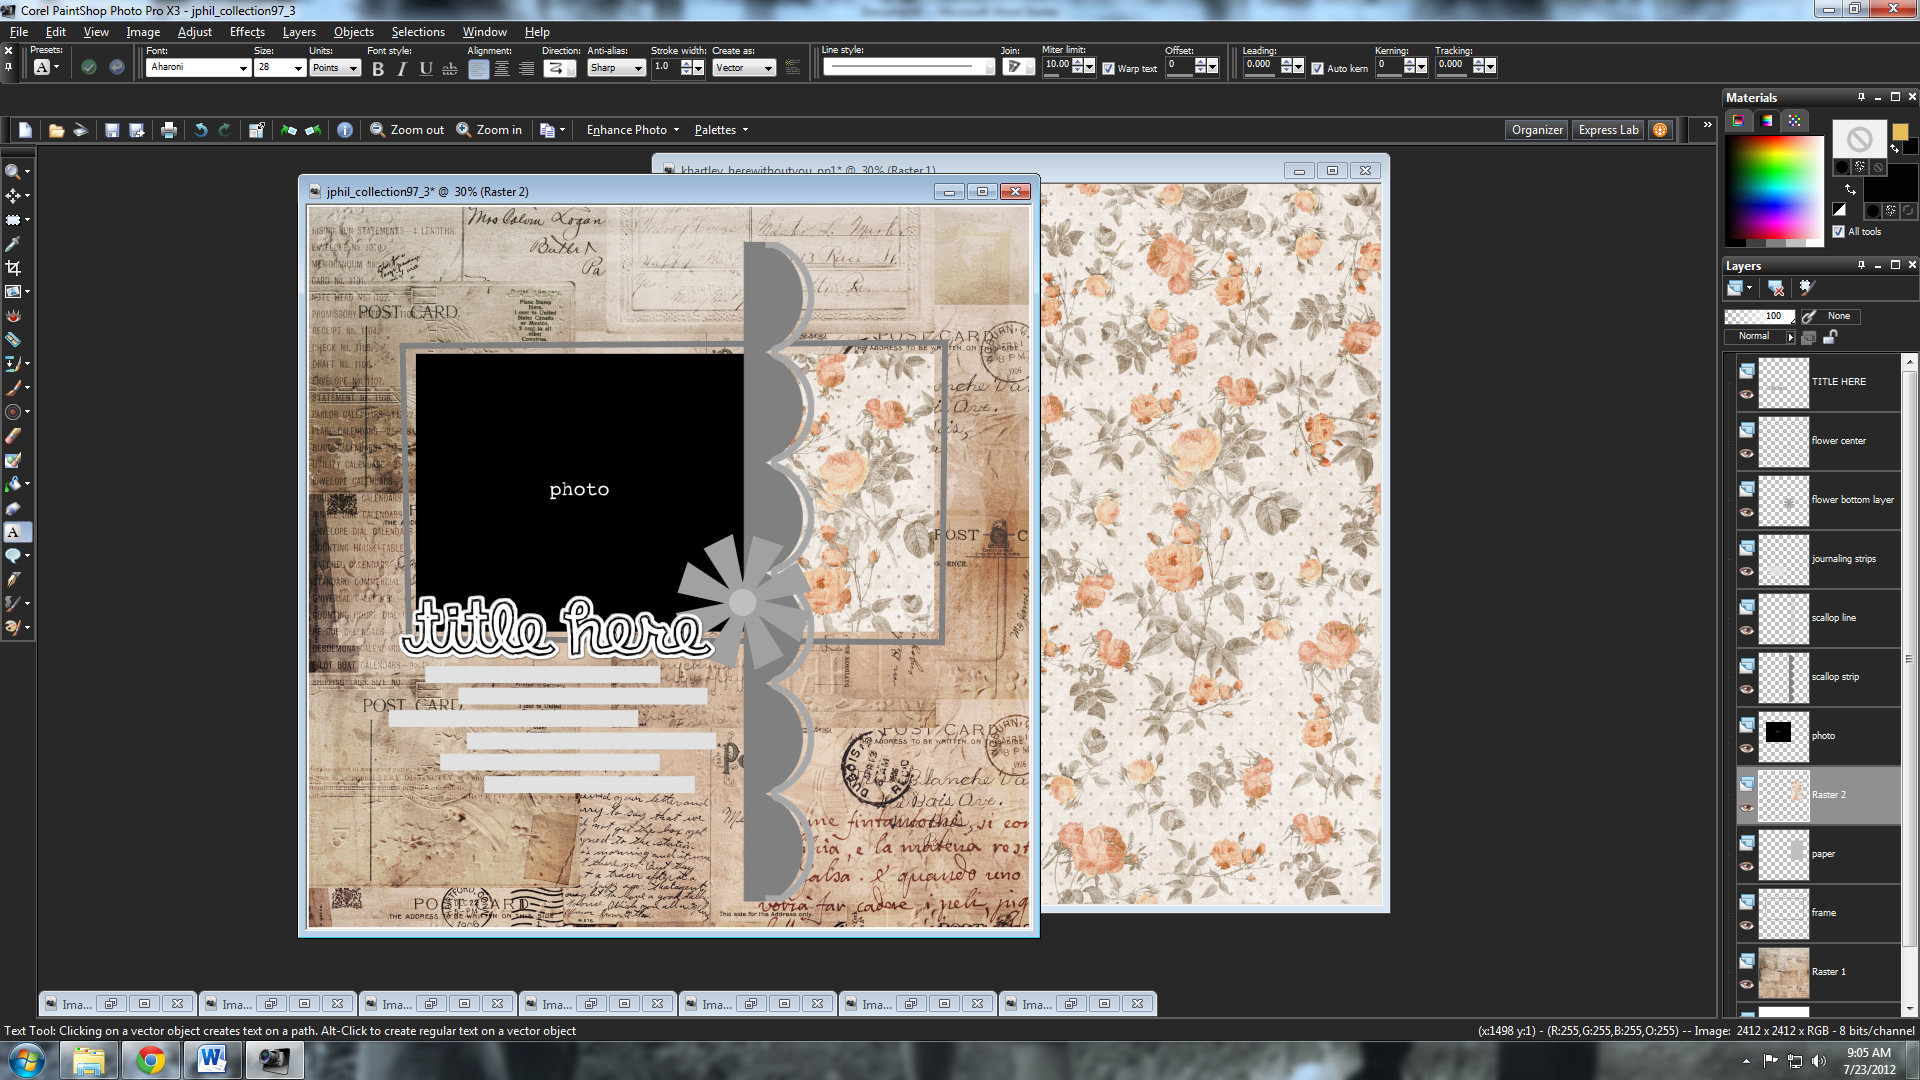
There is an action that does this for you-but I find that I hate it because I scrap 8X8 and it was written for 12X12 scrappers, it left a lot of overlap along the part of the template you can’t see which played havoc with my shadows.
You will repeat the above steps for each paper area on your template…I used a simple template by Janet as an example as to not overwhelm you with layers-but the same steps work for any template if it has 10 layers or 50.
On to adding elements which thank goodness is not so detailed and much easier. If you want to follow the template exactly-which I never do btw…you need to browse to where your kit is and open the element of your choice…it will look like this…at this point I copy the element as seen in the photo
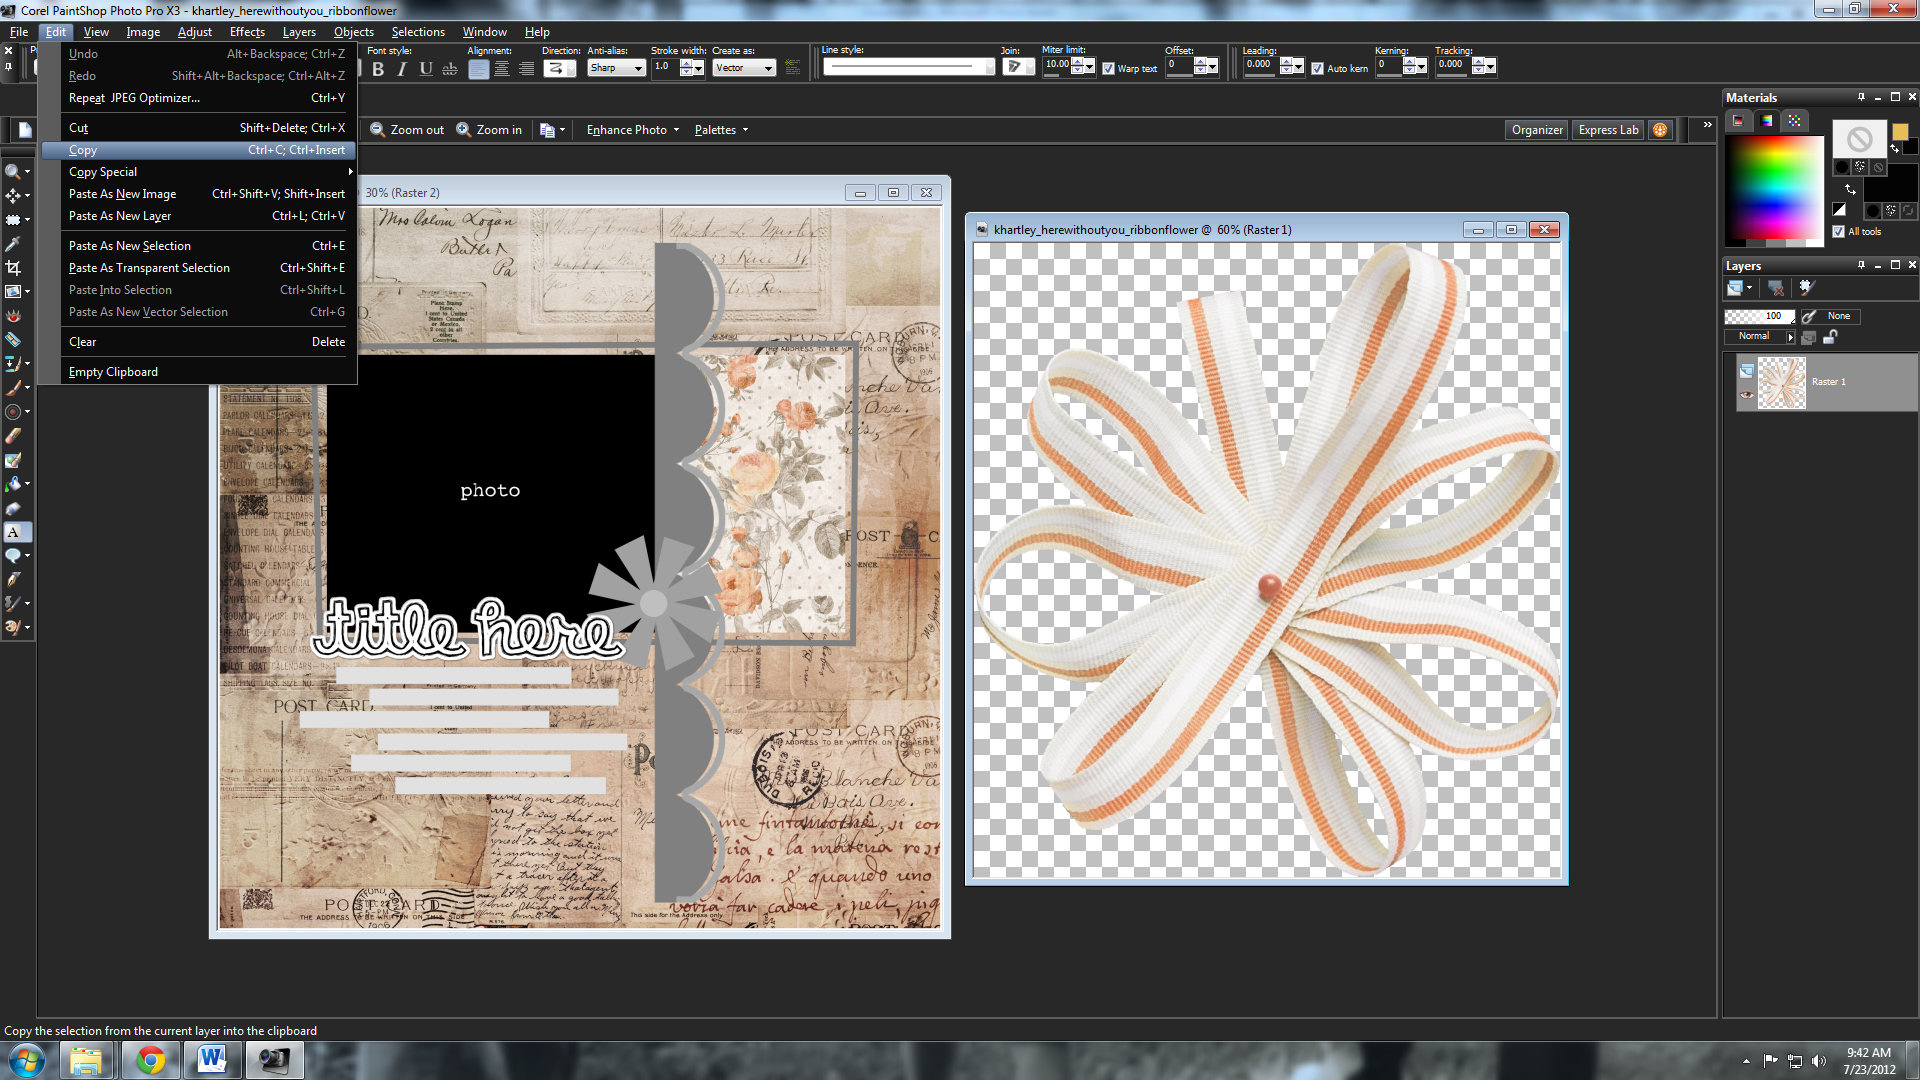
I then paste the element as a new layer on my template canvas.
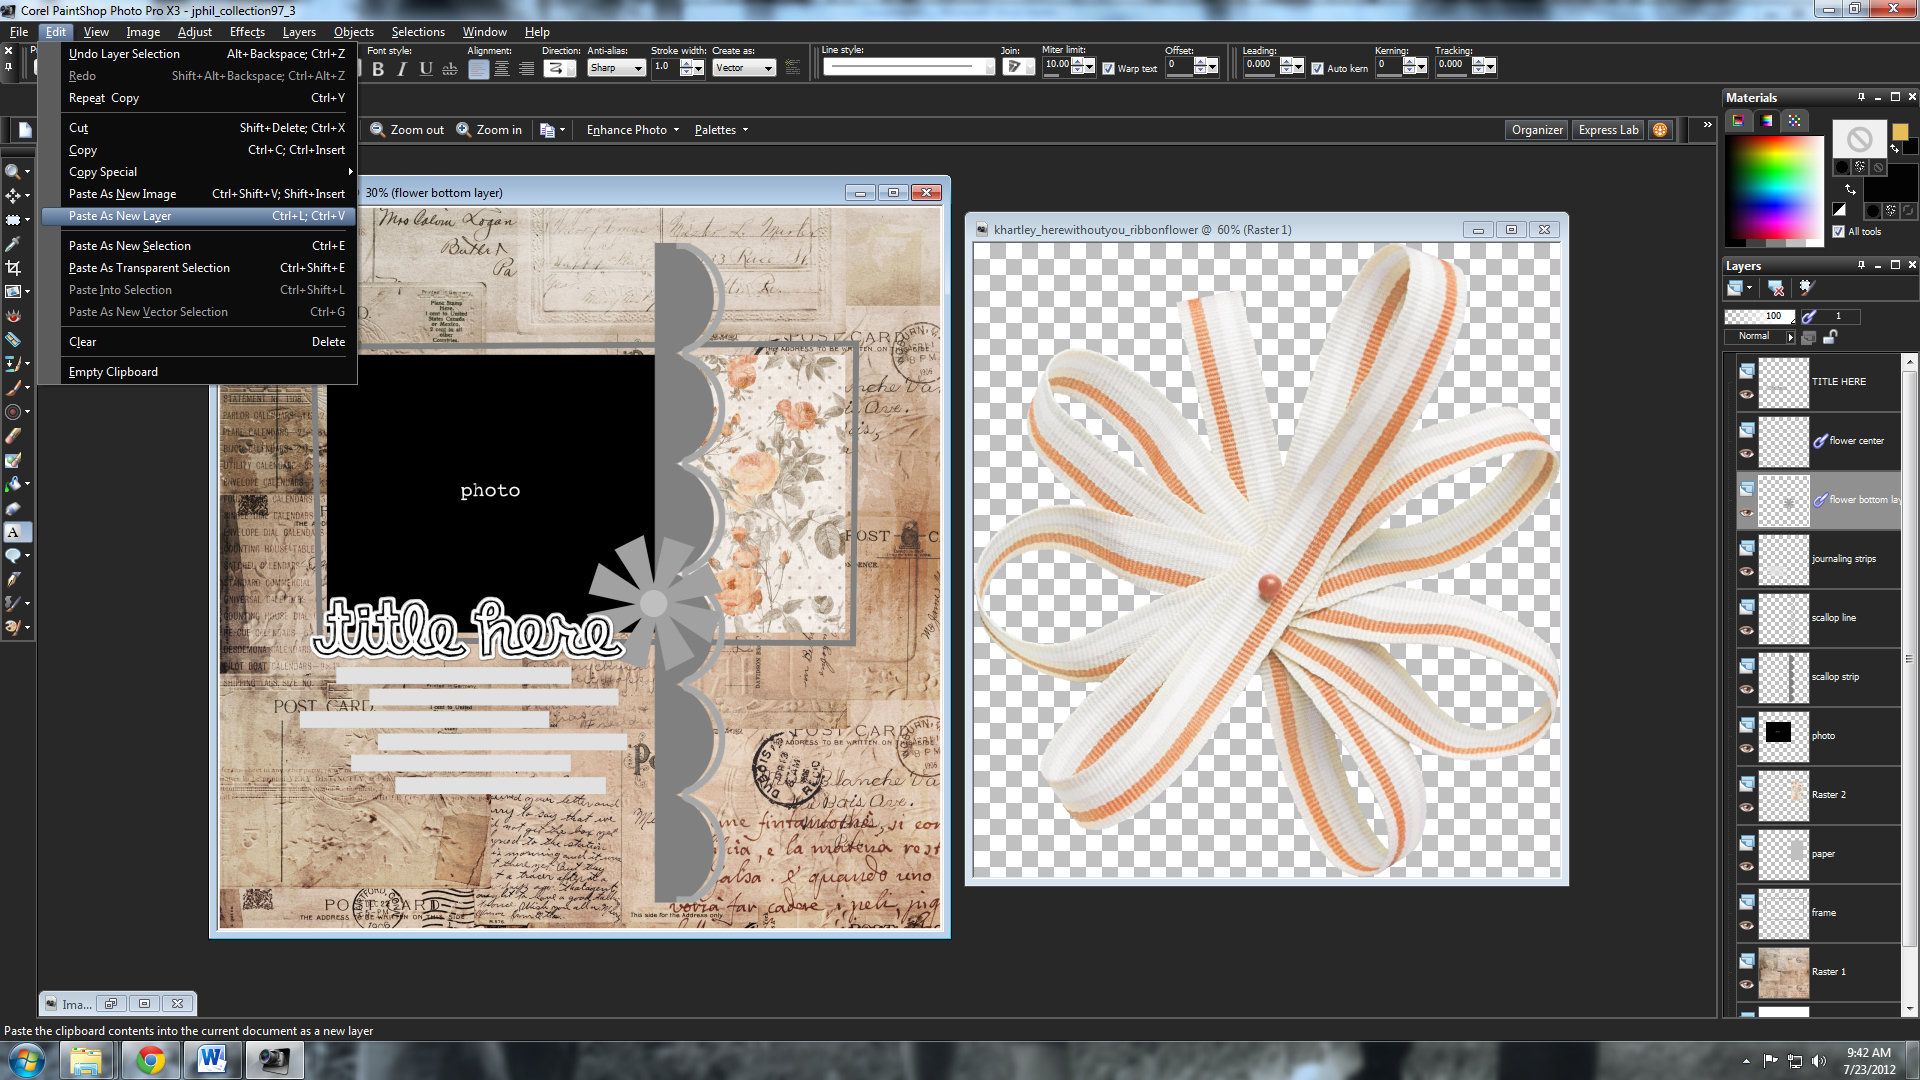
Now our template canvas looks like this
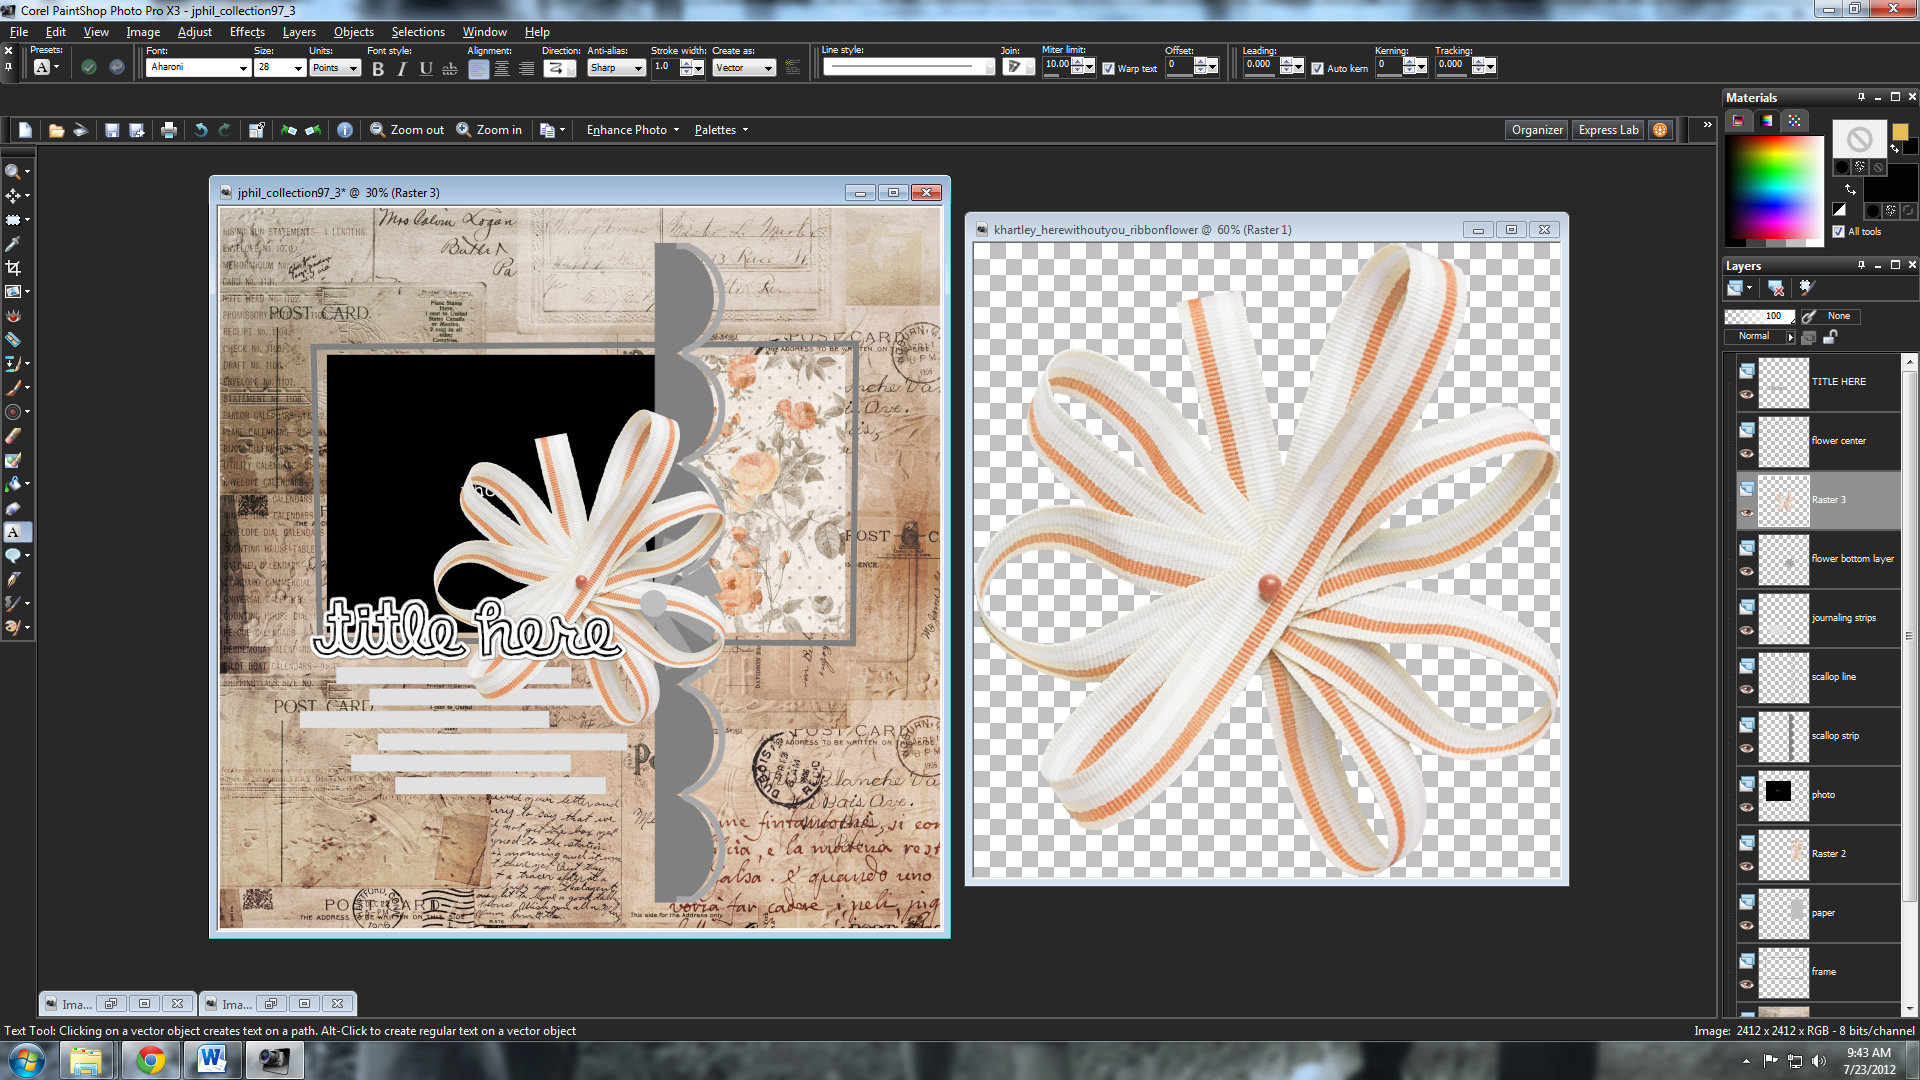
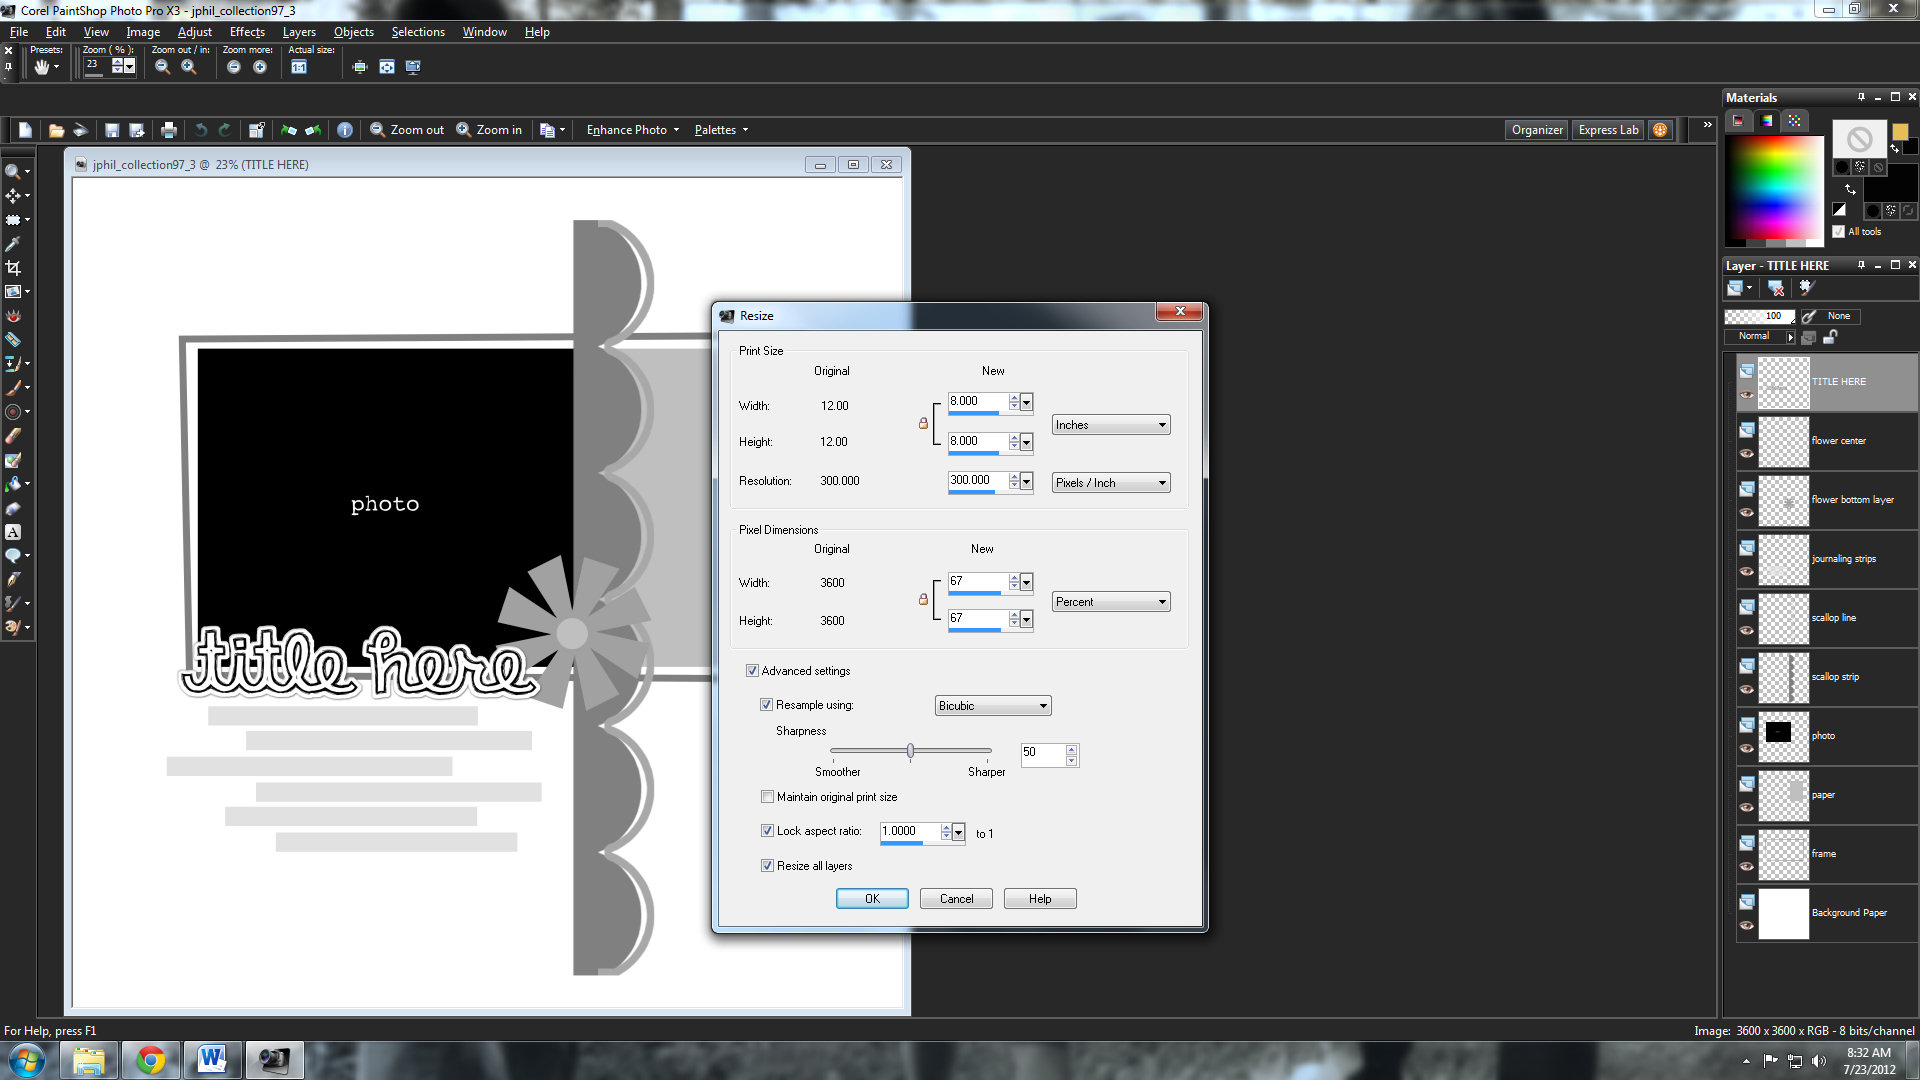
Krystal’s flower is a little big for the canvas…so I’m going to have to resize that beautiful bloom
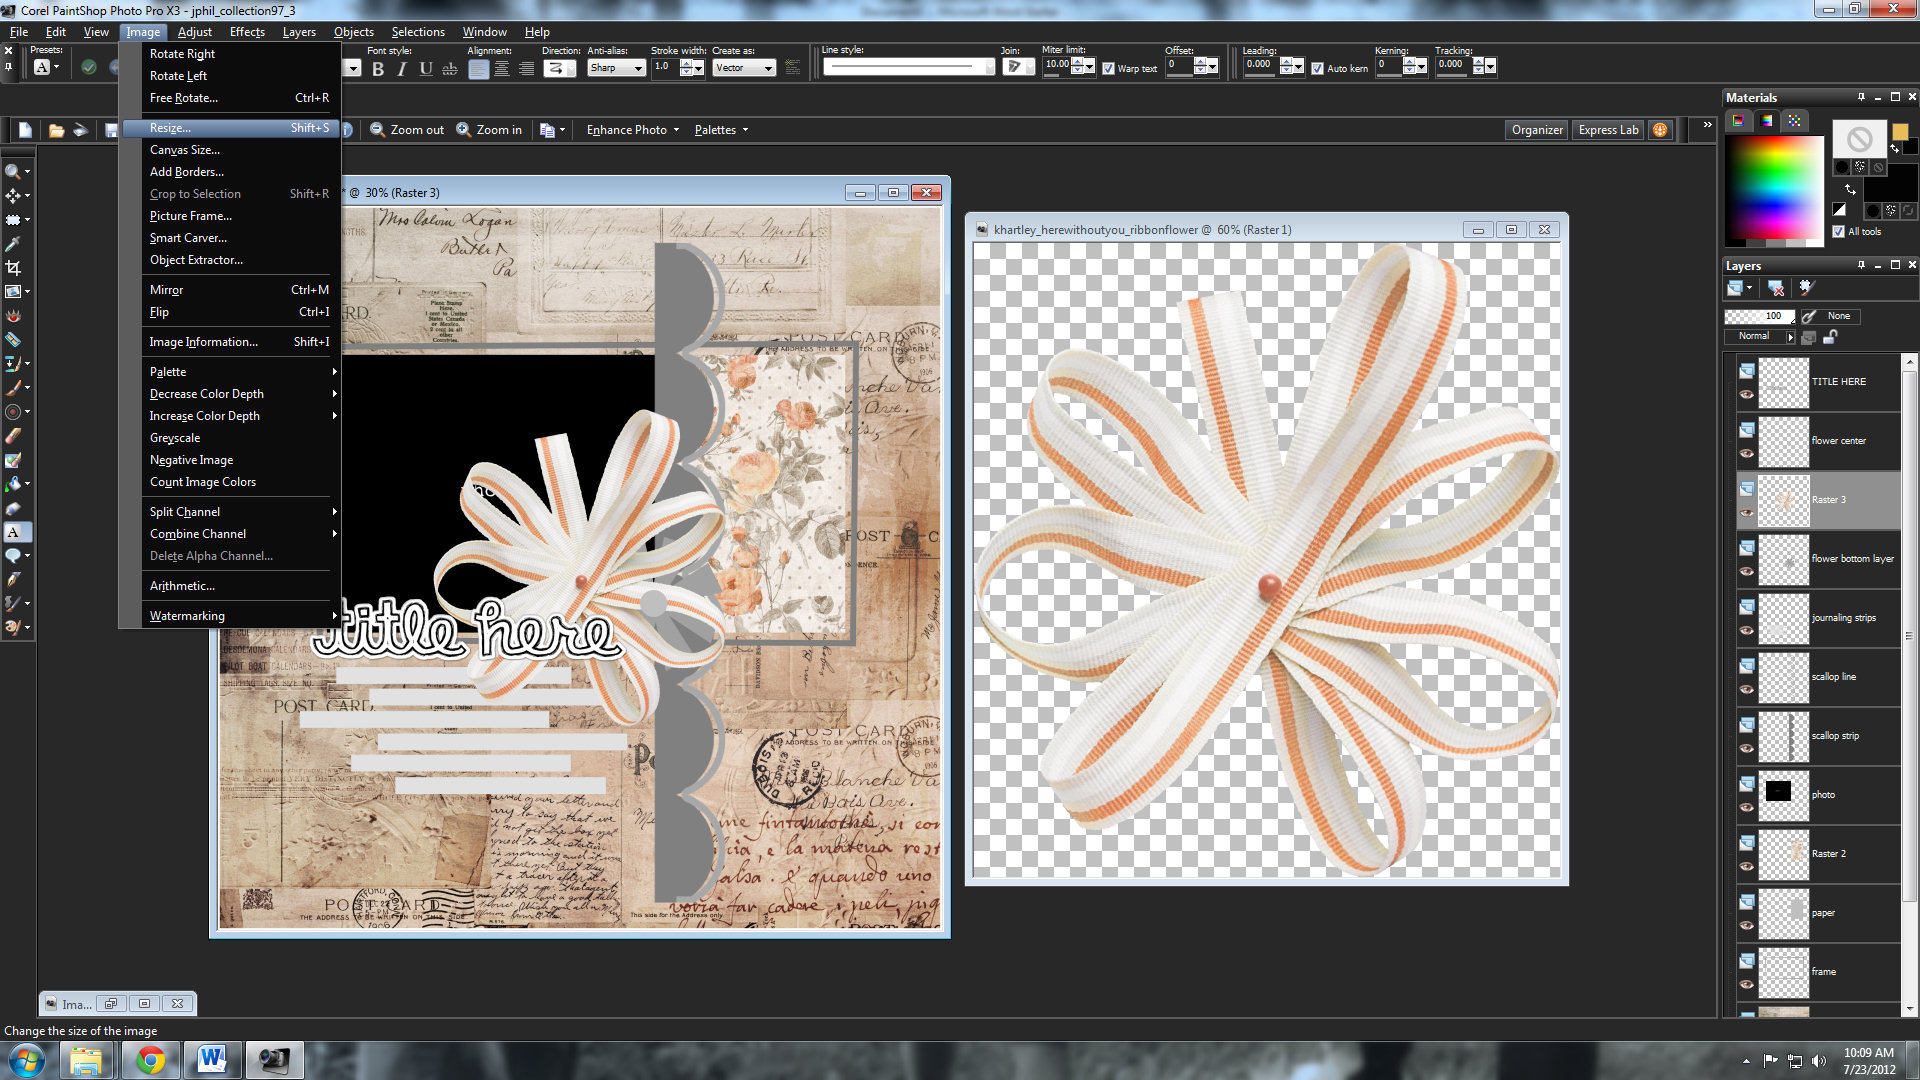
I use the following settings-I change the tab from pixel to percentage-I find it easier to resize using a percentage, lock your aspect ratio and make sure that resize all layers is NOT checked, or you will resize your entire canvas not just your desired element.
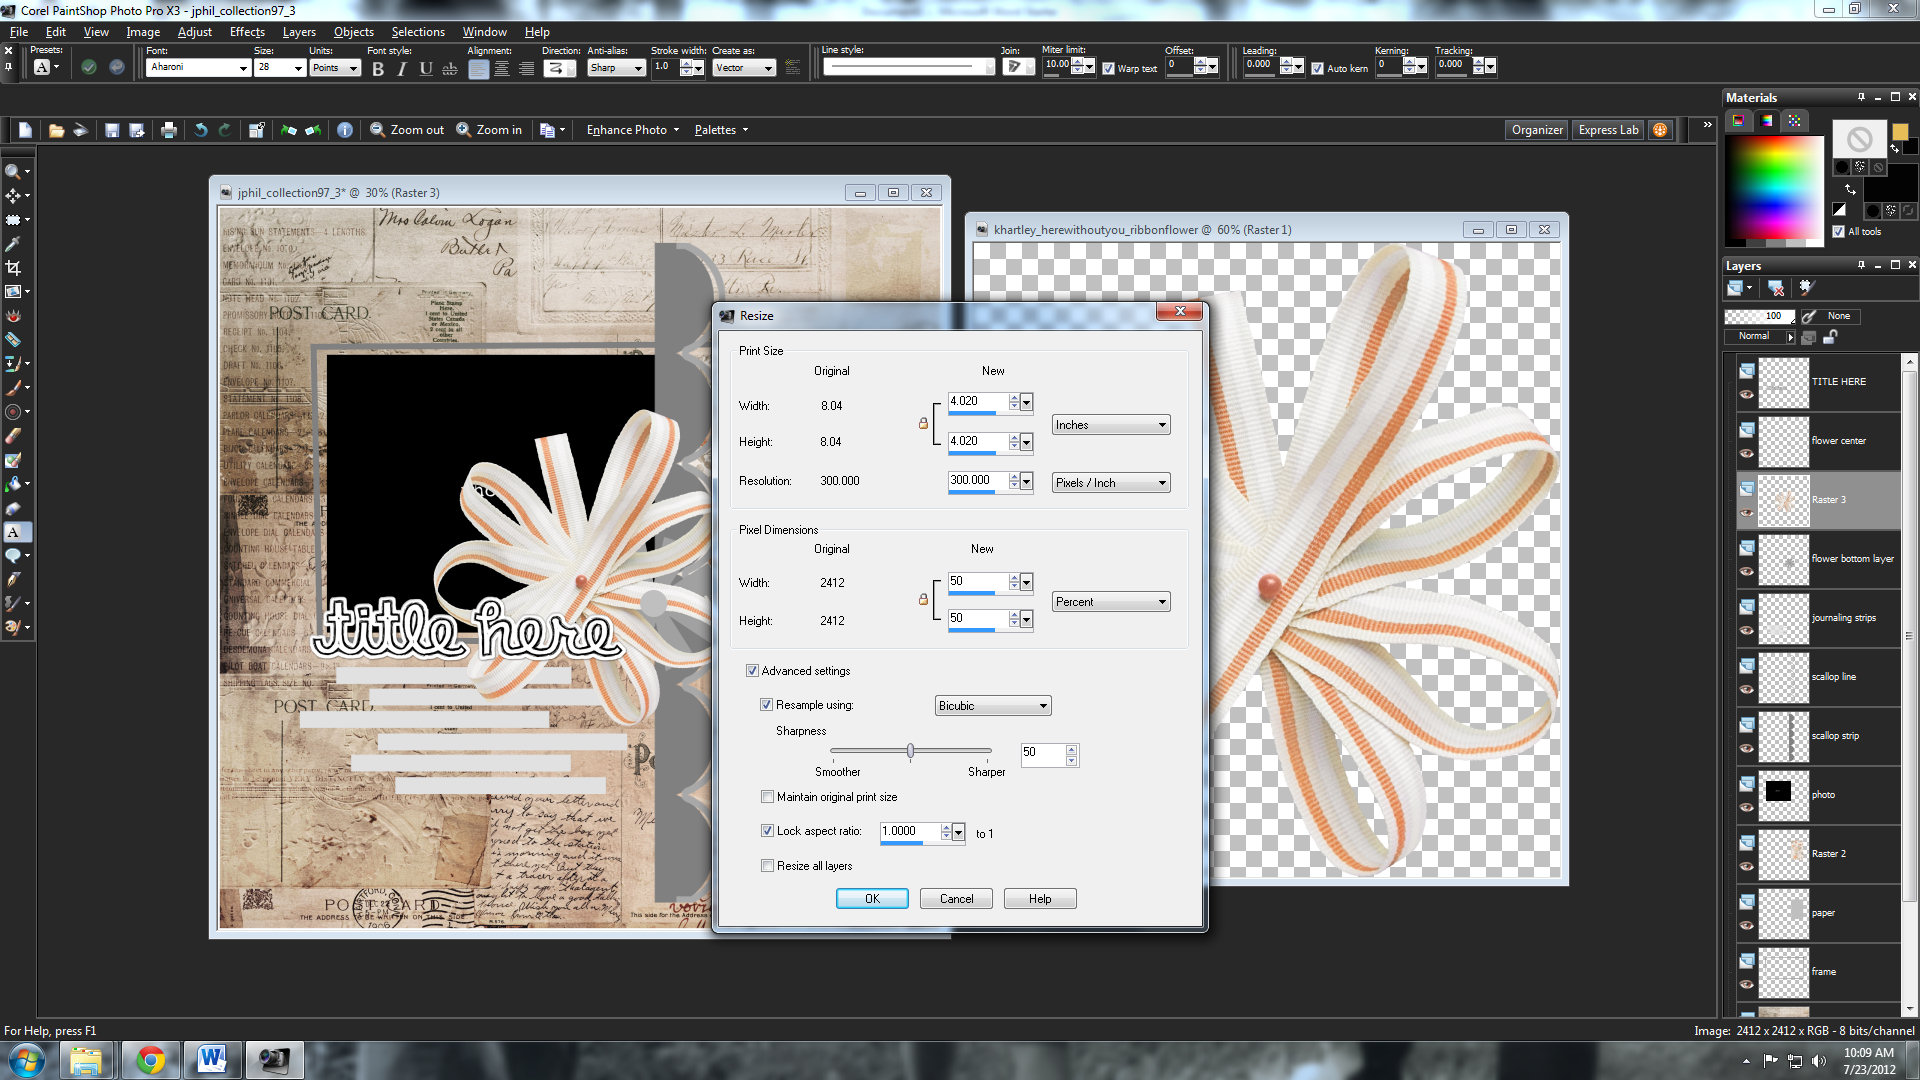
I resized that flower by 50% two times and now it looks like this…
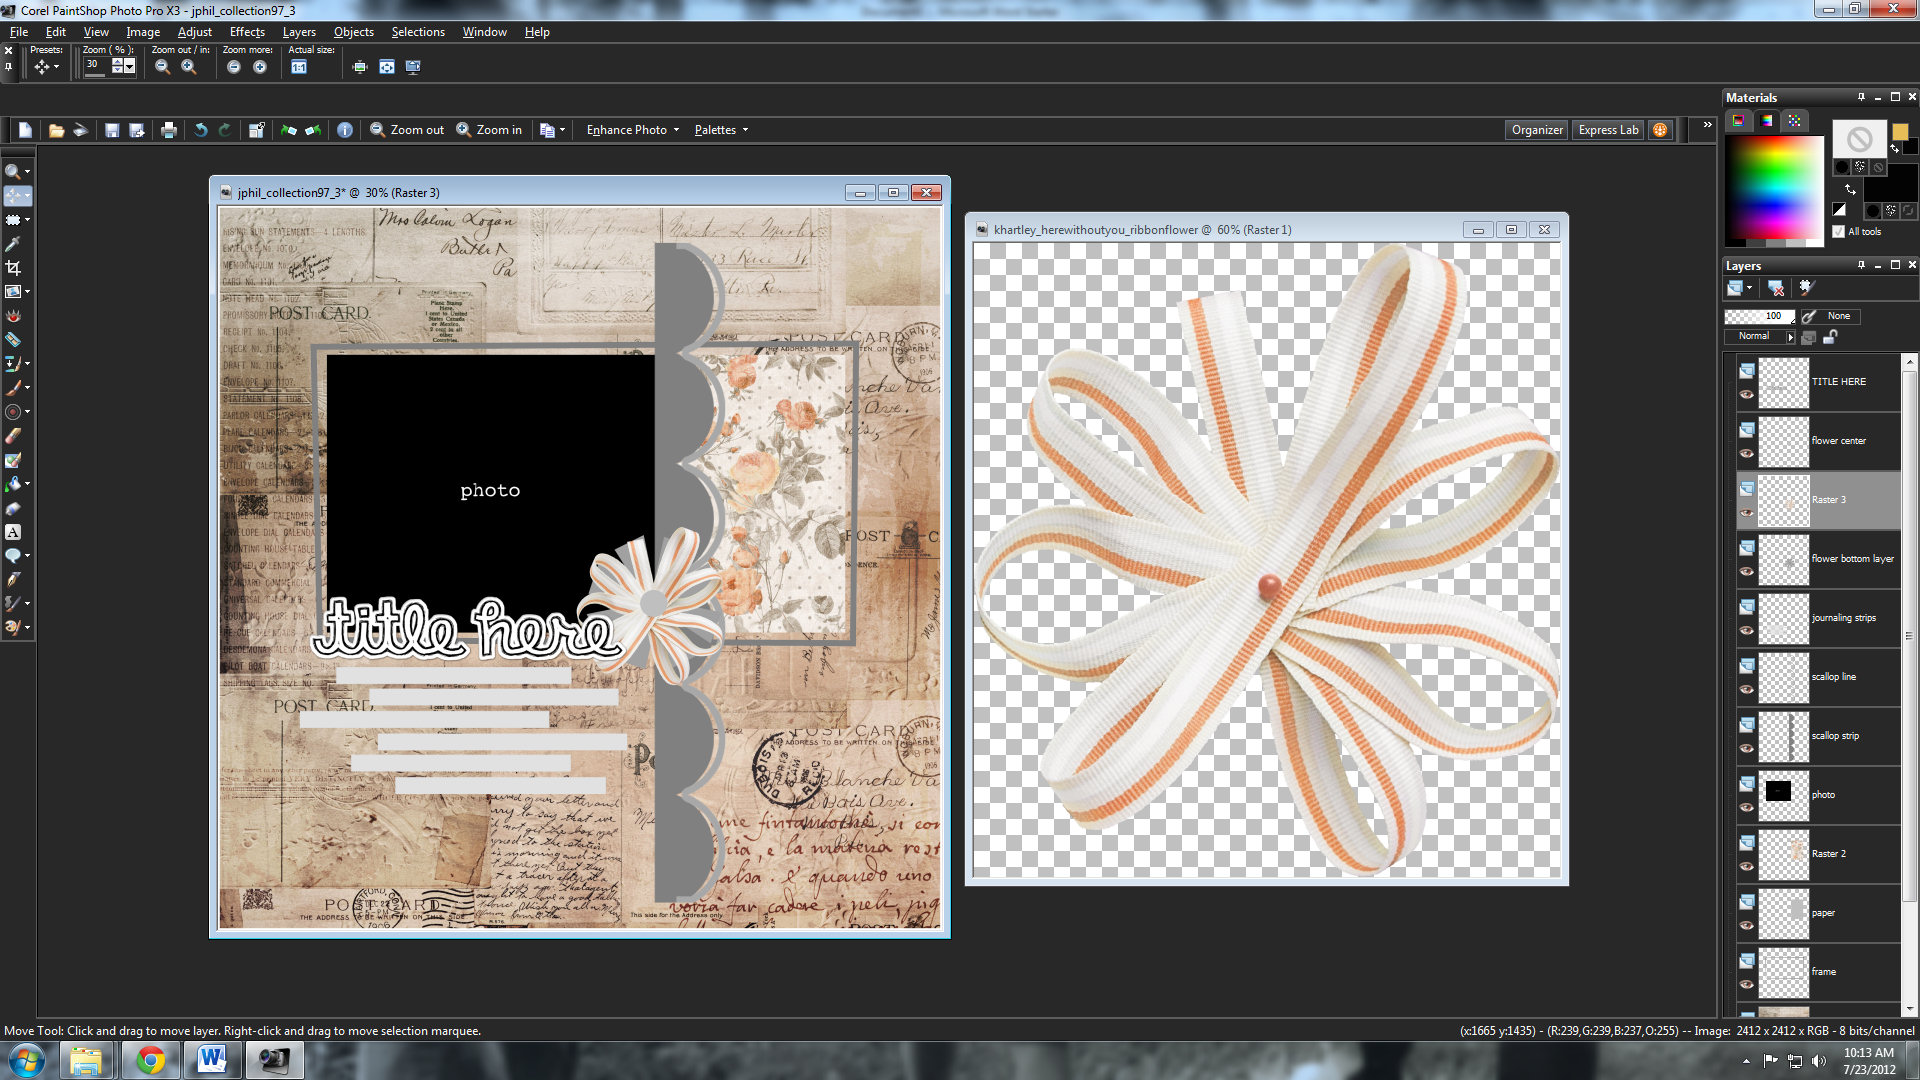
You use this same method for placing elements wherever the template guides or if you wanna be a rebel-plop um down where you think is good and resize using the same steps for each one.
Well there it is my friends the basics of using a template in PSPX3. I hope that I have given you a little bit of insight into my creative process when using a template. If you have any questions about Paint Shop Pro X3 or any versions below that feel free to shoot me a PM.
ShannonG


Teresa said...
on March 3rd, 2013 at 12:32 pm
Hi Shannon, I know I’m a lil late seeing this, but I just wanted to say Thank You So Much for taking the time to make this PSP tut!! PSP tut’s are really hard to find! A couple other tut’s mention using the ‘Copy into Selection’ for putting paper in the shapes. I don’t understand why it sometimes works and sometimes it doesn’t.(I think it has to be the same size & that seems like a lot more work) I will try it your way! I’m really trying to understand how to use templates and this has really helped me I tried to find your website/FB and had no luck. If you have one, please email me the link!
Cassel said...
on June 27th, 2013 at 9:33 pm
Hi Teresa,
The “Copy into Selection” should be “paste into selection” and will usually distort the design of the paper if the selection has a different size and format (which is usually the case in templates). There is a video on how you can use a template using a couple of time saving tools. It also adds a lot of flexibility to move, resize or rotate the design, photos, papers.
http://www.youtube.com/watch?v=aNRH57gWFsw
Lisbeth Mojlanen said...
on March 22nd, 2014 at 8:50 am
Hi!
I can see you using PSP x3.
I have 3 programs I jumping between. Corel Paint Shop Pro Photo x2 and a new verison Corel Paint Shop Pro x6, and Adobe Photoshop Elements 12.
But now I have some problems with a layer in png, I can not use it as it is now. May be you can help me.
I can not get it out of my head, and my goodness i may be crazy…
I can not explain it here with my bad shcool English, so can you pleace send me any E-mail adress there I can send you some Pictures, and my layers to explain, best and show you.
Hugs, Lisbeth
model baju batik pria dan wanita said...
on July 13th, 2016 at 6:25 pm
Hi there just wanted to give you a quick heads up. The text in your content seem to be not viewable on the screen in Firefox.
I’m not sure if this is a format issue or something to do with web browser compatibility but I figured I’d post to let you know.
The design look great though! Hope you get the issue solved soon. Many thanks