365 Days of Bliss: Day 57
Hello, It’s my turn (Andrea) to take over the blog for the day again. I am loving reading all the new daily blogposts and generally having a bit of a nose into everyone elses lives. Last month I told you I was planning a new craft room and today it is almost finished, just the finishing touches left to do now. We have built onto the back of our house, adding on a large conservatory which now has a dining table as well as comfy sofas and arm chairs – no television in here so if people want to watch television they have to go in the living room at the front of the house – and the room that leads into the conservatory which was a bedroom has had it’s window and wall removed so that it leads directly into the conservatory and is now the new craft room.
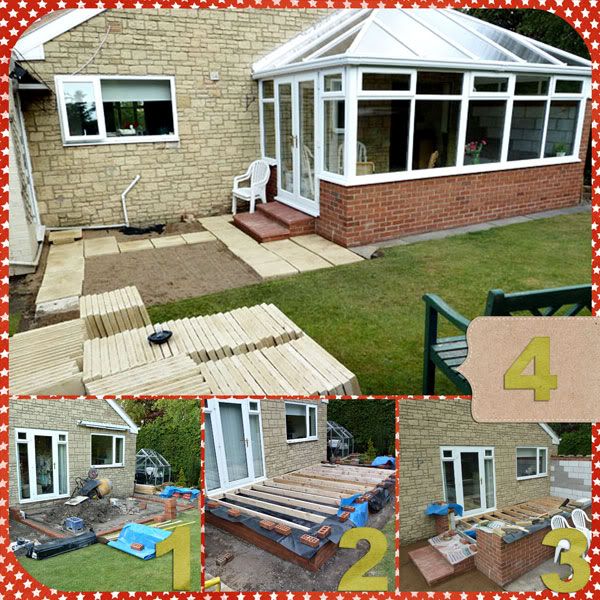
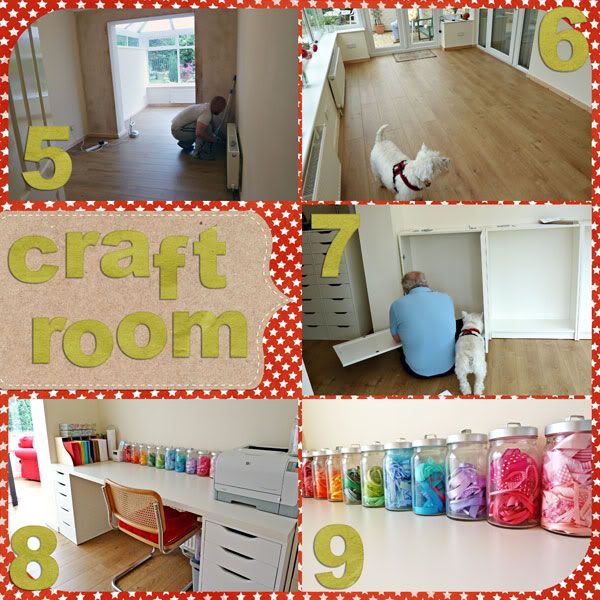
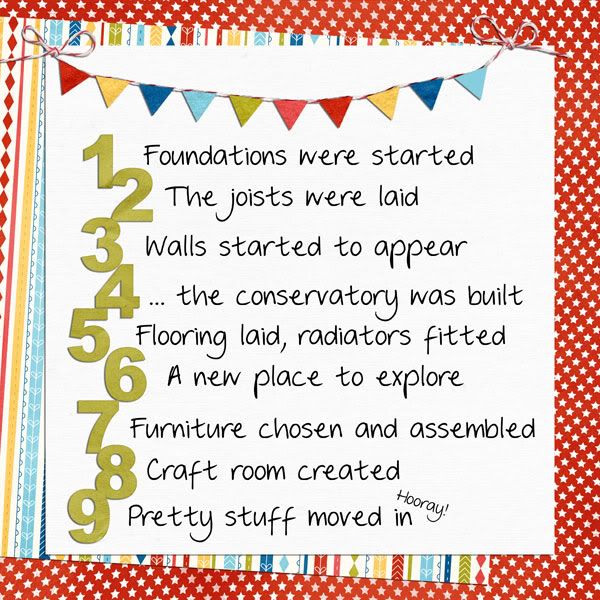
I have to say that I absolutley love our new rooms, they need pictures and photographs, a clock and all the stuff that makes a house a home but at the moment we are happy to just live with what we’ve got until we see just the right pieces to go into the rooms. Our red sofa and armchairs are adding a nice splash of colour and at the moment we’ve kept the walls cream just like the rest of our house.
So, now that my craft room is at the stage where I can get in there and actually do some crafts I thought I would share my first craft project made at my new desk 🙂
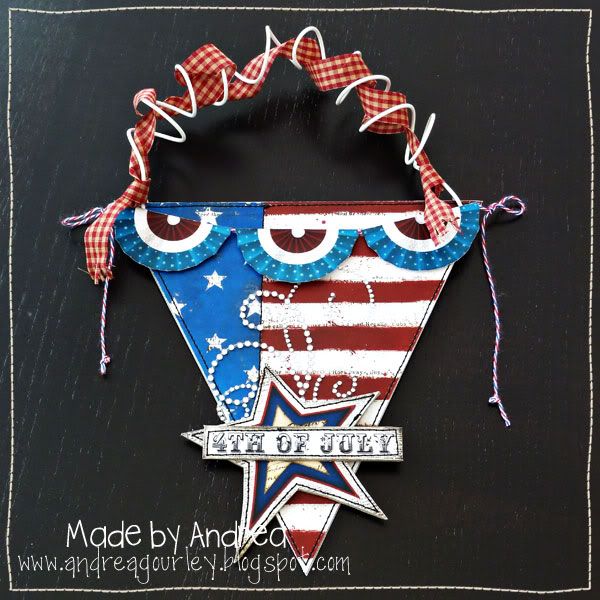
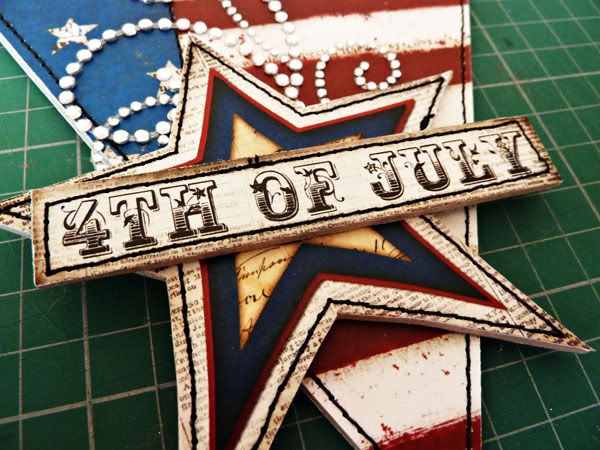
I used Melissa Bennett’s Proud 2B American digital kit for the papers and elements and Dani Mogstad’s Scrappers Tools: For The Love of Banners for the banner template (I just made it bigger in Photoshop)
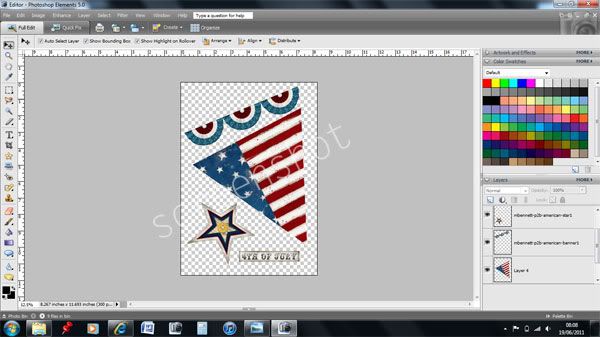
I started by creating the banner digitally in Photoshop
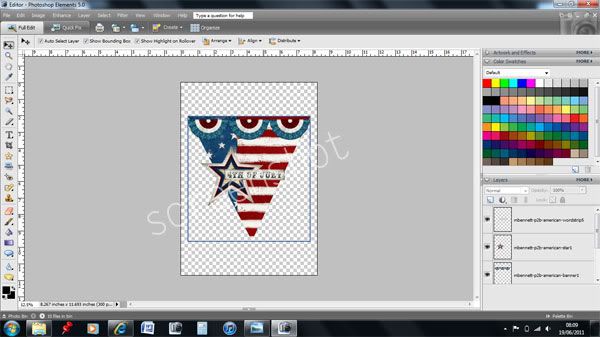
When I was happy with what I had I placed all the layers onto a new document the size of my printer paper
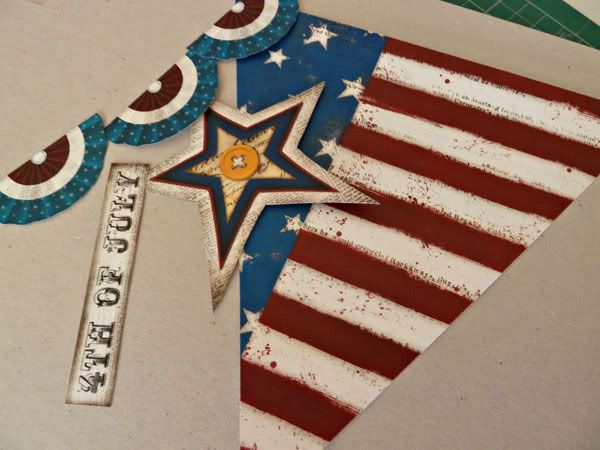
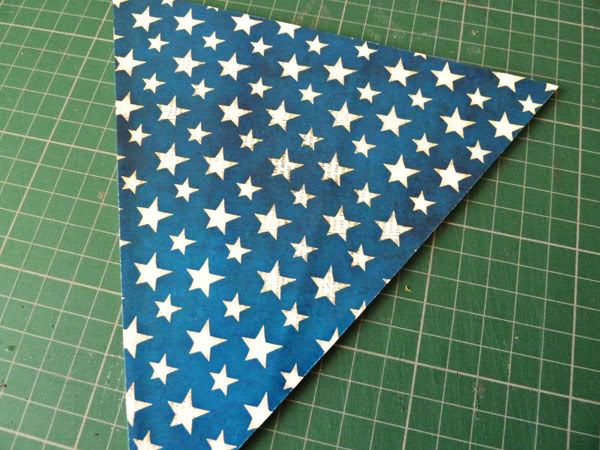
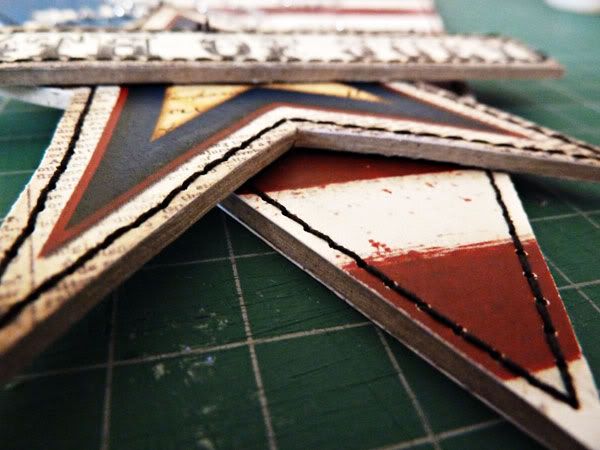
After printing I cut all the pieces out and glued the banner, star and wordart onto chipboard then cut out these shapes
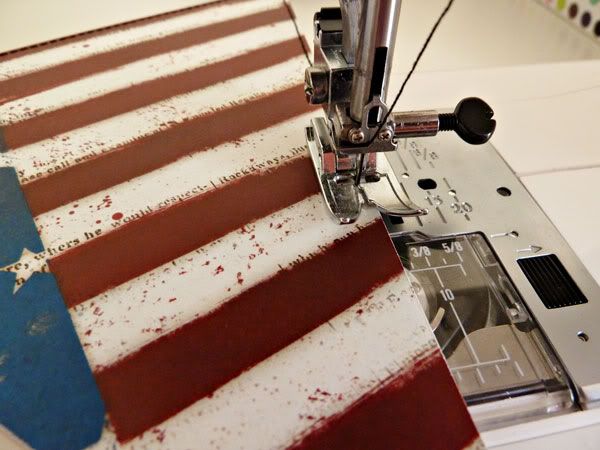
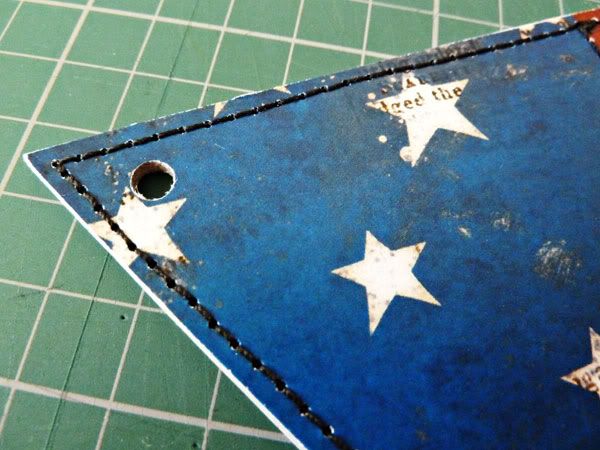
I used my sewing machine to stitch around the edges of the three chipboard pieces. If you’ve never used your sewing machine with chipboard then you really should have a go it is very easy, just remember to go slowly and take care not to stitch too close to the edge. Sewing through paper and card will blunt your needle so you should keep a seperate needle for fabric/paper.
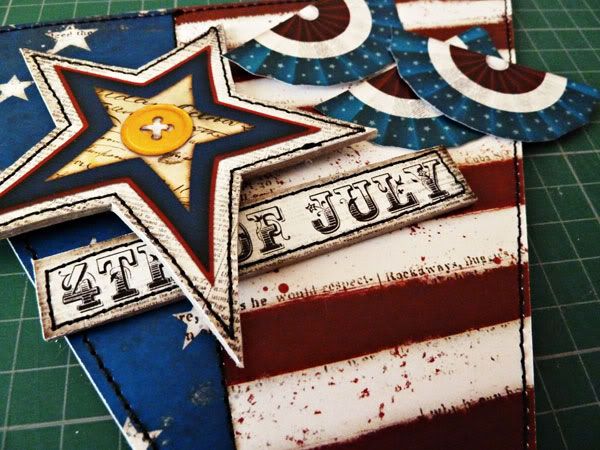
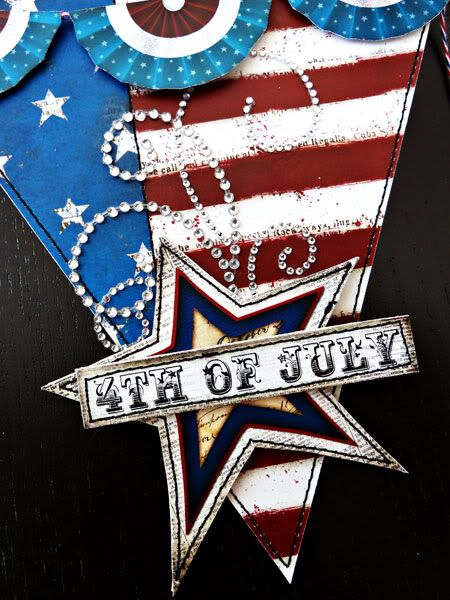
Next I flipped the banner over and added coordinating paper to the back to cover the back of my stitching and punched holes in the corners with a Cropodile
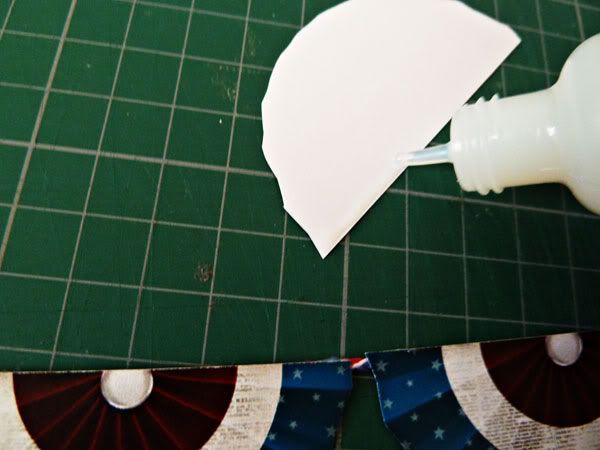
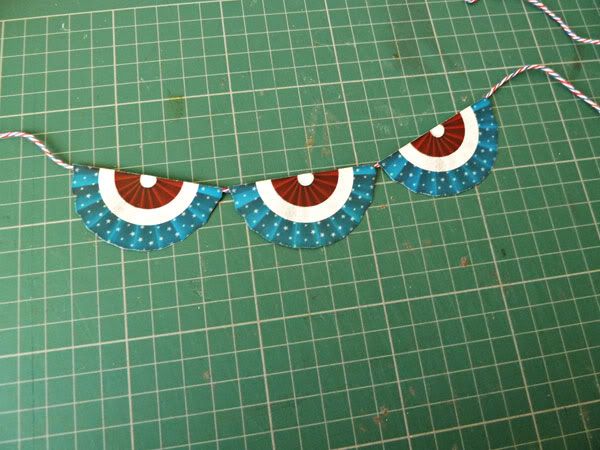
I cut out the seperate mini banner elements from Melissa’s kit and glued them to a length of bakers twine
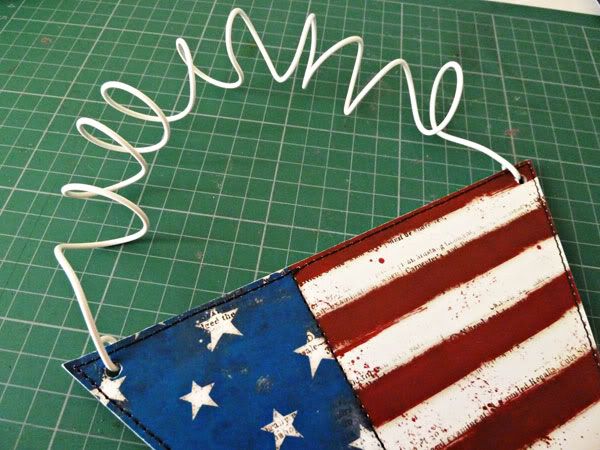
I added twisted wire to the top of the banner to hang it up
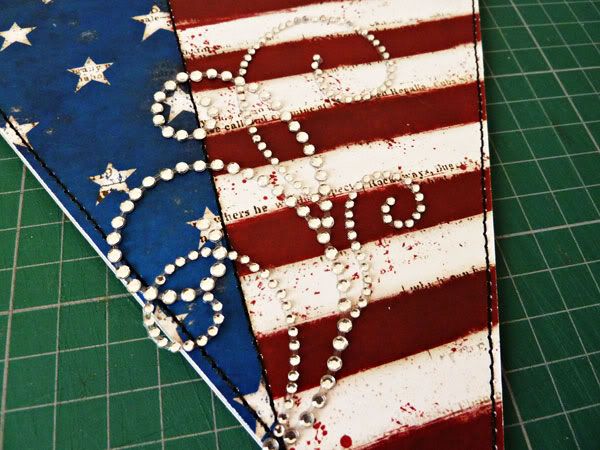
A crystal swirl sticker added some bling and then I glued on the star and word art
Supplies:
Proud 2 B American digital kit – Melissa Bennett
Scrappers Tools: For The Love Of Banners – Dani Mogstad
Crystal swirl, bakers twine and ribbon – Ribbon Girl
Chipboard, glue and sewing machine
If you would like to own my 4th of July banner I am giving it away to someone who leaves a comment on this post. Just leave me a comment and I’ll do a random drawing on Wednesday and post it off to the winner – if you aren’t a member of the Sweet Shoppe Designs forum then I need to be able to contact you to get your address if you win
Love Andrea xx


Gemma said...
on June 26th, 2011 at 6:48 am
I want to come to your house and watch you do your hybrid stuff, you rock!!!
KateC said...
on June 26th, 2011 at 7:11 am
Your craft room is amazing! And seems like it was done so quickly! The banner is so pretty. The way you took the extra step to stitch it put the bling on…it’s beautiful!
NeverendingJen said...
on June 26th, 2011 at 7:42 am
gorgeous craft room! soo jealous!
Lydia (ltarbox) said...
on June 26th, 2011 at 8:43 am
That looks amazing! I would NEVER have thought to stitch on chipboard, and it adds the perfect touch!
Heather (isaacsmom) said...
on June 26th, 2011 at 9:39 am
Awesome craft room! Love the banner you made!
AmyG said...
on June 26th, 2011 at 10:30 am
Amazing! You rooms look great-love the doggie in the photos too. I’m so not crafty, great work!
Amanda P (apphotos) said...
on June 26th, 2011 at 10:54 am
So beautiful! & your craft room is amazing!
Jill Dinkel said...
on June 26th, 2011 at 11:28 am
jealous of the room and the banner looks great!
Stacy said...
on June 26th, 2011 at 1:36 pm
How fantastic! You are SOOOO creative, and that banner is beautiful!
Kendall said...
on June 26th, 2011 at 1:45 pm
Andrea, you are just amazing! The banner is fabulous, and your craft room looks lovely. 🙂
Angie said...
on June 26th, 2011 at 2:15 pm
love this!!!! sooo cute!!!!!!!!!!
Scrapsandsass said...
on June 26th, 2011 at 3:16 pm
Wow. You are amazing.
Anna said...
on June 26th, 2011 at 3:18 pm
Ooooo what a fabulous giveaway!!!!! I would love, love, love to win : )
Amber said...
on June 26th, 2011 at 4:09 pm
This is amazing!!!! And congrats on the new craft room!
Ashley said...
on June 26th, 2011 at 5:37 pm
Love the jars of ribbon on your desk! The craft room is great and so is the banner. Would LOVE to win!
JenM said...
on June 26th, 2011 at 6:00 pm
Wow! You did amazing on that banner! I always love all those crafty type holiday decorations, and yours is truly amazing! I would love to win it! Thank you for the chance 😀
Mari said...
on June 26th, 2011 at 10:00 pm
Oh, I am a HUGE sucker for all things patriotic. I love your banner. Its gorgeous!
Kenzi said...
on June 27th, 2011 at 10:43 am
Super cute! and of course I’m totally jealous of your fun craft room! Thanks for the chance to win
Melinda said...
on June 27th, 2011 at 11:21 am
Gorgeous banner, Andrea!
Nicolelogg said...
on June 27th, 2011 at 11:44 pm
I love your project!!