Getting Started: Using Templates
Hey Sweet Shoppers! Laura here and today I want to touch on one of my very favorite topics. Templates! I used to be very anti-template because I thought it took away the whole creative process. But, now that I know that I can alter them to fit my needs, I absolutely adore them since I’m a person who has some major photo placement issues. So, without further ado, let’s bring on the tutorial!
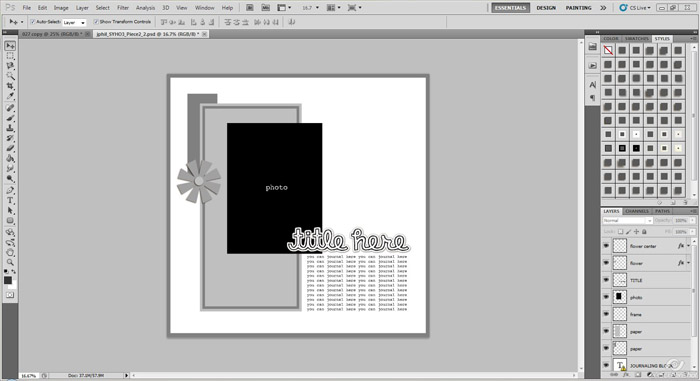
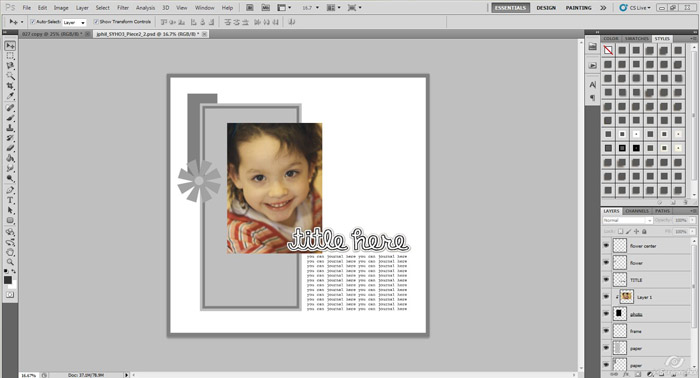
1. Open up a template of your choice in Photoshop. The template I’m going to be working with today is from our very own Janet Phillips.
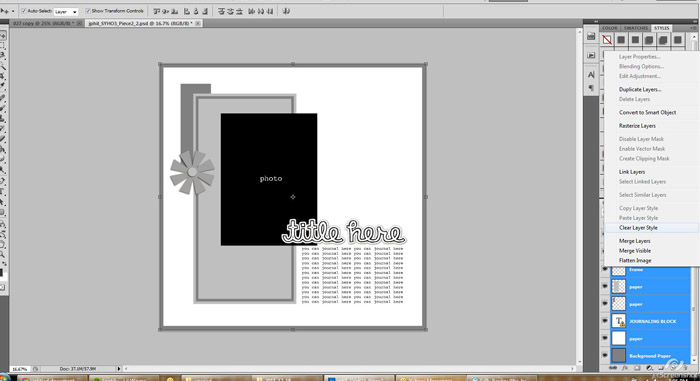
2. At this point, I clear all of the shadows that are on the template. I like to make sure that I can make my own shadows and they can go in the direction that I like them to go. This step is totally optional.
3. Pick out a photo. A lot of times, this is the longest process for me! Lucky for you, I have already picked which photo will be gracing my page, so you don’t have to go through that process with me.
4. Place the photo in the spot reserved specifically for a photo. With this template, that’ll be pretty easy since there’s just one.
5. Clip the photo to the reserved spot. In Photoshop, you can use the keyboard shortcut ctrl+alt+g (PSE would be ctrl+g) or you can simply right click on your layer and chose Create Clipping Mask. At this point, I also merge the layers. To merge down in Photoshop, you would use ctrl+e. It would be the same command in PSE as well. I tend to have a lot of layers to my layouts so I like to make as few as possible. By merging the layers together, I can move them easier (if need be) and it also makes for fewer layers.
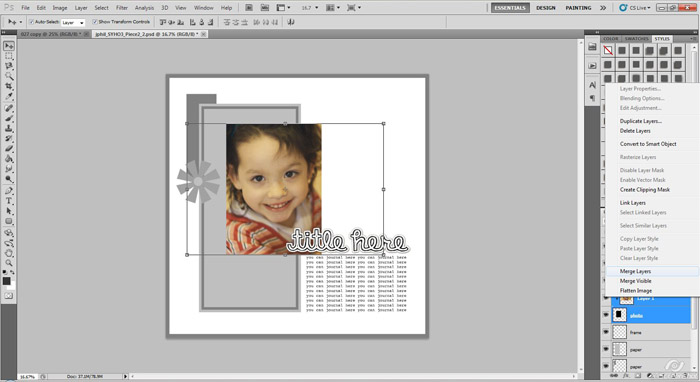
6. Add a shadow to the photo. I shadow as I go because if I didn’t, I’d surely miss a layer.
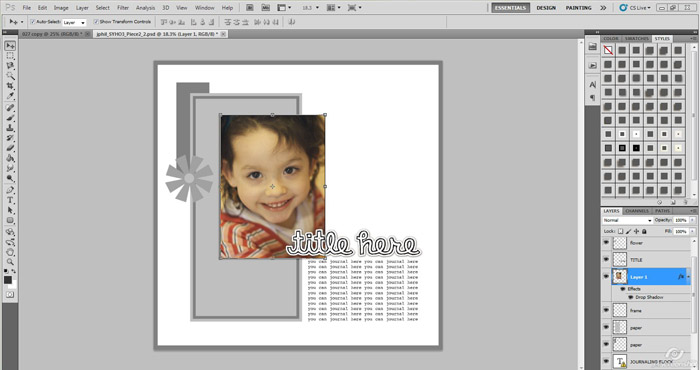
7. Decide which kit you would like to use. I will be using Zoe Pearn’s Serenity for this layout.
8. Get the “foundation” of your layout started. By this I mean, get the bottom layers (background papers) in place. I have placed the two bottom layered background papers so I can begin moving forward with the rest of the elements and papers for the layout.
9. Merge your background paper with the bottom layer. This would be the same as Step 5, purely optional.
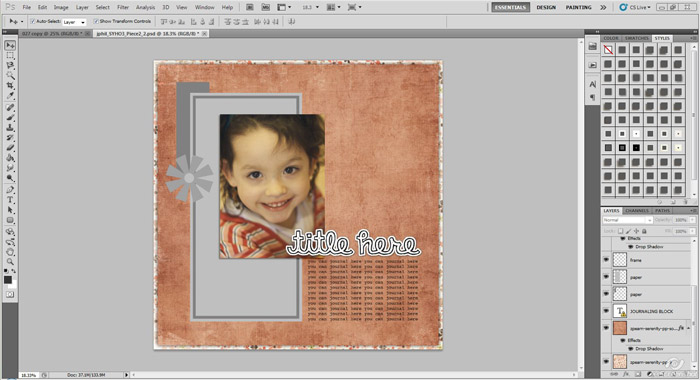
**At this point, we’ve pretty much just been working our way up from the bottom of the template. You’ll notice now I sort of veer from the “plan.” I like to journal and do my title work last. Once I see the layout all together, I have an easier time with title work and journaling.
10. Clip papers to the remaining paper spots. One way to change up the template would be to use ribbons in the designated paper spots or even a photo if you’d like. I’ll be using papers because Miss Zoe always has some yummy papers in her kits.
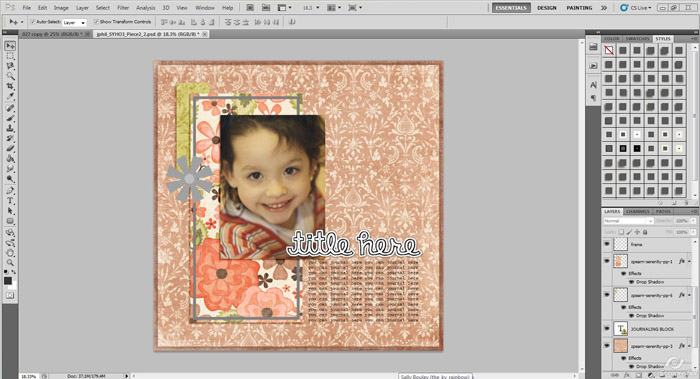
11. Merge all the clipped papers/ribbons/photos with their guided spots.
12. Either clip a paper to the frame that has been provided or make a frame of your own. I decided to use some ric rac from the kit to make my own frame.
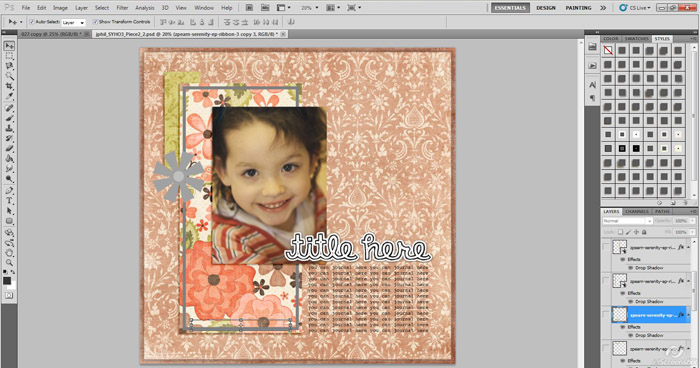
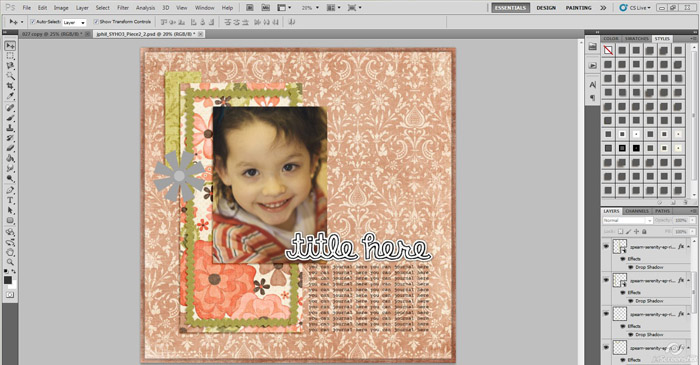
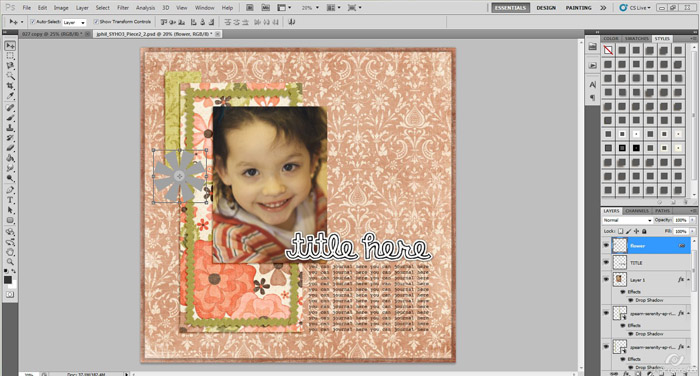
13. Begin adding elements as guided by the template. I love to work with Janet’s templates because there is so much room to add what you’d like. You don’t have to add anything to them, but I love that there is that option.
We’ll start with the flower that is already there for us.
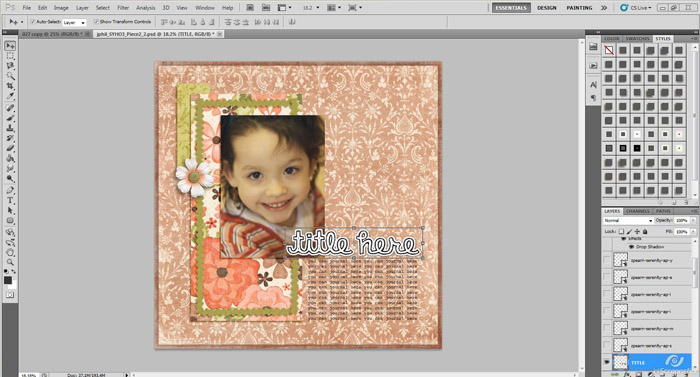
14. Make your own title work as shown on the template. If you chose to move your own title around, feel free to do so! Remember, a template is only a guideline for you.
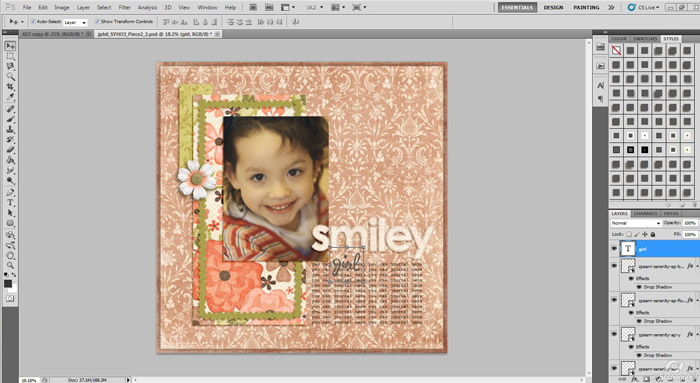
15. Since my title work interferes with the journaling spot that is already there, I will delete the journaling guide. I will still journal there, just not in the exact shape/size that Janet has provided.
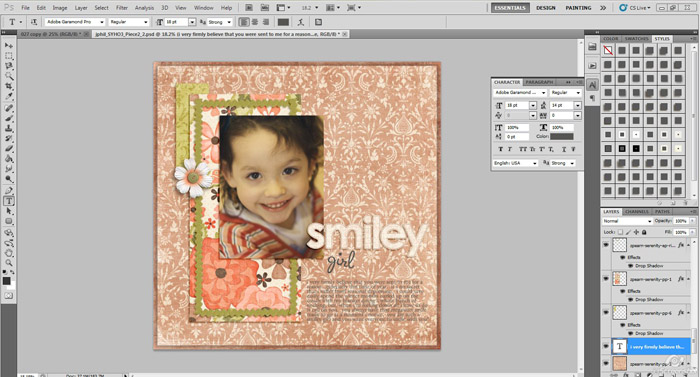
**Technically, my layout could be done at this point. I have filled in all the spots that Janet has provided. But, that’s not my style. I need more “stuff” on this layout. It just looks naked to me. There’s no rule that says you can only add what is provided in the template. Nor is there a rule that says you have to add all the elements that are suggested.
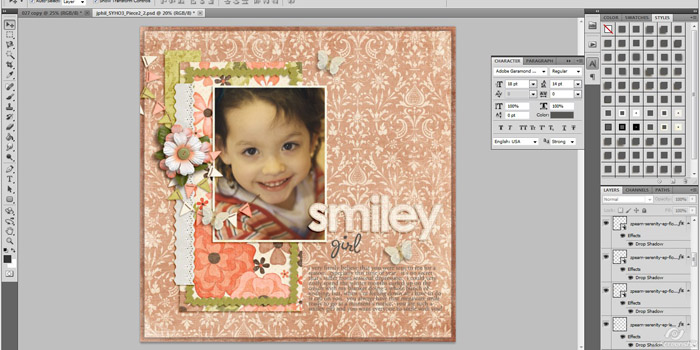
This is my finished layout. You’ll notice that I didn’t add a ton of extra elements, but I did add more than what was provided for me. I think that little extra made the layout more representative of my style, yet stayed true to the template.


Tracey said...
on December 10th, 2012 at 2:43 pm
Cindy Schneider recommended this tutorial for me and I’m so glad she did. It’s been most helpful and now I am excited about using templates for my scrapbook pages. Thank you so much, Laura, sweetshoppe and Cindy!
Create a Perfectly Chevron-tastic MiniAlbum (or Project Life Card!) in Minutes with this FREE Brag Book Template Album! | Traci Reed Designs said...
on April 1st, 2013 at 11:08 pm
[…] you’re new to digital and don’t know how to use layered templates, here’s a great tutorial by Hawt Mama […]
5 Ways To Incorporate Digital Goods Into Your Project Life | Traci Reed Designs said...
on April 2nd, 2013 at 10:26 pm
[…] than than #4, it just requires clipping papers to the template as well as photos! Here’s a more advanced tutorial on using […]
Christine J said...
on July 8th, 2013 at 3:19 am
thanks for the great tutorial! I’m new to digital scrap booking and PSE and this helps ALOT!!