Conquering Clusters using Templates
Today I’m back on the blog to talk more about clusters. I know that lots of us struggle with them and we’ve done some fun articles about clusters in the past. Angie brought us some tips on how she “fakes it” while making clusters by using the premade clusters from templates HERE on the blog. And I wrote about creating those simple element clusters HERE on the blog too.
“Making art is a journey.” — Meinrad Craighead
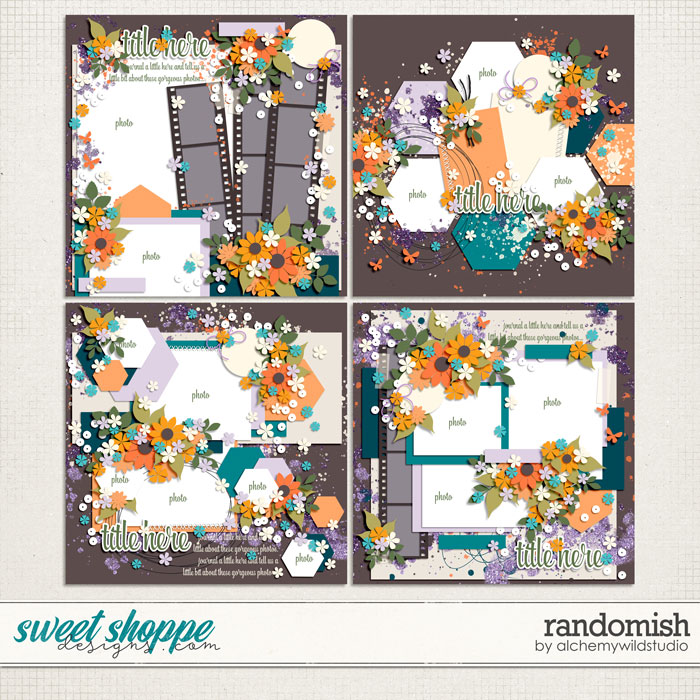
This month I propose you take a journey with me as we dive deeper into creating clusters. This time, we will tackle an over the top, clustered template from Alchemy Wild Studio. Amber is the queen of creating clusters on her templates bursting with foliage, elements, and flowers. Sometimes you might be intimidated by her style. Her templates are LOADED with layers and clustery goodness. In fact, the template set I chose for this article boasts that “one of these templates has a mind-blowing 153 layers” and that is certainly a LOT!!!
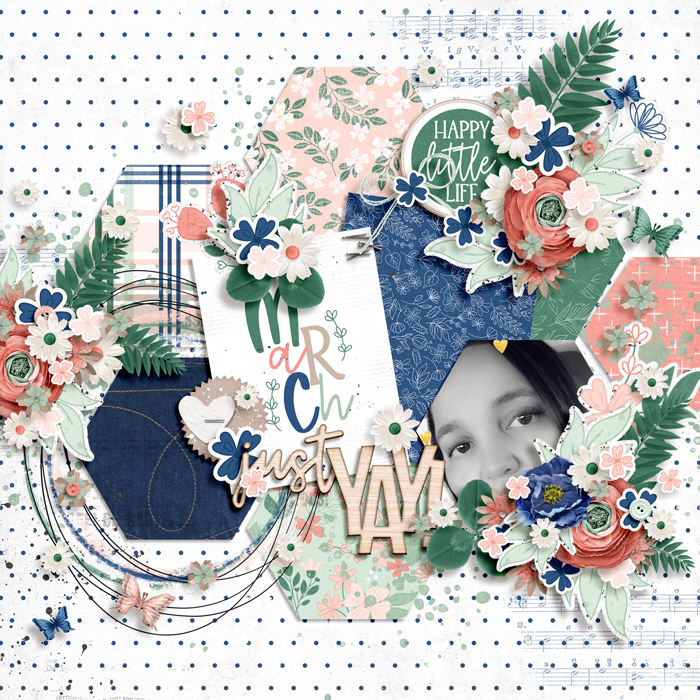
I’ll be working with one of Amber’s latest creations, Randomish, for my page.
Have you ever looked at templates like this, with tons of layers & clusters, and instantly get nervous?! I certainly have…and with 153 layers who wouldn’t. That’s ok, today I want to share a few tips I use to help me tackle templates like the ones above. Sometimes the only way to get out is to go through…..so let’s jump in.
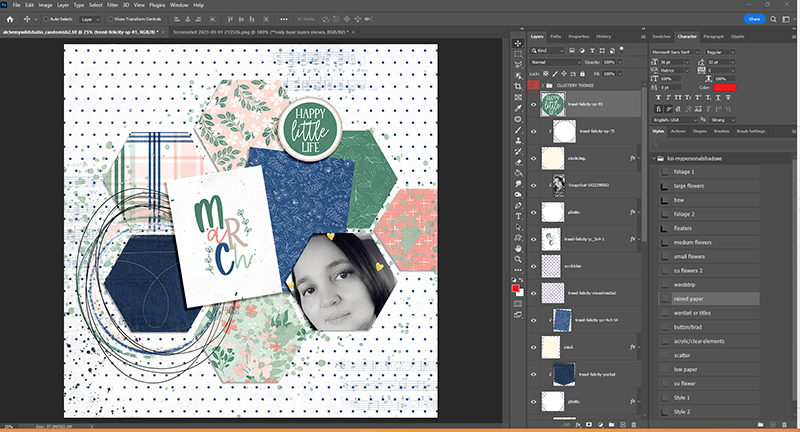
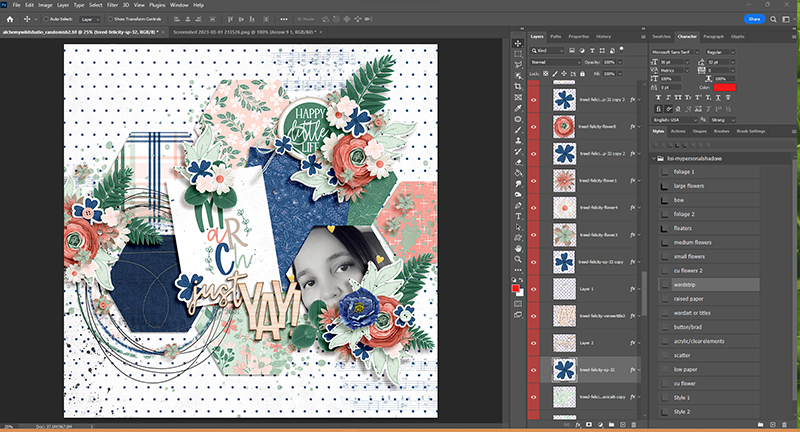
Being a super organized person and thinker *cough*(OCD just a little lol) I find this first step helps me quite a bit when tackling a template with a ton of layers. Because I totally get it…it can be daunting to open a template and see layer after layer staring back at you.
- I make a group with every layer ABOVE the base layers of papers, paper mats, & photos.
- and then turn OFF the visibility of that group
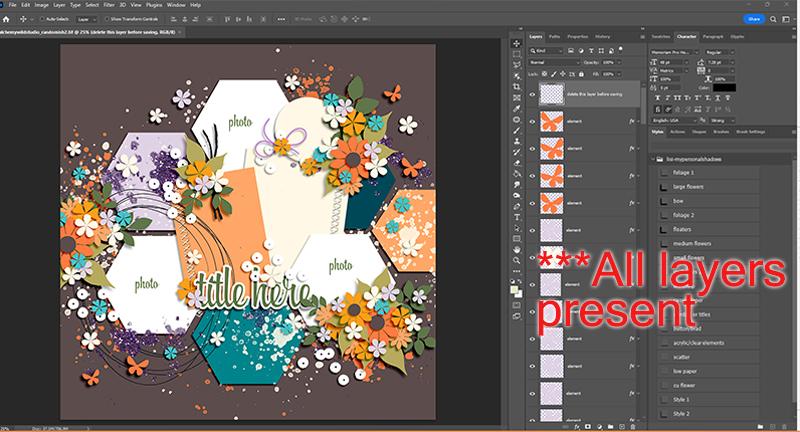
In fact, that’s one of the things I love about Amber’s templates. She makes this part easy since the majority of her clustery things sit ON TOP of those base layers. I’ve found by doing this first step I’m able to visualize the page better and not get overwhelmed or distracted by all of the clustery things.
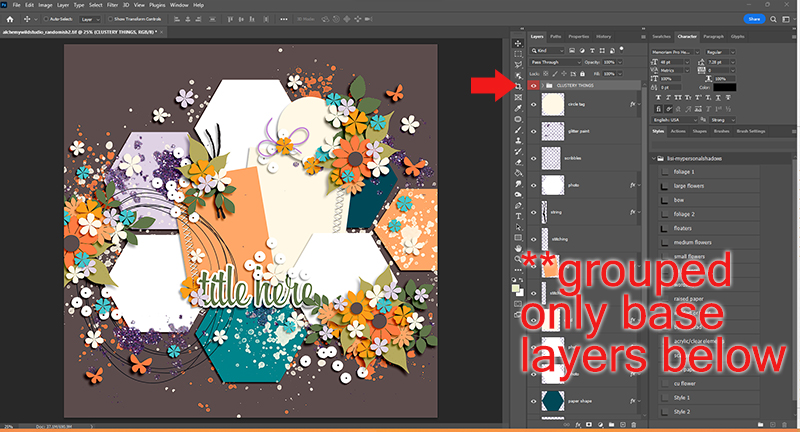
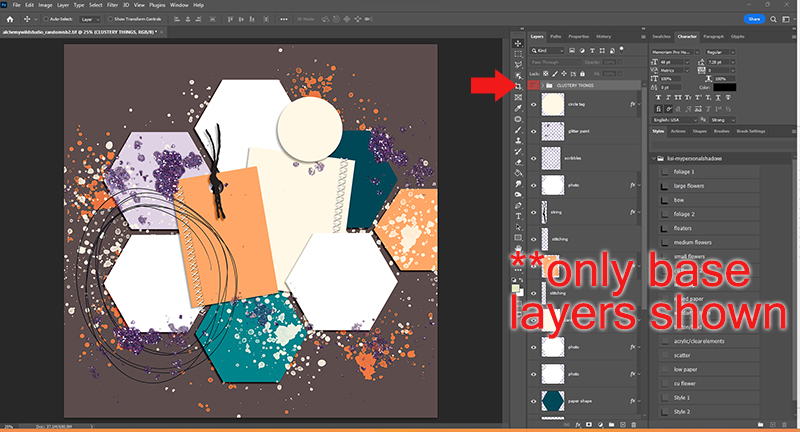
From here I’m able to assess the base layers, decide what I want to use, keep, remove and I start adding my papers and photos etc. like you see below.
Once that is complete now it’s time for all the fun.
- I turn the group visibility back on and expand it so I can see all the clustery things.
- Starting from the bottom up, I find all the foliage/leaves layers and I replace those first.
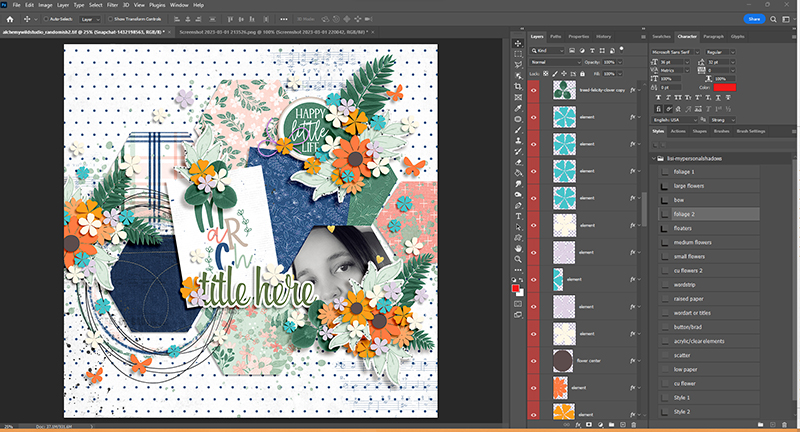
While replacing the foliage/leaves I’m able to place them & rotate them how I need so that it allows my photos or other cards/papers to be seen the way I want.
Now it’s time to take on all of the flowers. Before I get to that, Amber had a tip about how she approaches her clusters:
“But one thing that I think is important to making amazing clusters is to make sure everything you put in them is laying the way it would grow in nature.” -Amber of Alchemy Wild Studio
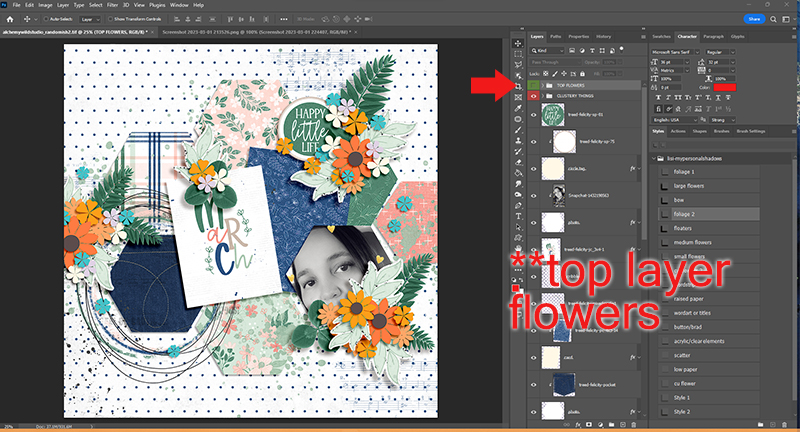
For flowers, I take a methodical approach and use groups again.
- I group any flower that sits above all other elements, papers or clusters. (turn off visibility)
*usually for Amber’s templates this is easy to distinguish because they are usually near the top of the layers anyway, but I got through and check some of the other ones too.
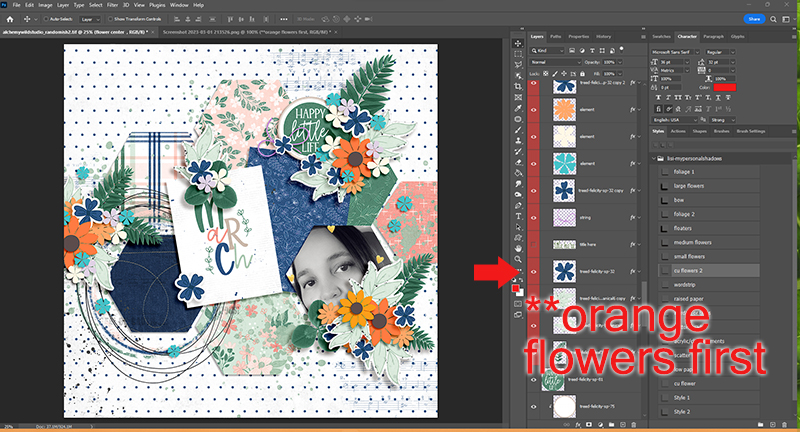
- Then I start at the bottom of the flowers and replace them with the flowers I want from the kit.
- The method to my madness is to replace each color at the same time.
- I will place the flower I want, then duplicate, rotate, resize every flower in the template of that same color working my way up the layers.
Here I started with the orange flowers.

Here is all of those replaced with a flower from the kit.
- I rinse and repeat for each color flower.
Rotating, resizing, and adding buttons or bows can help break up the visual monotony of flowers so I do that to some of them too.
After all of the flower colors are replaced I take on the TOP flowers that I grouped previously using the same approach I just finished. Once that’s completed. I will then go back and adjust things as I see fit. Adding buttons, scatters, other elements and more until I feel my page is completely done. This is my completed page, totaling 125 layers!!!! You can see the credits HERE in the gallery.
“Creativity takes courage.” — Henri Matisse
Thanks for reading. Have you tackled any of Amber’s fun templates recently? If not, I hope this has inspired you to try one!


Lidia G said...
on March 21st, 2023 at 11:33 am
I have a similar approach to playing with Amber’s templates. I do sometimes get overwhelmed with all the cluster layers so I simply turn them off and then as I build my page I re-introduce them and decide if I want to keep them or go with something lighter. That’s the beauty of templates, the sky’s the limit! Thank you for sharing your expertise with us, Kiana!
Kiana Fitzpatrick said...
on March 22nd, 2023 at 7:04 am
Yes that’s so true….templates are an expanse of creativity!!! So glad you liked my post. Thanks for reading.
Tracey said...
on March 22nd, 2023 at 10:29 pm
Great idea on how to tackle those templates. The number of layers is downright unnerving even for very experienced scrappers. But the results are certainly beautiful.
Angie Key said...
on March 27th, 2023 at 12:34 pm
This is such a great tutorial, Kiana! I take a similar approach to using templates – both by Amber and by other designers – where I drop layers into groups so I can turn them on and off. It makes it so much easier to work with!