Hybrid Inspiration for Beginners
Happy Wednesday everyone, I’m here today to show off some fun hybrid inspiration I found while browsing the hybrid gallery. I’ve always been a huge fan of hybrid pages, cards, and creations and I’ve dabbled a bit with them in the past. I don’t own special scissors or a Cricut or Silhouette machine, so cutting things to use for hybrid things hasn’t always been easy or fun for me. However, I love seeing what our amazing members and Babes come up with.
One of our main hybrid Babes is Esther and she has been creating gorgeous things this year. I pulled 2 cute cards that would be sure to put a smile on anyone’s face. These cards are so amazing and make me want to buy a cutting machine so bad. I just wish I had the time or the room.

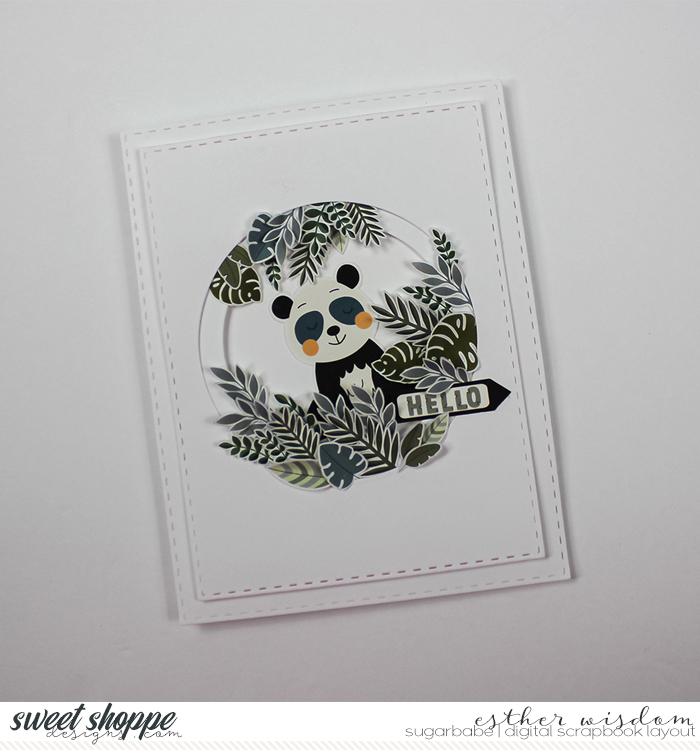
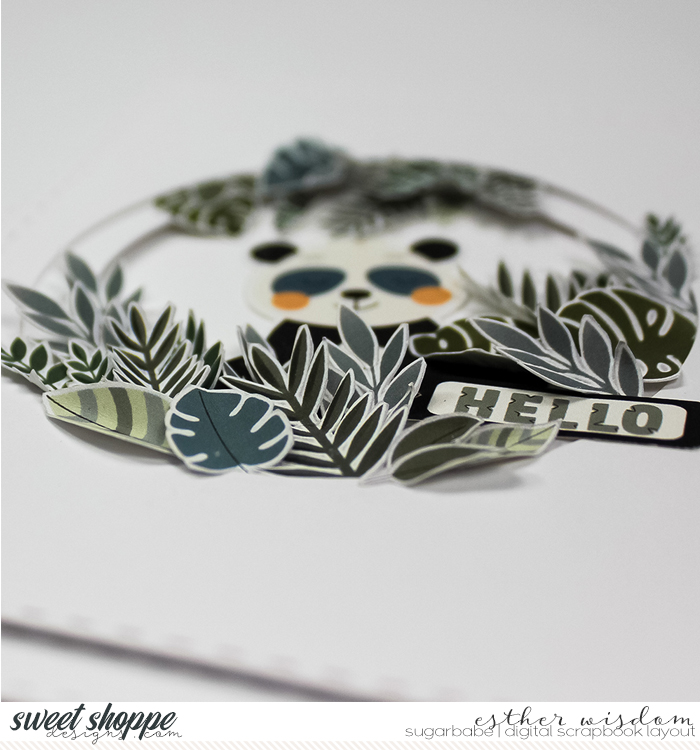
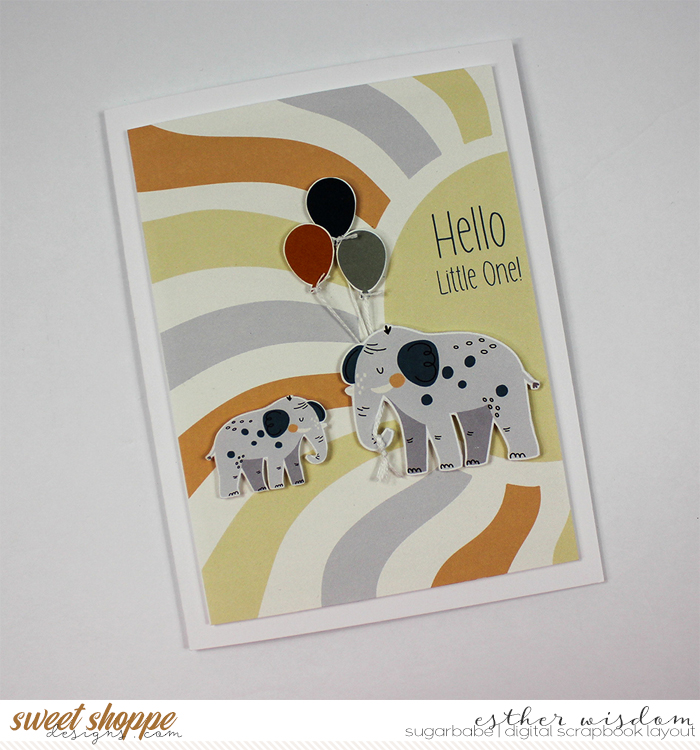
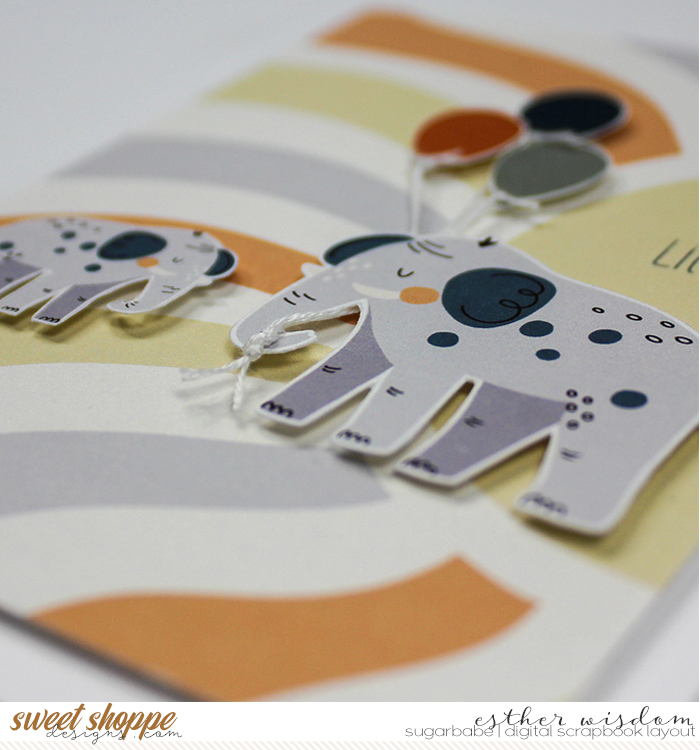
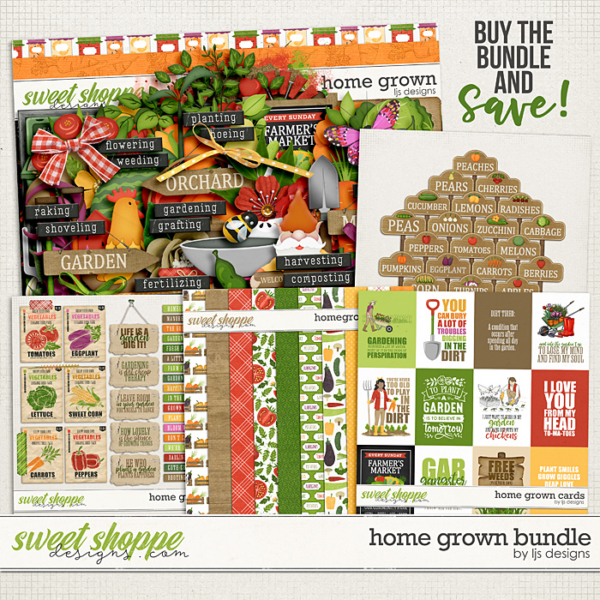
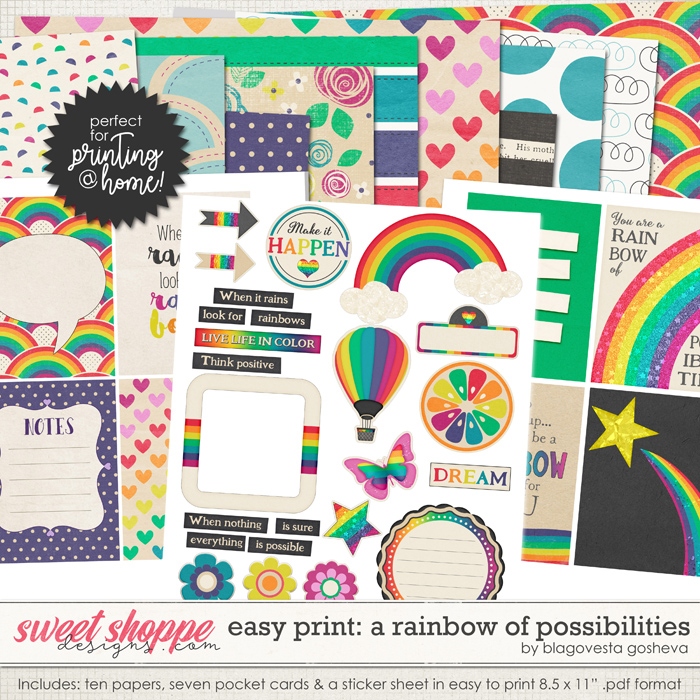
Seeing her cute cards made me want to take a stab at creating my own. I wanted to experience this as a true beginner using what I have at home without buying special machines or tools. So I examined Esther’s two cards and felt the one with the elephants seemed like it might be the easiest when you’re working at home with just basic scissors. With that card as my inspiration I went searching the Shoppe for a kit to use. I was looking for a product with mostly basic shapes that I knew would be easy enough to cut around by hand when I remembered there was a section of the Shoppe focused on “easy printing” for home. The ‘Easy Print Packs’ category of the Shoppe would be perfect for what I was trying to achieve so I settled on this beautiful easy print kit, by Blagovesta Gosheva, a rainbow of possibilities.
Here are the steps I used to create my card:
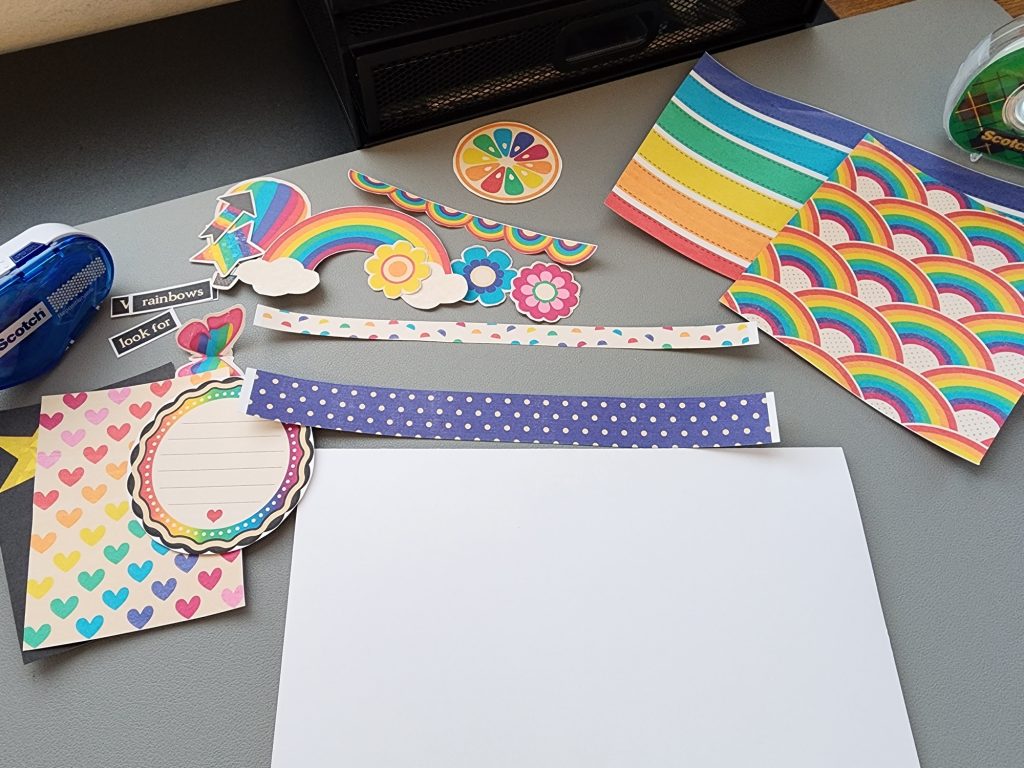
- Download, unzip & open the easy print kit. I was met with 13 PDF files. 10 were patterned paper backgrounds, 2 were the journal cards and there was 1 sticker sheet of elements.
- I folded a piece of card stock in half as my “white” or neutral base. Similar to what Esther has done by having the pattern paper mat smaller than the neutral card front base.
- I chose to print 3 patterned paper sheets, 1 sheet of cards and the element sticker sheet. This gave me 5 separate pieces of printed cardstock.
- I measured (really I eyeballed it, lol) the paper sheet I wanted as the main background mat and did a rough cut rectangle that fit inside of the folded card “front” of the cardstock.
- I cut out the pocket card I wanted to use and left a little white edge around it.
- The other two paper sheets I created a mat roughly the size of the pocket card and a paper strip to go across the card front as a sort of flat ribbon.
- Then I cut out the sticker elements I wanted to use for my card. This was the fun part, but also a little tedious since I didn’t have a fancy machine to do it. lol
Here is what everything looks like once I cut out the cards, elements and paper mats I wanted to use.
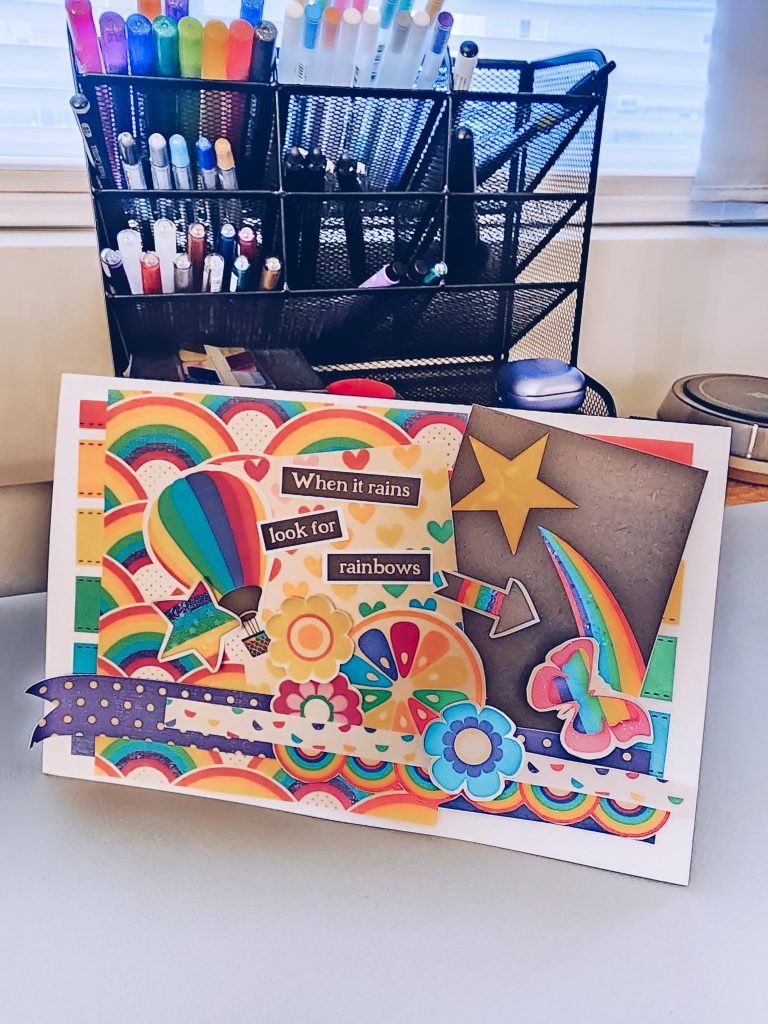
Now it was time for the real fun….assembling my card!!!! While I don’t work with paper crafts much, I am a serial creative and tend to have things I probably never would have used had it not been for this card experiment. Like double sided tape that I picked up on a whim one day in the craft section of some store that I can’t remember. lol
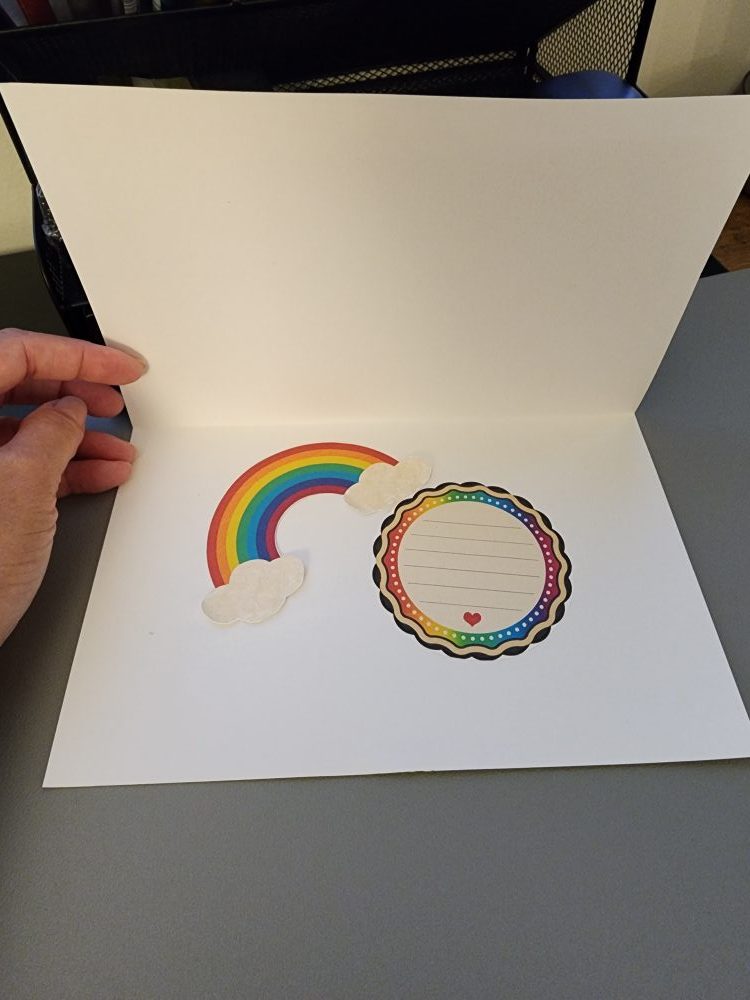
Once I was done with the front of my card, I used a few more of the sticker elements for the inside, to write my message. I have just the person I want to send this card to and I hope to brighten their day. I did some bends and folds on some of the sticker elements to create that “lifted” or real paper look like Esther’s cards above. They will flatten a bit when I mail it, but hopefully not too much.
This is my finished card. I really like how it turned out!
Anyway, I hope you enjoyed this experiment of sorts. Do you create hybrid pretties? If so, I’d love to see them, or know what else I can create with the household tools I have. Until next time, keep scrapping those memories!