Fixing Underexposed Photos in Lightroom, RAW and Photoshop Elements
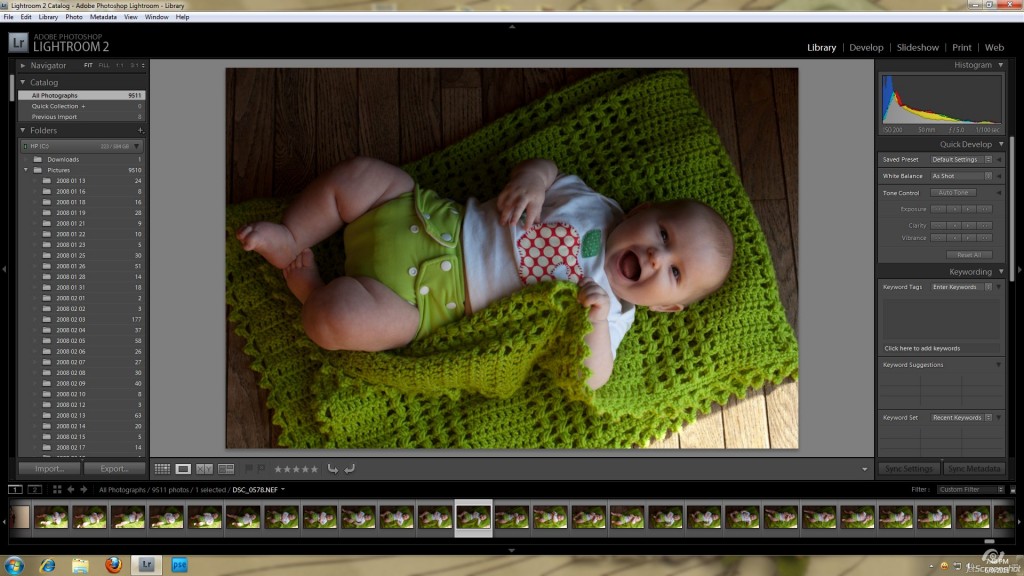
I know in the past, when I was paper scrapping, I was always so bummed out when my pictures turned out so dark and underexposed. They were hard to scrap with and really showcase the photo. I decided that I was going to learn how to fix them before getting them printed. I had also decided that I wanted to learn about lighting in photography to help avoid having to fix them in the first place. First, I’m going to share a few ways to fix the lighting in your photos using Photoshop Elements, Adobe Camera RAW, and Lightroom. Then, I will share some lighting tips for taking your photos to help avoid having to “fix” them in your photo editing program.
Lightroom
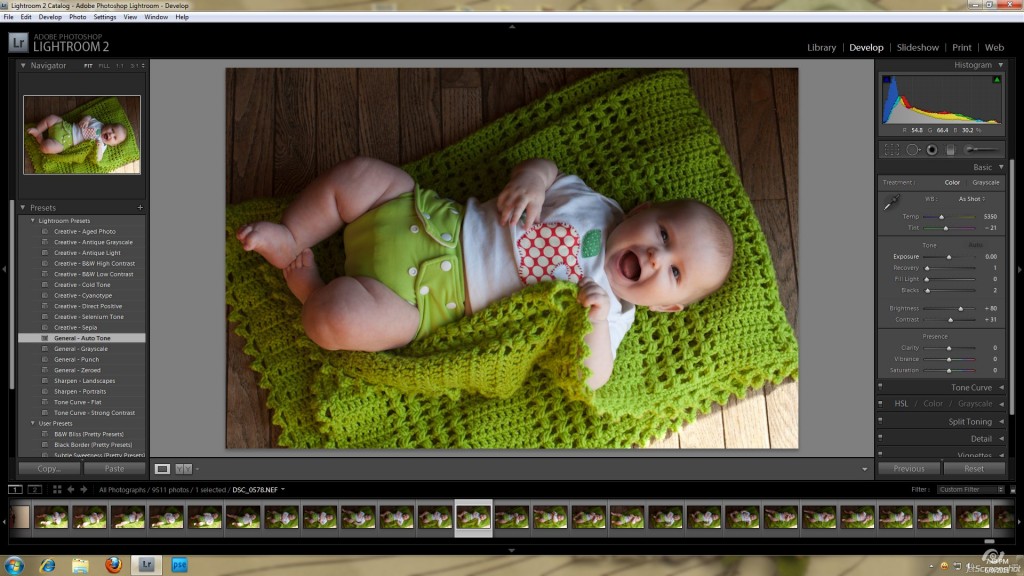
Auto Tone
The first thing I do is go to the presets and click on “Auto Tone.” This is a great starting point, and I normally like the outcome, but sometimes I like to do a bit more tweaking.
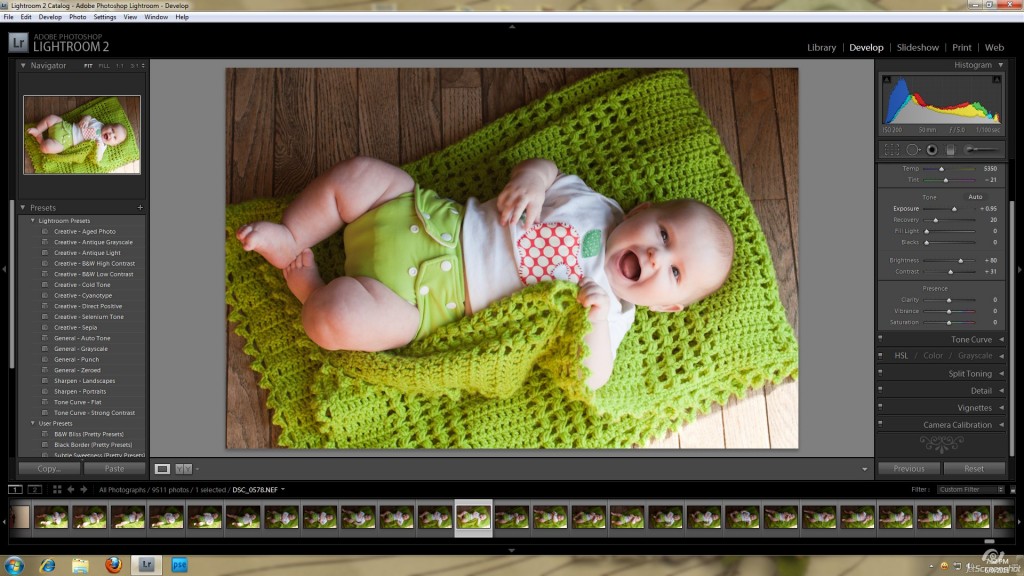
Histogram
The next step I take is to play with the histogram (the little graph in the upper right hand corner). The goal is to move the spikes on the left over, so that everything is more centralized in the graph. You can do this two ways. You can actually grab the color graph that you’re trying to move and move it over. Or, you can use the bars below and play with them. I start from the top bar (the “Exposure” bar) and then work my way down. Starting with “Exposure,” I move that over to my liking, making sure that I don’t bring it so far over that the graph ends up too far to the right, which means I’m overexposing the picture.
Recovery and Fill Light
So, once I’ve gotten the overall exposure to where I want it, I’ll move the “Recovery” bar. This will help recover some of the overexposed parts of the picture—moving the graph from the right side back to the left a little bit while leaving the rest of the exposure the same. Look at your histogram while doing this. You’ll see a triangle in each of the upper corners of the histogram. If part of the graph is too far to each side, that triangle will light up with the color of the histogram that is too far overexposed or underexposed. Your goal is to get your graph to meet the edges of the histogram without those triangles lighting up. So, once you’ve gotten the exposure where you want it, you’ll use the “Recovery” bar to bring back that overexposed part just until that triangle goes back to gray. The next one down is “Fill Light.” This does opposite of “Recovery.” This one moves the underexposed part of the graph to the right while leaving the rest the same. So, you’ll do the same thing and move that bar just until that triangle turns gray. Now, that’s just the basics. You can play with the other bars to really get your graph where you like it. Remember that your goal is to spread that graph out throughout the histogram without lighting up the triangles.
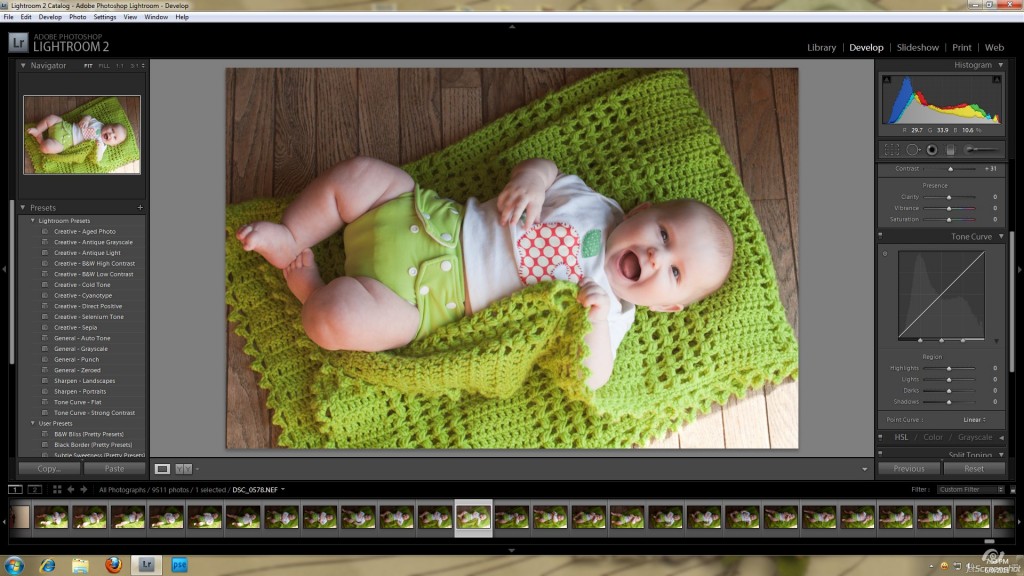
Tone Curve
One last thing I like to do is to go right below the bars to the “Tone Curve” and play with that. That also moves the histogram around to make it more interesting. Sometimes I just toggle to linear or medium contrast, but you can play with the curves to really get the histogram more spread out. I really like Lightroom and find I get the best results when editing my photos using it. I know not everyone has LR, so I’ve got some fixes for those who use Photoshop for your photo editing.
Adobe Camera Raw
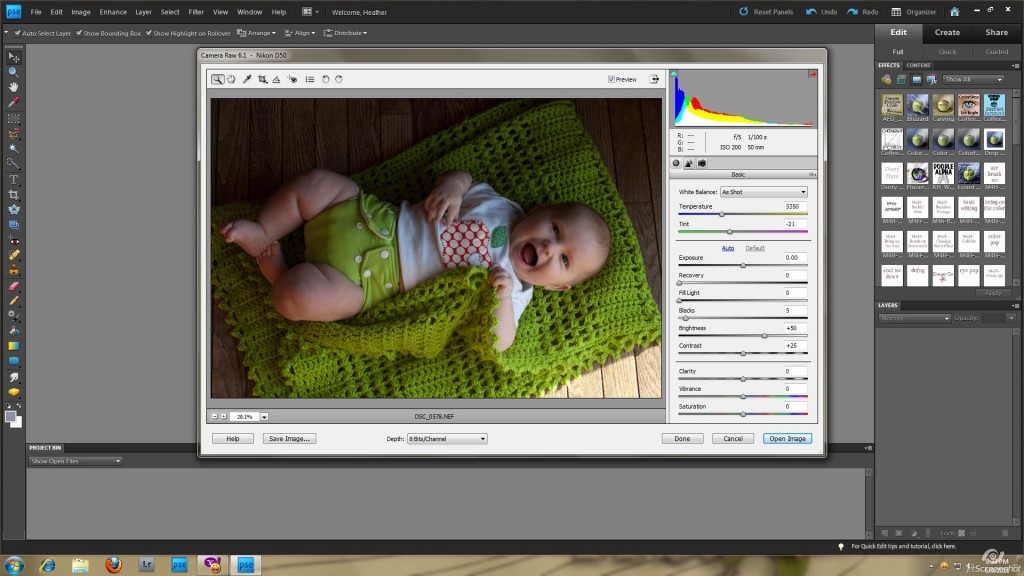
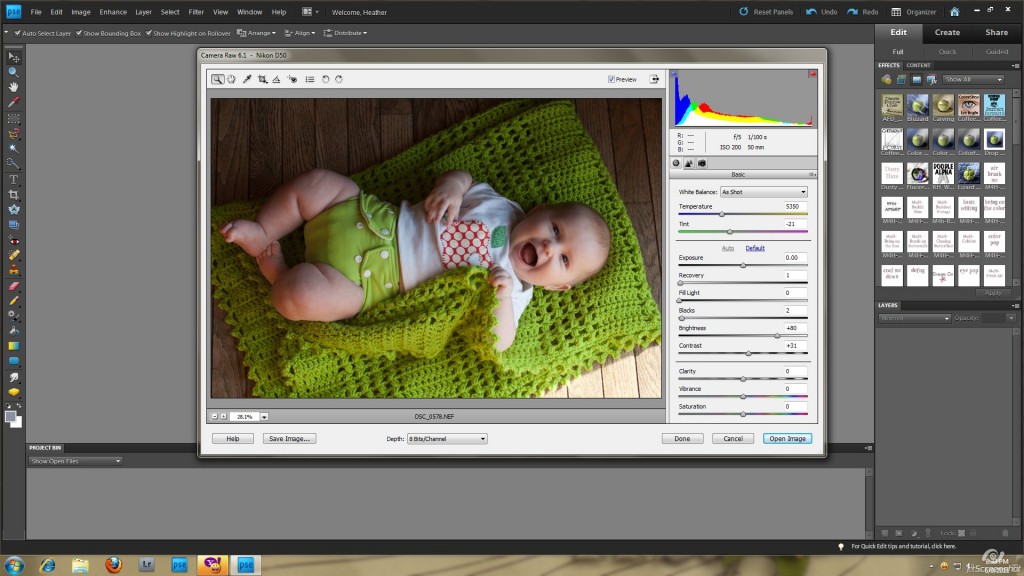
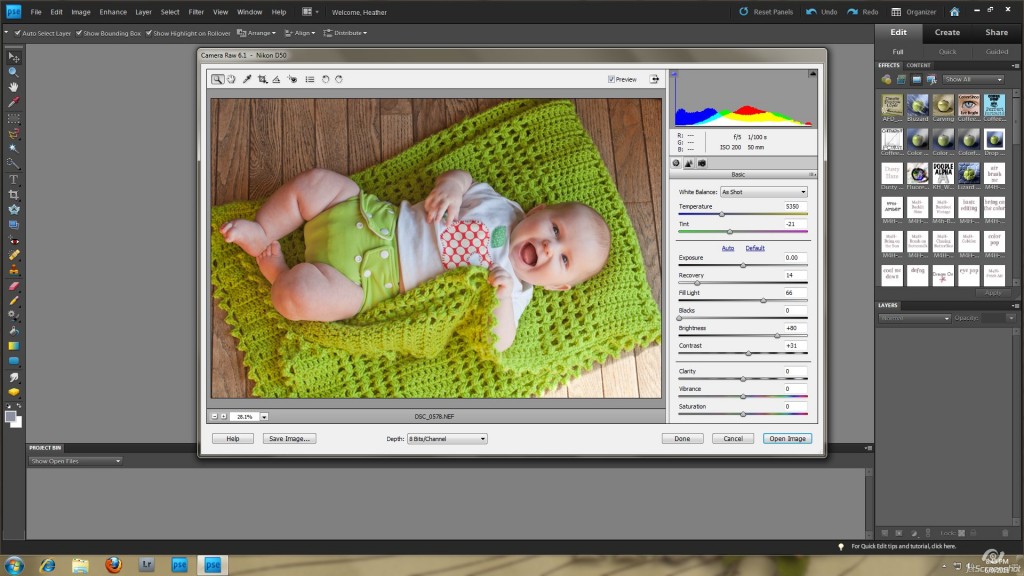
I really like Adobe Camera RAW (ACR) as it is very similar to LR. I can get very similar results to those I get with LR. I just feel like I have a little less control with ACR compared to LR. I shoot all my photos in RAW so ACR automatically comes up when I open a photo while in PSE. If you don’t shoot in RAW, you can go to “File→Open As” and open your .jpg as a RAW file. Technically it’s not RAW, and you’ve lost some information in your photo, so when you’ve underexposed a photo it will become grainy in those areas when you fix the exposure. If you have the option to shoot in RAW, I totally recommend it for being able to save some of your photos. Like I said, ACR is very much like LR in that you have your histogram in the upper right hand corner. I usually click “Auto” as my starting point and then again, I move around the bars until I get an exposure I’m happy with. I start with “Exposure” and then work my way down the bars until I’m happy with how the histogram looks, and my picture too.
Photoshop Elements
Lastly, I’ll show you what I do in Photoshop Elements (PSE). This is a little bit different in that I don’t have the histogram to work with.
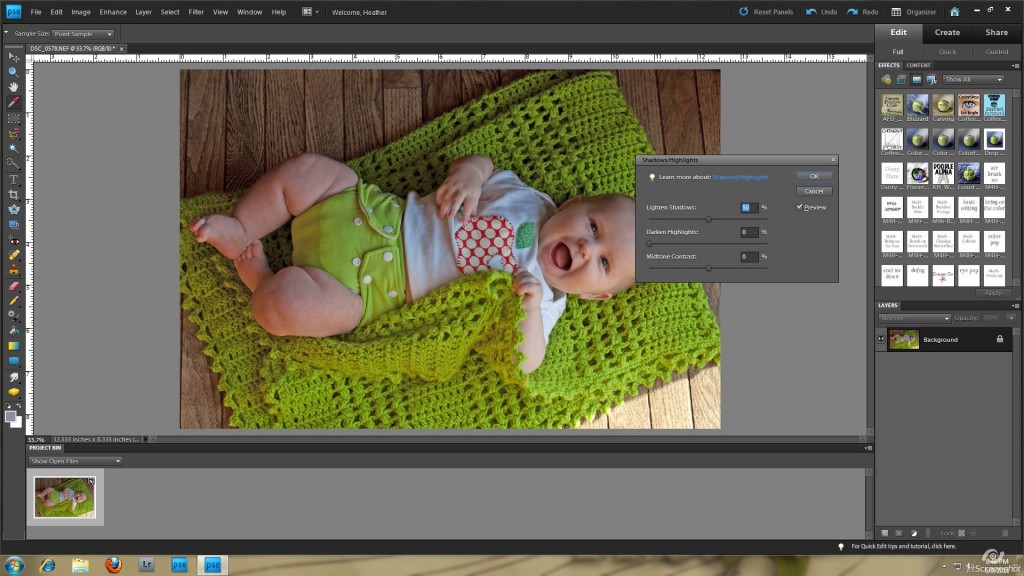
Shadows/Highlights
The first thing I’ll do is go to Enhance → Adjust Lighting → Shadows/Highlights and adjust the “Lighten Shadows” bar until I’m happy with what I have. I do this because I’ve found that I like the results for my next step better after I’ve done this first step.
Levels
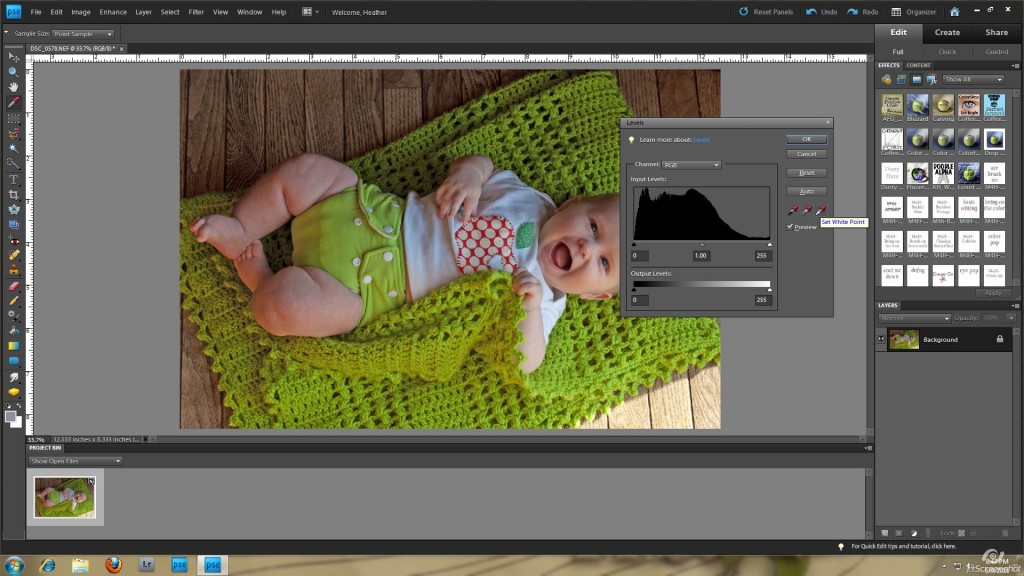
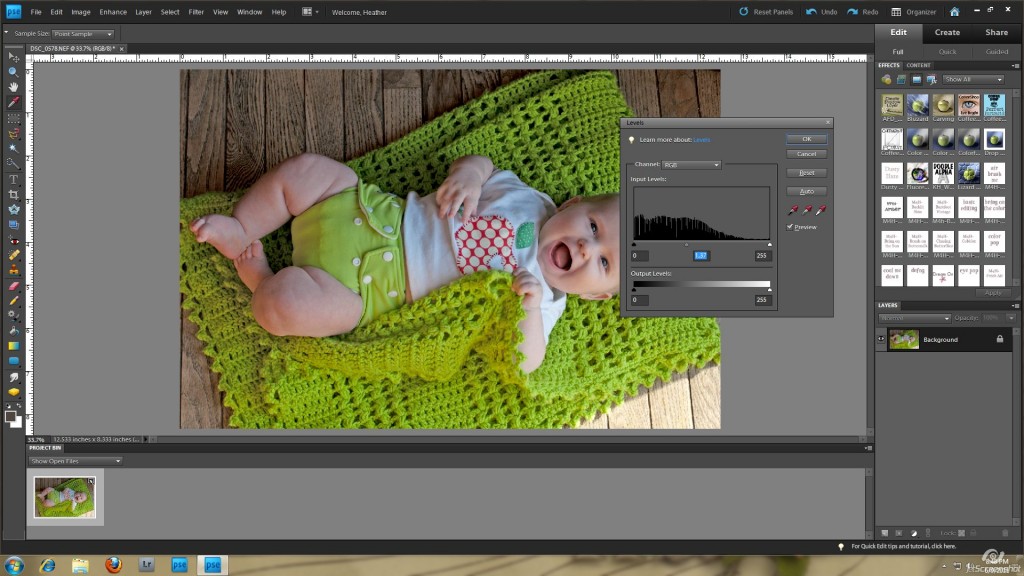
My next step will be to go to Enhance → Adjust Lighting → Levels, or Ctrl + L. Here you will see something similar to a histogram. I do a couple things in here. First, I’ll click on the gray dropper and click on something that’s supposed to be gray. This gets me to a great starting point and usually gets my levels close to where they need to be.
Next, I’ll play with the three adjusters below the graph. I move the black triangle to the left end of the graph, the white triangle to the right edge of the graph, and then I move the middle gray triangle around to somewhere in the middle of the graph, moving it around until I like the lighting of my photo. Play with it and see what you like.
I hope you’ve found this helpful in “fixing” the lighting of your underexposed pictures. Remember that if it’s severely underexposed, there will be some noise even in RAW pictures. There just is too much lost information in that photo to get it back. I also said earlier that I had some pointers in helping to prevent underexposing your photos. So, here are some things to think about.
- Don’t be afraid to use a flash even outside. I know that natural pictures look the best but if you don’t have enough natural light you just need to use a flash. If you can use an external flash and bounce it off a wall, ceiling, or reflector, that is your best option since the light won’t be as harsh. Also if it’s really sunny outside, you want to use your flash to get rid of the harsh shadows. This was a huge change for me to have to bring my flash with me when shooting in bright sunlight but I love that it avoids the harsh shadows.
- Speaking of being outside on a sunny day . . . You know how they say your subject needs to be in the shade when taking a photo? Well, you do too. If you’re out in the sun and your subject is in the shade under a tree, your camera thinks it’s bright out and will underexpose the photo. So you need to get in the shade of the tree also, or use your flash with a diffuser.
- If you’re in a dark setting, use a tripod. This will give the camera the time it needs without any movement to properly expose the photo. That would mean your subject needs to be still too, which might not be an option. But, this method works well for still subjects.
- Have your subject face the light source. Have them facing a sliding glass door if indoors or facing the sun while in the shade of a tree. Remember that you need to be in the shade too, then there won’t be any squinting from the sun.
- Use reflectors for bouncing a flash or even natural light. White walls are good for bouncing a flash off of too.
I hope you found this to be helpful in fixing your underexposed photos or avoiding them in the first place. Now, go take those wonderful pictures for scrapping those wonderful memories!

Misty said...
on January 23rd, 2012 at 10:36 am
Fabulous tutorial, Thank you for sharing