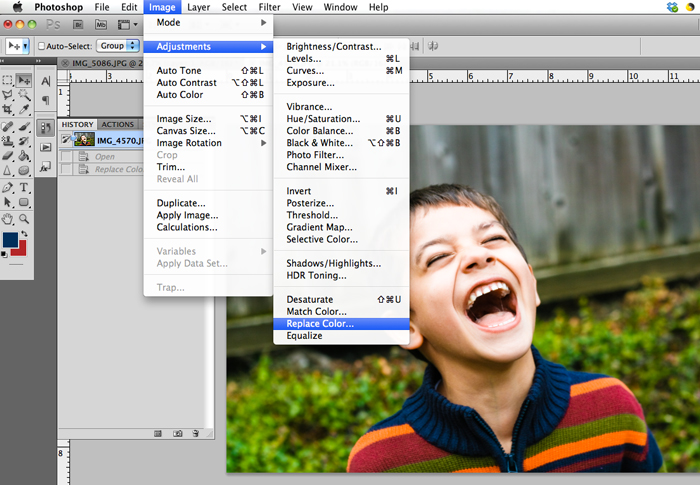
Using the Replace Color Tool in Photoshop
If you’re anything like me (or even if you’re not), occasionally, you may want to change the color of something in your photo to compliment your scrap page. In this example, I will be changing the color of the navy blue in my son’s sweater to brown.
Step 1: Choose the Replace Color tool: Image -> Adjustments -> Replace Color
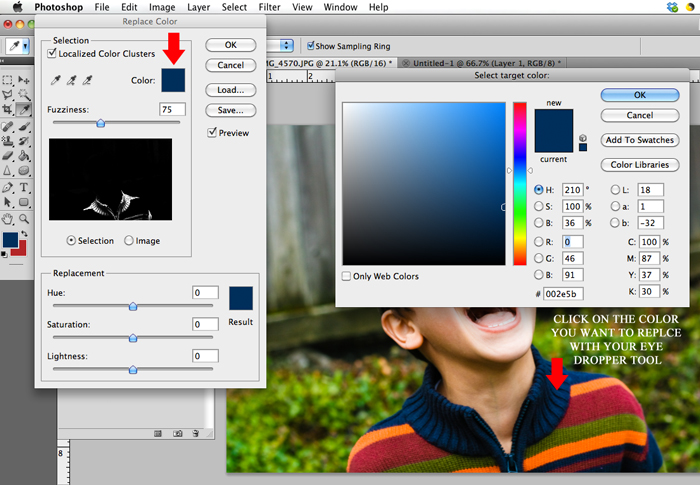
Step 2: Once you have the Replace Color palette up, click on the color box to enable the eye dropper tool. Use your eye dropper tool to select the color from your photo you want to replace.
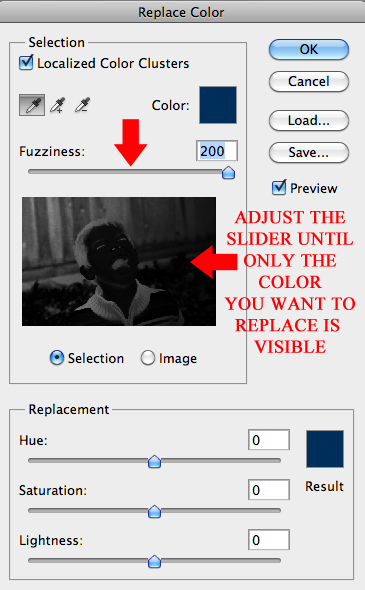
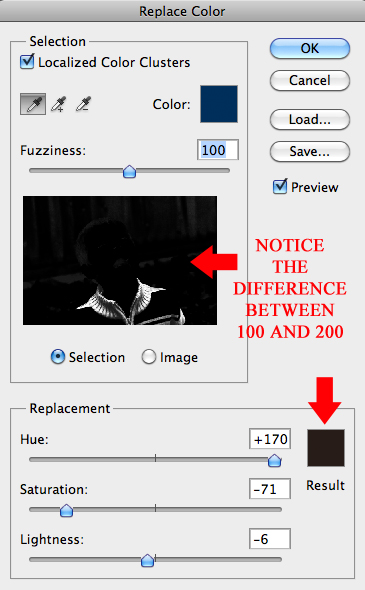
Step 3: Use the fuzziness slider to adjust the areas of your photo to apply your color changes too. Please note that if you want to isolate a color that that also shows up in other areas of your photo (for example, the green of the sweater), you may need to do a selection before you enable this tool to avoid recoloring everything that is the same color. For example, if we wanted to change the color of the green stripe in the sweater, we’d want to select that area first, so the integrity of the background foliage was not compromised.
Step 4: Once you’ve adjusted your fuzziness, now it’s time to choose the color you want to replace. Click on the replace color box and use the color palette to find the desired color (unfortunately, the eye dropper does not work in this step).
Before:

After: