Clean Photo Processing
Before I start a digital layout, I first choose my photo or photos and edit them. Most times I opt for a clean edit, which means I am making sure the colors are displaying the way I saw it in person. I am going to walk through how I would edit one of images using Adobe Camera Raw and CS6. I have a DSLR, so I shoot all of my photos in RAW. RAW files are larger in size but they hold a lot of image data making for a better quality photo and an easier edit. I can change the exposure of a RAW file and not worry too much about the amount of noise (or grain) that I am adding to the photo.
Right now, I have my Photoshop preferences for Camera Raw set to open up JPEGs (JPGs) in Adobe Camera Raw. That means my preferences are set up as:
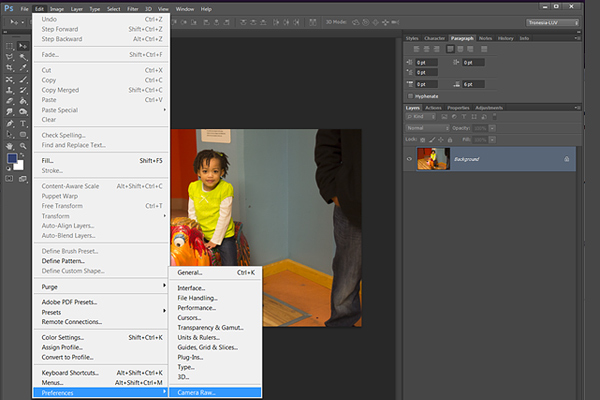
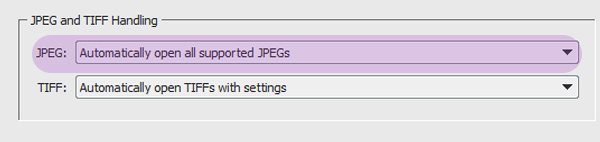
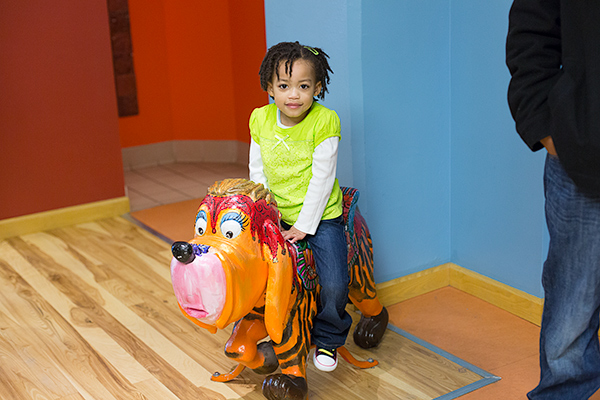
With the above setting, your JPGs will open in Adobe Camera RAW (ACR) just as a RAW file. This editor will do less damage to the quality of your image. Now, once I have chosen my photo, I drag it to Photoshop to open up ACR to begin basic edits. This is the original image is it was taken in-camera.
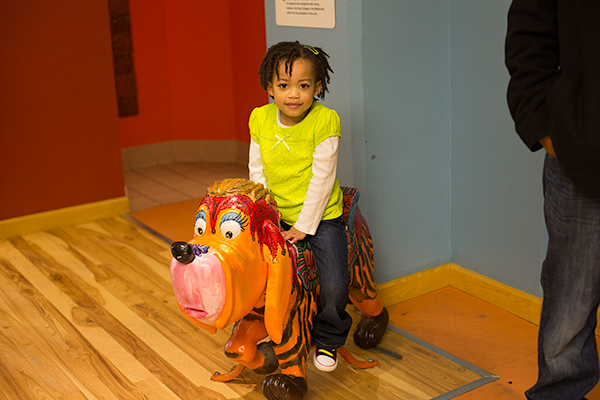
I can already see several problems that will need to be fixed. The list would include:
- White balance – The colors are off. Notice the white of her shirt sleeves has a green/magenta hue and her skin is disgusting yellow..lol! She is yellow but not that yellow.

- Distractions – Get rid of her dad in the right side of the frame and clean up the blue wall and orange floor.
Now in ACR the first thing I notice is the histogram in the upper right corner. That will determine where I begin. The arrow on the left of the histogram gives me shadow warnings and the arrow on the right gives me highlight warnings. I usually ignore the shadow warning until after I adjust exposure and white balance.
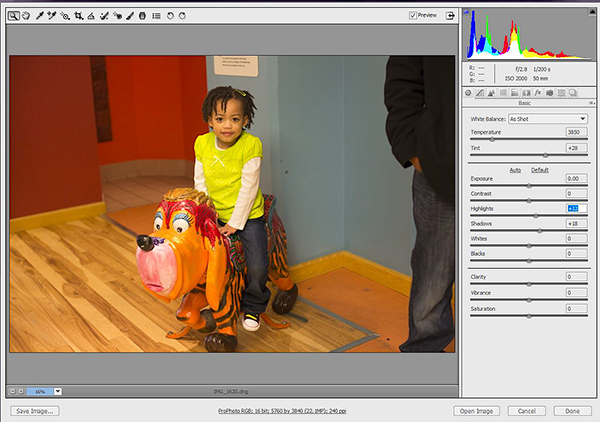
To adjust white balance in ACR, I use the White Balance dropper ![]() in the tools listed in the bar at the top and click on an area of the image that should be white or a neutral gray.
in the tools listed in the bar at the top and click on an area of the image that should be white or a neutral gray.
Already, that is a huge improvement. Then, I increase my exposure by +0.25 because her face still looks too dark. As soon as I change the exposure, my shadow warning also disappeared. That is why I wait fix that issue. Next, I bump my contrast up to 5, but you can adjust yours to whichever amount you like. I tend to like deep, rich colors in photos. That is all I would adjust on the Basic panel of ACR. You can play around with the other settings, but that is up to you and it really depends on the photo. The clarity slider will give you a clearer image but it also adds darker edges. That is the one setting I rarely use.
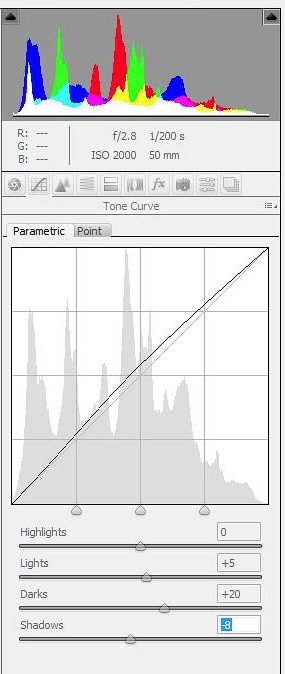
The next tab in ACR is the Tone Curve adjustment. I like to increase the lights, darks and shadows just a bit if there are still shadows on the face of my subject. There is a light shadow over the right side of her face, near her eye and cheek. I will increase the lights to +5, the darks to + 20 and shadows decrease to -8 (to keep her jeans and hair dark).
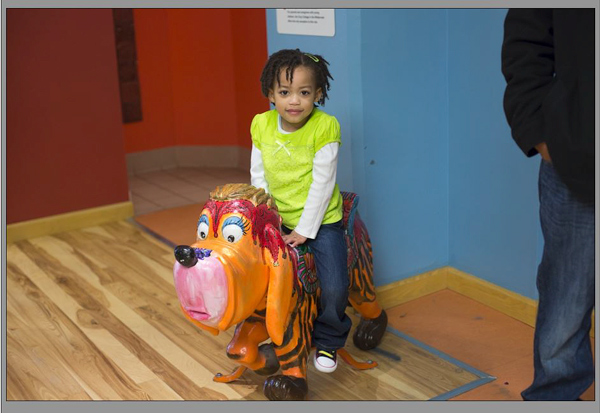
On the next tab, there is a handle little Noise Reduction tool. I use it very lightly as it will take away a lot of the detail in your photo if over-applied, and possibly, leave you with a plastic-looking child (lol!). Once I am done with all adjustments, I click done to have the photo open in Photoshop. This is what I have so far with just editing the RAW file in ACR:

First thing I would like to do is use the Content-Aware fill to get rid of the dirt on the wall and floor and the sign that is behind her head. I duplicate my background layer and use the square marquee tool to select a small section at a time. Shift + F5 to open the Fill settings and make sure content-aware and 100% are selected, then Enter. If I am using content aware on more than 3 places on an image, I will duplicate the layer again and continue fixing spots. That way if it does something weird, I can delete a layer and now have lost all the fill areas already completed.
For the sign on the wall, I am going to use the content-aware move tool. I selected an area of the wall underneath the sign, moved it to the bottom of the sign and PS will load the fill that matches the wall. I do this 6 to 8 times until the sign is completely covered. Once it is completely gone, I flatten the image.
At this point, I crop out the guy to the right and my clean edit is complete. I add a few finishing touches to get the photo result below. To save my photo for the web, I flatten it, duplicate the layer, and apply Filter -> Sharpen -> Smart Sharpen with the settings: Amount 80%, Radius 0.6 px and remove lens blur option selected.

I hope you found this to be helpful to see how I achieve a clean edit. Once this part is done, you can have fun adding some creative processing and start scrapping your page!