How To Make a Custom Siggie: Part 1
Have you ever admired those fancy scrapped signatures people use on the forums? Want to learn how to make one of your own? Here’s a little tutorial to teach you the ropes. Making your own custom siggie is easier than you thought.
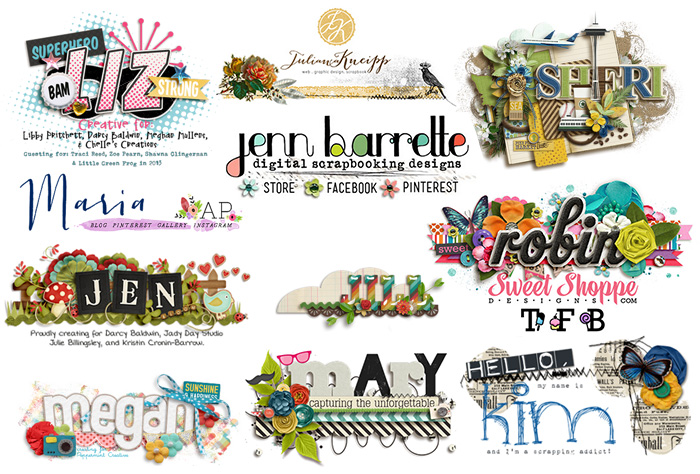
Here’s a few examples of amazing siggies from the SugarBabes, designers, and talented ladies who hang out here:
I’m going demonstrate by making two siggies for some ladies on the forum, Mary & Rachel. Follow along to make your own. Today, for Part 1 we will see how to make Rachel’s siggie.

Let’s get started. For each siggie I need a digital kit with papers and elements, and an alpha or font.


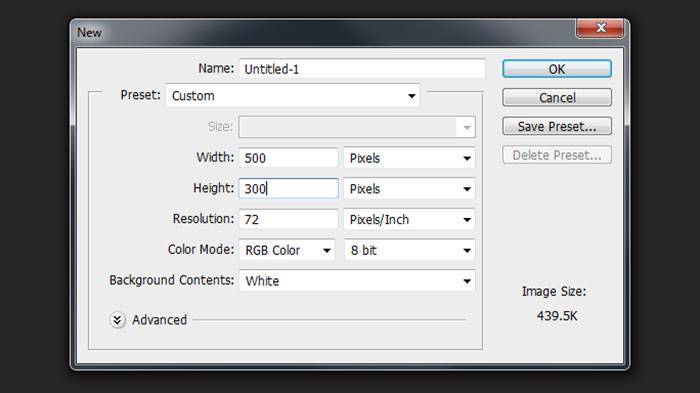
Open Photoshop or whatever program you use (I am working in Photoshop CS6) and begin by going to file > new to open a new canvas. I type in the size: 500 pixels wide by 300 pixels high at 72 ppi resolution (the resolution here is important because this is an image crafted for viewing on the web, not for print). You can make your siggie any size you want, but I would not exceed 400 pixels high or 600 pixels wide.
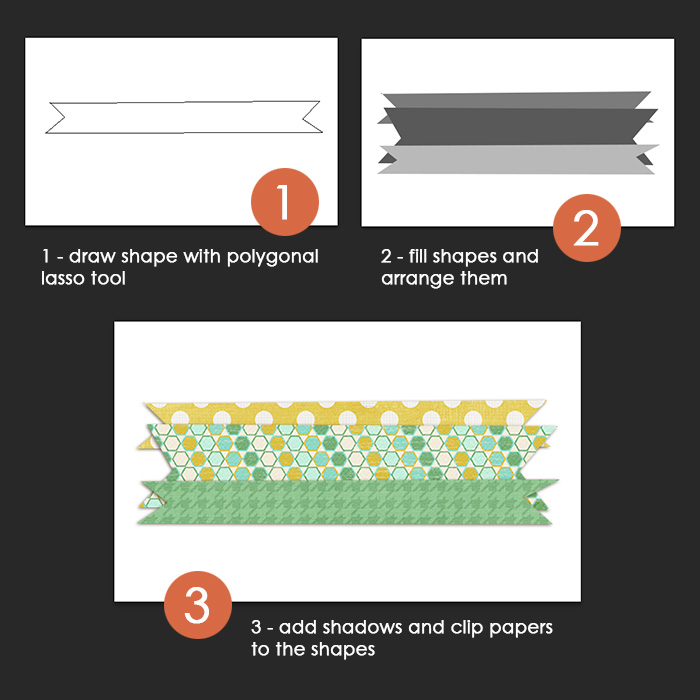
I begin Rachel’s siggie by drawing some pennant shapes with the polygonal lasso tool. I will clip some papers to these shapes and shadow them to build an interesting background for her name to be placed on.

Next, I begin placing some interesting elements beneath her name and the paper pennant shapes, making sure to not go too close to the edge of the canvas (think ahead about what direction your shadows will be going and be sure to check that nothing… including shadows or paint splatters… extends off the canvas). The adorable nest card element would be great, but I don’t have room for the whole card. Using the polygonal lasso tool again, I “cut” around the shape roughly.
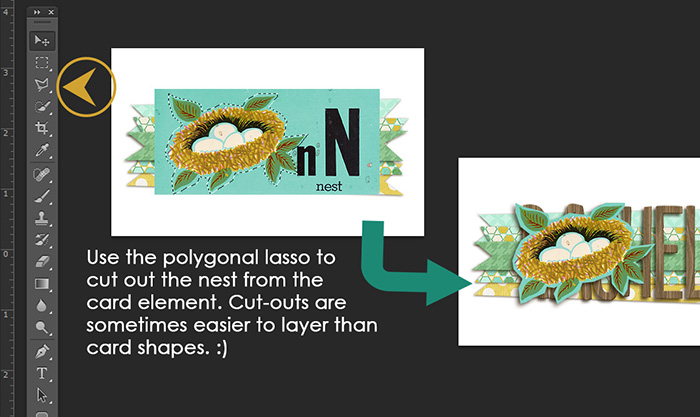
Now I can layer my cut out nest at an angle (so we can see the cute little eggs) beneath Rachel’s name. I also add some buttons on each side of the top paper piece, and a flower above the alpha… making sure to only overlap parts of the alphabet that won’t cause it to be unreadable. Some stitches, a scatter, washi tape, and some foliage. It feels finished to me now!
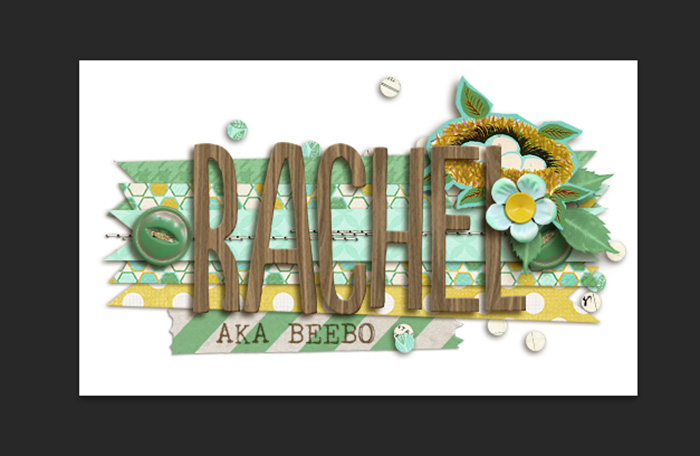
But wait… I had to add just a few more touches to make it WOW! I also turned off visibility on the background layer to prepare for saving it as a transparent .png…
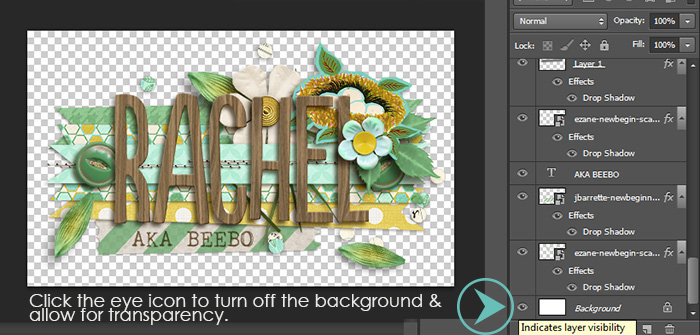
Now that the fun scrapping part is over, let’s get this puppy saved and uploaded! You can save for web as a .jpg or .png. A .png will save a siggie with a transparent background, which is nice for forums that have colored backgrounds. I am going to demonstrate how to save a .png.
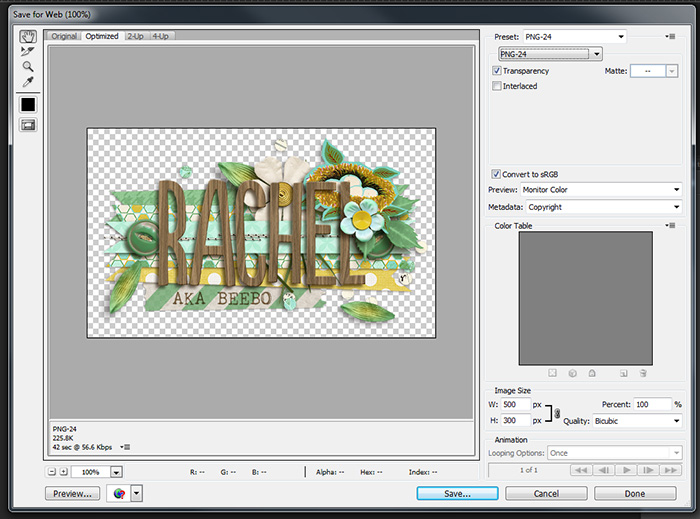
First, go to File > Save for Web. The window will come up as shown above. Select PNG-24 for siggies (it will be a bigger file, but will display more colors than PNG-8). Check the box for transparency. Then click save!
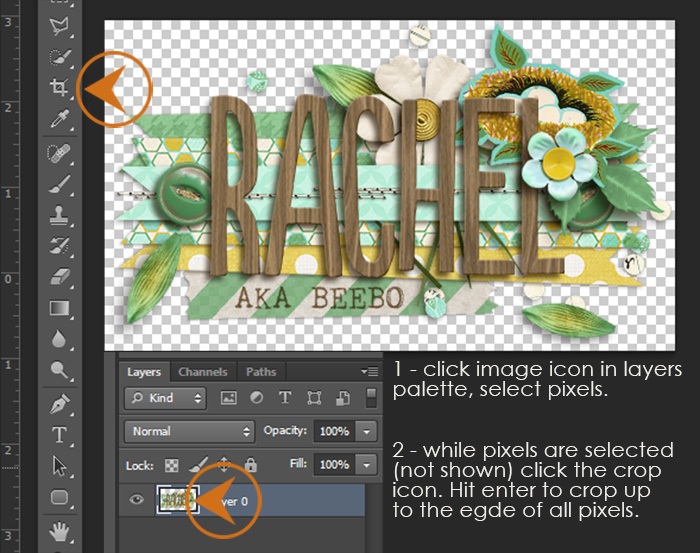
Next, I saved and closed my layered .psd file that I was working on. I re-opened the .png I just saved. On the one and only layer, right click the thumbnail on the layer palette and click Select Pixels. Then, while pixels are selected, go to the toolbar and click on the crop icon. It will automatically crop up to the very edge of the pixels without cutting anything off. This makes your image as small as possible. Hit enter to crop and save.
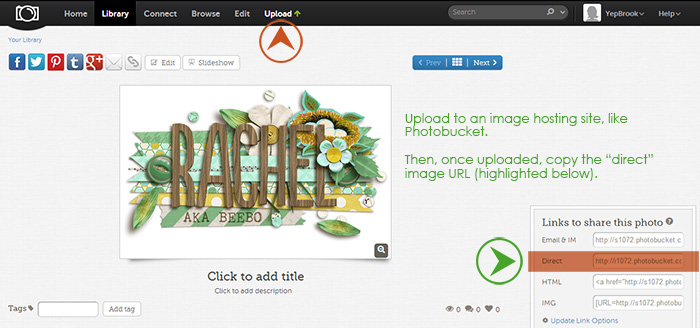
Take this image and upload it to an image hosting site like Photobucket. After uploading, you need to copy the direct url to the image.
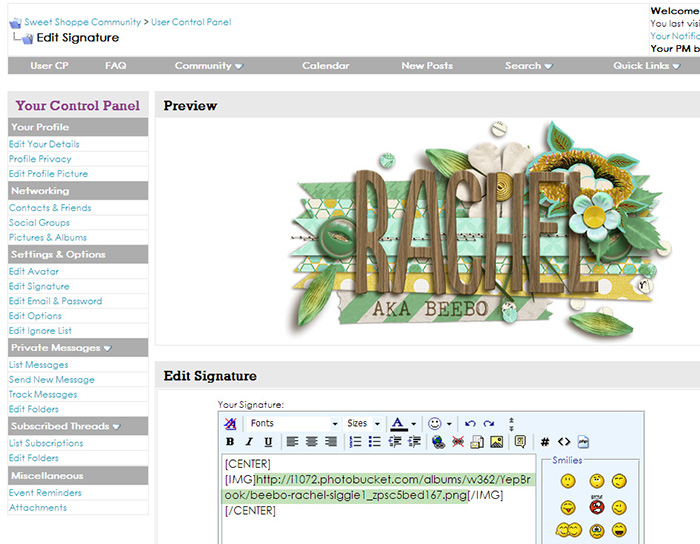
Now go to the Sweet Shoppe forum and click User CP on the top left of the gray bar. On the menu under Settings & Options click Edit Signature. It should look something like this below. Type what I did in the field, replacing your image URL with the green highlighted section. Click save & enjoy!
That’s all for today! Thanks for following along!
-Brook
PS: I will bring you a step-by-step through how to make Mary’s siggie in Part 2! Here’s a little peek of hers:


Tracy Brewer said...
on June 17th, 2013 at 11:04 am
Always wanted to know how to do this and thanks for the tutorial and great help with this one LOVE IT !!
Tracy Brewer said...
on June 17th, 2013 at 11:16 am
Fantastic !!
Shayla said...
on June 29th, 2013 at 6:59 am
What would be even more awesome to know, is how to create links on a siggie. Many people have links to their website, blog, Facebook page, galleries, etc. How do they add those links to an image made to be a siggie? Thanks.
Phoenix said...
on July 12th, 2013 at 4:33 am
Hi! Great tutorial. Helped me get back into creating again. Thank you. Unfortunately being new to the forum I cant add my signature to my UserCP on the forum. Please email me letting me know when I can do this? thank you
Tutorials by Sweet Shoppe Designs » How To Make a Custom Siggie: Part 2 said...
on August 19th, 2013 at 10:31 pm
[…] Hi! It’s Brook again with another siggie tutorial! If you missed Part 1, you can catch up on the basics of how to make your own custom signature graphic to use in the forums here: How To Make a Custom Siggie: Part 1. […]
Donna said...
on August 24th, 2013 at 9:50 pm
I’ve always wanted to know how siggies were made! I don’t have Photoshop but just bought Photoshop Elements….will I be able to follow the tutorial and use that program instead?
Thank you so much for giving of your time to make this tutorial. I’m going to pin this so others know it’s here!!
~Donna
SoniFL said...
on November 7th, 2015 at 7:03 am
Good Golly, Miss Molly! Thank you.
I have always wondered how Siggies were done.
Ebony said...
on September 5th, 2017 at 1:37 am
Thanks! This really helped
Hanna AKA Vrielinkie said...
on July 25th, 2024 at 1:11 pm
Thank you, this helped me make my siggie!
Kiana Fitzpatrick said...
on September 2nd, 2024 at 7:29 pm
That’s so awesome to read Hanna. I’ll have to make a note to check it out!!!