Make a Hybrid Word Album!
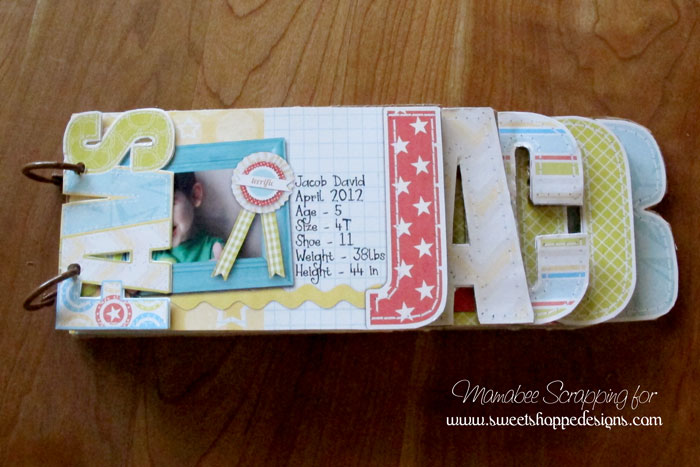
Hi, this is Rebecca and I’m going to show you how to make a chunky cardboard album. I love creating albums out of to be recycled cardboard boxes and I was excited to see that it was also this month’s portfolio challenge! For my album today, I’m adding letters to the edge of the album and design the pages a bit longer so when the album is closed, it spells out a word. For this example, it’s a list of my favorites of my son, Jacob. Let’s get started!
Supplies
- Corrugated cardboard box
- Binder Rings
- Scissors
- Craft knife (optional)
- Adhesive
- Crop-dial or hole punching device
- Digital products of your choice (I used Award Winning by Kristin Cronin-Barrow and Paper Clips – Alpha Stitches templates by Libby Pritchet)
- Photo editing software
Step by Step Directions
1. Open up a blank canvas in your photo editing software. For this tutorial, I’m using Photoshop Elements 7.0
2. Draw a rectangle on the blank canvas to the size you want the height of the album. I like to make these albums about 4 inches high so I can get two album pages from one printed page.
3. Add the alpha you want to use on the edge. I like to use a good chunky alpha because it’s easier to cut the cardboard when it’s less “fussy”… haha
4. Resize the album so that the top of the letter and the bottom of the letter create a straight line with the rectangle. You might have to shift it into the rectangle and erase any overlap with your alpha.
5. Repeat drawing a rectangle and adding letters to spell out your word, shortening your rectangle as you build your album. I like to start at the end of the word since I’m limited by the size of paper my printer prints.
6. Tip – Link the layers together as you figure out the spacing of the letters. If working on multiple canvas, copy over the letter to the next page… remember to unlink the rectangle to shorten or lengthen.
7. Decorate your pages with papers, elements and journaling; and then print.
8. Gather your hybrid supplies and cut the cardboard to the size of your page.
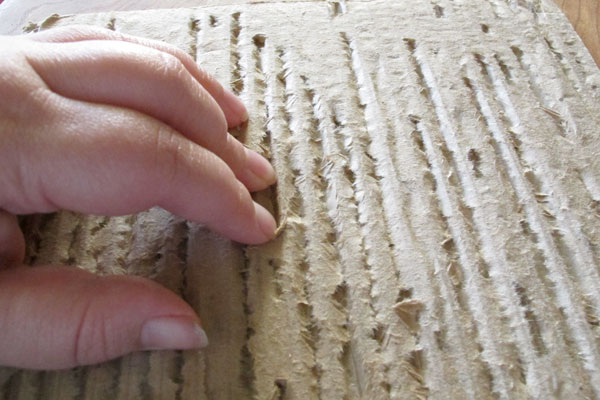
9. Remove the back layer of the cardboard, exposing the corrugating.
10. If you are struggling removing the papers, rub your finger nails in the groves to help expose the ripples.
11. Adhere the page to the cardboard and trim out.
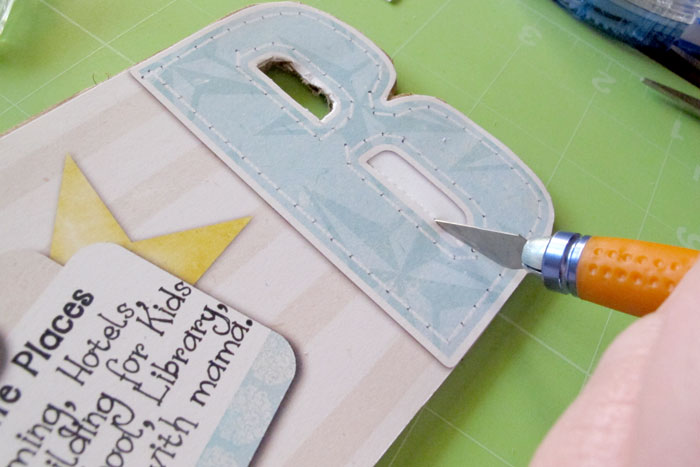
12. Use a craft knife to carve out the centers of letters or to get into tight spots, optional.
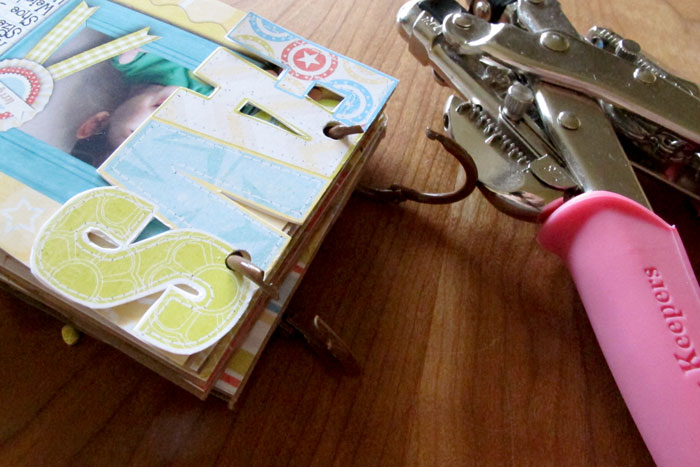
13. Punch holes into the end with a crop-a-dial or hole punching tool and thread in the binder clips.
And there you have it… a very cool album that is easy and inexpensive to create! Talk about wow factor!




Donna E said...
on April 7th, 2012 at 4:02 pm
too cute!
JJ Meyer said...
on June 16th, 2013 at 6:51 pm
This is so cute. Great tutorial and ideas! Blessings.
cynthia said...
on August 3rd, 2013 at 1:11 pm
This is so great….my grandson is graduating next year 2014 and I am going to make one of these with pictures from – – baby to graduation – – for display at his grad. party. Thank you so much for sharing the great TUT.