Think Outside the Album – Custom Drink Tumblers 6/1
Welcome to the second installment in our new series of posts here at the Sweet Shoppe Blog, where we look at different ways we can take our digital scrapbook supplies Outside the Album and use them to make the rest of our world just a little bit sweeter!
How’s your summer treating you so far? Whether you’re relaxing by the pool, sunning yourself on the beach, chasing after the kids, or slogging through your normal 9-to-5, I hope you’re staying hydrated. Making sure you are drinking at least eight 8-ounce glasses of water a day will give you more energy, decreased joint pain, better temperature regulation, fewer headaches, and a better-functioning immune system. The best way to make sure you and your family are getting enough fluids during the summer is to always keep a drink on hand, and today’s project will help make that easy, stylish, and fun.
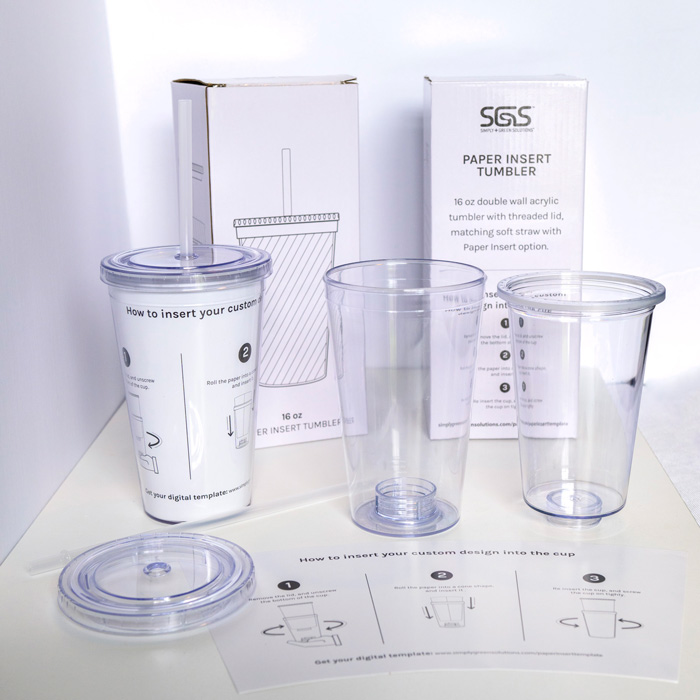
I found these clear 16oz double wall travel cups on Amazon. They are acrylic, BPA-free, and come with a reusable straw and screw-on lid. Best of all, they have a removable insert you can replace with a customized liner to make your cup look any way you want – and with the gorgeous digital scrapbooking supplies from the Sweet Shoppe and a little bit of scrapping magic, the possibilities are endless!
For example, why not make yourself a summer themed tumbler for your trips to the pool?

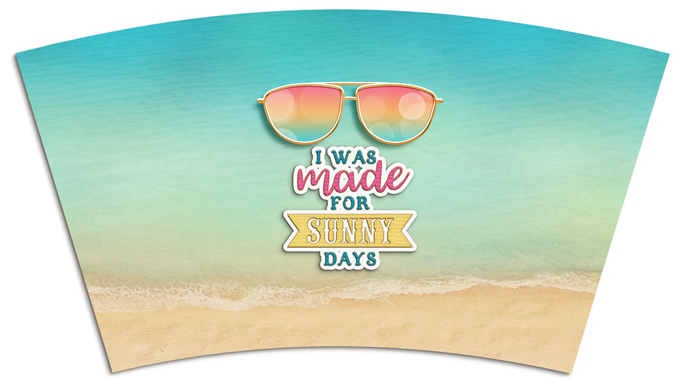
Created with This is Paradise Bundle by Digital Scrapbook Ingredients
Maybe your family has an epic summer road trip planned… if everyone has their own tumbler customized with their name, there’s no spills in the car and no arguing about whose cup is whose!
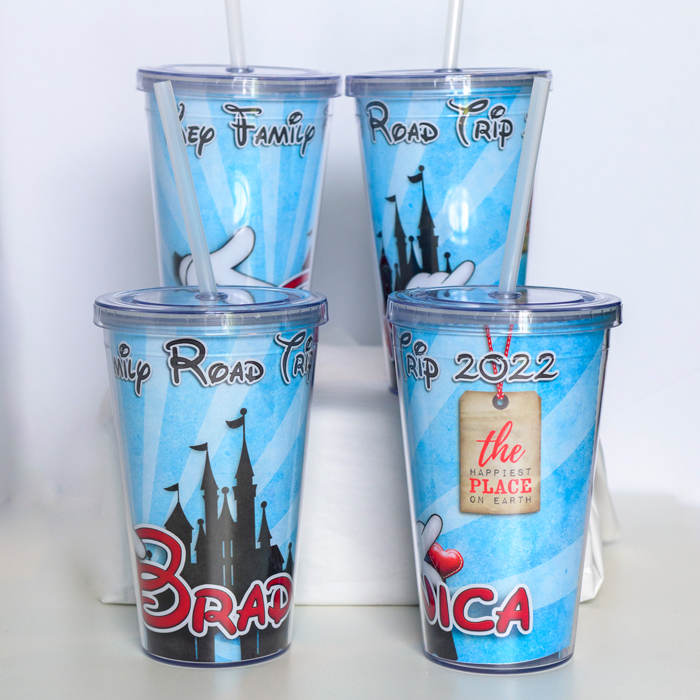
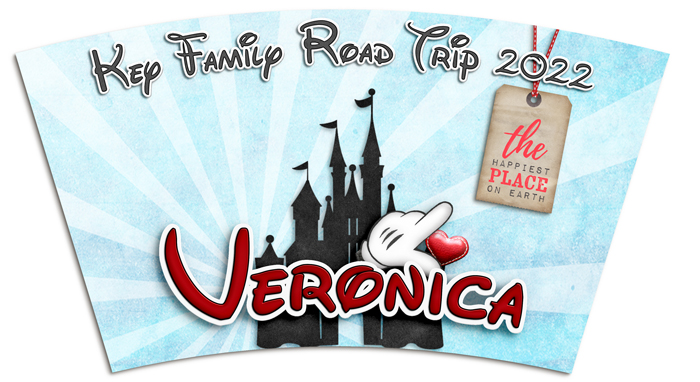
Created with Happy Place Bundle by Simple Pleasure Designs
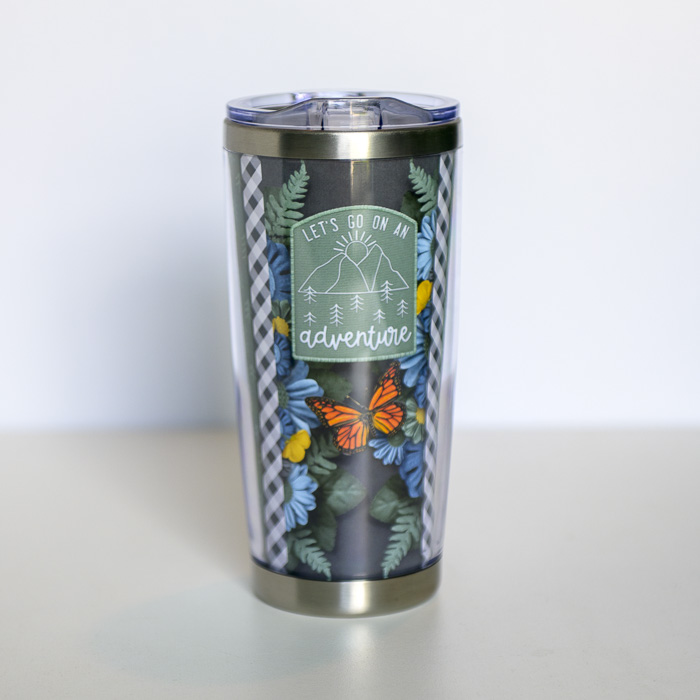
But you’re not just limited to the tumbler-and-straw design. I also found a 20oz Stainless Steel Travel Mug that’s double-walled with a removable and replaceable liner insert. Father’s Day is coming up, and this could make a thoughtful and useful gift for Dad when you create something customized to his interests.
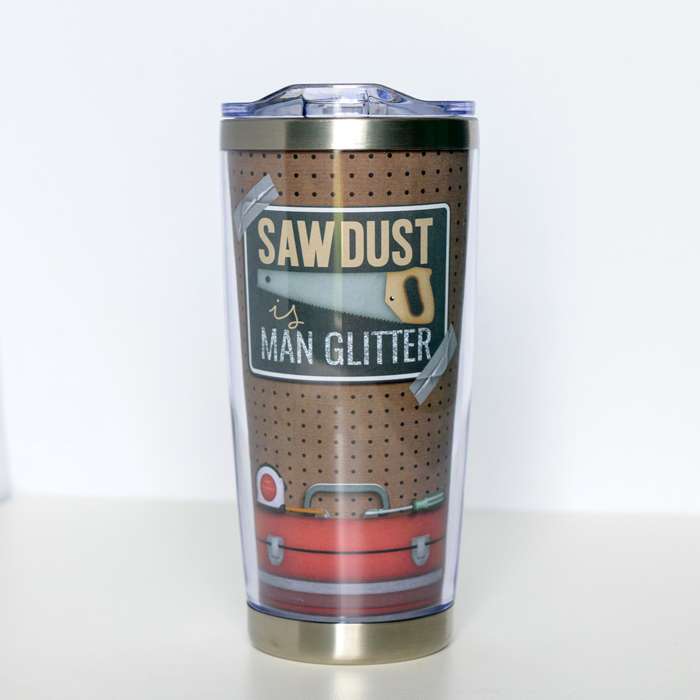
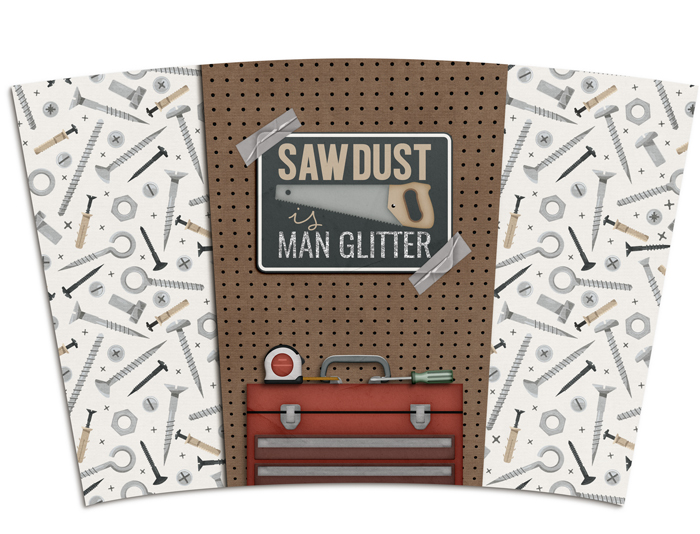
Created with Man Cave Bundle by LJS Designs
If having kids home from school means finding countless cups and glasses left all over the house, why not make a custom tumbler for each child, personalized with their name and interests?
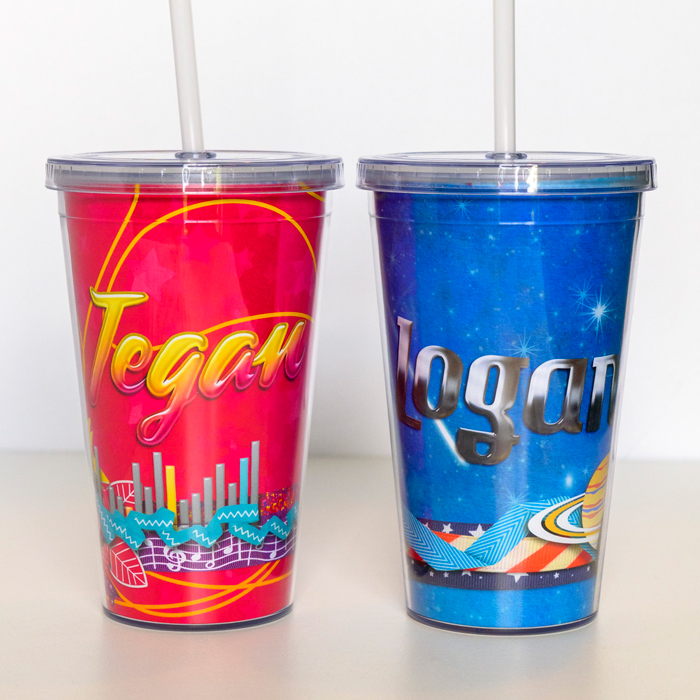
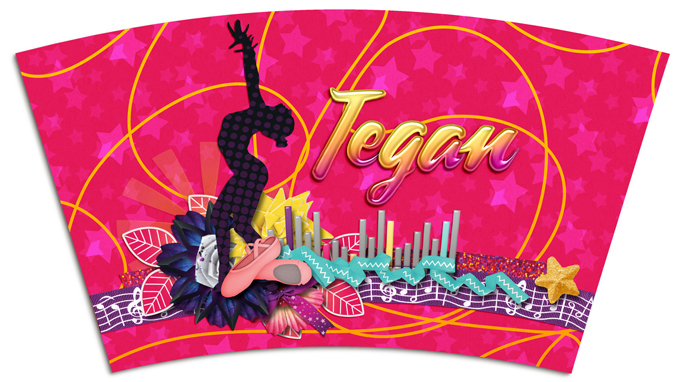
Created with I Like to Move It: Collection Bundle by Meagan’s Creations
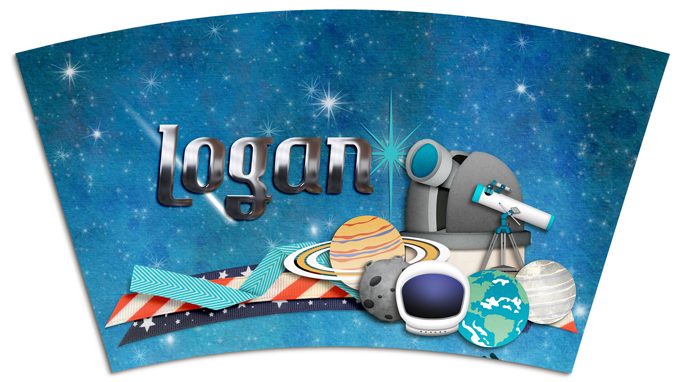
Created with Stargazer: Collection Bundle by Meagan’s Creations
Have a friend who needs a pick-me-up? These make fantastic gifts:
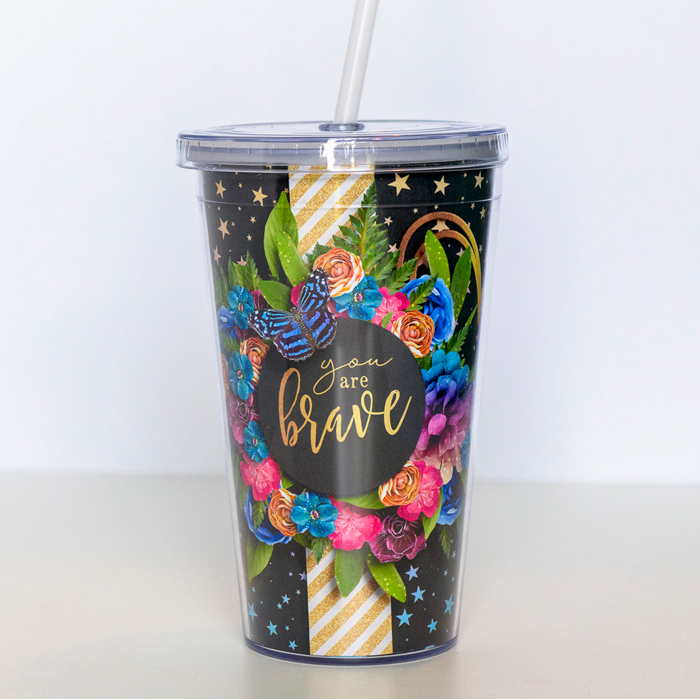
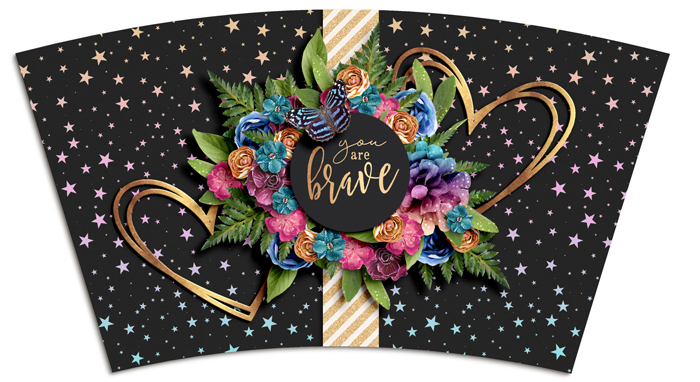
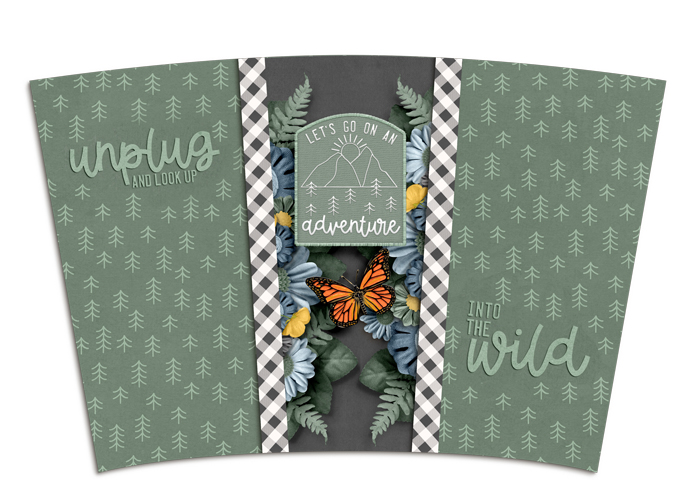
Created with a brand new kit coming to the Sweet Shoppe June 3rd!
As I said, the possibilities are endless!
How to customize your double-wall tumbler:
First, you’ll need to disassemble your tumbler by following the manufacturer’s instructions.
- In the case of the clear acrylic ones made by Simply Green Solutions, they’re printed clearly on the insert. Remove the lid, and gently unscrew the bottom of the cup.
- The OKADI stainless-steel tumbler comes apart in reverse. You unscrew the bottom of the cup, and the inserts are accessible. I was able to separate the inner and outer walls of the tumbler by placing one hand inside the cup and twisting it while gently holding the outside still.
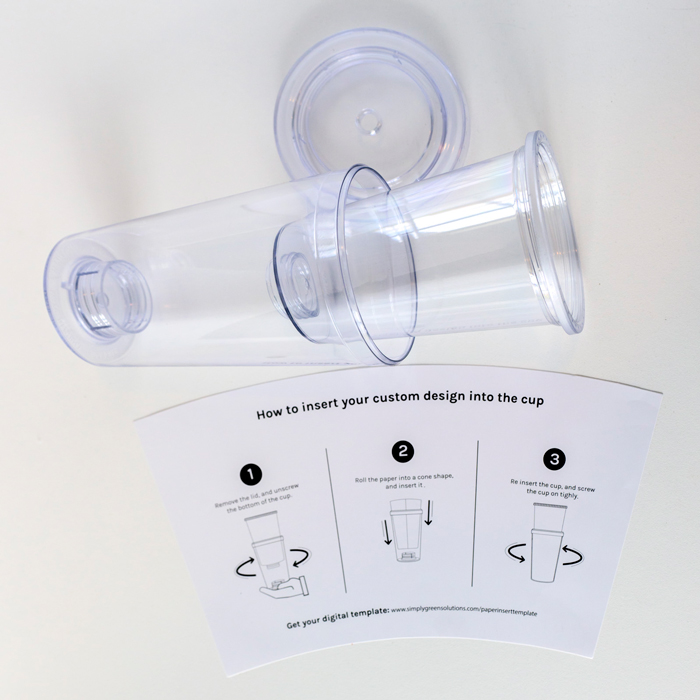
DO NOT THROW AWAY THE LINER! This is your template.
- The clear acrylic tumbler actually has a digital template you can download, as noted on the paper liner!
- The OKADI stainless-steel tumbler – like most other brands you may purchase elsewhere – did not come with a digital template. To create your own, you’ll need to either scan the sample liner into a JPG at 300dpi or photograph it next to a ruler or on top of a ruled grid, such as a cutting mat. Then bring that file into your preferred digital imaging program. You will want to print a rough draft first to make sure your template matches the paper liner before you get too much further.
Or, if you’re using one of these two tumblers, you can make your life easier and just download my template files! I’ve included .PSD, .TIF, and .PNG formats:
Now that you have your template in your program of choice, it’s time to play! Decorate it to your heart’s delight.
A couple design tips:
- Linear designs – specifically horizontal stripes, checkered patterns, and plaids – don’t work well on these unless you want to do some significant work with the Warp tool.
- In order to get a design to follow along the bottom of the cup, use either the Warp tool or a Transform into an Arc shape (play with the % bend, starting at around 20%).
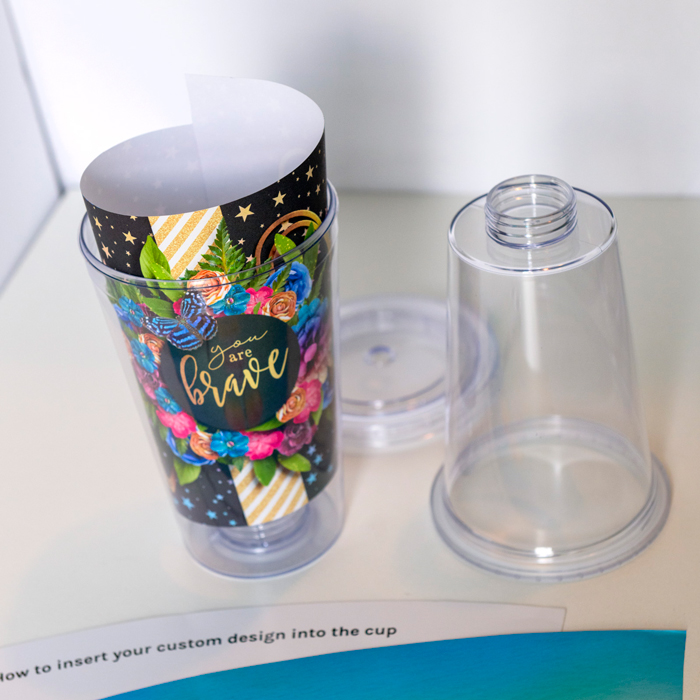
When you’re happy with your design, you’ll print a copy of the finished file either on your home inkjet printer (they fit on 8.5×11 paper, though the SGS template requires you rotate and crop it before printing) or you can send it to a photo printer if you prefer.
Then cut out your insert, roll the paper into a cone shape, slide it into the tumbler, re-assemble the cup, and marvel at just how brilliant and talented you are!
What other ideas do you have for making use of customized drink tumblers? Tell me in the comment section below, and be sure to snap a few photographs of your next project to share in the Gallery. I can’t wait to see what you create when you Think Outside the Album!


Kellie said...
on June 2nd, 2022 at 8:11 am
Wow! Those turned out great. Thanks for the detailed tutorial.
jaye said...
on June 2nd, 2022 at 7:47 pm
Angie, what a fantastic post and project!
Megan Scott said...
on June 3rd, 2022 at 8:23 am
I love this. Easy and fun. Great gifts.
Leablahblah said...
on June 7th, 2022 at 12:46 pm
Those are great!