Think Outside the Album: Snap-On Storage Cube Tags
If you love a well-organized space, raise your hand! Yup, count me in – I own a label-maker and I’m not afraid to use it!
In the past decade, the popularity of shelving units known as cube organizers, cubbies, or locker cubes has grown to the point they can be found in many homes. I think IKEA was probably the first with this shelving system, known as their KALLAX series. But Walmart and Target were quick to offer their own versions, and now they can be found everywhere. It’s a combination of a shelving unit that’s divided into cubes with fabric boxes that fit perfectly on each shelf to provide hidden storage.
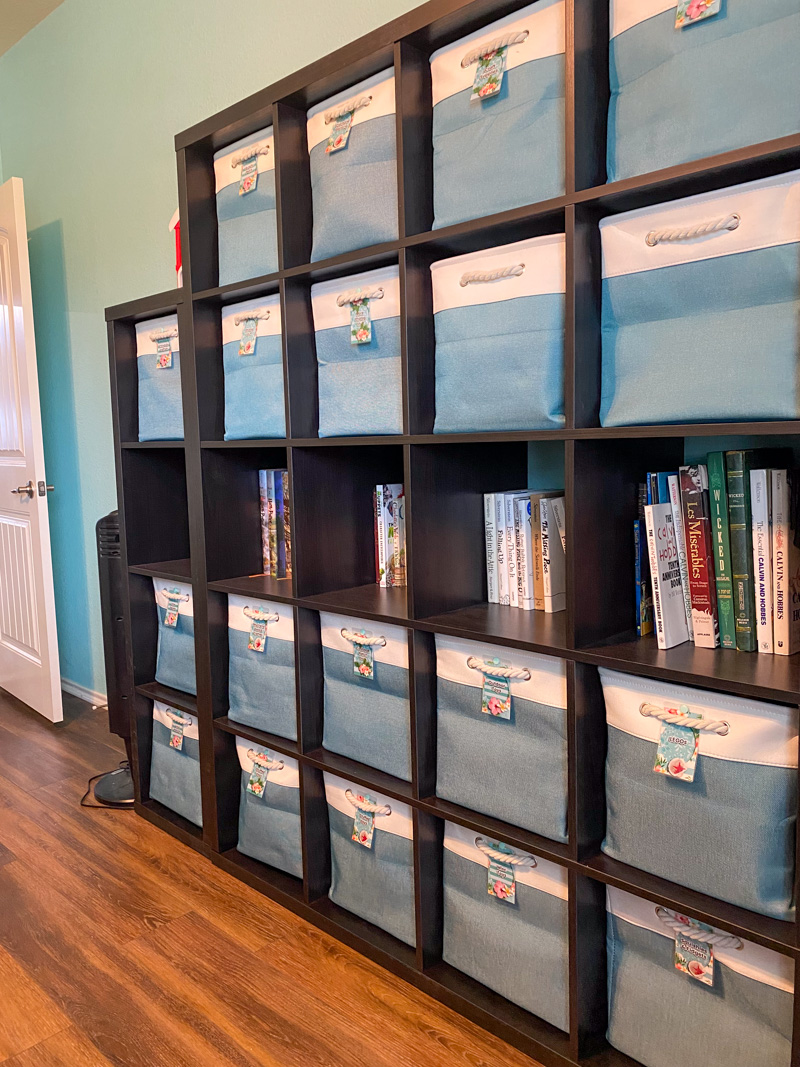
Sometimes these shelving units are utilitarian and hidden in closets; other times they’re made part of the room’s decor with the fabric cubes in different colors and patterns. Personally, I use them in my living room, dining room, front hallway, guest room, and studio to keep things neat and tidy.
But the one challenge I’ve had is remembering what’s in each box. Do I keep the dog’s leashes and harnesses in the 3rd from the end, or is that my hats, gloves, and scarves?
With the cubes being made of fabric, there’s not an easy way to label them – simple adhesive doesn’t stick and eventually peels off. I’ve tried plastic clips that hang on the edge of the box, but they pop off easily. And no matter what type of label I put on them, it’s going to be visible to the entire room, so I want it to be attractive, not just utilitarian.
After researching different ways to label fabric cubes, I came up with an idea that I love! It’s another way to use my digital scrapbooking supplies for a DIY project, and I’m excited to share it with you today. This is the June 2025 installment of Think Outside the Album, where we look at different ways to take our digital supplies off the scrapbook page and, instead, use them to make the rest of our world just a little bit sweeter.
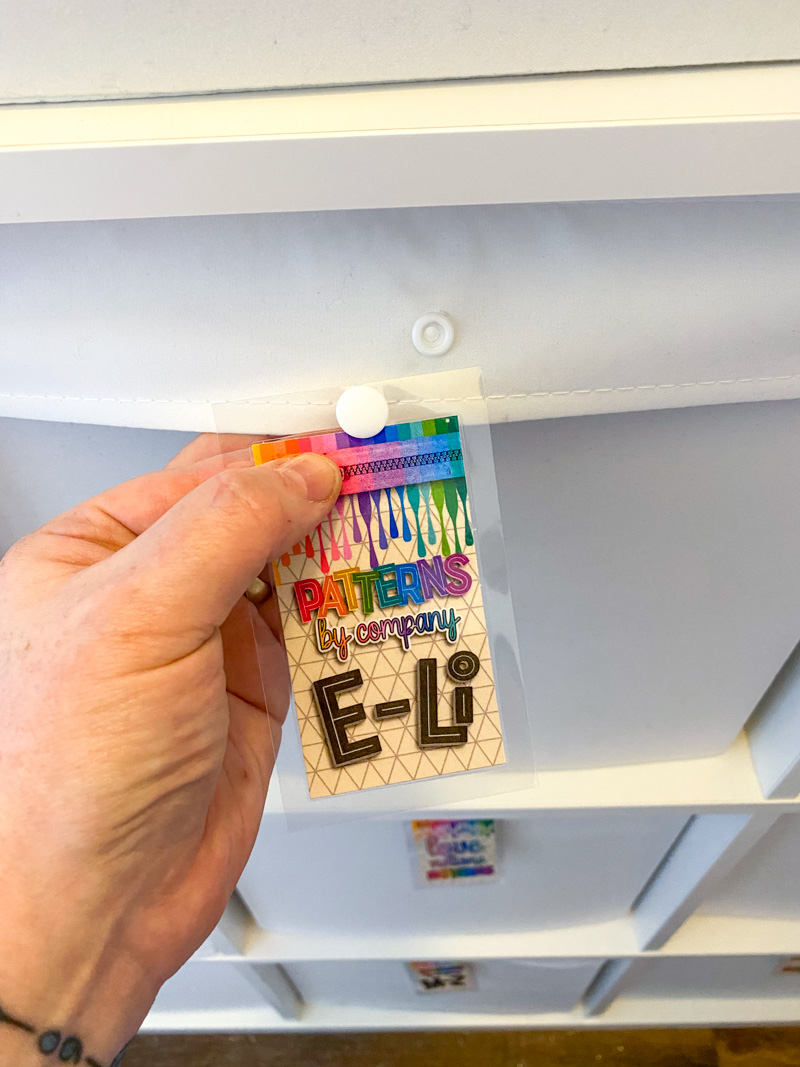
Today’s project focuses on a cute DIY tool to help with home organization (and a little home decor, too!). We’re making custom snap-on tags for fabric cube storage.
Here’s what you’ll need:
A color printer
For this project, either inkjet or laser is fine. I used my HP OfficeJet Pro 9010 All-In-One.
Quality printer paper, preferably bright and on the thicker side.
I recommend 48lb and up, with the highest brightness rating you can find. I used HP Professional Business Paper (48lb, 180g/m, glossy) for this project.
Digital scrapbooking supplies from the Sweet Shoppe
I had a lot of fun picking out kits that complemented the room for each set of tags!
A way to cut out your tags
A paper trimmer with cutting blades works well for this project. Alternatively, you could use a rotary cutter and ruler or a basic pair of scissors.
A way to laminate your tags
I own a small personal laminating machine (an older version of this one) and use it for all sorts of crafting.
If you don’t have a way to laminate at home, you can take your printed tags to an office supply store or teacher supply shop and pay to have them laminated instead.
Plastic snaps
For this project, I recommend Size 20 regular-length plastic snaps. You’ll need 2 caps, 1 socket, and 1 stud for each tag. I buy my plastic snaps from Kam Snaps and highly recommend all their products. You can also buy other brands of plastic snaps from Amazon or Walmart as well as your local fabric store, sewing shop, or craft store.
The right tool to attach your snaps
I own a Kam Snaps multi-functional press that I use for a variety of sewing tasks. Paired with the dies for plastic snaps, it makes installation quick and easy. They also offer a less expensive set of pliers that just does plastic snaps, if you don’t plan to ever install things like rivets, grommets, and studs.
Alternatively, some plastic snaps can be bought in sets (such as these from Amazon) that includes a set of pliers for snap installation. Or older sets sometimes come with a tool you use with a hammer to set the snaps.
A fabric storage cube that needs labeling
This kind of goes without saying, but you’ll also need the storage cube you’re labeling. I’ve done this on cubes purchased from a variety of sources, including IKEA, Amazon, and Walmart.
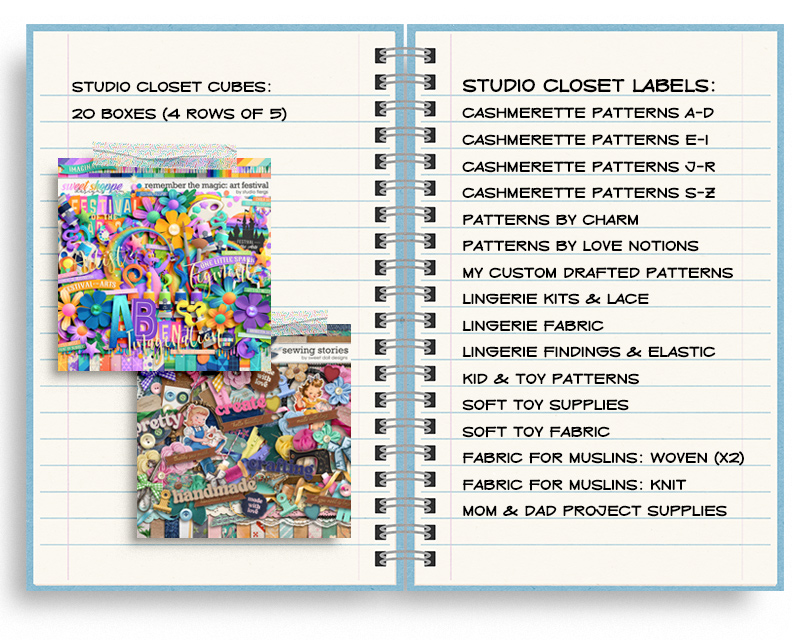
Step 1: Make a list of your cubes and what’s inside
Trust me, it’ll save you a lot of hassle if you make a list of the tags you need before you open your design software! Just grab a piece of scrap paper and make a list of your cubes and what’s inside. For this example, I’m making tags for the storage cubes in my studio closet. Here’s what part of my list looks like:
Step 2: Set up your canvas
Now that you know what tags you need, launch your preferred digital scrapbooking software (I use Adobe Photoshop) and create a new document that’s the same size as the paper you’ll be printing on. (ex: 11″ wide by 8.5″ high at 300dpi)
Use the shape tool to create a rectangle the exact size of the tag you want to create. I’m going with the size of a business card, so mine are 2″ wide by 3.5″ high.
Duplicate that shape as many times as you want to fill your page. Printing on letter-size paper, I’m able to fit 10 tags on one sheet: 2 rows of 5 tags.
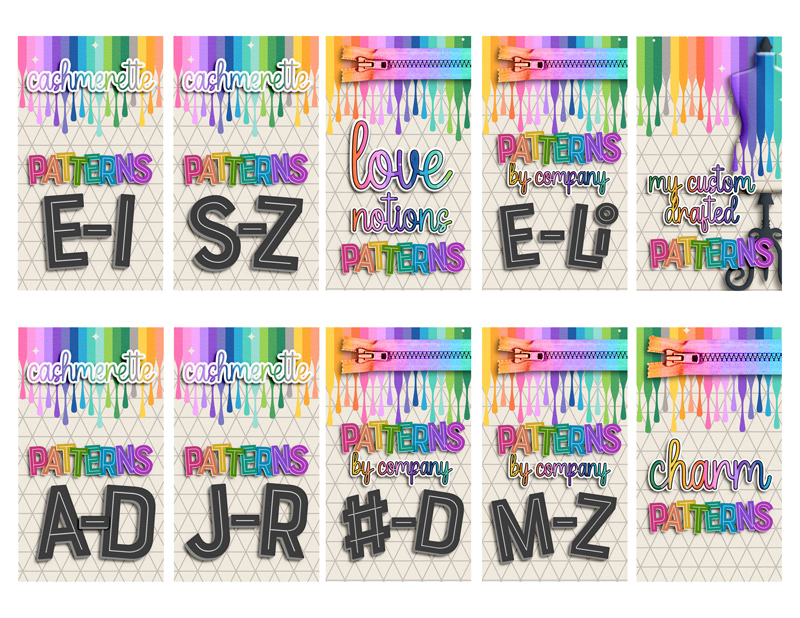
Step 3: Design & decorate your tags
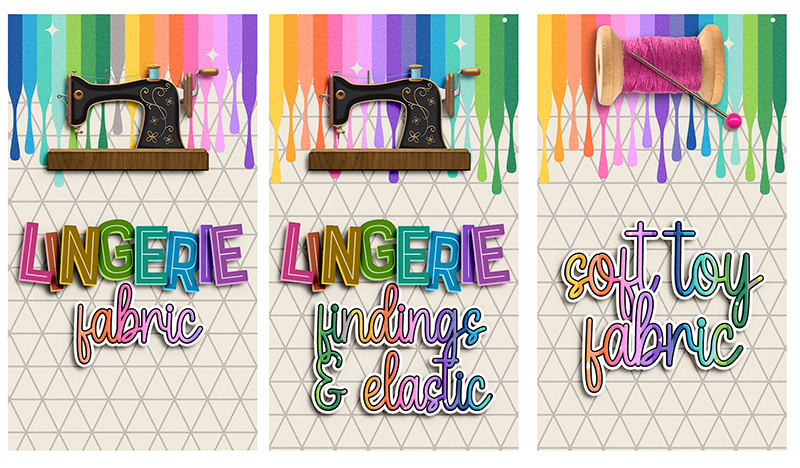
Pull out the digital scrapbooking supplies you’ve chosen and have a blast decorating your tags. Since I’m creating tags to label a set of storage cubes in my studio. I decided to use Remember the Magic: Art Festival by Studio Flergs as my primary set of supplies, and I’m adding in small themed elements from Sewing Stories by Sweet Doll Designs.
IMPORTANT: Make sure your text is legible!
It’s easy to get swept away by gorgeous, artistic digital scrapbooking supplies and forget that – first and foremost – these tags must be functional. That means whatever text you add to the tag must be not only legible, but easily read. I had fun using alphabet stickers from this kit to create word art for words like “Patterns” and “Lingerie”, but also I made sure that the most important words were easy to read. Here’s my advice:
- Choose a font that’s super legible. Scripty fonts with swashes and curls are gorgeous, but not always the easiest to read. For my labels, I used the font Monday, which I found very readable.
- Add contrast between your text and the background by incorporating one or more strokes. Add a thick white stroke outside the text to turn it into a sticker. Layer another thinner stroke in-between in a contrasting color to really set off the text.
- A good drop-shadow can also help. Especially if you’ve added a white stroke to the edges of your text, incorporating a dense drop-shadow can help set it off from the background and make it even more easily read.
Step 4: Print & trim your tags
When you’re happy with your design, send your completed tags to your printer. Be sure to configure your printer settings to the Highest quality (rather than draft) and allow lots of time for the ink to dry.
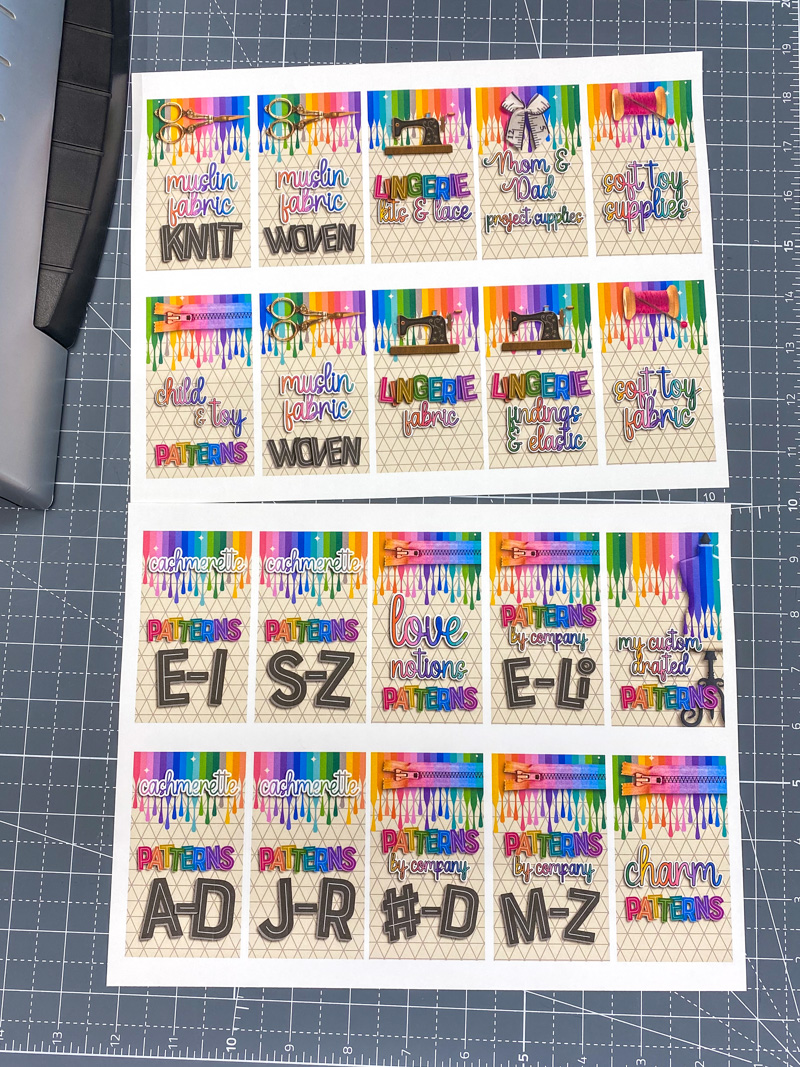
Then you’ll want to cut out your tags. Take your time, trimming off all the excess white paper around the edges, and when you’re done you should have a stack of tags ready for the next step.
Step 5: Laminate your tags
Laminating makes all the difference in the longevity of your tags. Whether you use a small home machine like I did or take it to an office or teacher supply shop and have them laminate it instead, you’ll be glad you took the time for this step.
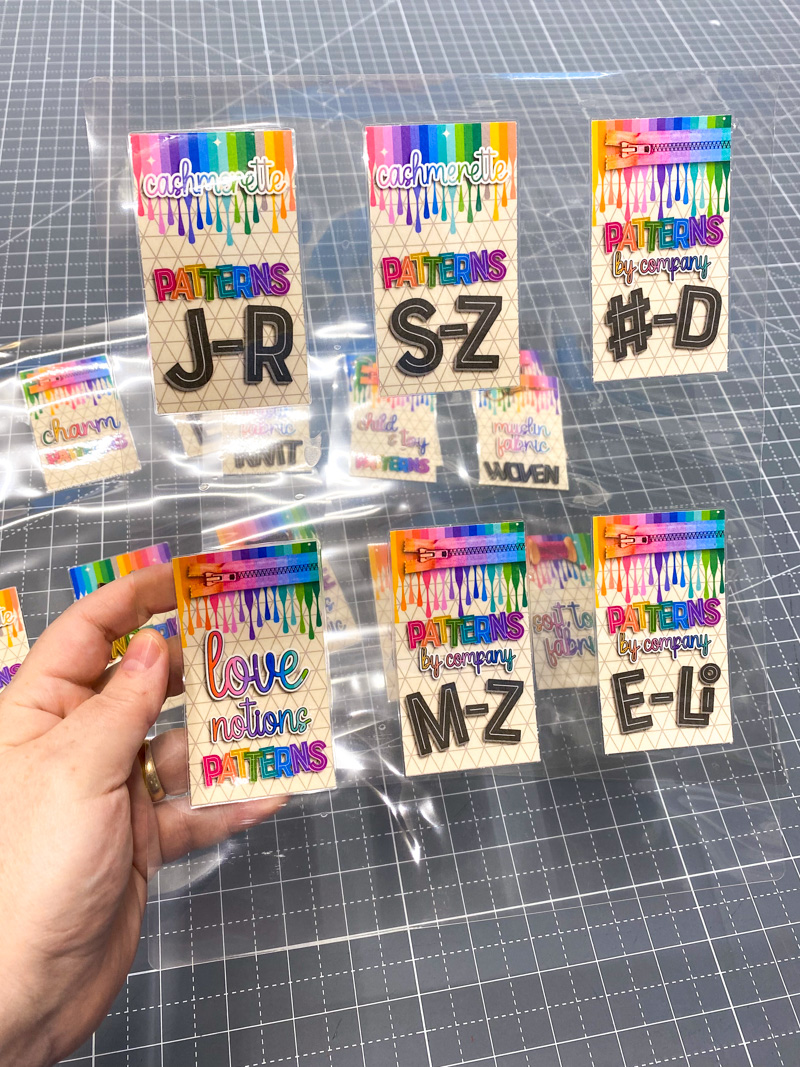
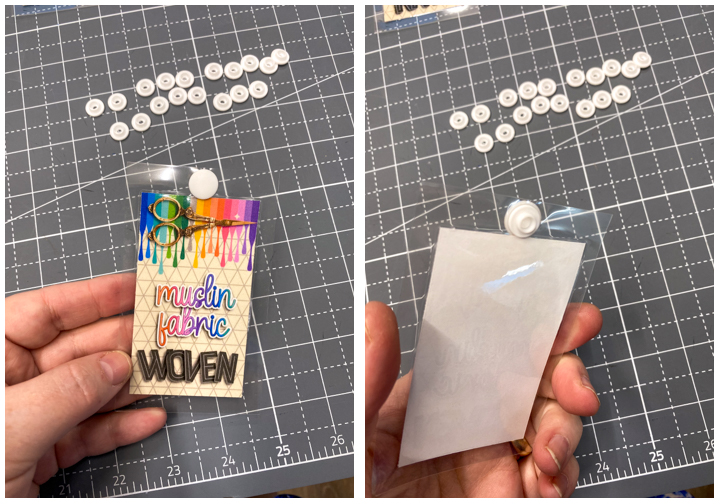
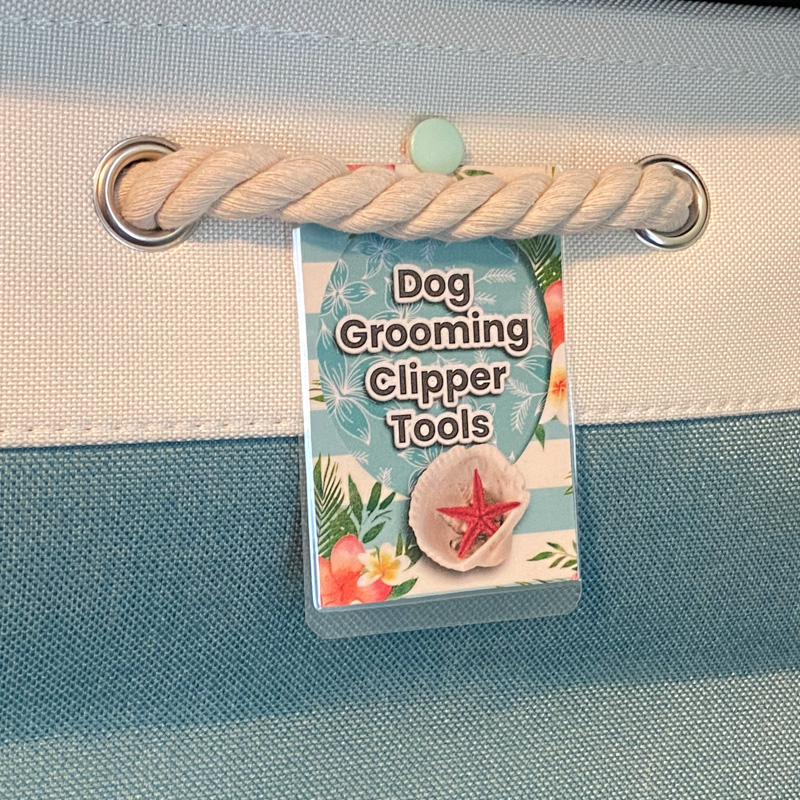
Next, you’ll need to trim your laminated tags. Be sure to leave a border of the clear lamination around the edges; I left 1/4″ on the left, right, and bottom, and 1/2″ along the top.
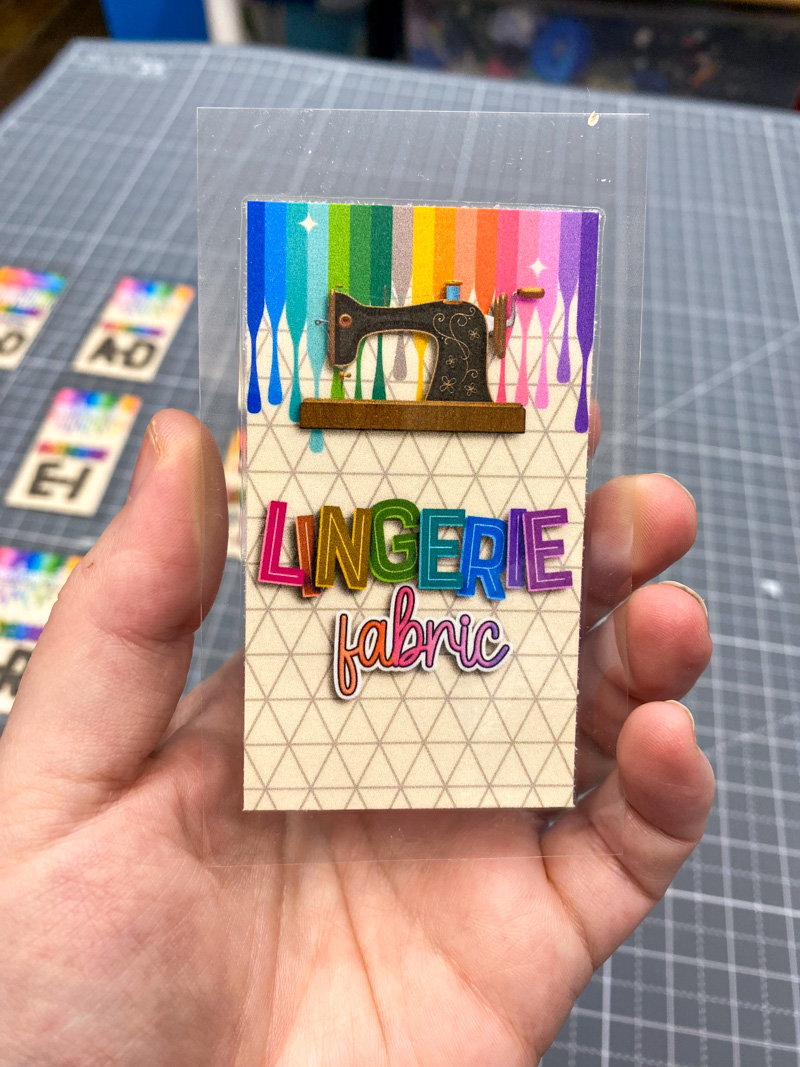
Step 6: Install the snaps on your tag and cube
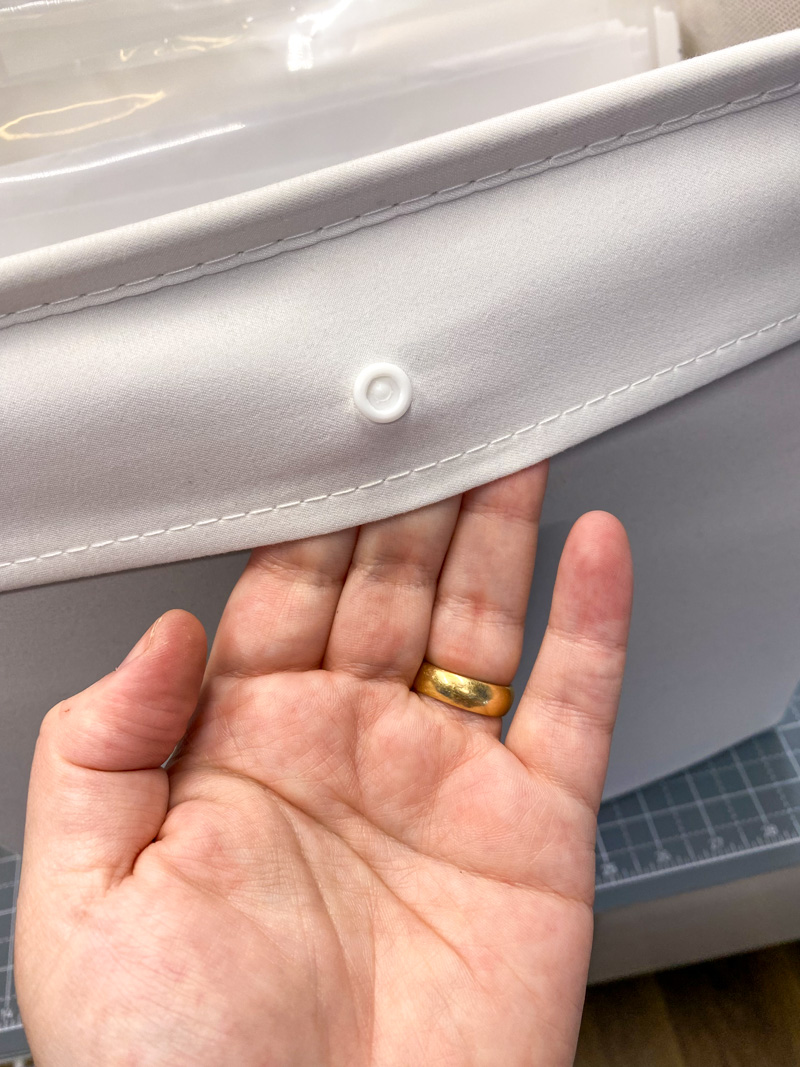
Now it’s time to put it all together! Following the instructions for your brand of snaps and the tools you have to install them, you’re going to attach one side of the snap to the tag and the other side of the snap to the box.
Take a close look at the snap hardware. You’ll find that one side contains the socket, which looks like a small cup (also referred to as the “female” side), and the other contains the stud, which pokes out (also referred to as the “male” side).
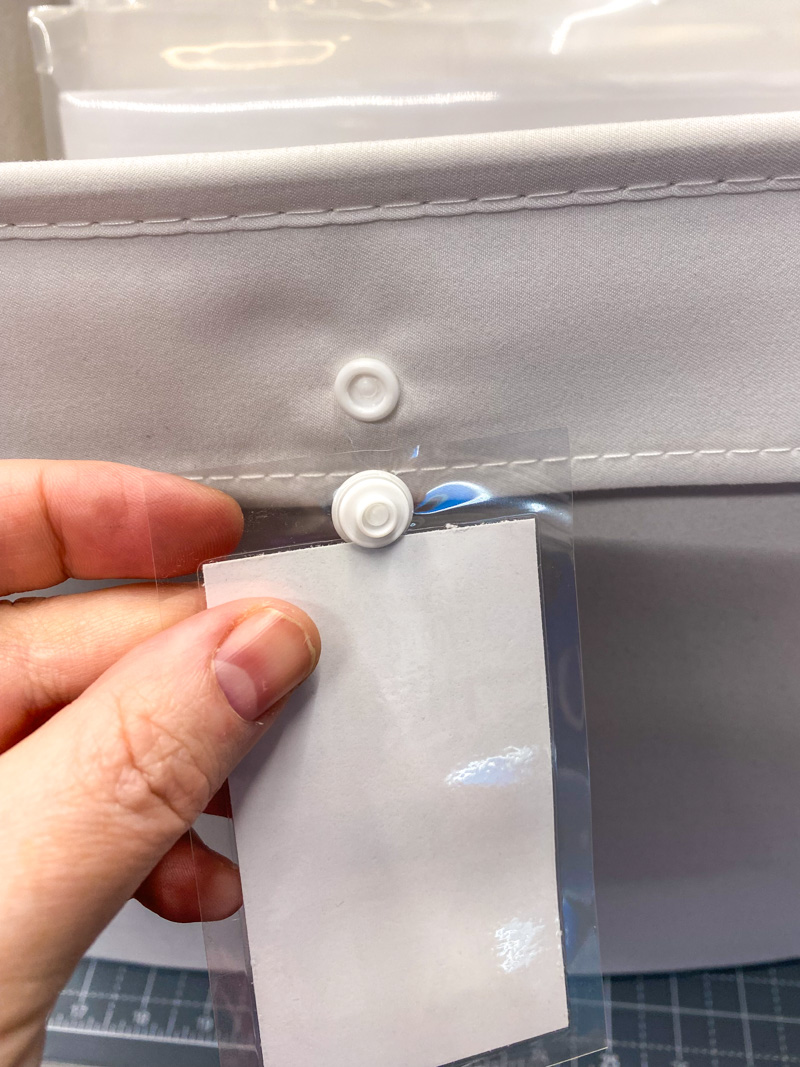
It doesn’t really matter which one you install on each side, just as long as you’re consistent. Personally, I installed the stud or “male” side on all my tags and the socket or “female” side on all my boxes. That way, if I need to re-arrange the tags and attach them to different cubes, they’ll still pair up and snap together.
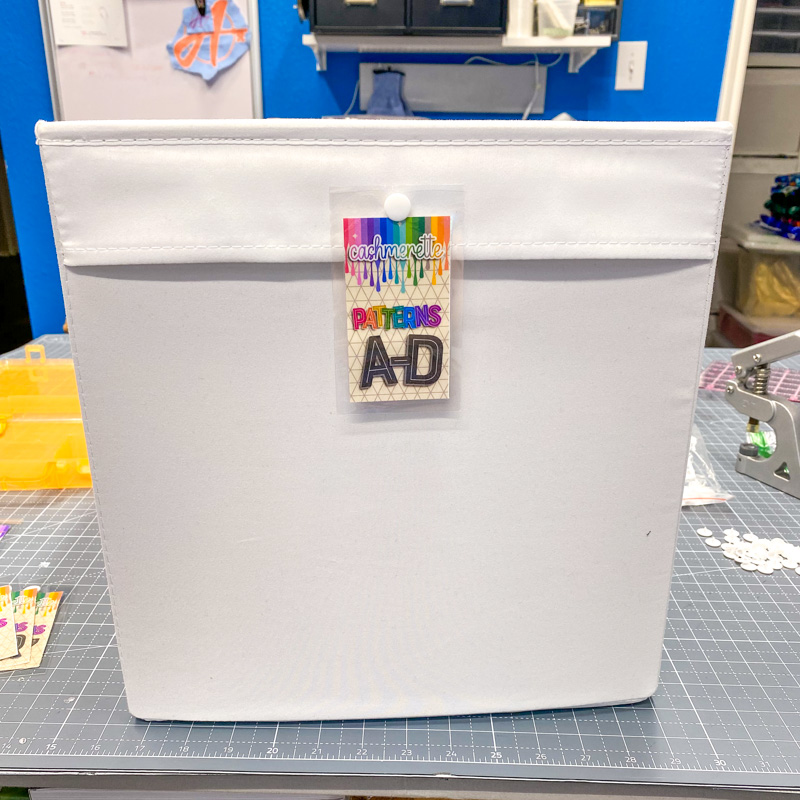
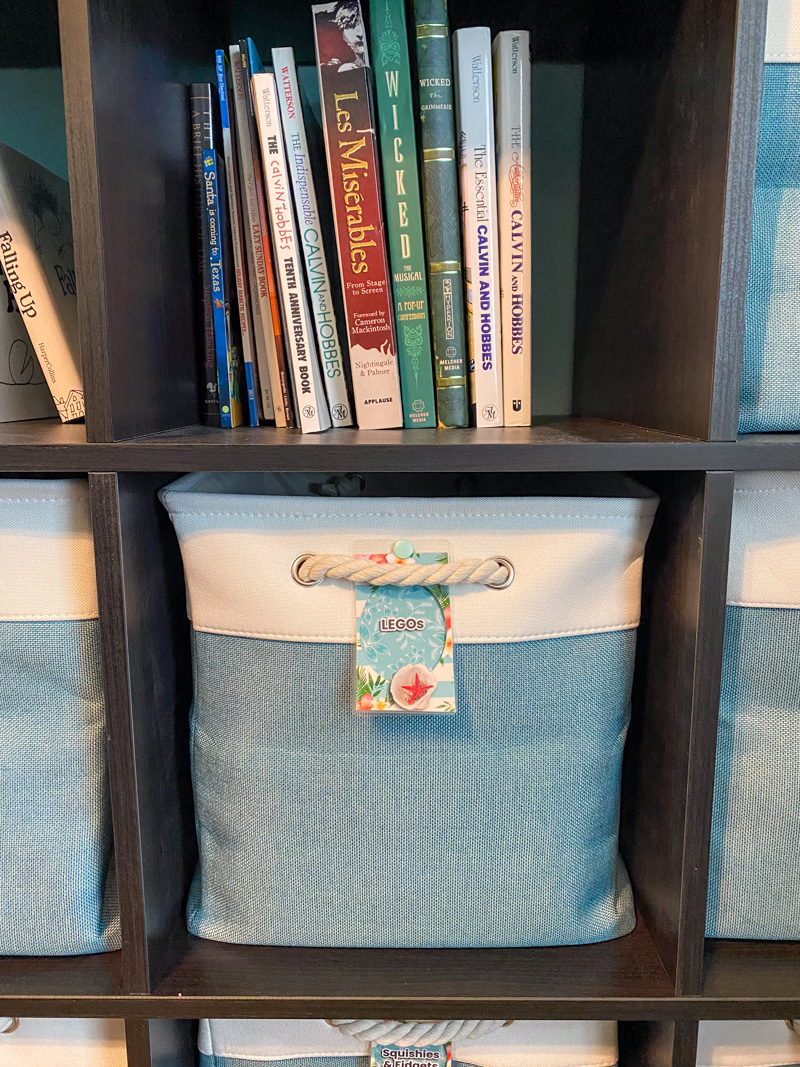
When you’ve got all the hardware in place, simply snap the finished tag onto the cube and voila! You’re done!

DIY Versatility: Same Project, Different Room
In addition to the cubes in my studio, I also created a set of these tags for the storage unit in our guest bedroom. We call that space our Ohana Room, as it’s where family and friends who are family stay when they visit.

I wanted something a little more decorative for these tags, so I pulled out a Hawaiian-themed collection by Kristin Cronin-Barrow – A Beach Tale: Collection – and created a set of tags that complements the room’s decor.
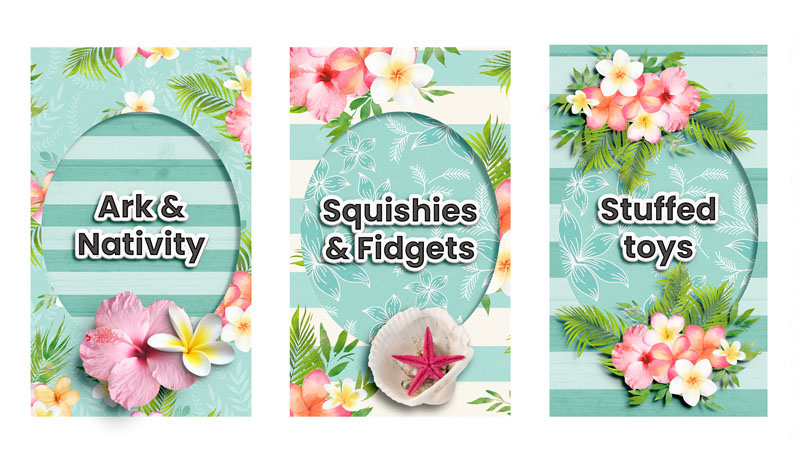
Now, despite the fact that these cubes hold everything from toys for my grandkids to crafting supplies and dog grooming supplies, they look lovely, neat, and tidy and perfectly complement the rest of our beach-themed Ohana Room.
Whether you’re organizing a utility room, de-cluttering a closet, setting up storage in your family room or even helping your college student configure their dorm room, cube organizers are an easy, inexpensive solution. And now that you know how to use your favorite digital scrapbooking supplies from the Sweet Shoppe to create snap-on tags that are both decorative and functional, there’s nothing you can’t organize!
Hopefully you’ve gotten a bit of inspiration from today’s post and some ideas for your next DIY organizing project. Be sure to snap a photo or two and share them with us in the Hybrid Project Gallery … because I can’t wait to see what you create when you Think Outside the Album!