Think Outside the Album: DTF Transfers
A bright and cheery hello to all my Maker friends out there! It’s been a while since we’ve done a blog post in this series, but we’re baaaaaack with fun ideas for how you can use your digital scrapbooking supplies to make the rest of your world a little sweeter. It’s Think Outside the Album, and this month, we’re creating a project you can wear.
We’re talking about Direct-To-Film (DTF) Transfers, and you’re going to love just how easy these are to work with!
Before we go any further, though, it’s time for a quick but important reminder about licensing and terms of use. When you buy digital scrapbooking supplies from the Sweet Shoppe, they come with a license for personal, non-commercial use. That means you may use it to make t-shirts, sweatshirts, tote bags, and more for yourself, your family, and as gifts for the people you love. You may NOT make items that include or use these designs and sell them on Etsy, on your website, or as a fundraiser, no matter how good the cause. If money is changing hands, it’s considered commercial use, and you may only use SSD supplies for that if you have prior written permission from the designer. So personal, non-commercial use only. Got it? Cool.
The best option for wearing your Digital Scrapbooking supplies
There’s several different ways you can use your digital scrapbooking supplies to create wearable art. In past blog posts, we’ve demonstrated how to use heat transfer vinyl (HTV) with a digital die cut machine like a Cricut or Silhouette (October 2023’s post here and April 2024’s post here) as well as how to use printable iron-on transfers (June 2022’s post here).
But there’s a downside to both of these methods.
The downside to HTV is that the image needs to be made up of solid-color shapes, so you can’t use photo-realistic designs.
And while printable iron-on transfers allow for photo-realistic images with gradients and drop-shadows, they’re simply not as durable as we’d like. Colors often fade after the first wash and if you dry your garment in a dryer rather than air-drying it (and realistically, who air-drys kids clothing?) the transfer can begin to peel at the edges.
The answer to both issues? It’s DTF Transfers.
What is DTF?
DTF stands for “direct to film”. It’s a method of imprinting items with a custom design that’s different from the traditional DTG (“direct to garment”) or screen printing methods.
With a DTF transfer, your design is printed onto a sheet of PET film. PET stands for Polyethylene Terephthalate (say that one five times fast!); it’s a type of plastic that can withstand high temperatures, allows ink to stick to it during printing, and releases the ink cleanly onto fabric when heat is applied. When you’re ready, you place the film with your design directly on the shirt, bag, or other item and apply heat. Place it, press it, and peel it – and you’ve got a gorgeous, full-color, vivid custom image!
DTF works on all fabrics including cotton, polyester, rayon, bamboo, and blends, and doesn’t require a white border around your image. Best of all, the designs stretch without cracking and, depending on the printer, are rated for over 100 washes.
How to print a DTF transfer
As hobbyist crafters and makers, we live in wonderful times because DTF is both available and accessible to us. But I have good news and bad news.
Here’s the bad news: a bare-bones home DTF printer set-up starts around $1,000 – $2,500 and will not only require a high level of maintenance, but give you less consistent results than professional DTF set-up. Realistically, you’re looking at $2,000-5,000 to get started with printing your own DTF transfers at home.
But the good news is you can easily order your transfers from a professional printer online.
Many companies have no minimums – meaning you can order just one DTF transfer of a design rather than having to order a batch of 10 or more – and the pricing is super reasonable.
Open your favorite search engine and look for “order DTF transfers” along with your country of origin, and you’ll get numerous results to choose from.
The company I use is Ninja Transfers, and I have no affiliation with them other than being a satisfied customer. I purchased all the transfers with my own money and this is not a paid advertisement for their company… but I can say I’ve been highly pleased with the results and I’ll be ordering from them again in the future.
How to create your DTF transfer
The short version is: use your software to create your design with a transparent background, and save it as a transparent PNG at 300dpi.
For the longer version, let’s use my first project as an example.
DTF Project #1: Band Nerd T-shirts
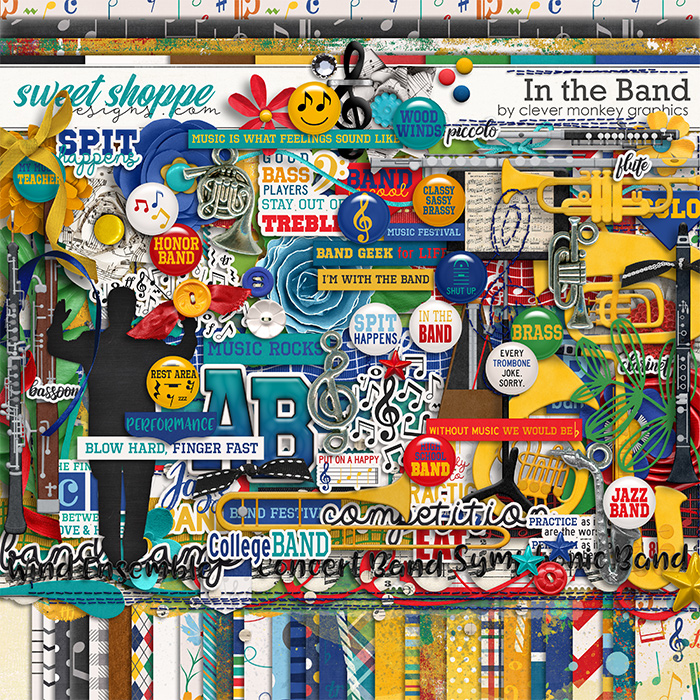
My grandsons have both entered the age when it’s tough to shop for them. But a custom t-shirt centered around their interests is usually a big hit. They’re both active in their schools’ band program, so I pulled out In the Band by Clever Monkey Graphics and got to work.
My older grandson is a percussionist and plays bass drum during marching season. Here’s what I did with for his shirt:
- Open your preferred digital design program. (I use Adobe Photoshop.)
- Use your digital scrapbooking skills – and your digiscrap supplies – to create your custom design.
- Turn off the background layer so it’s transparent.
- Export your image as a transparent PNG at 300dpi.

Created using In the Band by Clever Monkey Graphics
That’s all it takes to create the file you need for your DTG Transfer!
And my younger grandson plays trombone, which is an instrument that plays music written in bass clef (as opposed to treble clef). Here’s what I came up with for him:
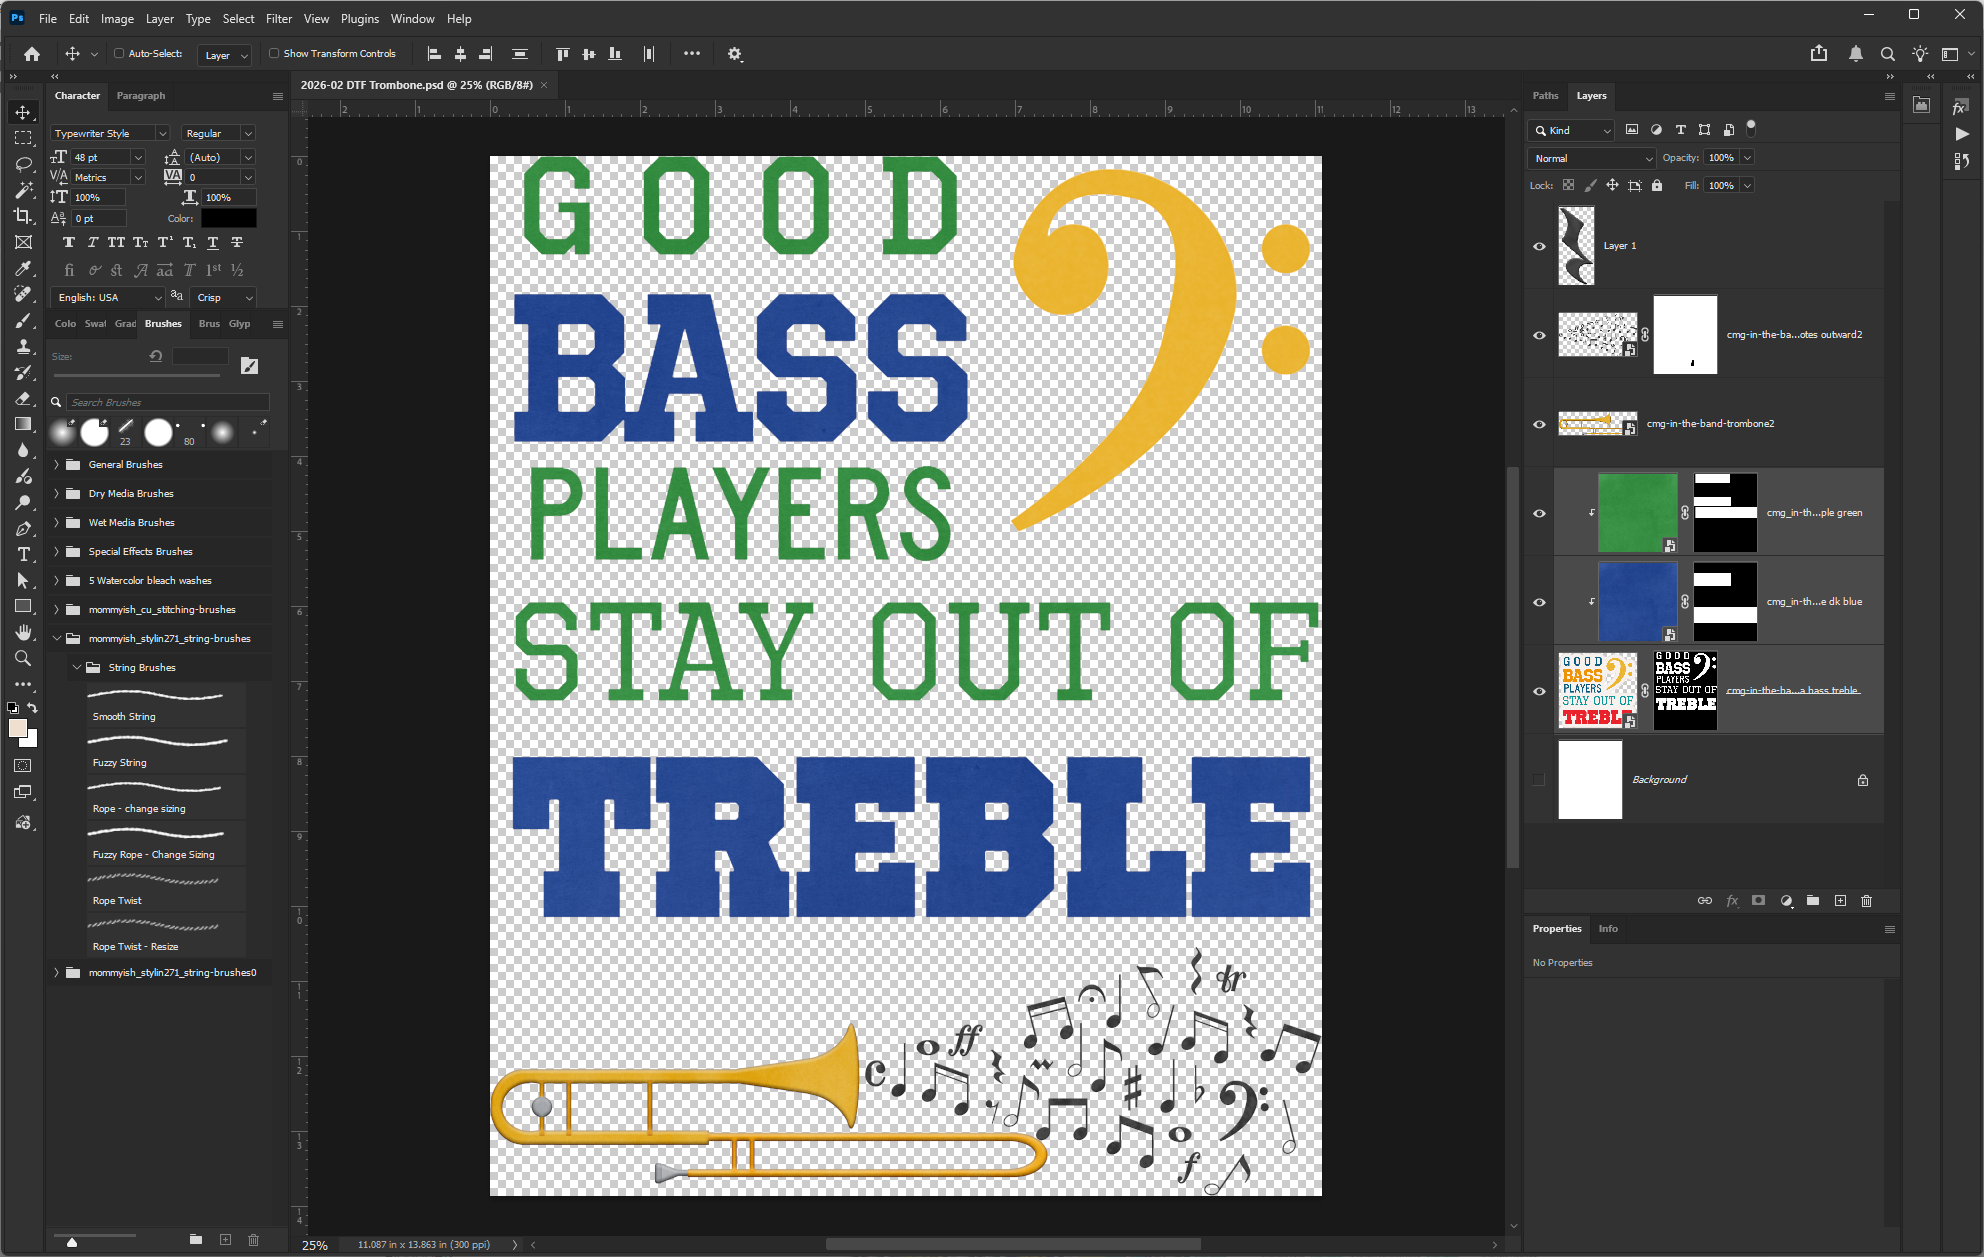
Created using In the Band by Clever Monkey Graphics
Then it was just a matter of uploading my PNG files to Ninja Transfers, specifying the size, and paying for my order.
When I placed my order with Ninja Transfers in early 2026, the DTF transfers sized ran me $4.28 for the first one and $5.81 for the second.
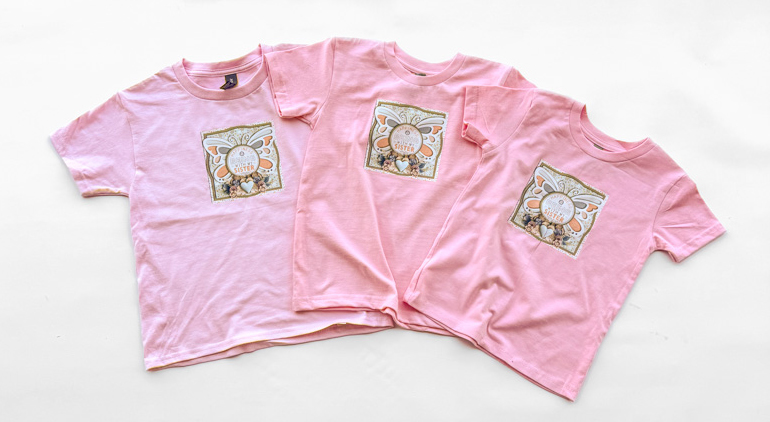
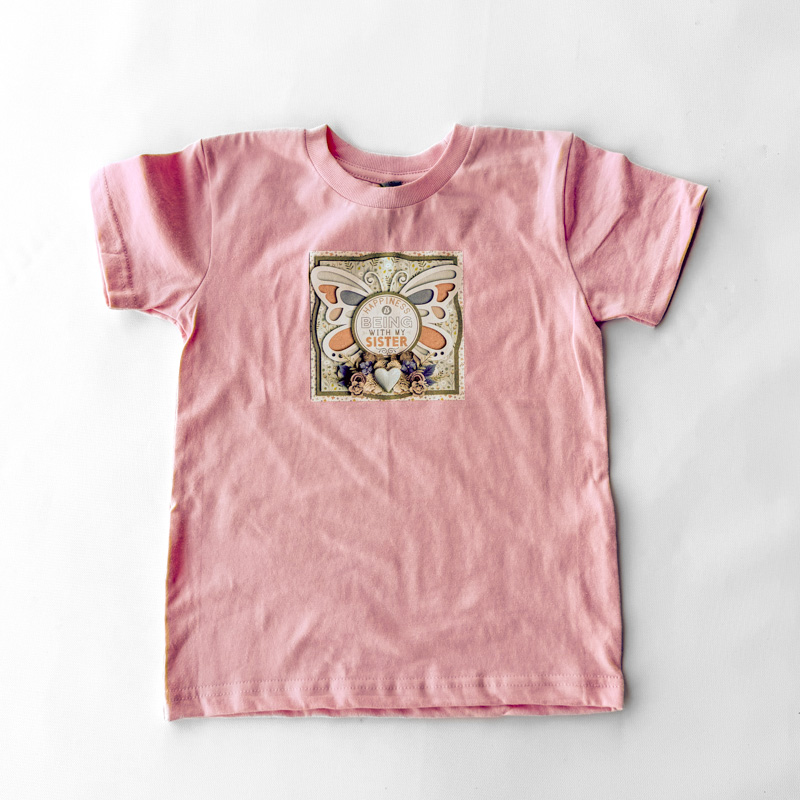
DTF Project #2: Three “Sisters” T-shirts
Before we learn how to transfer your DTF design onto a shirt, let me introduce my second project. You see, it’s a good idea to batch together several transfer designs and order them all at once if you want to save on shipping – so plan ahead if you can.
For my second project, I wanted to play with images that had more dimension than the flat illustrations on the shirts for the boys. I have three granddaughters – all sisters – and matching clothing is always a hit with them.
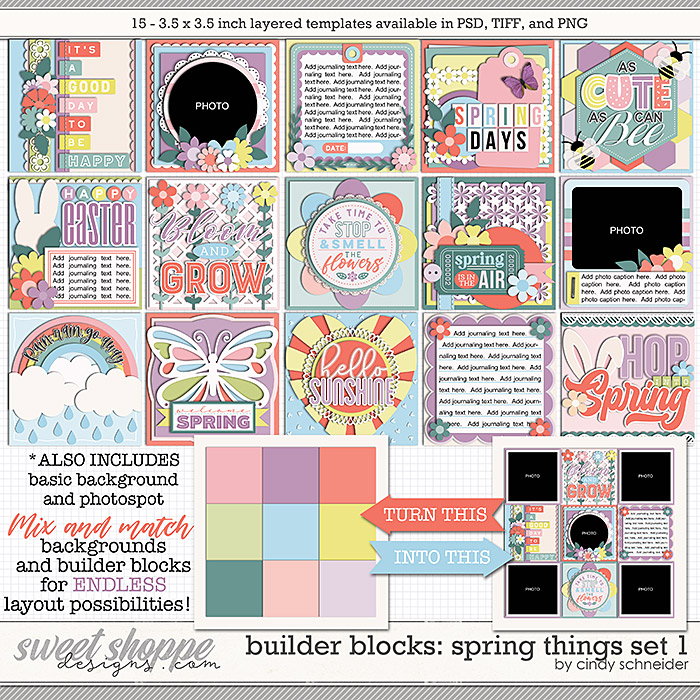
First, I pulled a template from Cindy Schneider’s Building Blocks series – Spring Things Set 1 – the butterfly you’ll see in the 3rd row, 2nd column of the preview image – and resized it to 5″ x 5″ in size.
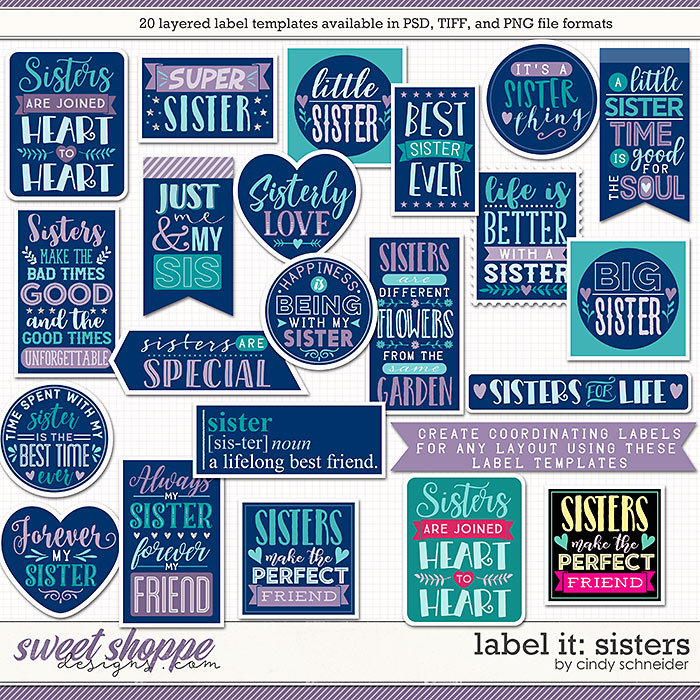
Then, I pulled my word art from Cindy’s Label It: Sisters. I chose the circular design that reads “Happiness is being with my sister”.
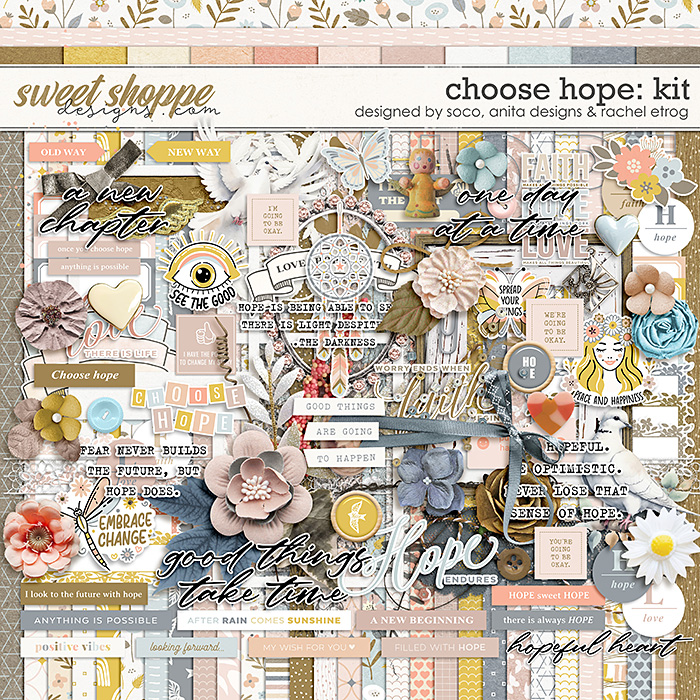
And finally, I chose the digi-scrap collection Choose Hope by Designed by Soco, Anita Designs, and Rachel Etrog to embellish my design.
Put those three products together, and here’s the results:
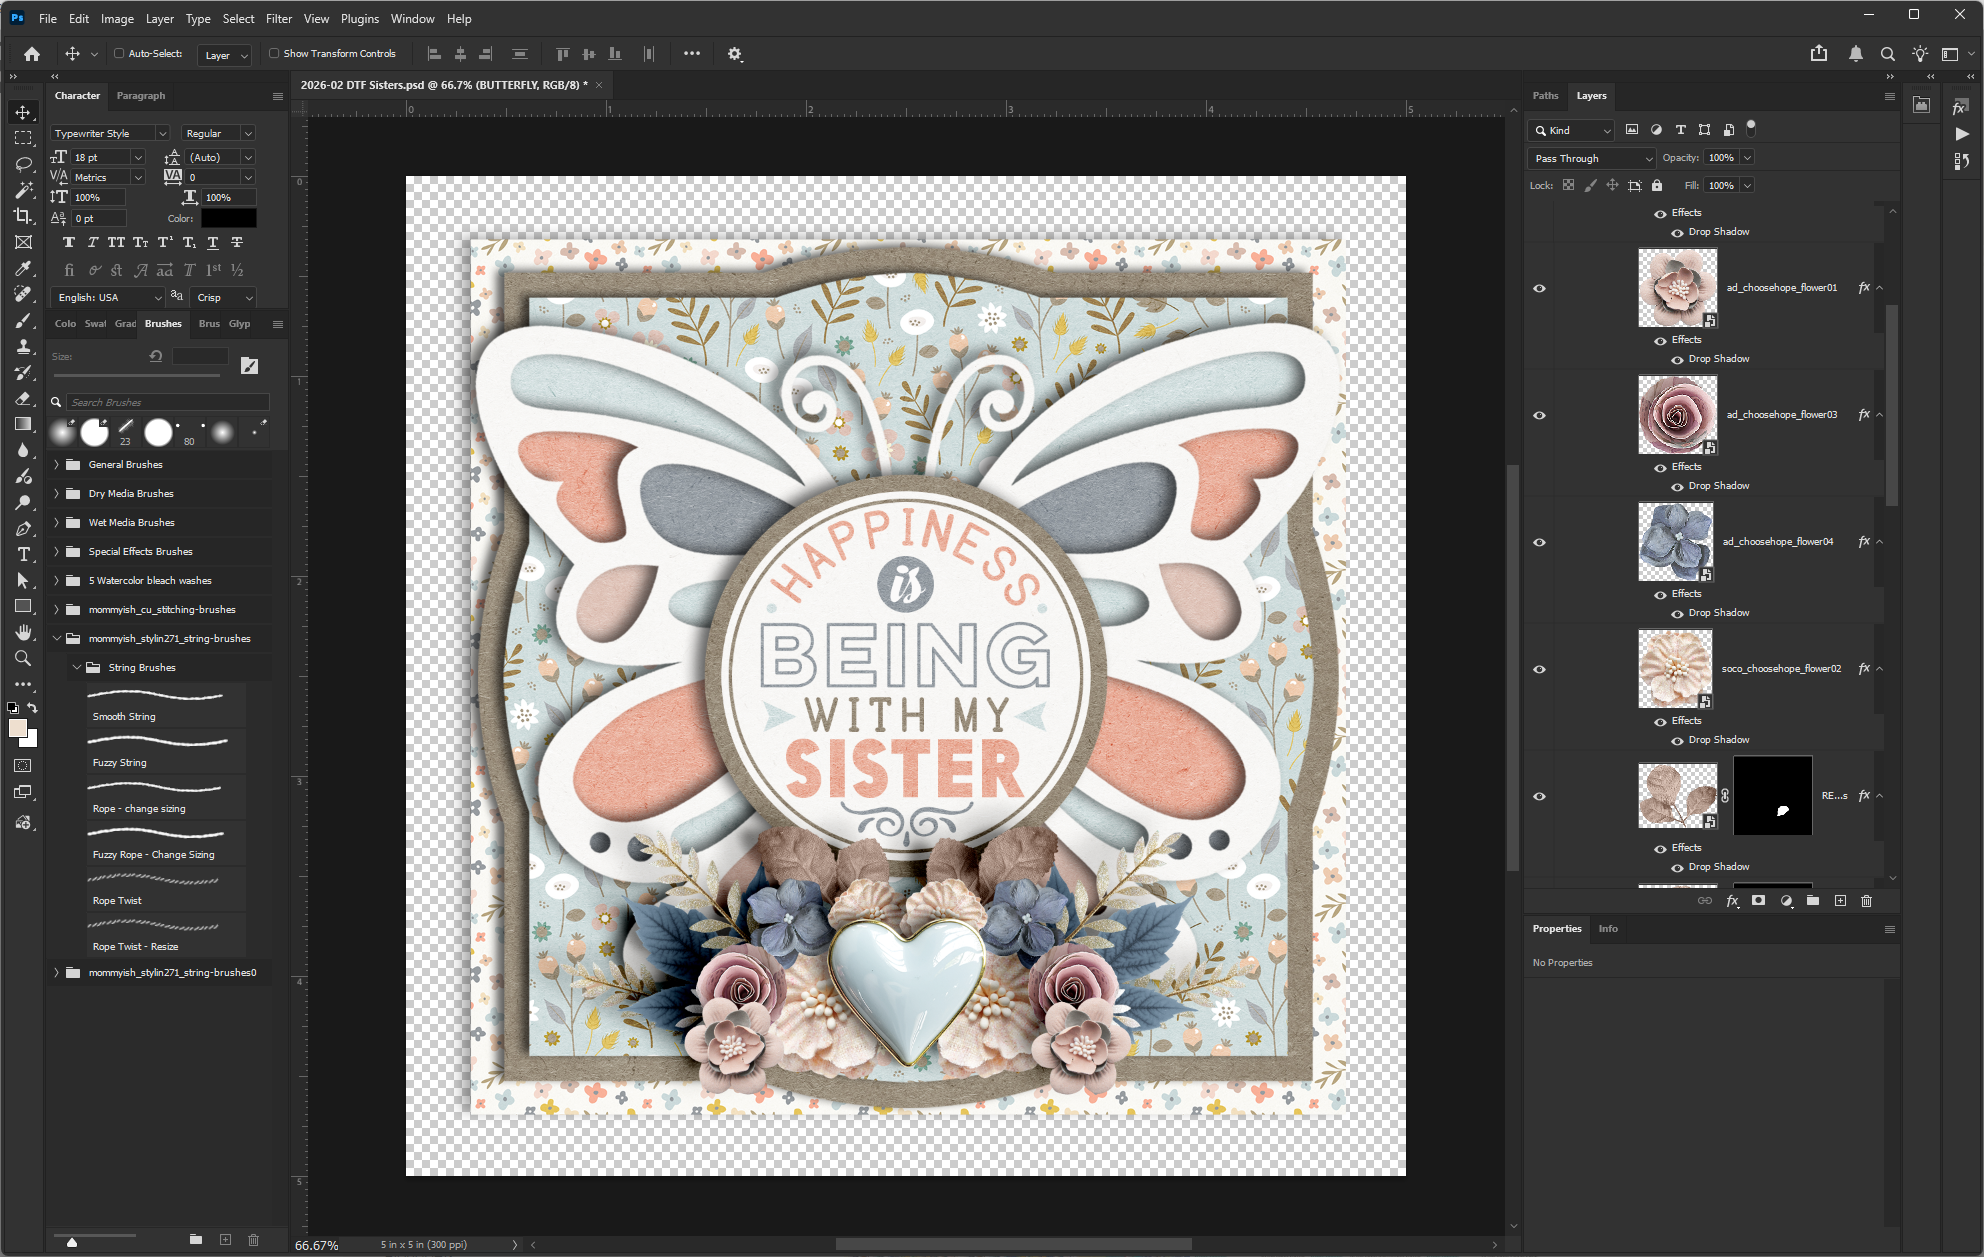
Created using Builder Blocks: Spring Things Set 1, Label It: Sisters, and Choose Hope.
I ordered three of these, and they ran me $1.90 each.
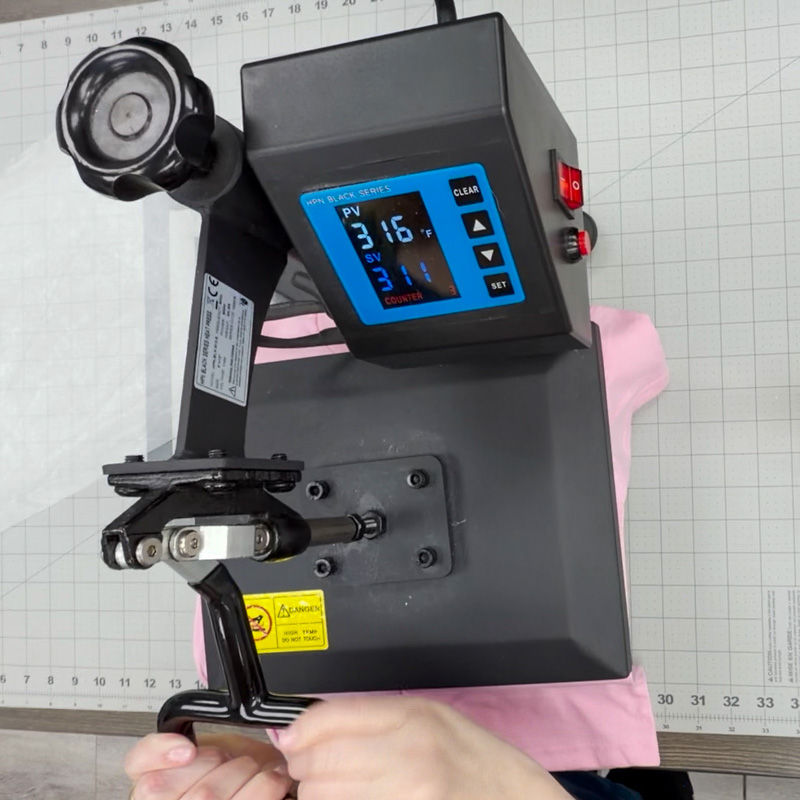
How to transfer your DTF design
When your order arrives, you’ll receive a thick plastic sheet (that’s the PET film) with your image printed atop it.
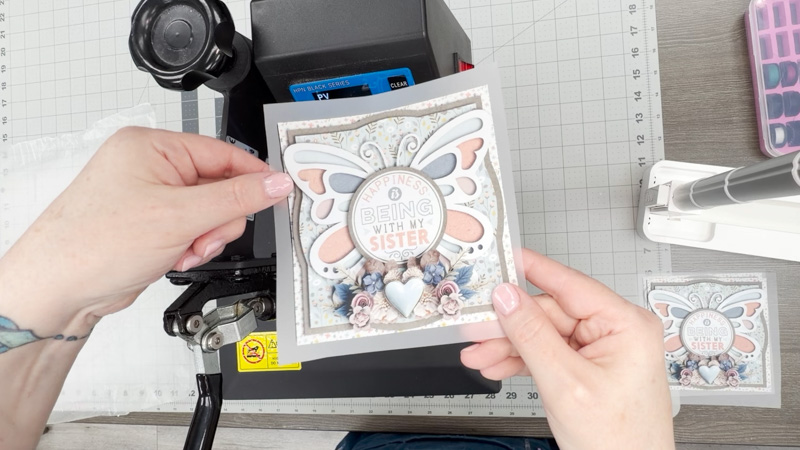
Now all you need is something to put your transfer on (commonly called a “blank”) and a heat source to do the transfer. Ninja Transfers says their film can be used with a household iron, a home crafting heat press like the Cricut Heat Press, or a professional-grade heat press. The only difference will be the temperature setting and possibly the length of time you apply the heat.
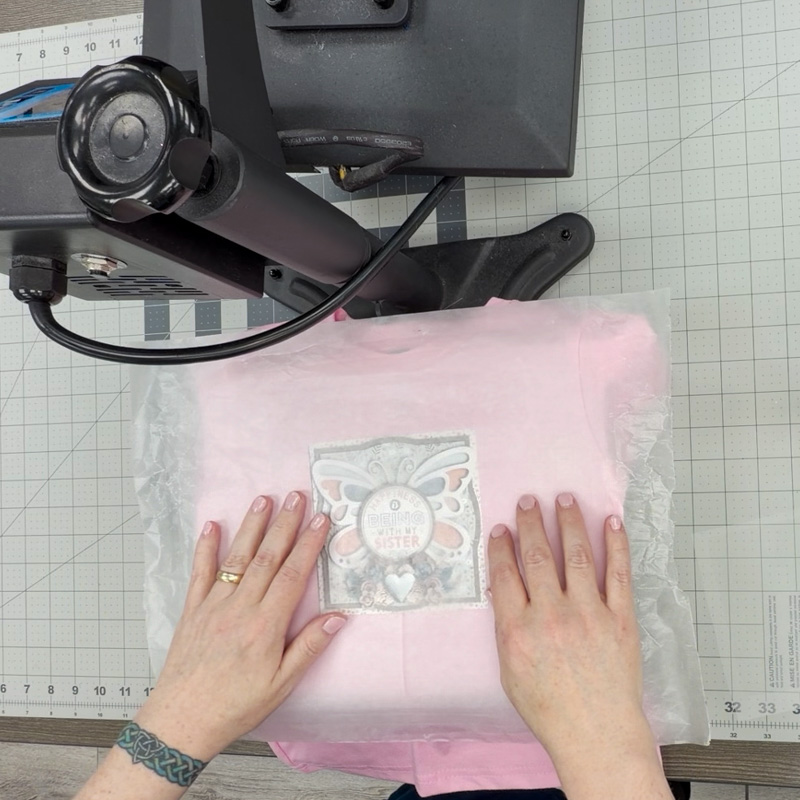
I have a small heat press (the HPN 9×12 Swing Away heat press machine) that uses a lever to apply consistent pressure (which is easier on my shoulders and back) so that’s what I used for my project.
My #1 tip for you is to read your printers instructions for how to transfer the image. Every printer will be different, and you’ll get the best results if you follow their directions. But here’s the basic gist…
- Place
- Press
- Peel
- and Polish
Place … your transfer
Decide where you want your design to go on your item. If you’re doing something like a t-shirt, be sure to find the middle of the shirt and align your transfer accordingly. My favorite trick is to fold the shirt in half and press it lightly to create a slight fold, which I then use to align my design.

Press … your item
Following the instructions from your printer, apply heat and press the design onto your item. If the transfer is bigger than your heat source, press it, move it, and press again until you’ve applied heat to the entire film.
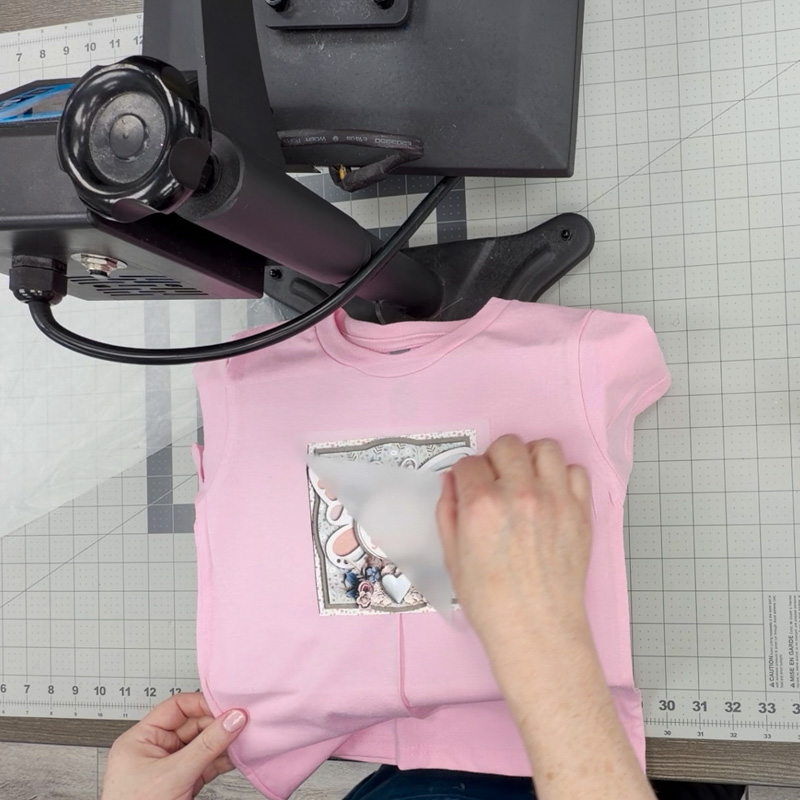
Peel … the transfer film
Check your printer’s instructions for whether you do a hot peel or a cool peel – whether you remove the film while the item is still hot or if you need to wait for it to cool off before you peel the film away.
Polish … the design
Once again, I say check your printer’s instructions. They may suggest you do one additional pressing of your design in order to seal it to the fabric or to reduce shine. Following Ninja Transfers’ instructions, I used a sheet of waxed paper to cover the design and applied heat for another 10 seconds.
And that’s all there is to it!
Final results for DTF Project #1: Band Nerd T-shirts
I opted for grey t-shirts for my grandsons so the colors would really stand out (and because they’re boys, so grey makes them happy) and I couldn’t be happier with the results:
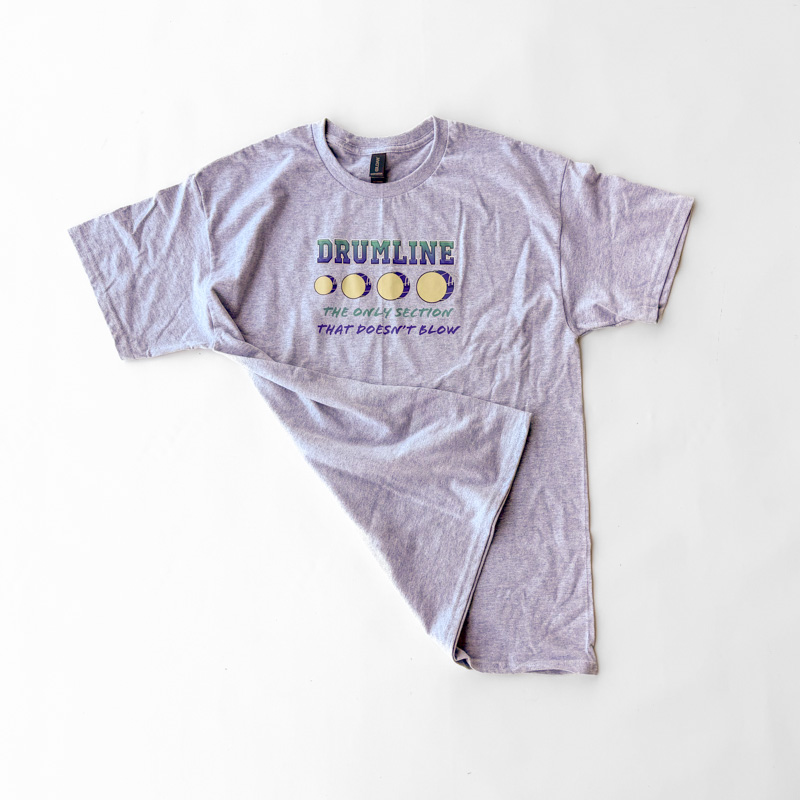
Created using In the Band by Clever Monkey Graphics
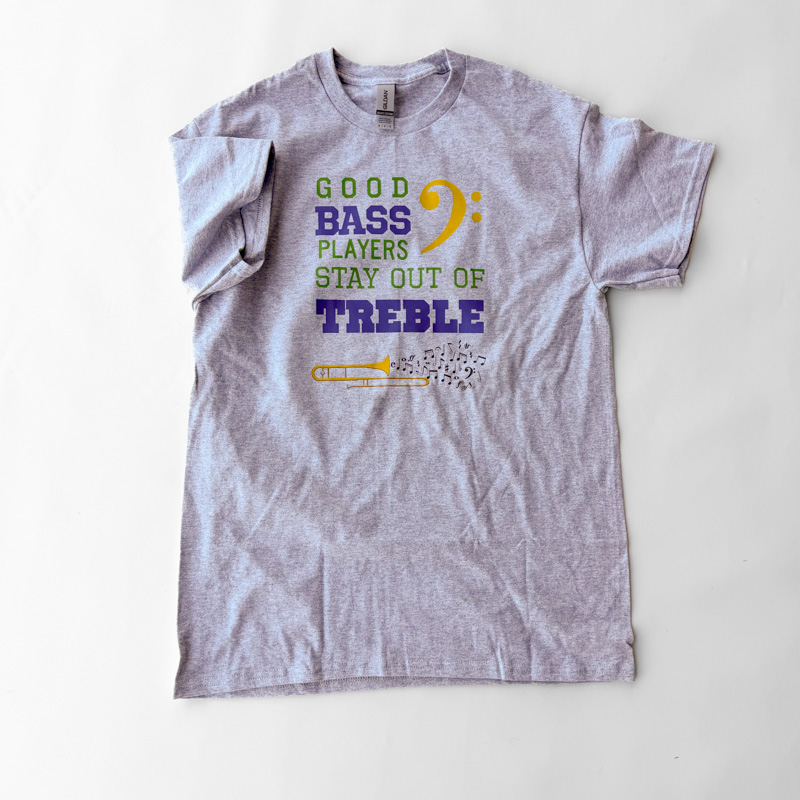
Created using In the Band by Clever Monkey Graphics
I can’t wait to give these shirts to my older grandsons next weekend!
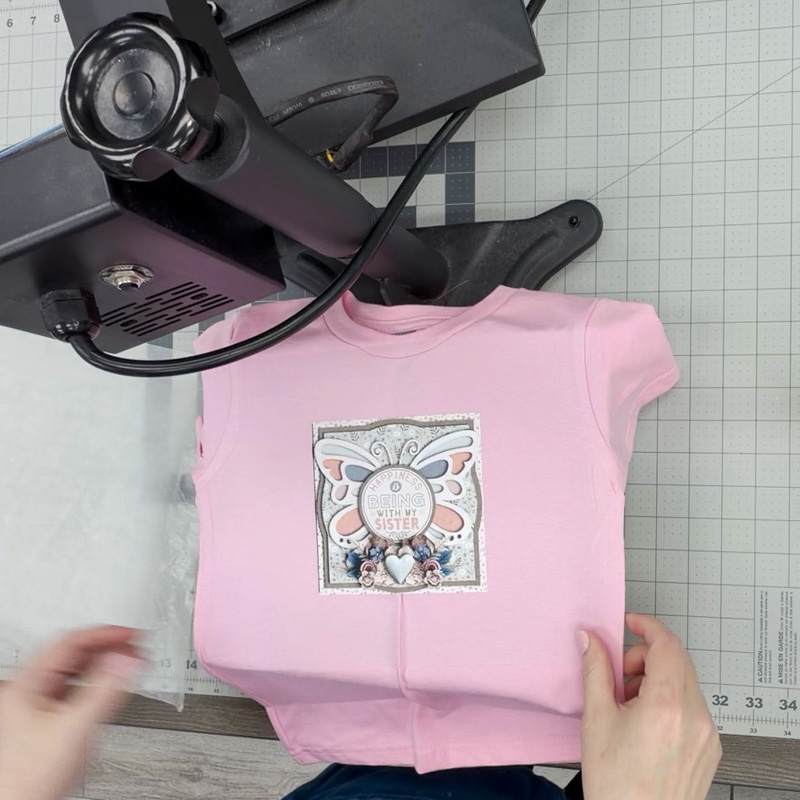
Final results for DTF Project #2: Three “Sisters” T-shirts
For the girls’ shirts, I opted for a light pink, and the transfer applied beautifully with no tinting or bleed-through from the material:
Created using Builder Blocks: Spring Things Set 1, Label It: Sisters, and Choose Hope.
My only regret is that I didn’t pick out the t-shirts before I designed and ordered the transfers. My oldest granddaughter now wears an XS youth shirt while her little sisters still fall in the toddler range of 3T and 4T. I couldn’t locate pink shirts across those two size groups that were an exact match, so the eldest’s shirt is a lighter shade of pink.

Created using Builder Blocks: Spring Things Set 1, Label It: Sisters, and Choose Hope.
It probably won’t bother anybody but me once the shirts are on the girls, but it’s something to remember for next time.
So now I want to know, what kind of custom shirt, sweatshirt, tote bag, or other item do you have in mind to make this spring?
Whether you’ve got a family vacation in your future and you’re dreaming of matching shirts for your crew, have a birthday is coming up for a friend that’s hard to shop for, or have a fun idea for a garment all your own, DTF transfers and Sweet Shoppe digital scrapbooking supplies are a Match Made in Maker Heaven!
Have fun dreaming, designing, and DTF’ing, and be sure to share your finished makes with us in our awesome, newly-upgraded Gallery – because I can’t wait to see what you create when you Think Outside the Album!