Fixing Color Cast in PSE, RAW and Lightroom
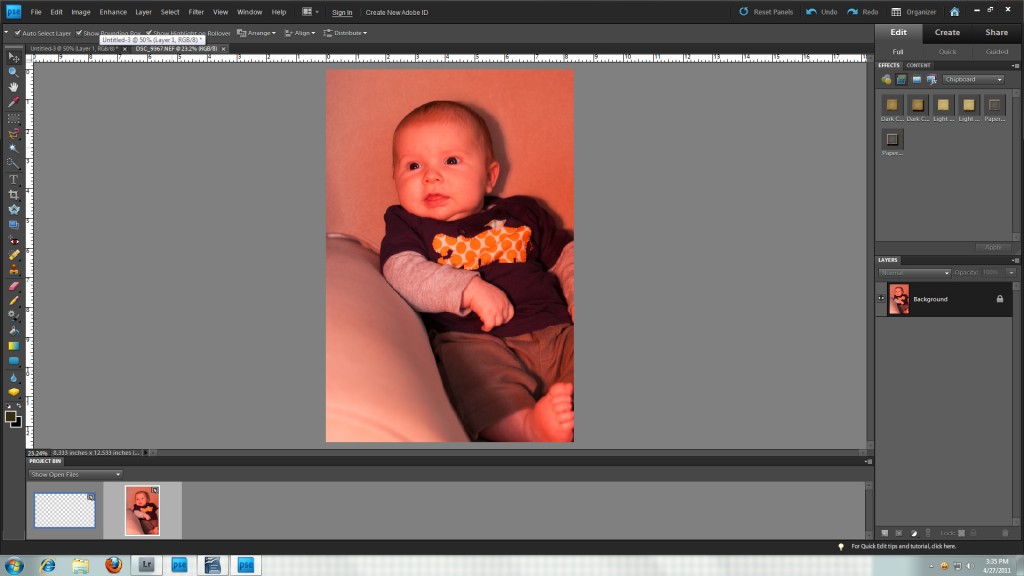
No, I don’t use self tanning lotion on my kids, but my indoor pictures always turn out orange. That’s because my walls are orange, so any light coming in the window, or using my flash, will give my photos an orange cast. Thankfully, there is an easy fix for that in your photo editing software. I use PSE9 (Photoshop Elements 9) and LR2 (Lightroom 2) for editing my photos, so those are the two programs I’ll be using to show you how easy it is to fix color casts in your pictures. I used to have PSE6 and the process was the same, so I’m assuming this will work for PSE6-PSE9. I also will be showing color correction in Adobe Camera Raw, which comes with PSE.
Removing Color Cast in PSE9
OK, here we go. This is really easy, I promise. First up, I’m going to show you how to remove color cast in PSE9.
1. Open up your .jpg in PSE
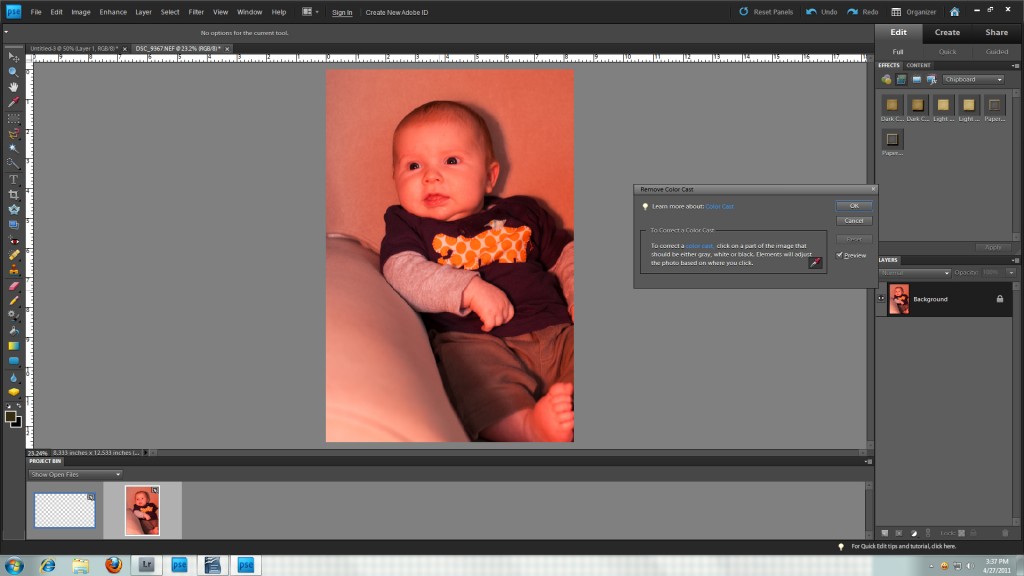
2. Enhance → Adjust Color → Remove Color Cast
3. Click the gray dropper on a part of your picture that should be gray, black, or white
4. Continue to click around the picture until you’re happy with the result.
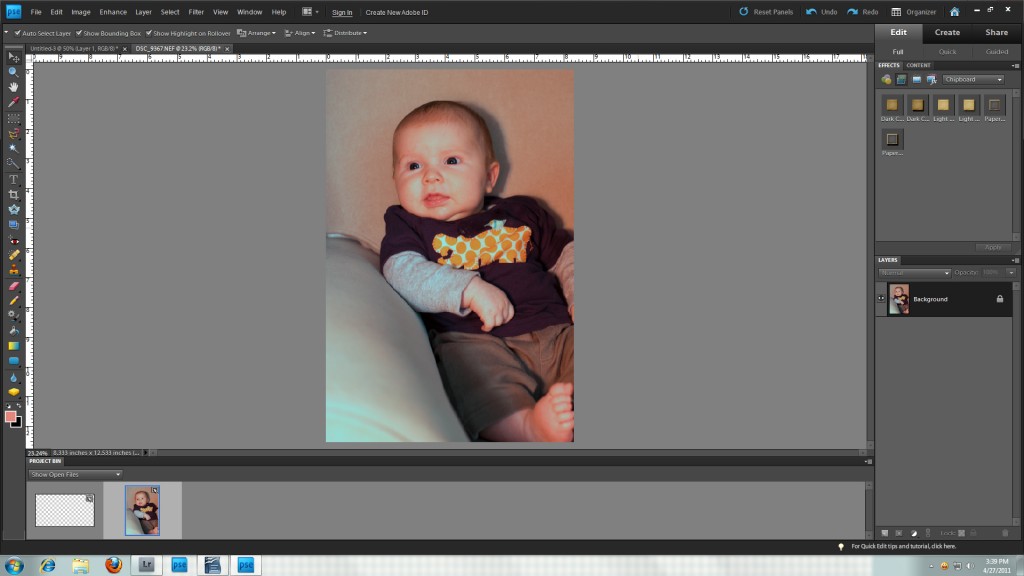
Voila, you’ve gotten rid of the color cast in your photo using PSE.
Another option in PSE if your picture is of a person is to go to Enhance → Adjust Color → Adjust Color For Skin Tone. Then you would do the same thing only instead of clicking on something gray, black, or white, you’ll click on the person’s skin until you are happy with it, you can also adjust the sliders to make more adjustments.
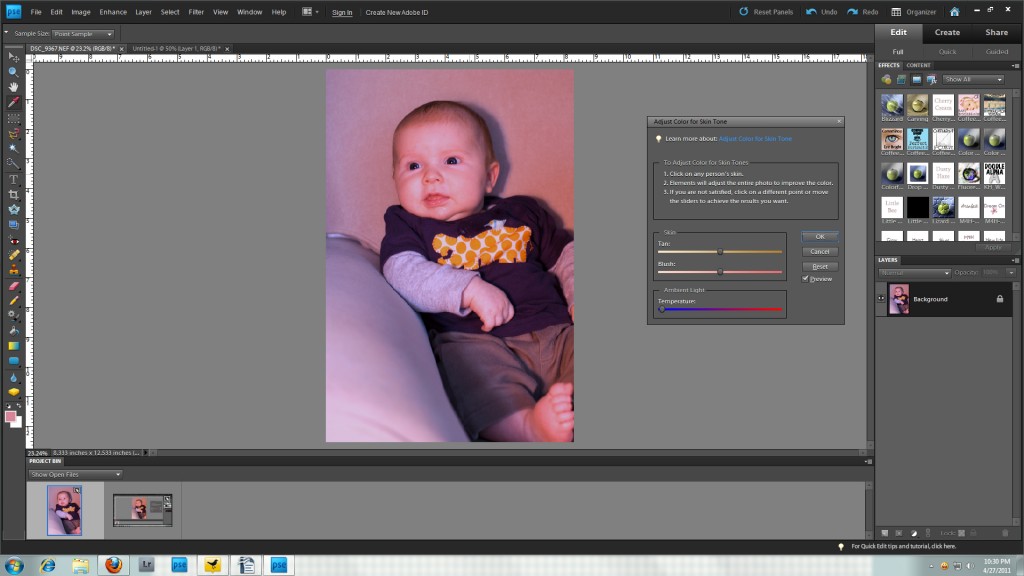
These are not my favorite ways of getting rid of color cast. I find them to be less accurate than the other two ways that I’m about to share with you, but they definitely remove most of the color cast. If the color cast isn’t as bad in your original photo you’ll get much better results than I have for these examples because the color cast is so extreme.
Removing Color Cast in Adobe Camera Raw
OK, on to some of the better ways of removing color cast. While you have PSE open, I’m going to show you how to remove color cast in Adobe Camera Raw. I shoot my pictures in RAW, so Adobe Camera Raw always pops up when I try to open that file. The cool thing about PSE is that you can open a .jpg file in Adobe Camera Raw too.
1. Go to File → Open As and a box will come up.
2. At the bottom of the box, you’ll see “Open As” and then you’ll change “Photoshop” to “Camera Raw” from the options.
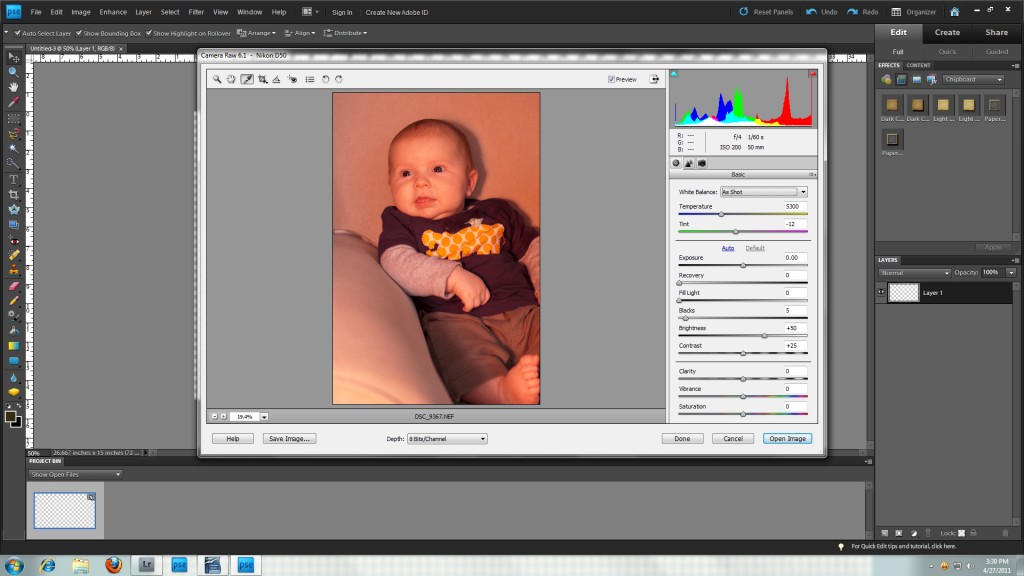
3. Open the .jpg file you want to open. You’ll get a new box with Adobe Camera Raw and will be able to edit your photo in this mode.
4. At the top you’ll see a gray dropper, click on it.
5. Then click the gray dropper on something that’s supposed to be a light gray in the photo. Click around the photo until you are happy with the coloring.
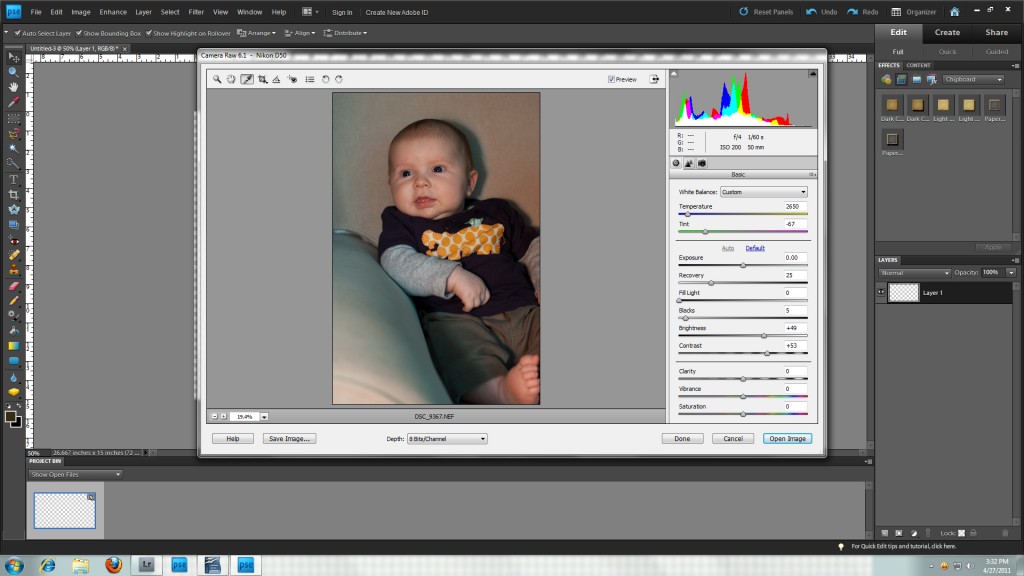
Voila, you’ve gotten rid of the color cast using Adobe Camera Raw. I like the results of this edit much better than I did in PSE. It seems to have gotten rid of more of the orange throughout the photo. After that, you can move the temperature slider around to continue getting it closer to what you’re looking for.
Removing Color Cast in Lightroom
I also want to show you how to remove color cast in Lightroom. I love Lightroom for editing pictures, and if you have some spare change and room on your computer, you might want to consider checking it out if you don’t have it already. It’s very similar to Adobe Camera Raw but much more detailed. I also find it to be a bit more accurate for editing and find it easier to use. It’s not scrapbooking software so really it’s an extra program for editing and organizing your photos.
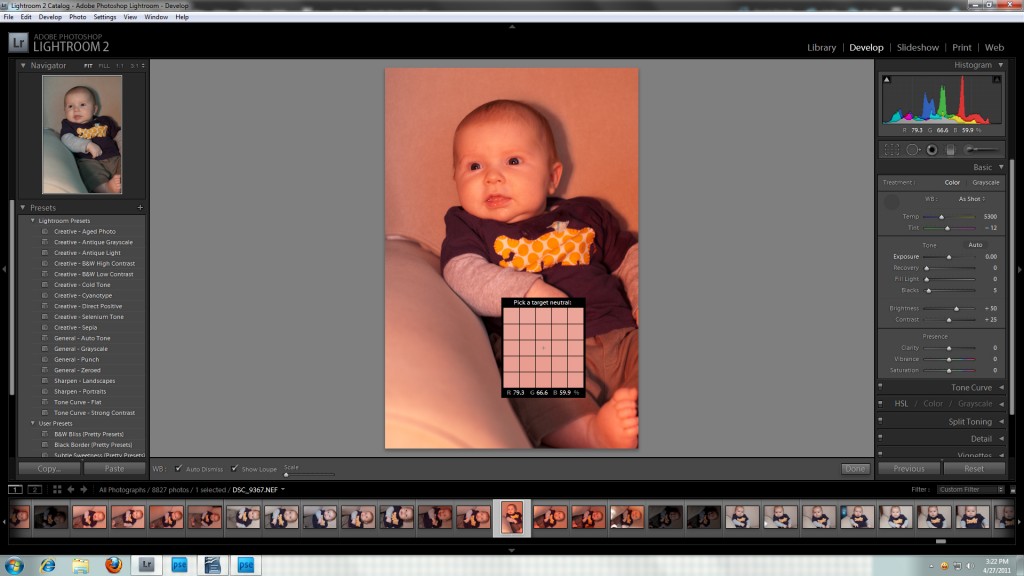
OK, let’s take a look at how to remove color cast in Lightroom.
1 When you are in “Develop” mode, you will find that gray dropper on the upper left of the menu under the histogram.
2. Click on that dropper and then, just like in the previous examples, you’ll click around on the gray areas of your photo until you like it.
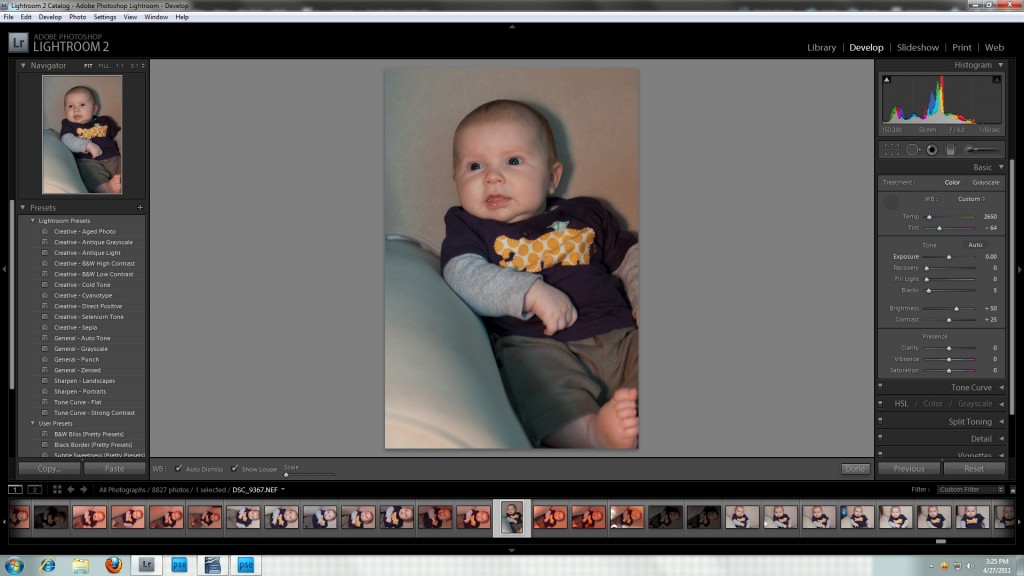
3. There are also temperature and tint sliders you can fiddle with too.
Tips and Tricks
Lastly, I have a few tips or ideas I want to share with you too, because the more accurate your color is in your initial shot the better and easier any color correction is going to be in your editing. As you notice, there is still some color cast in my photos even after color correcting, and it will take a lot of time and hard work to remove it all. These are just things I’ve personally found to help with color cast problems. Some of these things are still on my wishlist of things to purchase.
- Bounce your flash off your white ceilings if you have an external flash.
- This isn’t something I’m planning on doing, but painting your walls pure white is definitely a huge help for indoor shots.
- If you have colored walls or ceiling, consider buying a reflector and use the white side for bouncing your flash.
- Get yourself a gray card and take one picture of your subject holding that gray card in each new lighting situation so that you can do a bulk color correction by clicking on that one gray card while you have all your photos selected in Adobe Camera Raw or Lightroom. You can get yourself a free one HERE. I also found this really cute camera necklace you can use in the same way.
- There are other tools that you can use to correct the white balance on your camera itself. I’ve found the ExpoDisc to be quite accurate, and it can be bought online or at many brick and mortar camera shops. Now that I’ve moved to this house with dark and bright colored walls, I’m wishing I still had it, lol. Thankfully, we’ll be painting our walls soon. There are other white balance lens caps out there too that I’ve heard are good. I just haven’t had a chance to try them out.
- The whites of the eyes in your photos are great for clicking your gray dropper on since they are naturally a light gray.
- If your camera allows you to, shoot in RAW format instead of .jpg. The file is bigger, but that is because, when you shoot in .jpg, you are allowing your camera to do some editing for you and then delete the info it no longer needs. Shooting in RAW format does not lose any of that information, so you have more room to edit the way you see fit. This is an endless debate in the photography world–bigger files with more editing room or smaller files and allow your camera to do some of the editing for you, which means you can lose detail when you begin editing yourself.
This is the first of many steps I take in my photo editing workflow, and I hope you find it helpful in correcting the color in your photos. If I can’t get the color right in my photos, I usually end up converting to black and white. I don’t want to spend a ton of time trying to fix my photos so that’s usually my solution after I’ve worked on it a bit. I usually want to scrap the photo after I’ve taken it so I try to make the photo editing go quickly, lol. Next time I’m going to share my next step in my workflow which is fixing lighting.
