Hybrid Iron-On Transfer
Hi everyone! Juli here and I’m going to show you how you can use your digital scrapbooking supplies to make iron on t-shirt transfers!

Supplies
- White T-Shirt
- Up and Up Brand (Target) T-Shirt Transfer paper for inkjet printers
- Ruler
- Scissors
- Iron
- Heat resistant flat surface
- Watch or timer
- Digital Kits – Happy Campers by Lliella Designs
1. Read all the directions provided in your t-shirt transfer package. Depending on the manufacturer you might need to pre-wash your t-shirt prior to starting your project.
2. Lay your t-shirt on a flat work surface.
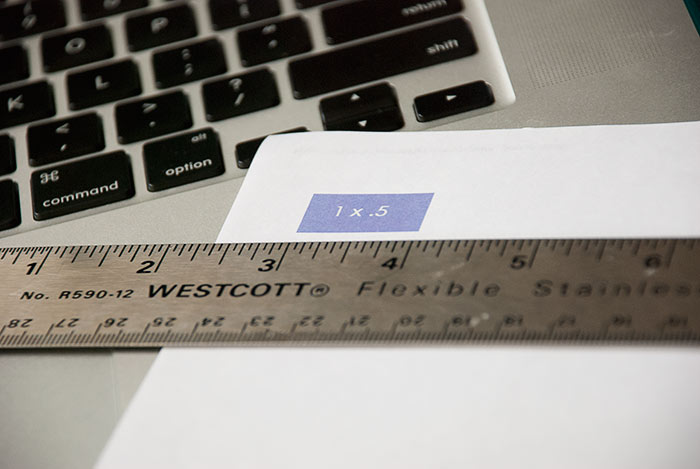
3. Determine where on your t-shirt you want your artwork to be and write down the measurement of that area.
4. Open Photoshop Elements.
5. Create a new canvas 8.5” x 11”
6. Create a new layer in Photoshop Elements by selecting Layer from the top menu and then New and Layer.

7. On the new layer, create a box using the image dimensions(measurement) you calculated in Step 3 above by selecting the rectangle
tool to make a box using the same dimensions.
8. Create your iron-on design using your favorite Sweet Shoppe kit keeping your design inside the box you created in Step 7.
9. When you are done with your design, select Image, Flip Horizontal to flip your image so that any type you have will print the in the
correct way on your shirt.
10. Delete the guide box you created in Step 7 so that it doesn’t show when you print your transfer.

11. Before printing out your project you have to read the directions that come with your iron-on t-shirt transfers!!! My transfers were for
inkjet printers only. I printed using the product description.
12. Allow the transfer to sit for at least 30 minutes (or whatever your transfer directions state) for the ink to cure.
13. While waiting for the ink to cure, set up your ironing station. You need a heat resistant solid surface (not an ironing board), a press cloth,
your iron, and scissors.

14. Use the scissors to trim around your image leaving a small edge of white (1/8”) all the way around.

15. Lay your pressing cloth (I used and old pillowcase) out flat on your heat resistant working surface (I used our old coffee table). Smooth
out the pressing cloth so there are no wrinkles. Lay the t-shirt on top of the pressing cloth with the location you want your image facing
towards you.
16. Position the t-shirt transfer where you want it go.

17. Flip the transfer over, color side down on to your t-shirt following the directions provided with the product you use.

18. Iron the transfer on to the shirt following the directions provided with the t-shirt transfer. Mine said to iron with firm pressure in a straight, non-stop motion top-to-bottom and side-to-side for up to 2 minutes. Keep the iron moving to prevent scorching.

19. Allow fabric to cool completely and the carefully remove the transfer backing.

Here is what my final shirts looked like after ironing and cooling.

jill dinkel said...
on February 17th, 2012 at 11:28 pm
What a great idea! I was just telling my two boys that we should have smaller birthdays this year – where they invite 4 friends or so instead of a big party. I totally love the idea of making them matching shirts