Scrap Like a SugarBabe: Stephanie Czosnek

Stephanie is like an institution here at SSD, she’s been a Sugarbabe for so long that I can’t imagine the site without her! She’s an amazing layout artist that manages to both fill the page and leave it open to create a masterpiece that’s her own signature style! Let’s walk with her through how she uses one of her signature layout tools..brackets!
Hi – Stephanie here – bringing you this Scrap with a Sugarbabe blog post. I have been a scrapbooker since 2001 and if you count gluing down recipes and pictures from the newspapers and magazines with my Grandmother scrapbooking – I was doing that at a super early age. I was 4 when we started those projects! And my grandmother made my glue out of flour and water. I started digi-scrapbooking when my oldest daughter was 6 months old. I belonged to a Mommy Forum and another mom on the board introduced me to Digital Scrapbooking. This – I thought was super awesome since I have a degree in Graphic Design and actually use PhotoShop on a daily basis. And it was so much easier for this klutzy & impatient girl. I cannot cut a straight line to save myself nor do I like to wait for things to dry. I am not a “putzy” person. And although I can spend some hours on one layout – it doesn’t seem putzy to me.
My Claim To Fame
My layouts use a lot of white space. I like my photos to be on the smaller side and I love to cluster, but I also like to see the papers I chose. And I love paper. To me, the paper draws me into a kit, then the elements. I also do a lot of vertical layouts and I don’t know why – they just really appeal to me. I also use brackets a lot. After this blog post I want you to see brackets in the same light I do.
Brackets are the most underrated element, I believe. These little guys can do so much for a layout. Don’t let the placement of brackets within a kit fool you. Brackets, since they are part of an alphabet are found normally within that folder or within the alpha sheet. Very rarely do I see a use for them in a title. Going through my gallery, I found one layout where I used them in the title. See how the brackets draw focus and solidity to the title? See how it also points you to the journaling?
You can use brackets as a basic element to layer behind a stack of papers or behind a photo. And I think Jen might have this bracket as an element within the kit:
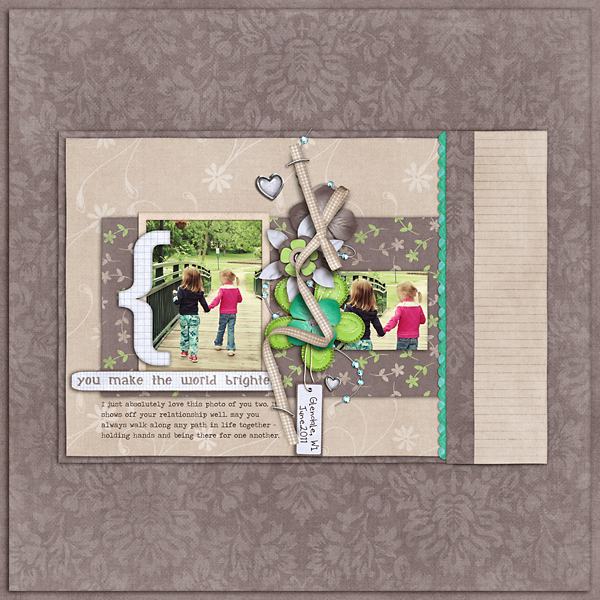
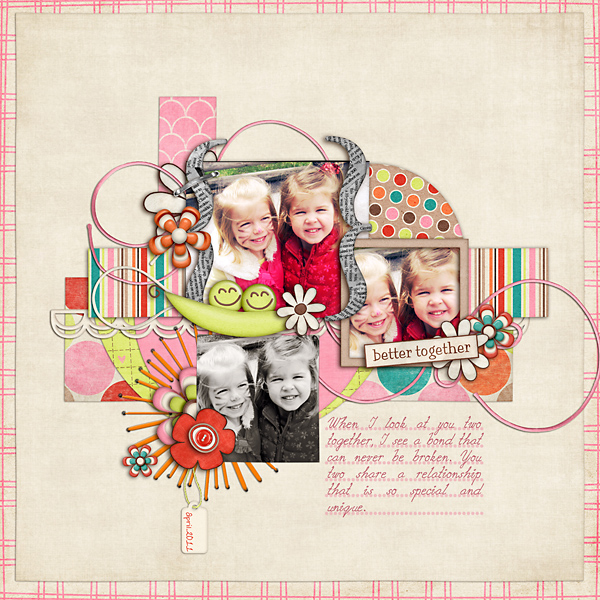
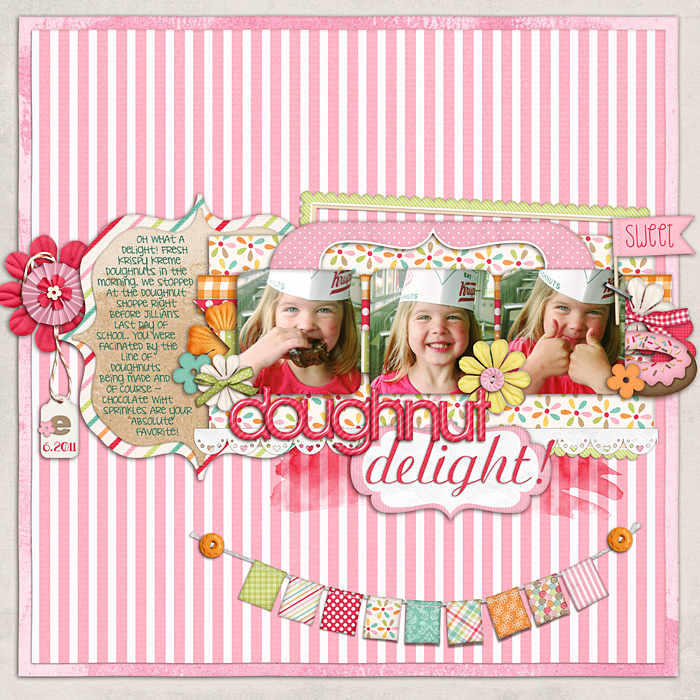
My favorite way to use brackets is to draw focus to an area or more importantly a face. In this layout, the pop of white draws your attention to my girls holding hands and proves that they DO love each other. I did not want this to get “lost” in the page.
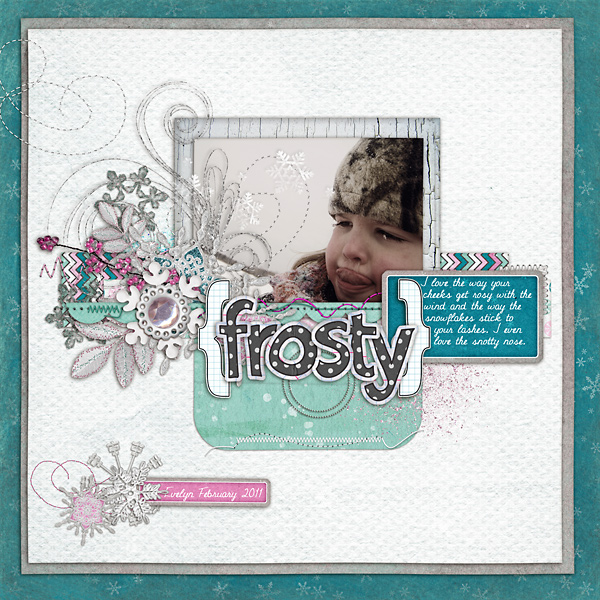
In this layout, I used the brackets as anchors to the page. I used a lot of white space in this layout and wanted to solidify the main focus of the page – Evelyn’s grumpy puss.
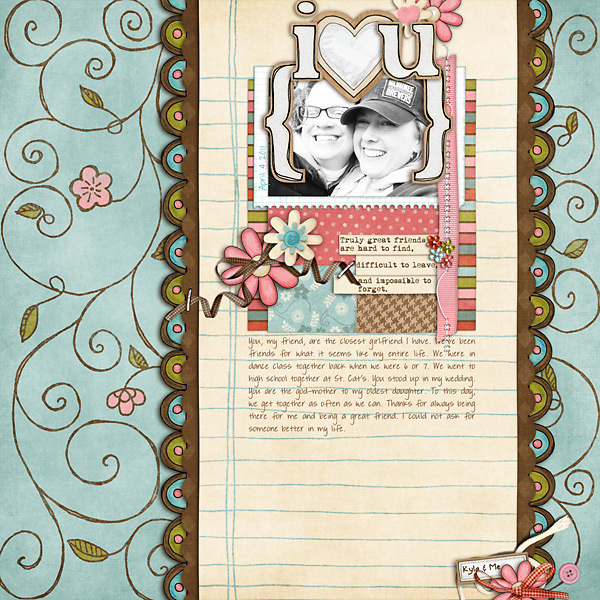
I also use brackets to highlight faces. For me, brackets are a different take on a frame. Frames are so conventional – sometimes I want different. This is one of my and my BFF.
This one draws focus to one particular photo in a group of 3. The same could have been done with a frame, but brackets make it was more interesting!
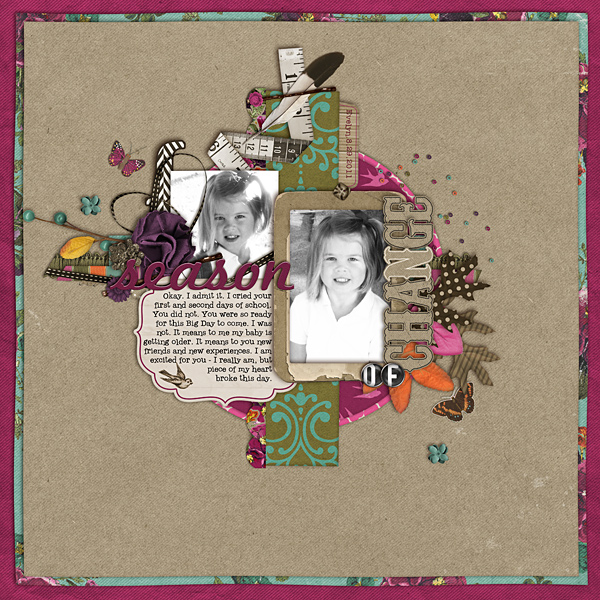
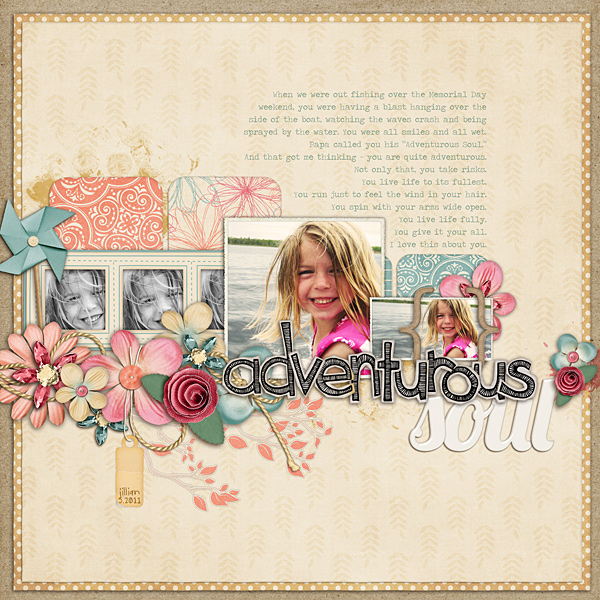
And in this page all about my eldest, I use the brackets to highlight her face in a very horizontal photo. I used the same photo throughout this page, but I really wanted to capture the open water, but did not want her to get lost – so I used a thinner bracket.
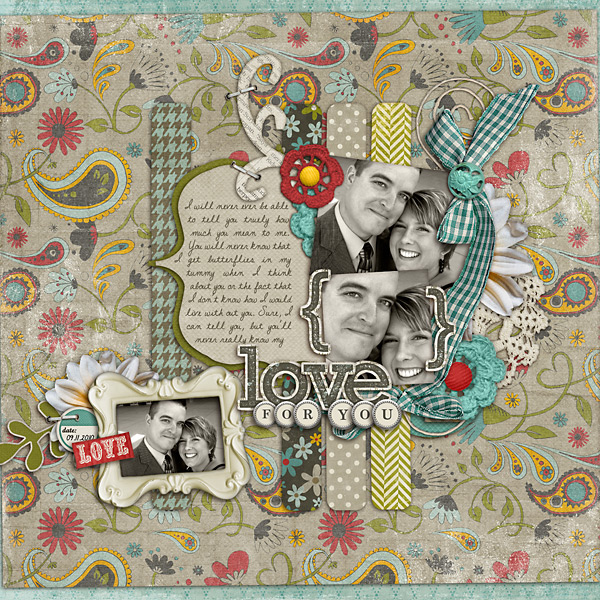
And this layout of my hubby and I, I again used the same photo throughout the page, but did a tight crop on our faces. To highlight how close we are and to draw your eye to the journaling mat, I used brackets.
I actually made that journaling mat out of a few brackets. It is just a few steps & I will show you how.
Here is how I start all of my layouts. I create a template for myself. When I sit down to scrap, I know which kit I will be using and how many photos I have. Where the red arrow is, I want a bracket mat.

I take my type tool and create a left bracket. I make it really large (300 pt) and chose Times New Roman. I duplicated the layer by hitting CTRL+J and rotated it 90 degrees.


I zoomed in and lined up the edges of the two brackets. Selecting the two layers by holding down shift, I merged them by hitting CTRL+E. The two brackets are now one.

I duplicate this layer once again and rotate it 180 degrees and line up the edges.

I select the two bracket layers and merge them using CTRL+E. I now have one bracket frame! But I want a solid bracket so I use my color picker to make sure that my foreground color is the same as my bracket. I use my magic wand tool to select the inside of my bracket frame.

I go up to the menu and chose >SELECT >MODIFY > EXPAND and expand my selection by 15. (I chose 15 just to be on the safe side and that I don’t leave any gaps)

I select my bucket tool and fill in my selection with my foreground color. CTRL+D deselects my layer. I now have a bracket mat!

Of course I love to have multiple layers and love to mat things, so I CTRL+J to make a copy and CTRL+I to inverse the color, CTRL+T to shrink down the layer and I now have a matted bracket mat for journaling.

A few more odds and ends to my design and my template to begin my layout is ready to add papers to!

And here is my finished layout. As you can see – I added a lot and deleted a few items from my original plan. 


Heather Greenwood said...
on May 31st, 2012 at 11:16 pm
Oh how awesome is that!!! I had no idea how easy it was to make one and that layout is adorable as always… and I’m totally thinking I need to use more brackets to focus on something!!!
mrshobbes said...
on June 1st, 2012 at 1:34 am
Dude!!! I’m totally making myself a bracket mat! I had no idea of making it that way, thank you!
Chris said...
on March 29th, 2020 at 2:19 am
The brackets are awesome! I can’t wait to do this myself and start adding to my pages!
Thank you so much for sharing!
Chris