Simple Element Clusters: Follow Along
 Summer is here and in full swing, weather has been crazy all around and the heat wave here seems to be never-ending. I know many of us are trying to find ways to stay cool, myself included, and what better way to stay the coolest than by scrapping at your PC indoors where there’s A/C. lol 😉
I’m here today with a little bit of a scrap along. These next two months during our Scrap-A-Thon event you’ll be creating lots of layouts, hopefully, so I thought I’d pop in with a sort-of follow along on creating your own simple element clusters. I know that Angie blogged about her super-awesome-amazing clustering trick she uses with templates, and if you haven’t read it, you should HERE. I’ve always been a DIY girl….ok scratch that, because I don’t want to DIY anything around my house. lol
Life is a do-it-yourself kit, so do it yourself. Work. Practice. – Phyllis Diller
But when it comes to creating I like to do it myself. When I wanted to put out my poetry books, I learned all I needed about creating my own manuscript, self-publishing, creating my cover etc. When I wanted to design my own digital scrapbooking products I learned that too. So it’s only natural that when I took to digital scrapbooking I wanted to be able to create all of the things I was seeing in the galleries on my own, myself. Add to that I’m not typically a “search & find” type gal when I’m scrapbooking. I usually stick to one kit and don’t want to go search and find other things to create the page I’m working on. So today I’m going to create a simple element cluster and share all of the screenshots so you can scrap along with me. I’m using a FREE product – More Alike than Different – from our amazingly talented, Tracey, of Clever Monkey Graphics so that everyone that wants to can follow step-by-step with the exact same product. 
- I’m starting with a 12×12 page, transparent background and I’m going use one of her papers with the least amount of pattern or some type of solid I went with the wood background. This just helps me visualize things better sometimes instead of using transparent or white backgrounds.
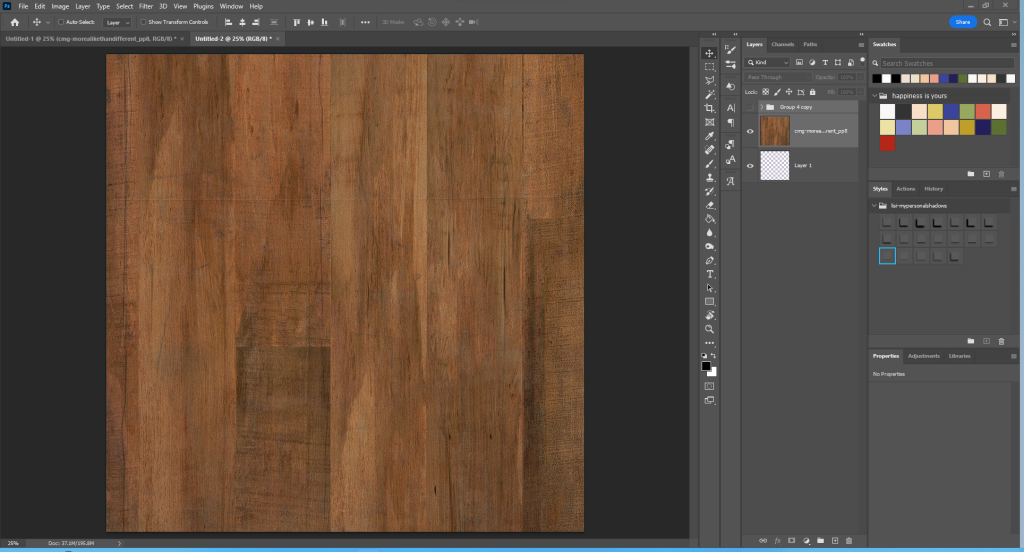
- Clusters need something to anchor to, a base of sorts so I brought in a frame and one leaf/foliage element.
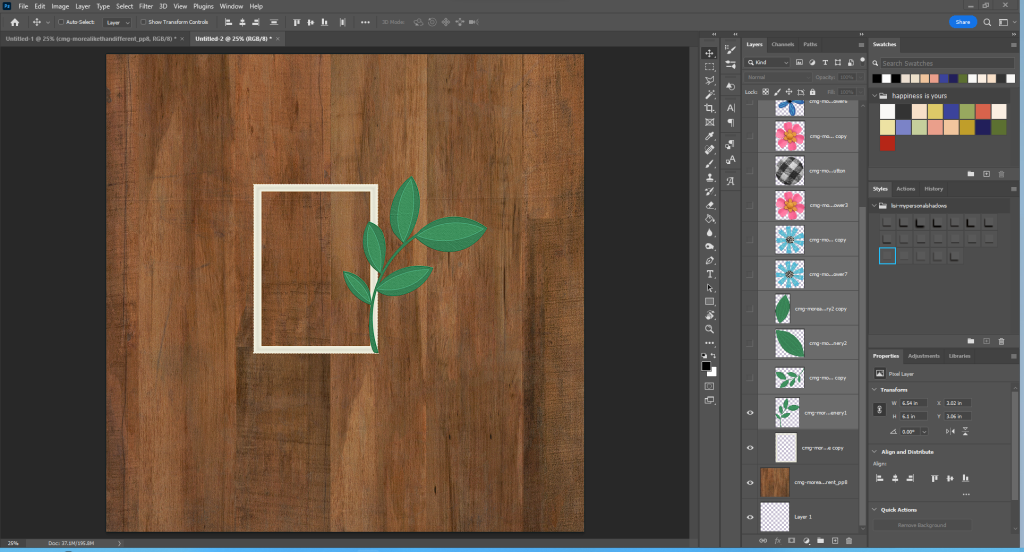
- I usually create clusters with the “odd numbers” in mind. Artistic design ideals indicate that odd numbers are more visually appealing and look more natural. So from here I added 3 flowers. You’ll notice the larger center flower. This creates another anchor point for the cluster itself. I could stop there build my page, add the photo and have a very basic cluster spray. BUT I think you all know I won’t. teeheehee 😉
- Next up I am going to create some drama by adding 3 more elements. I duplicated, rotated and resized the foliage placing it kind-of diagonal/opposite plus 2 different flowers for some interest. Again I could stop here and build the rest of my page. Yup you guessed it, let’s add some more. lol
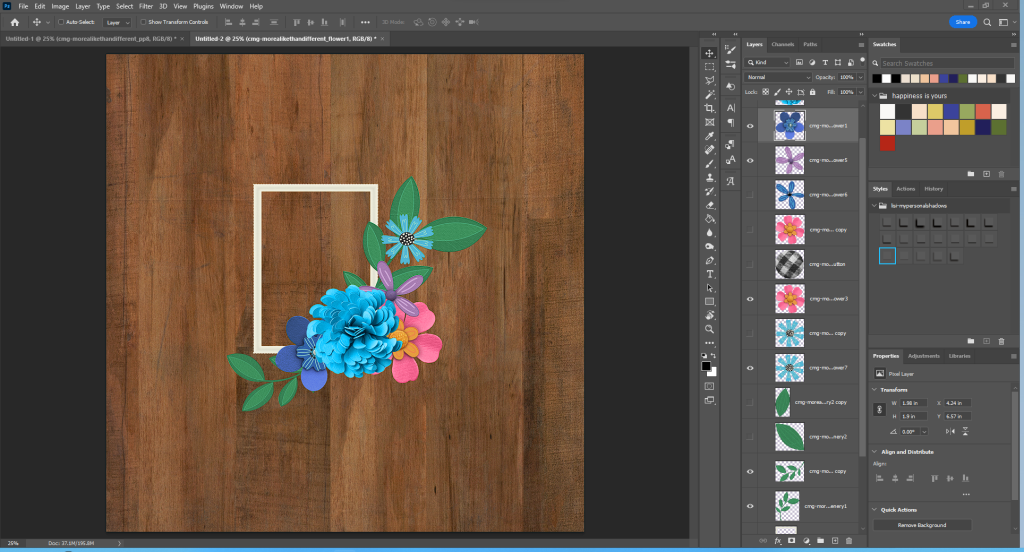
- Now I am going to simply duplicate those last 2 flowers and size them down plus I added 2 single leaves from the main anchor flower. Take note of placements, I am keeping the big anchor flower my “center” the rest of the foliage and elements are branching out from that.
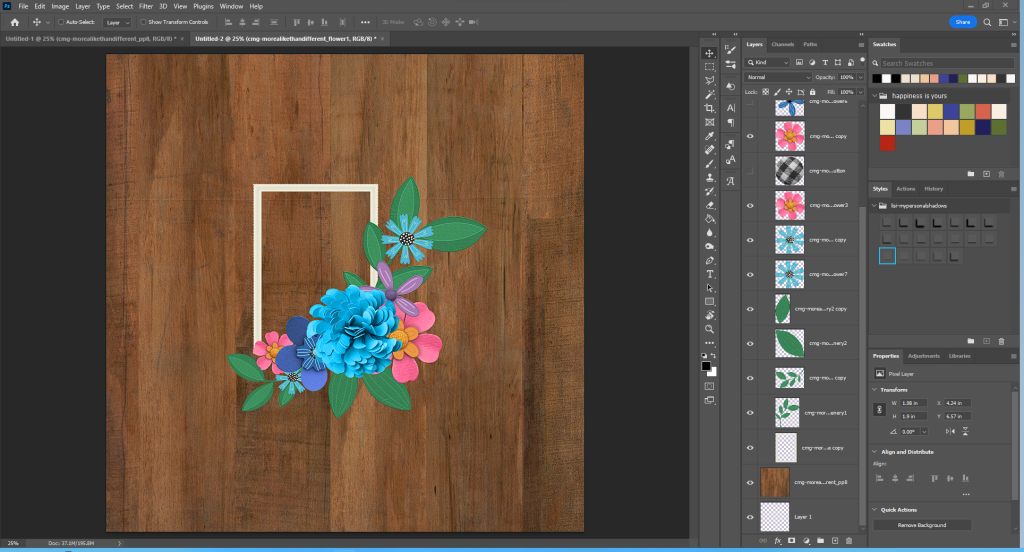
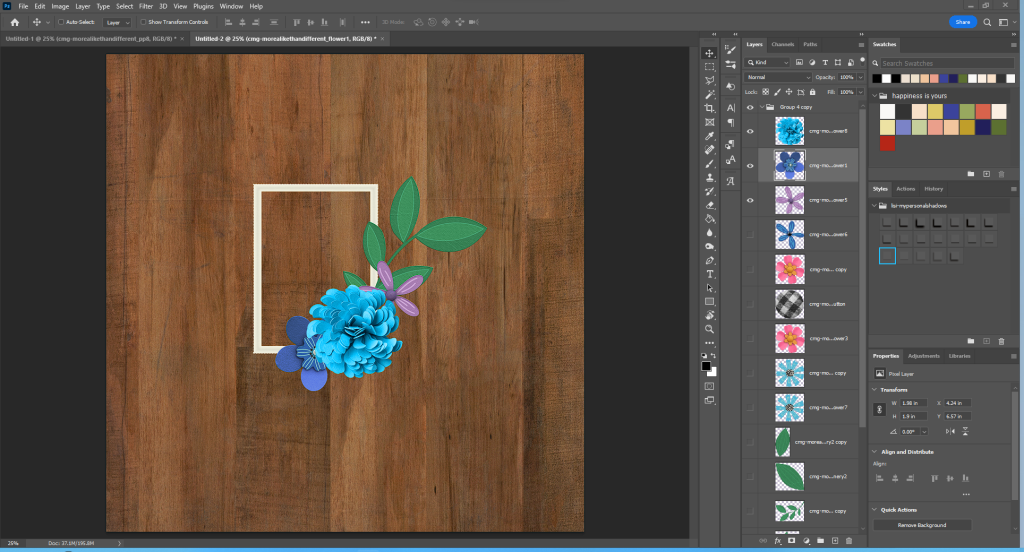
- At this point the cluster is full, makes a statement and can be considered done…..but personally I wasn’t quite done with it. So I added a button on top of the larger pink flower and a blue flower in the same style as the purple one to place on top of the other pink flower. I ONLY did this because I knew my photo was of my “guys”. This is a page about my hubby & son. I didn’t want the pink to be too overpowering. I also moved the darker blue flower over top of the anchor flower.
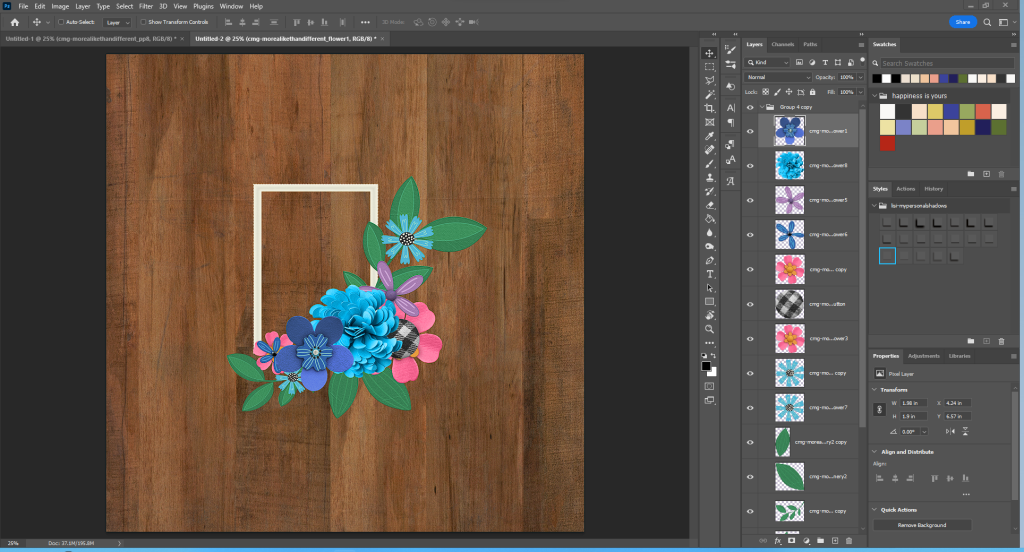
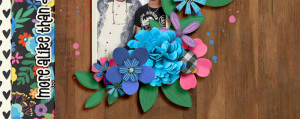
- After that I was satisfied so I went ahead and created my full page by adding shadows, other papers, elements etc. to finish it off. Here’s the completed page:
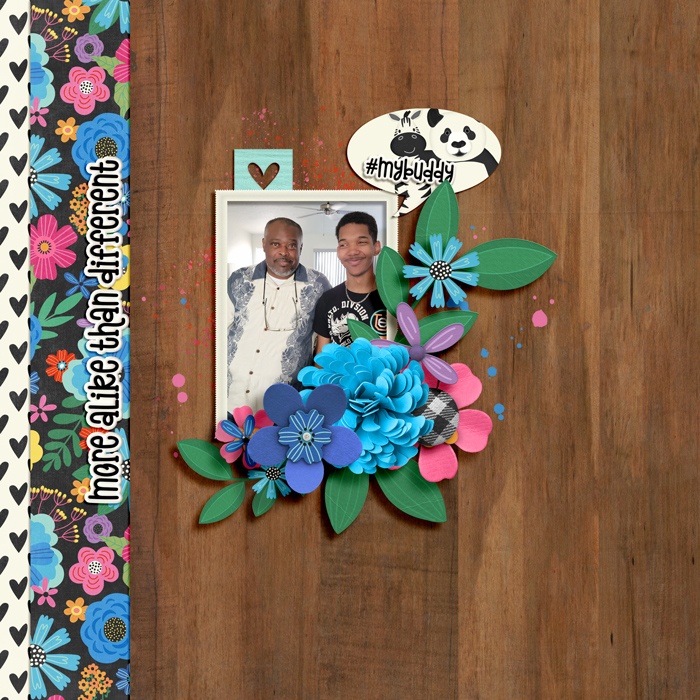
Isn’t it adorable?! I really enjoy how this turned out. I will tell you I was trying to screen record this so you could see it in “real time” but my software didn’t do what I told it to do. Typical technology woes. I hope this helped you anyway and if you want to see more like this, let me know. I always love sharing my processes.


Lori Smith said...
on August 30th, 2024 at 2:35 pm
Thank you. I sometimes want to buy kits that don’t have clusters but didn’t because flower arranging is my greatest fear, but I think I’ll try it now.
Kiana Fitzpatrick said...
on September 2nd, 2024 at 7:31 pm
Aww Lori, I’m so glad you are ready to tackle your fear. I’d love to see what you create!
Mary said...
on April 18th, 2025 at 4:12 pm
I really enjoyed this tutorial.