Make Your Own Chevrons in Photoshop
Have you ever wanted to make your own chevrons in photoshop but didn’t know an easy way to do it? Well I’m here to the rescue with this super easy, super quick tutorial on how to design your own chevrons!
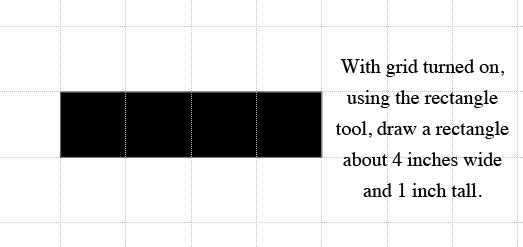
Step 1: On a new document, make sure your grid is turned on and using the rectangle tool, draw a rectangle that is about 4 inches wide and 1 inch tall. You can really make it any size you want, but you’ll want to maintain a 3:1 or 4:1 width to length ratio.
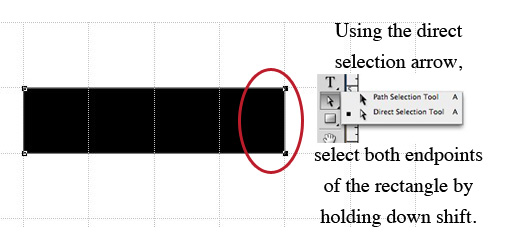
Step 2: Using the direct selection arrow on your tool bar, hold down shift and select both far right endpoints so that their points turn black as shown.
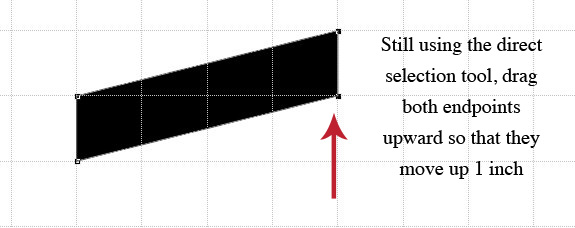
Step 3: Still using the direct selection tool, drag the line between the two endpoints upwards 1 inch so that both endpoints move together.
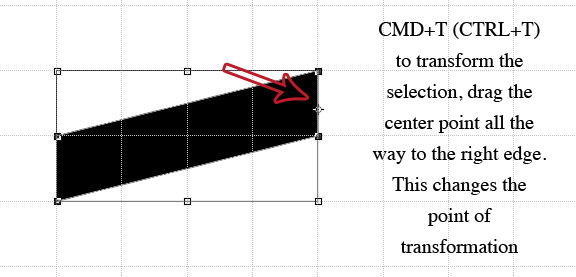
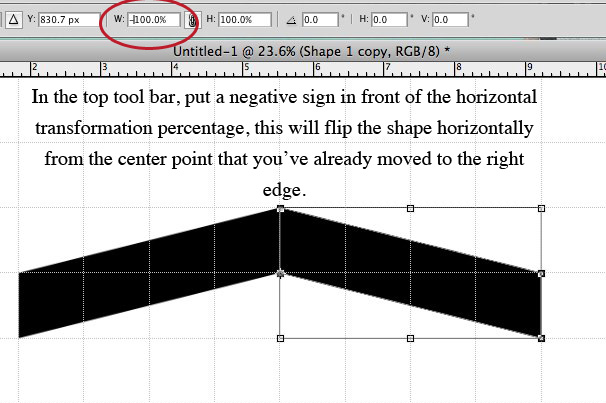
Step 4: Duplicate the layer, and hit CMD+T or CTRL+T to transform the selection and drag the center point all the way to the right edge. This changes the point of transformation from the center to the outside edge of the shape.
Step 5: In the top tool bar, put a negative sign in front of the horizontal transformation percentage, this will flip the shape horizontally from the center point, which you’ve already moved to the right edge.
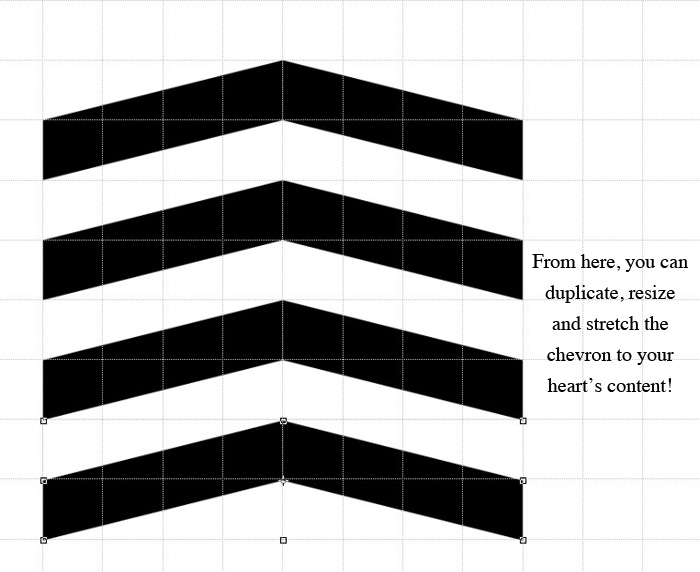
Step 6: Leaving your two chevron halves as separate layers, you can duplicate and arrange them to create stripes, arrows, whatever motif you want!
Step 7: For the purposes of this tutorial, I’ve made stripes.
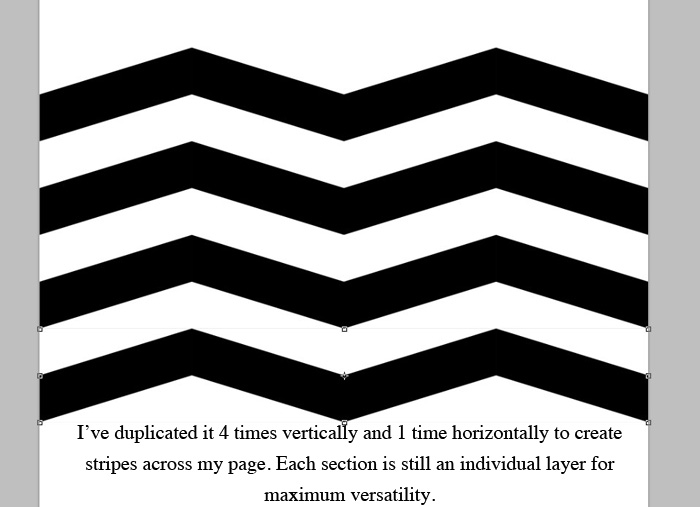
Step 8: From here, you can merge any combination of layers to create your own design!
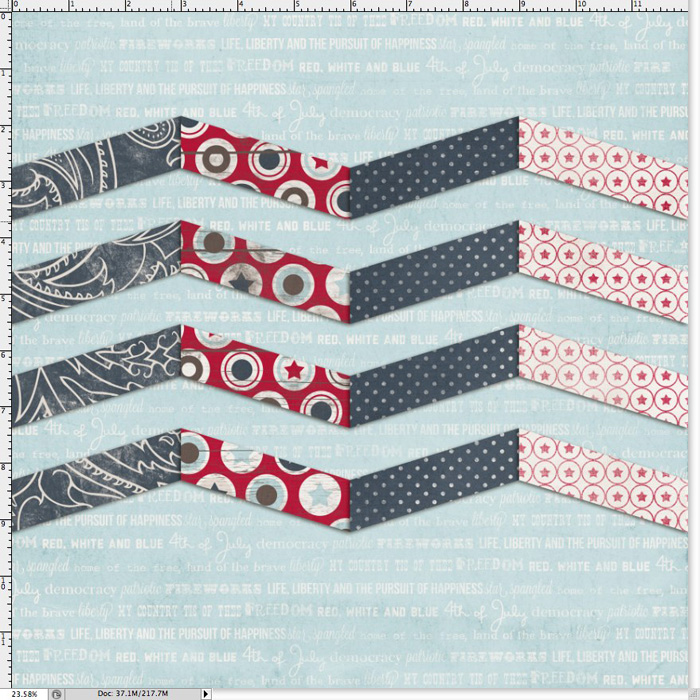
Merged horizontally:
Merged vertically:
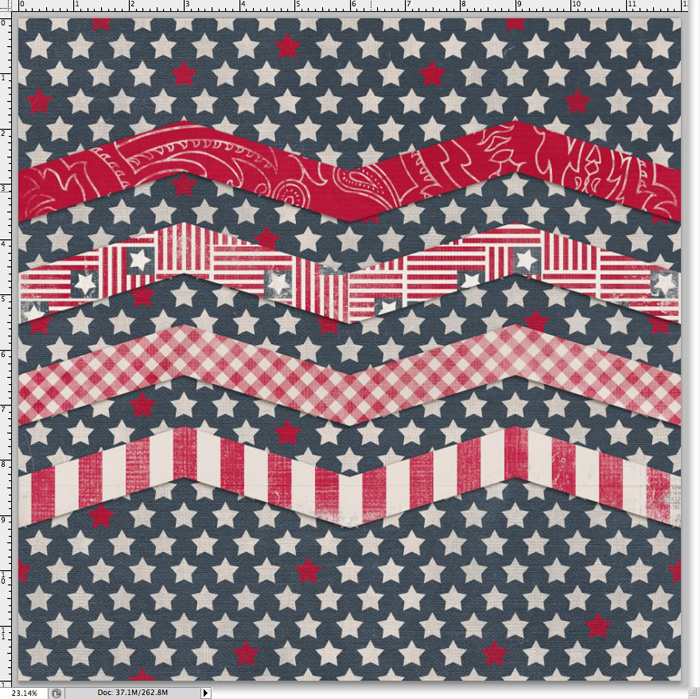
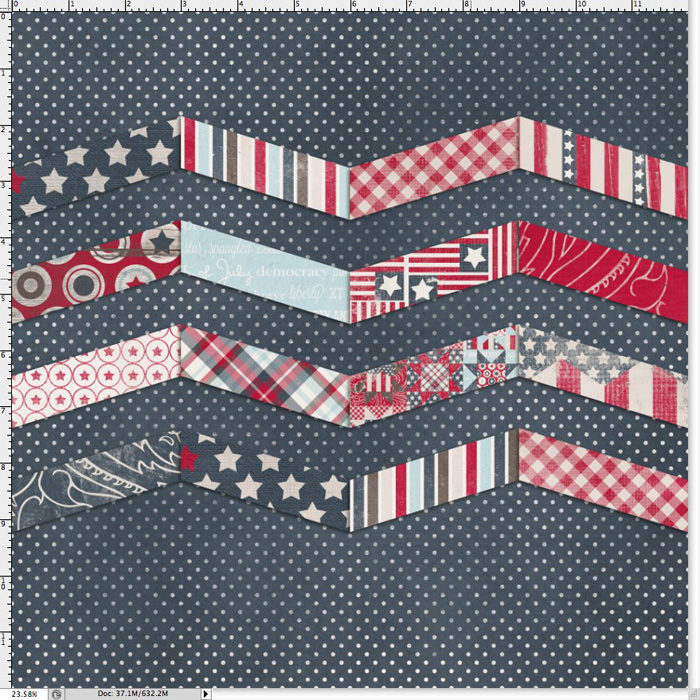
Kept as individual pieces for a patchwork look:
You can offset the two halves, make a series of arrows instead of stripes, the possibilities are endless!

Heather Greenwood said...
on June 21st, 2012 at 6:41 pm
this is soooo awesome Traci!!!
Tami Miller said...
on June 21st, 2012 at 11:43 pm
Love it!
Christina said...
on June 22nd, 2012 at 1:31 am
Excellent tut; thanks so much!
Jessica said...
on July 3rd, 2012 at 7:20 pm
Not sure what is happening, but when I select the direct selection tool, it tells me that there are no options for the direct selection tool…..Could you tell me what I am doing wrong?
Traci Reed said...
on July 9th, 2012 at 1:34 am
You shouldn’t need options for the direct selection tool, just click on it and then use it to click on the points!
Jessi said...
on July 9th, 2012 at 1:16 am
Thanks so much for this!
Adrienne said...
on July 11th, 2012 at 3:55 pm
I must be daft (and i’m new to photoshop…been using PSP for ages) but when I add the “-” to the horizontal transformation it doesn’t duplicate the shape…there is outline where the duplicated shape should be but …not shape. I’m sure i’m making some newbie mistake. Any help would be appreciated and thank you so much for this tutorial! I would never have gotten as far as I did without it! So nice of you guys to make these.
Traci Reed said...
on July 11th, 2012 at 4:00 pm
Adrienne, you’ll need to duplicate the layer first, thanks for catching that, I’ve updated the instructions!
Hawt Trends: Chevrons | Traci Reed Designs said...
on January 12th, 2013 at 1:40 am
[…] Do you want to know how to make your own chevron in Photoshop? Traci wrote this tutorial. https://www.sweetshoppedesigns.com/tutorials/index.php/2012/06/make-your-own-chevrons-in-photoshop/ […]
Tash said...
on May 6th, 2013 at 2:11 pm
THis is a great tutorial – thank you. I’ve managed to make the chevron shape, but now I want to fill it with a patterned paper from one of the SSD kits – and I just can’t figure out how………HELP please?
Traci Reed said...
on May 6th, 2013 at 4:30 pm
There’s a tut for that! https://www.sweetshoppedesigns.com/tutorials/index.php/2012/02/using-clipping-masks/ Hope that helps!
Angela said...
on June 24th, 2014 at 11:44 am
Fantastic tutorial, Can’t wit to try this