Using the High Pass Filter in Photoshop
Sheri (SeattleSheri) here to share how I give my photos and layouts a little boost by using the High Pass filter in Photoshop. This filter is primarily used to sharpen your image. What I like about this filter is that it adds definition to the edges of your subject making them stand out. It also highlights the details within the image.
So let’s get started. The first thing you need to do is select the image you want to apply the filter to. The image can either be something within your layout or a stand-alone image. For purposes of this tutorial, I will be using a stand-alone image.
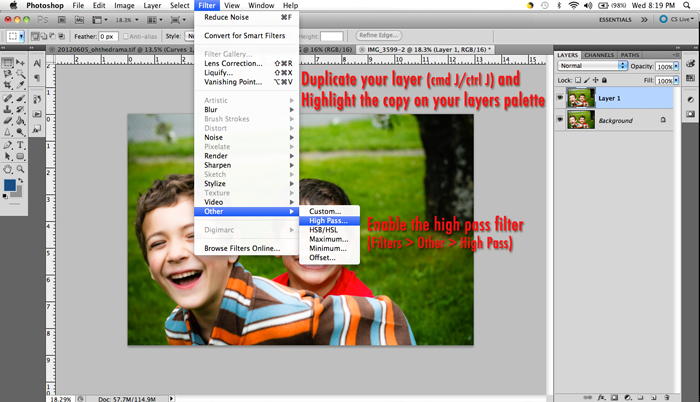
To apply the High Pass filter, you will need to create a duplicate of the layer you want to apply it too. I’m fond of keyboard short cuts, so I use Cmd J / Ctrl J. Once you’ve made a duplicate, highlight the copy and go to your Filters menu, then select Other and High Pass.
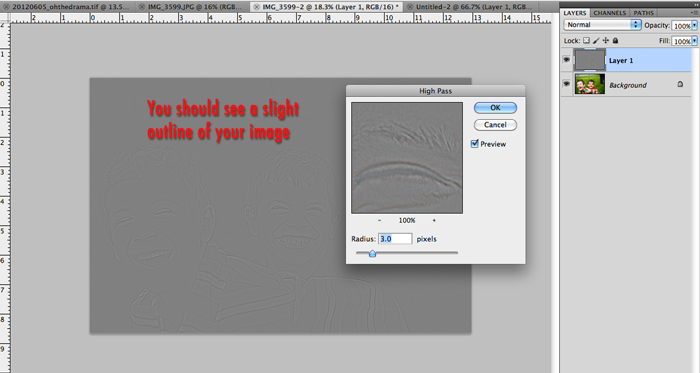
You will get a preview window showing you the detail of the High Pass filter. You should adjust the filter until you see an outline of the image as shown below. As a reference point, I used 3 pixels on a full size high resolution image. On something smaller like an optimized layout being prepped for web display (600×600) you’d want to choose something in the 0.3 to 0.5 pixel range.
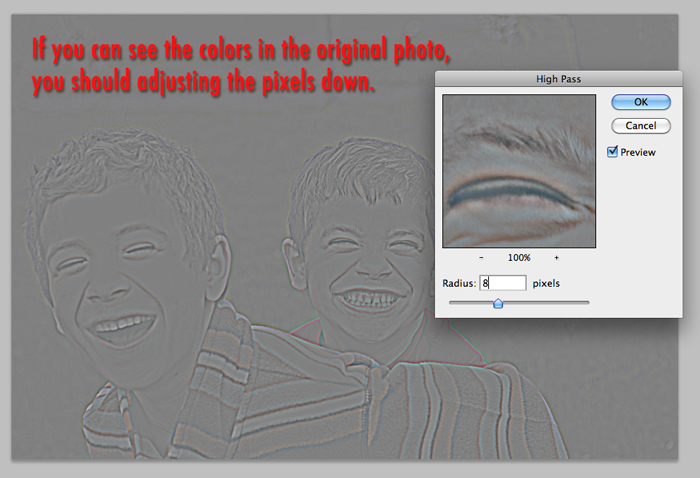
If you can see color on the original photo, you should consider adjusting the pixels down, as the likely result will be over-sharpened.
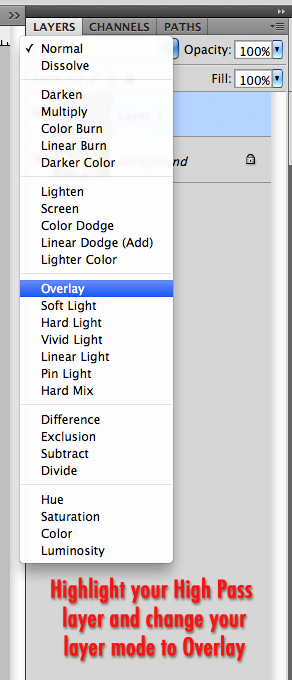
We are almost done. The last thing you have to do, is change your High Pass layer to Overlay mode.
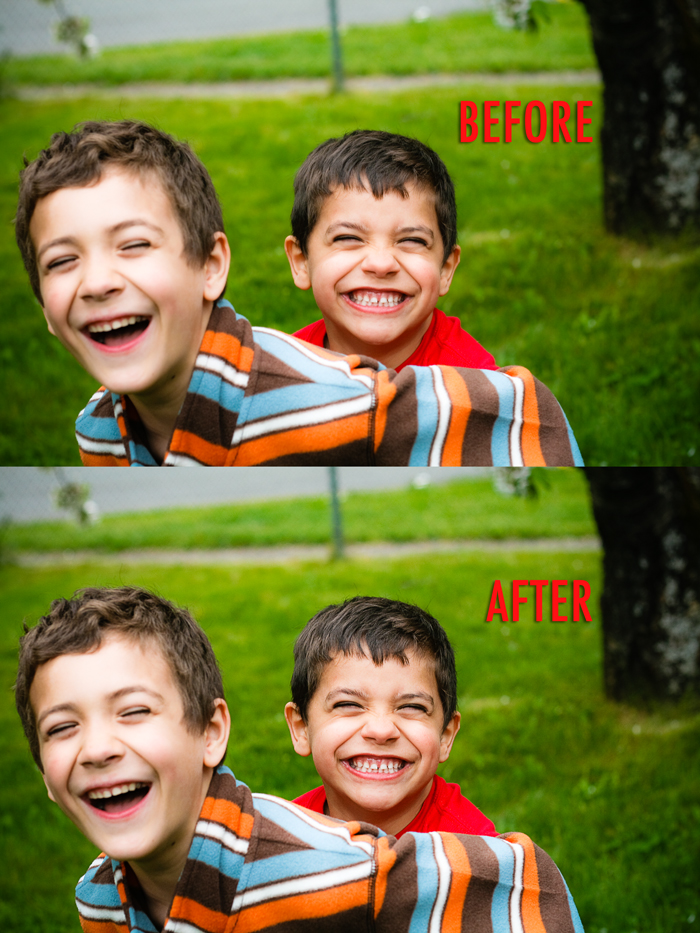
And the finished product!
Here is a close up of my youngest son’s face. Notice the increased definition of his hair and mouth.
I hope you enjoyed this tutorial and happy scrapping!



Anne R said...
on March 3rd, 2013 at 12:43 am
Thank you so much for this tutorial. I have always wondered how to sharpen my layouts. I have PSE 9 & 10. This tutorial worked great in both programs.