Hot 4 Hybrid Wednesday – Haunted House Part 1
Hey hey sweet shoppers, how’s it going? Who’s ready for our weekly trip to the world of scissors and glue? I’ve got part 1 of an altered Haunted House to share with you today. Part 2 will be posted in the forum in a few days.
So do you have a lot of Halloween decorations in your house? Since we don’t have kids yet, I don’t really decorate for Halloween, I decorate for fall. A while back I found this awesome little wood house just perfect for Halloween, and it was on clearance so naturally I snapped it up. It’s taken me forever to get to making it, but I’m so glad I’ve made the time to get it done this year. But, it’s not done yet (I’ve made much more progress since these photos were taken). Now I don’t know about you, but whenever I think of a creepy haunted house from a movie or a cartoon, there’s always a big, bare, creepy tree right next to the house, perfect for branches to tap on windows and scare people half to death. So for today I’m going to share how I took an awesome digital tree and made it into a 3D tree to create a little scene for my altered haunted house.
But first, here’s a little sneak peek of things (don’t mind the messy paint job, it all gets covered up, lol!):
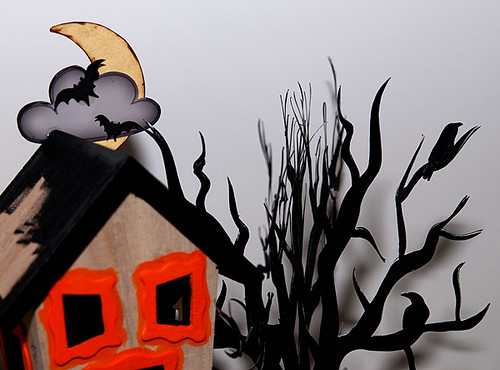
Ok here we go. I used the fabulous creepy tree from Melissa’s Hocus Pocus kit:
I covered it in a paper from Lauren and Jenn’s Nevermore kit, which is also where those great crows are from that you see up in the sneak peek.
I printed it out 4 times total. 2 times just as it is in the kit, and then I made a mirror image of it (flipped it horizontally) and printed it out 2 times. So you end up with this, once you cut them out:
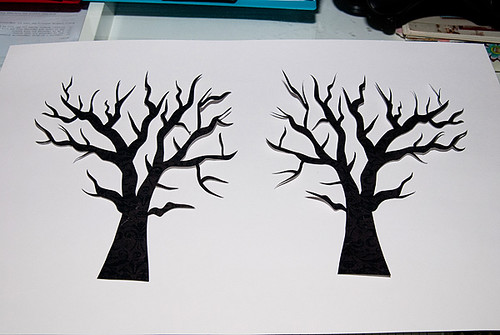
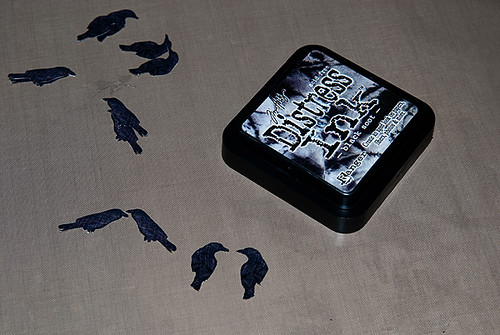
Now, here’s where you get to learn from my mistakes. Each tree is not exactly the same, because that would be impossible when cutting them out individually with scissors (if you had a machine that could read the file and do it for you, you could probably skip this step, but I don’t, so I couldn’t). So I flipped my trees over, and I used my black distressing ink pad and smeared it all over the back. This way, when I glue the trees together, where it doesn’t match up perfectly won’t be as noticeable. REALLY smear them good, it’ll make for a much better tree.
Naturally, I forgot to take a picture of the next 2 steps. Tutorial fail. But it’s not hard, so you should be able to follow along (if not, drop a comment or send me a pm and I’ll help you!!). Looking at the image above, you see how the trunk sorta splits off into 2 big branches that everything else comes off of? Using a bone folder, score a line from that split down to the bottom of the trunk. You’re basically folding the tree in half. Fold it towards itself, so that the printed parts are facing each other (if you were to set it on the table printed side up, it would make a V-shape. You’ll see what I mean in a second.
Next, take 1 of each kind of tree (as shown above, but folded). When you hold them side by side, the insides of them should match up perfectly. Adhere them together. I used my tape runner on the larger pieces, and a liquid glue pen for the smaller branch pieces. Repeat this with the other trees you cut out, adhering the last piece together to the first to complete the tree.
Here’s what you’ll end up with after those steps:
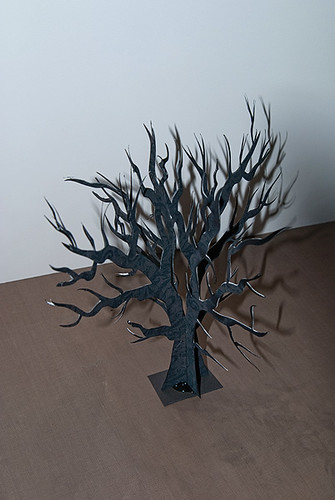
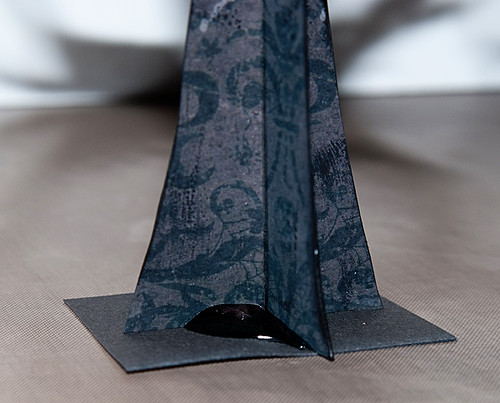
Here’s a shot of the base of the tree. Once it was all glued together I used my glossy accents glue to adhere it to a piece of cardstock for stability. See how the 4 pieces make up a full 3D tree? The paper provided some nice dimension, and the black smudges of ink really add some nice depth to it too.
Now what creepy tree would be complete without some black crows? I followed the same principle here that I did with the tree, creating a mirror image of the 2 types of crows. This way when you glue them together you see the crows on both sides, instead of white on the back. Again I smeared the black with my black soot distressing ink to hide those imperfections.
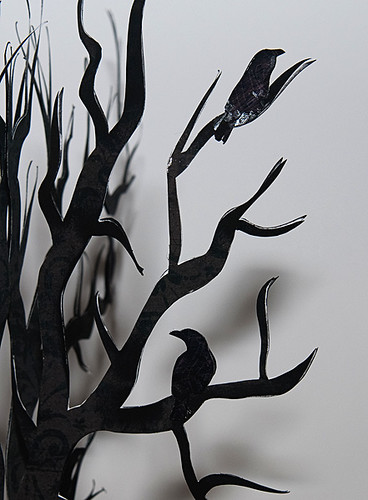
Then I just picked a few choice branches that I thought the crows would stand out, and glued them them together with the branch piece in the middle. I used a small amount of glossy accents to do this, because it gets very tacky very quickly, so you don’t have to stand around holding the pieces together for too long.
The crows do blend in a little bit too much, so I think will go back and add some black glitter to them, to help them stand out. I like the extra touch their shape adds to the look of the tree. (See the white bits on the branches? Really smear that ink around on the back and it’ll look better than this does, I promise!)
And that is all there is to it! You could do this for all sorts of little scenes throughout the year. I hope to create a second altered Christmas house this year, and I just might have to make a 3D Christmas Tree to sit outside of it in some snow. The possibilities are endless! There are a TON of kits in the shoppe with pretty trees in them, I bet you have a few in your stash that would look great like this!
Stay tuned to the forum in the next week while I finish off this house and show you the final product. I’ll have more step by step photos to guide you along if you’ve never altered a wood house like this before. I hope you enjoyed this and give it a shot! Don’t forget, if you have any questions feel free to leave a comment here, or shoot me a PM in the forums. I’m glad to help!
Have a great week everyone!
~Col





blurooferika said...
on October 20th, 2010 at 5:30 pm
Like your 3-d effect with just paper, Col. I was convinced it was precut chipboard or foamboard. Nice!
Darcy said...
on October 20th, 2010 at 8:20 pm
That is really amazing, Colleen!
penny said...
on October 25th, 2010 at 7:00 pm
wow! Colleen, it looks fantastic!