Think Outside the Album: Stickers
Let’s talk about stickers! What are they good for? As my stepdaughter would say, “All of the things!” Adults use them in planners, calendars, and bullet journals. Older teens and young adults emblazon their laptops, iPads, and water bottles with stickers and decals galore. And littles absolutely adore stickers as gifts or rewards for good behavior.
Did you know it’s super easy to turn a digital kit from the Sweet Shoppe into pages and pages of stickers? All sized perfectly for whatever your project is.
Welcome to the next installment of Think Outside the Album, where we look at different ways to take our digital supplies off the scrapbook page and instead, use them to make the rest of our world just a little bit sweeter.
Today, we’re looking at how easy it is to turn Sweet Shoppe digital scrapbooking kits into perfectly customized stickers.
All you need is a color inkjet printer, a digital diecut machine (like a Cricut or Silhouette), and sheets of sticker paper – easily available at craft or office supply stores or through Amazon.
Before we begin, though, it’s time for a quick but important reminder about licensing and terms of use. When you buy a kit from the Sweet Shoppe, it comes with a license for personal, non-commercial use. That means you may use it to make stickers for your planner and bullet journal. You may use it to make stickers for the little kids in your life. And you may use it to make decals to give as gifts to anyone you’d like. You may NOT make stickers from these designs and sell them on Etsy, at a craft fair, or as a fundraiser, no matter how good the cause. If money is changing hands, it’s considered commercial use, and you may only use SSD supplies for that if you have prior written permission from the designer. So personal, non-commercial use only. Got it? Cool.
What You’ll Need
Sticker paper
Any sticker paper will do if it’s compatible with your printer. I used this paper, which I purchased on Amazon for $9.99 for 30 sheets.
A color printer
Either inkjet or laser is fine; I used my HP OfficeJet Pro 9010 All-In-One.
An electronic digital cutting machine
I used my Cricut Maker, but any cutter capable of cutting sticker paper will do.
Cutting mat
For the Cricut, either the blue or green mat will work.
The appropriate cutting blade
For the Cricut, you’ll want a sharp fine point blade.
Please note: for today’s post, I’m going to walk you through specifically how to use a Cricut to create stickers. If you own a Silhouette cutting machine, the concept is the same but the specific steps and software will be different. You can see this post for instructions on how to do this with a Silhouette.
Kiss Cut vs. Die Cut
There are two kinds of stickers – kiss-cut and die-cut. If you buy a sheet of stickers and peel off the individual sticker leaving the backing paper behind, it’s a kiss-cut. If you get a decal or sticker where the entire shape is cut out and you have to separate the sticker paper from the backing paper along a cut edge, it’s a die-cut.
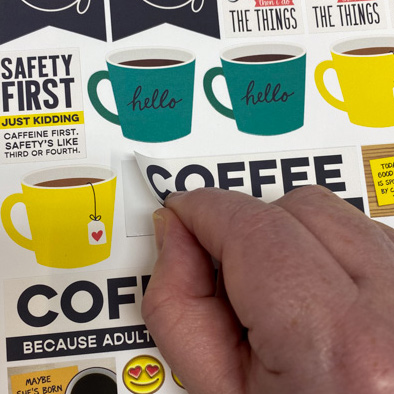
Which one you go with is entirely based on your personal preference.
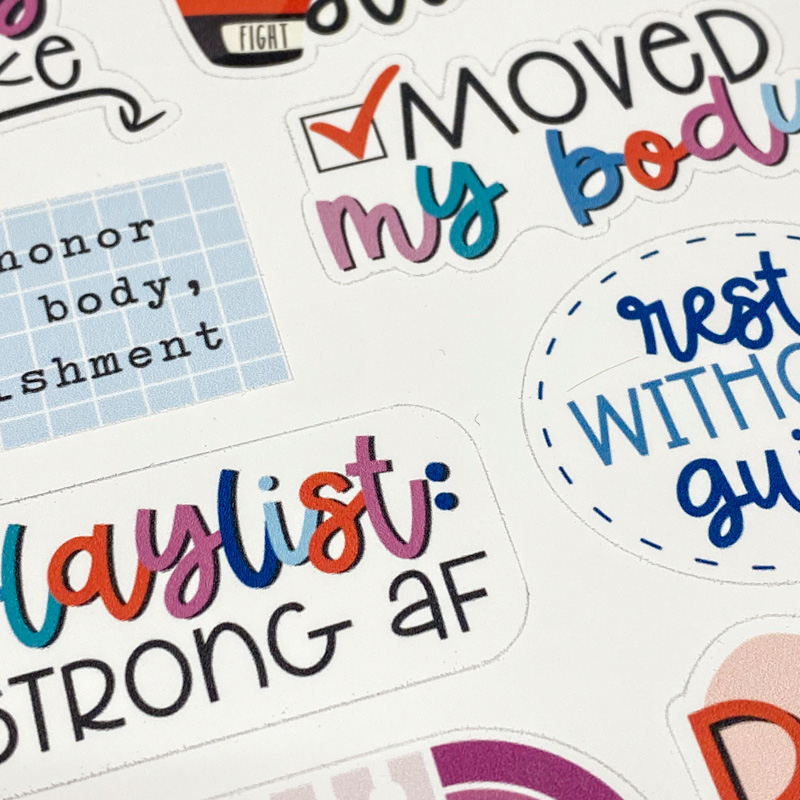
Personally, I prefer the ease of a sheet of kiss-cut stickers, so that’s what I’ll be demonstrating today. The precise cutter settings to get a kiss cut can vary depending on the brand and style of sticker paper you use. On my Cricut, I’ve had the best luck using the built-in setting for Washi Sheet. If you choose a setting that uses too much pressure, the worst that will happen is it cuts all the way through the paper, giving you a die cut sticker. You should expect to use several sheets of sticker paper as you play with settings and figure out what works best for your sticker paper and cutter.
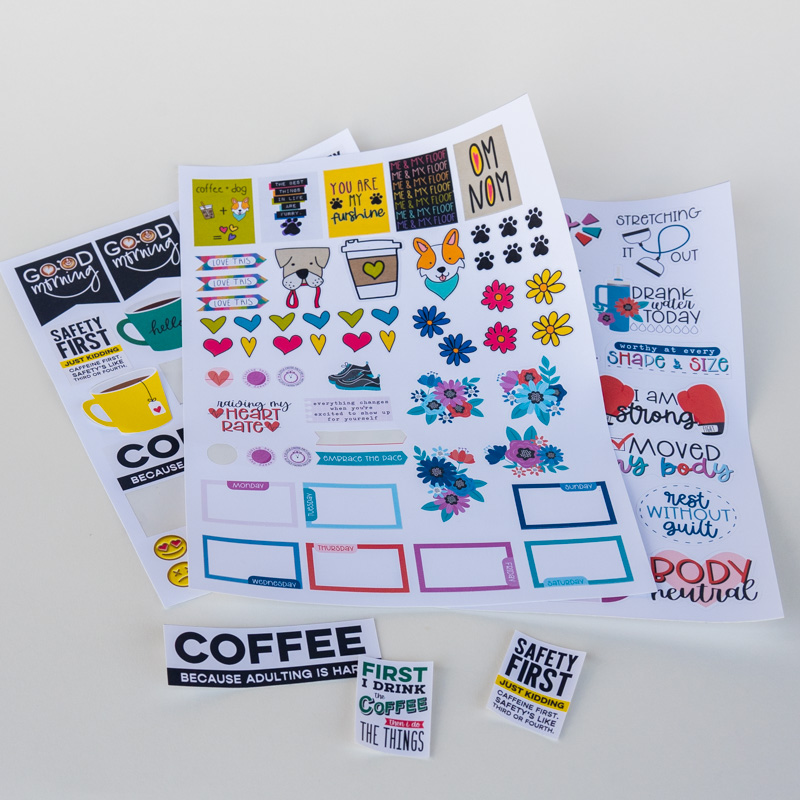
The rest of this post has lots of screenshots and photos and may seem more complicated than it is. Really, printing your own stickers is easy – but I wanted to give you all sorts of help along the way. We’re going to explore four different ways of creating stickers:
- Example #1: Quick-And-Easy Stickers from a Sticker Sheet
- Example #2: Custom Sizing Individual Stickers
- Example #3: Create your own sticker sheet layout in Photoshop
- Example #4: Add photos to your custom stickers
So let’s get started!
Example #1: Quick-And-Easy Stickers from a Sticker Sheet
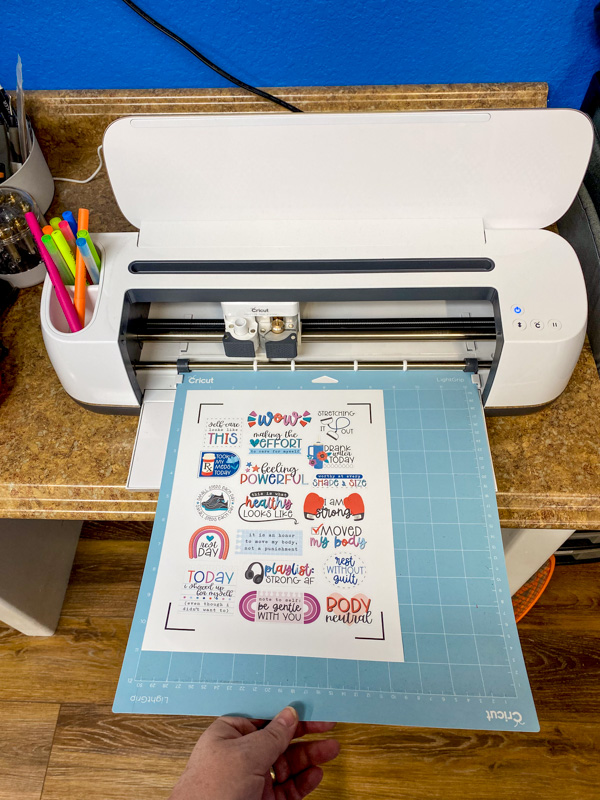
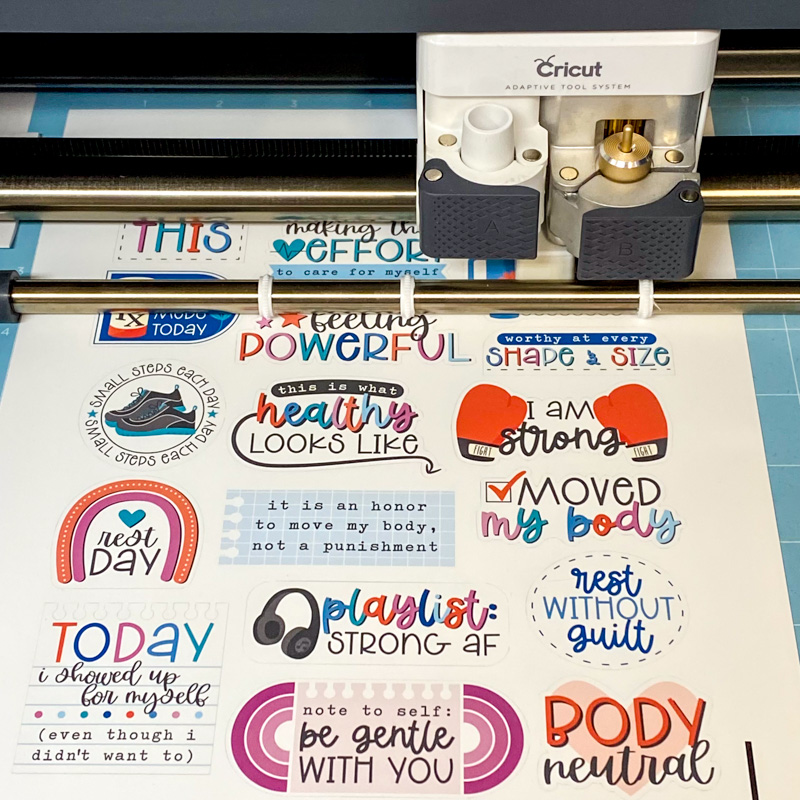
Did you know … some of our designers provide files for full sticker sheets with their sticker sets? Traci Reed is one such designer. Let me demonstrate how quick it is to create stickers with her recent release, Strong AF
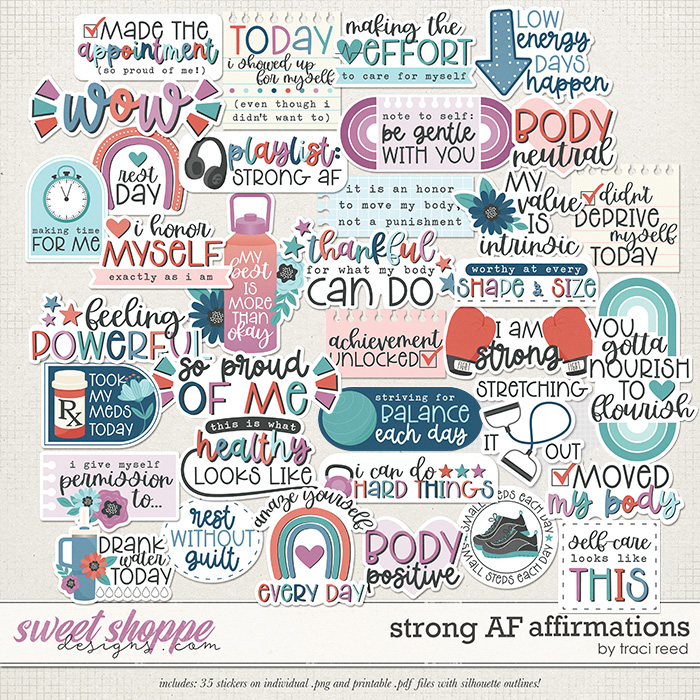
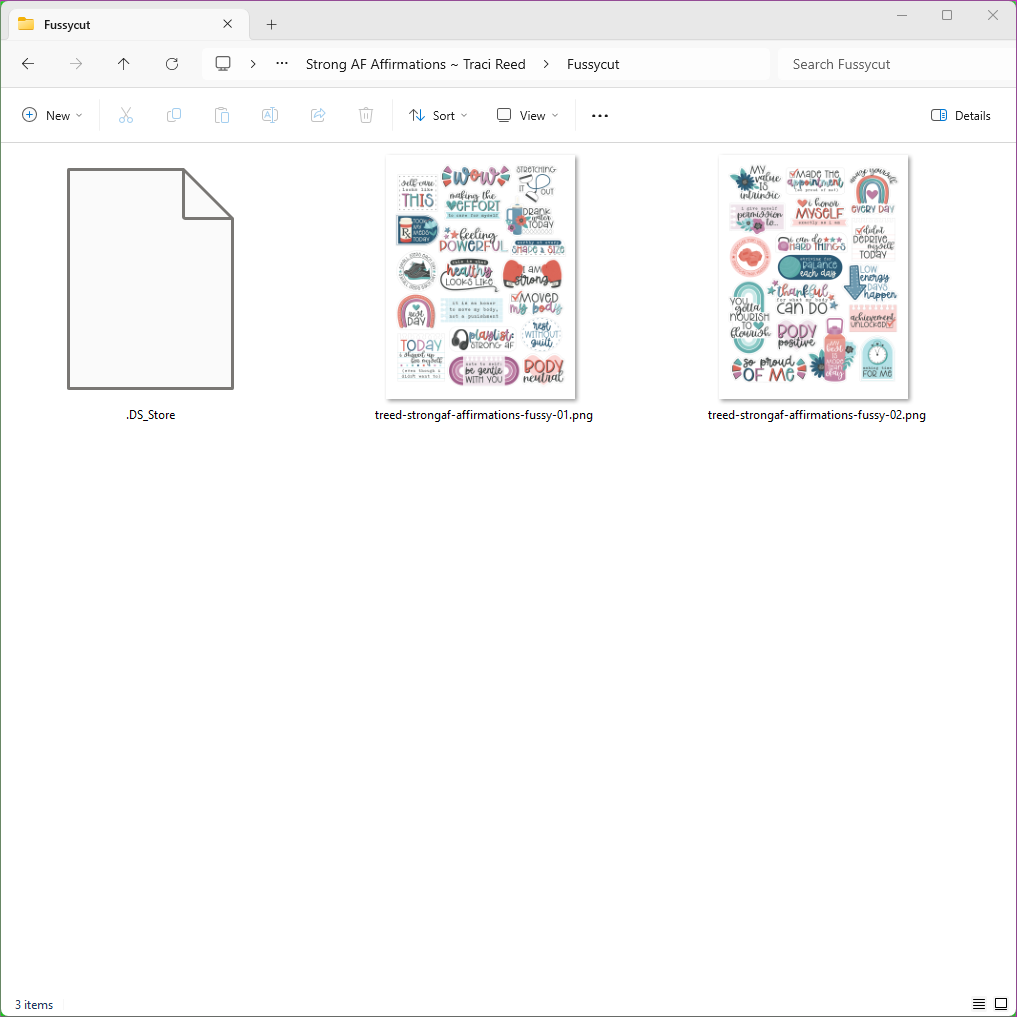
When you buy Traci’s Strong AF Affirmation Stickers you’ll download a ZIP file with your purchase. Extract (or unzip) the file and you’ll get several folders:
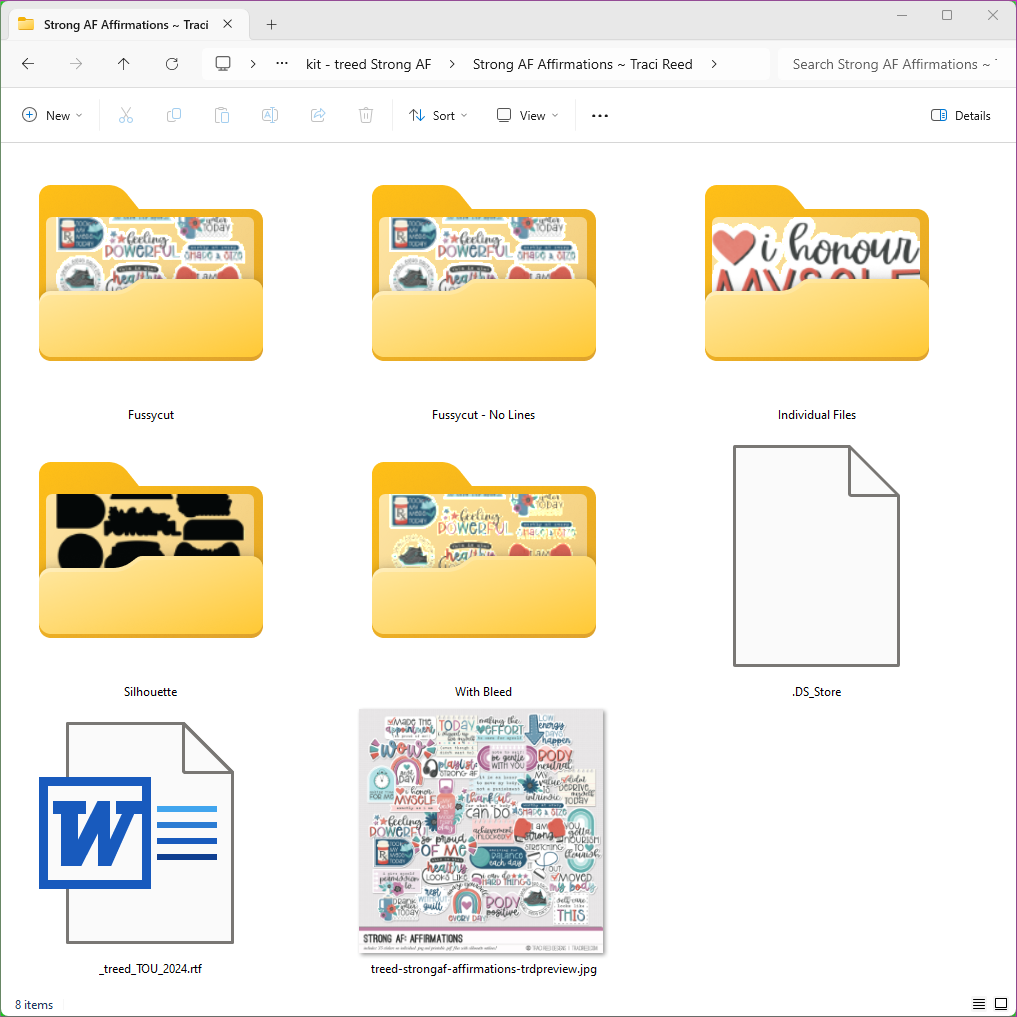
Inside the Fussycut folder, we find two PNG files – these are sheets of stickers ready to import into our Cricut Design software.
Note: these instructions are current for the version of Cricut Design Space software as of March 28, 2024. Steps and screen shots may change as the software is updated in the future.
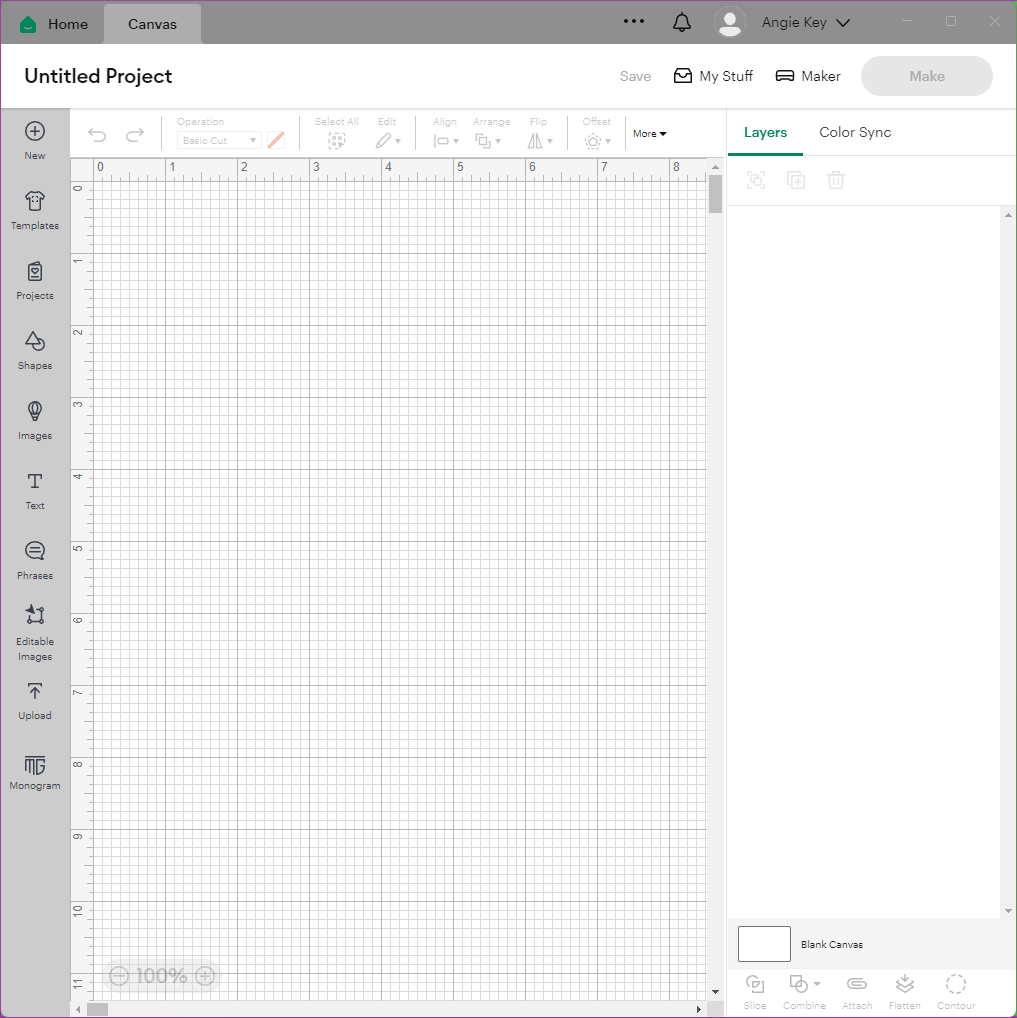
- Launch Cricut Design Space and start a new blank project:
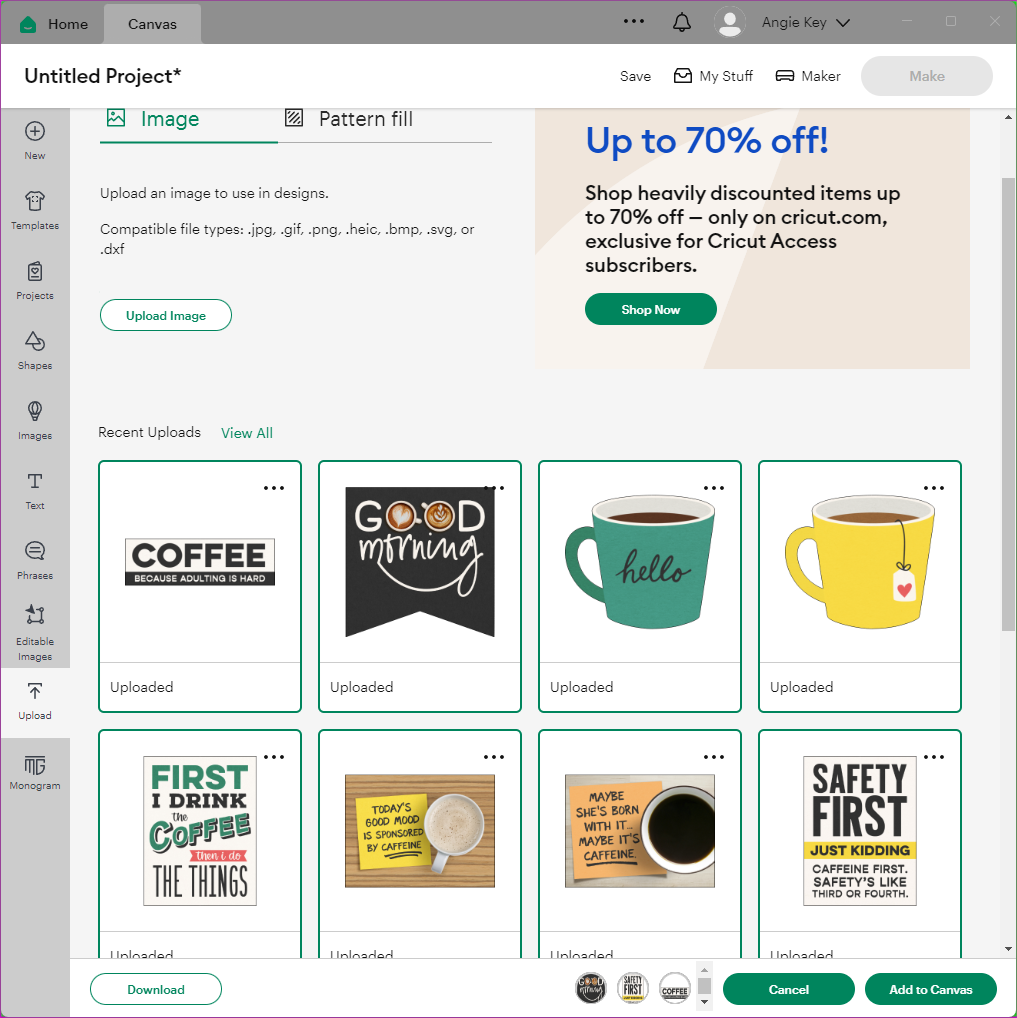
- From the left-hand menu, click UPLOAD.The Upload screen will appear.
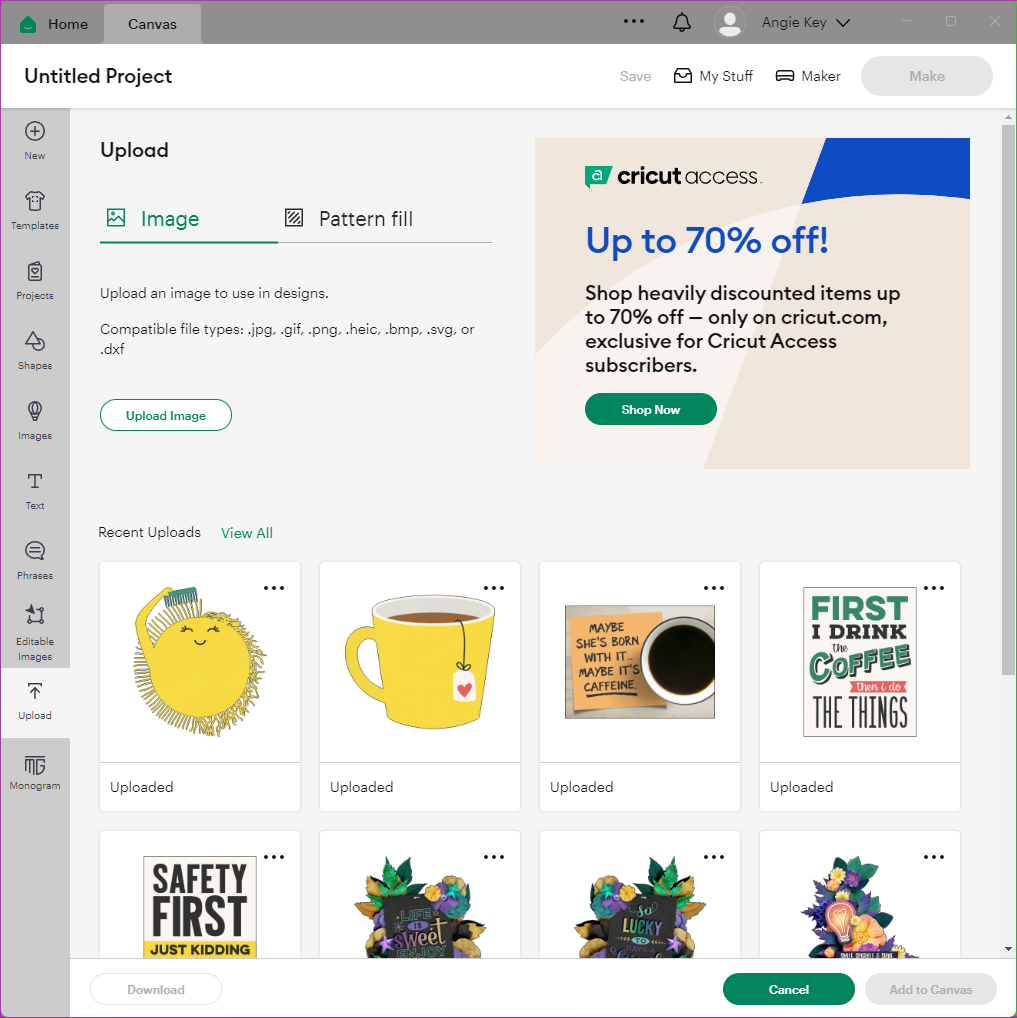
- Click the button to Upload Image.
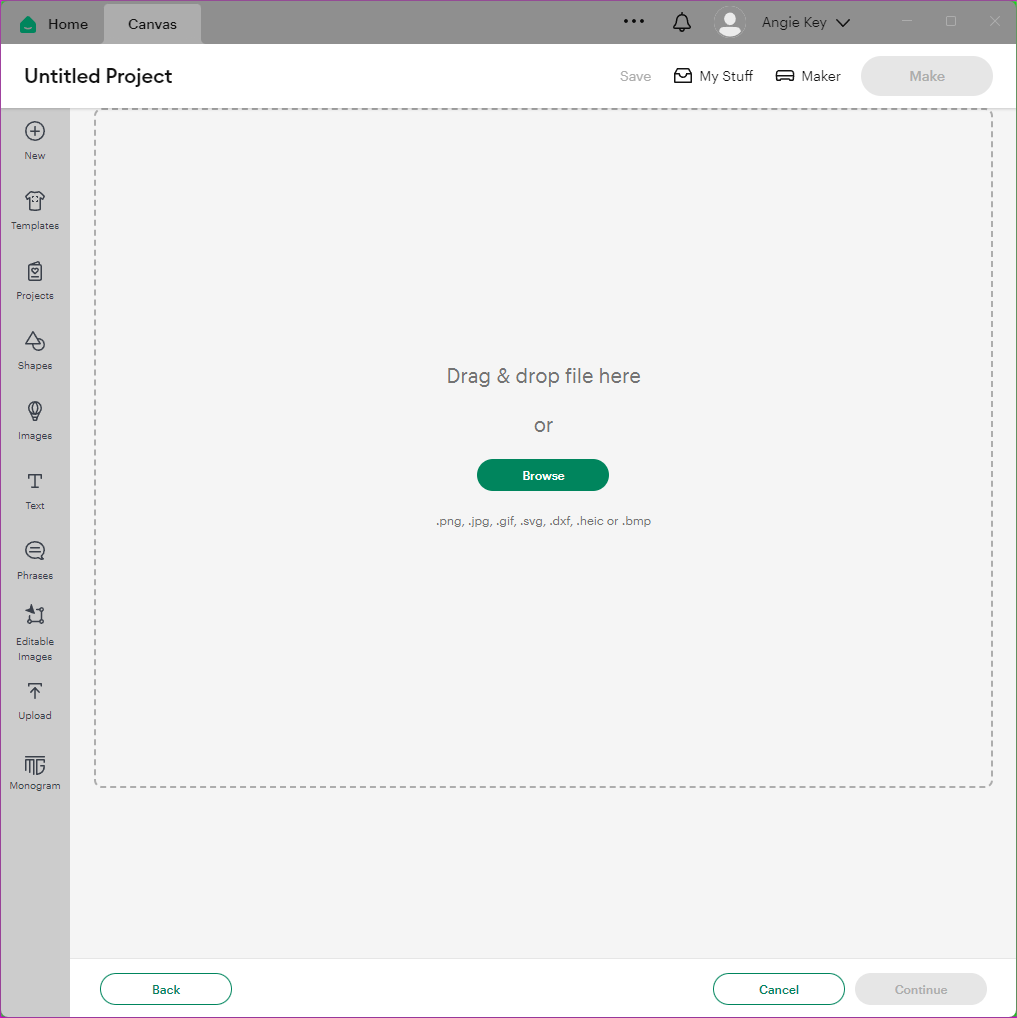
- Drag-and-drop one of the PNG files or click Browse and navigate to the PNG instead.The file will upload and a preview will appear.

- Under Select Image Type, choose Complex and click Continue.The Background Remover screen will appear. Since the file Traci provided has a transparent background, there’s nothing to remove.
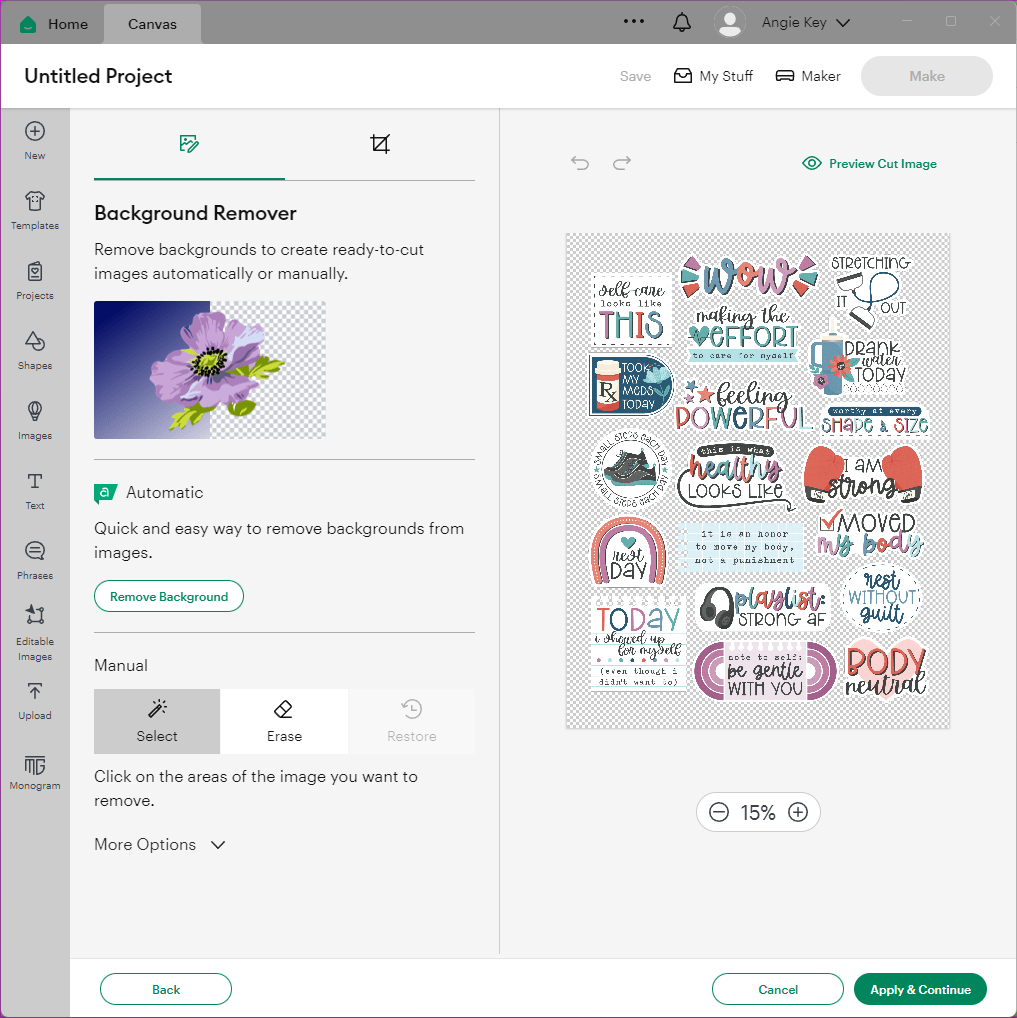
- Click Apply & Continue.The Select Upload Type screen will appear.
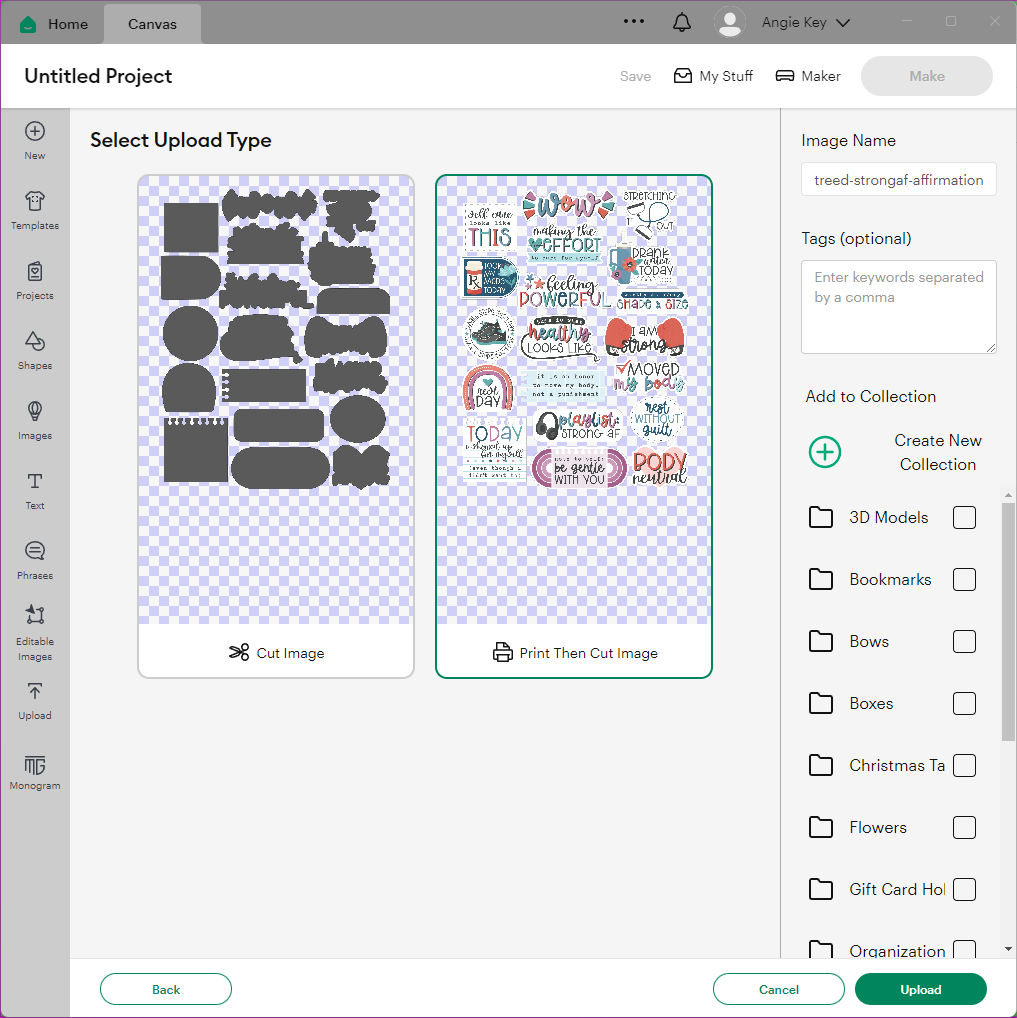
- Choose Print Then Cut Image and click Upload.The Upload landing screen will appear, and our new sticker sheet shows up under Recent Uploads.
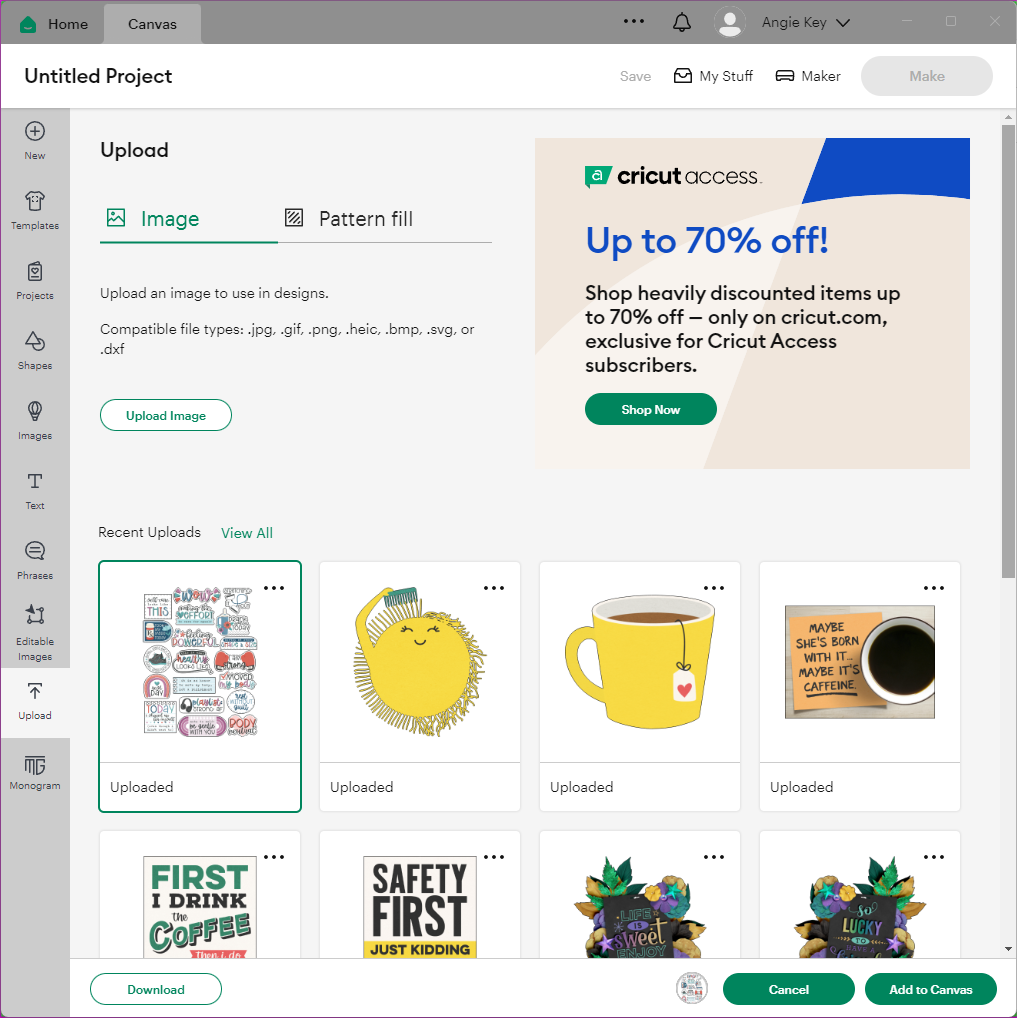
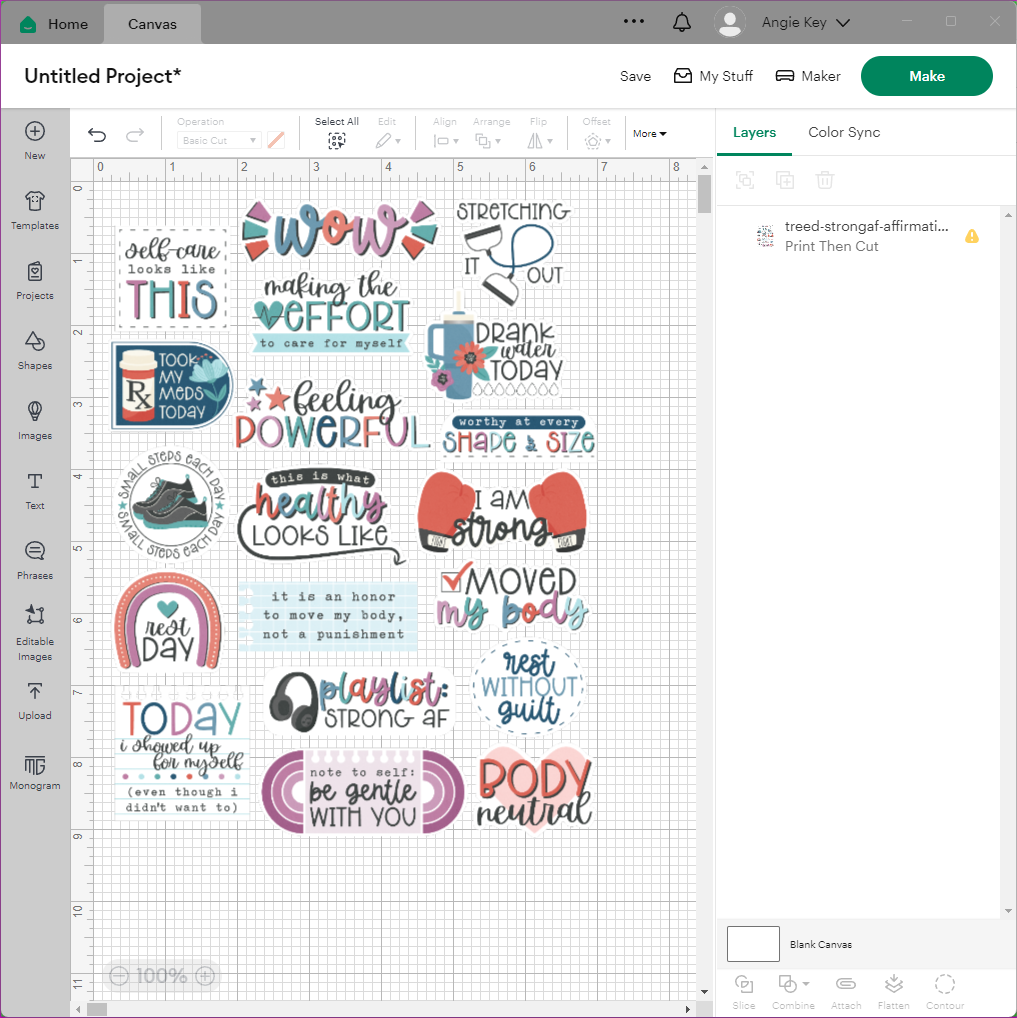
- Click on the sticker sheet image to highlight it and click Add to Canvas.Your Canvas will appear with the sticker sheet – but you’ll notice it’s scaled really large, bigger than will print on an 8.5×11 sticker sheet. Here’s the easy way to fix that:
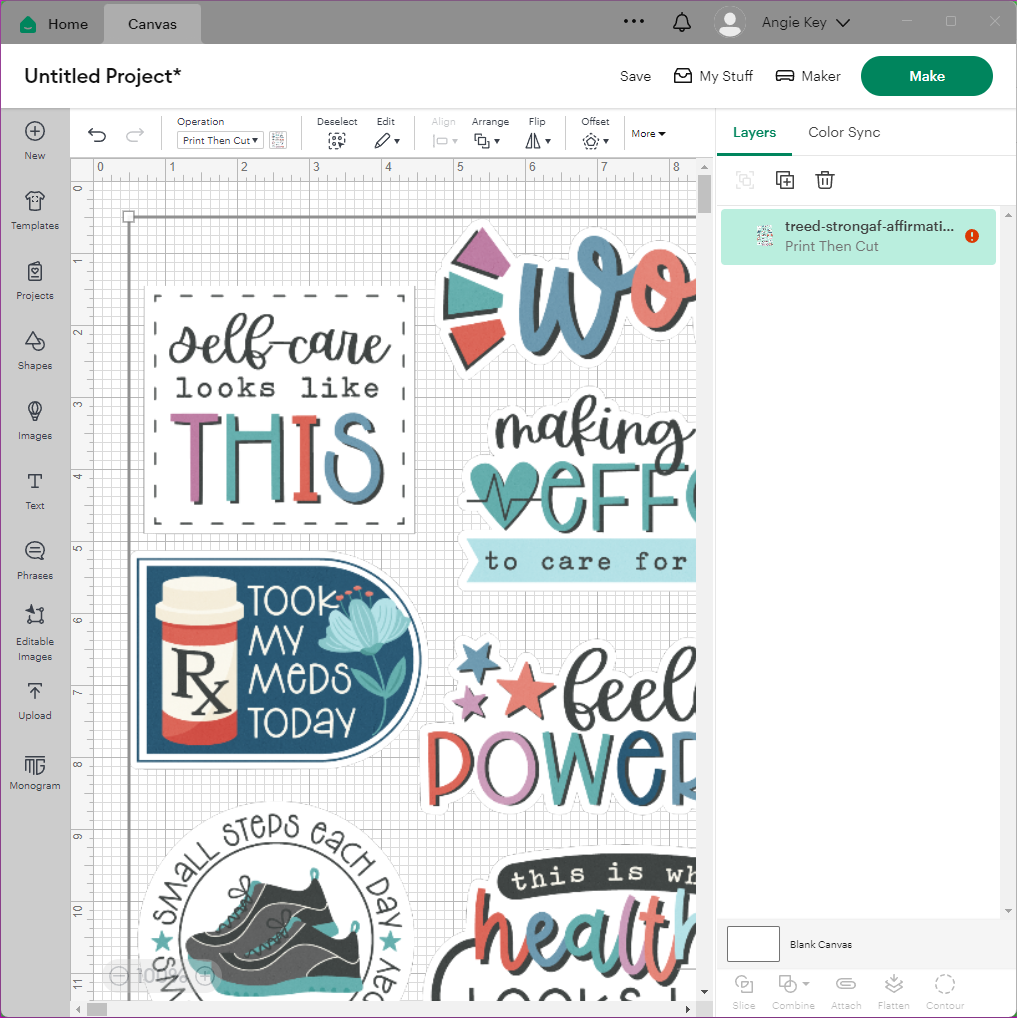
- In the Layers panel on the right side of your screen, the sticker sheet file appears with a red exclamation point icon. Click on the exclamation point.The Image Too Large message will pop-up. “We have detected that the max size for this shape is 6.79in x 8.92in.” Yay! The software automatically calculated how big this can print on a letter-size sheet in order to allow enough margin space for the print-and-cut registration lines. Easy peasy!
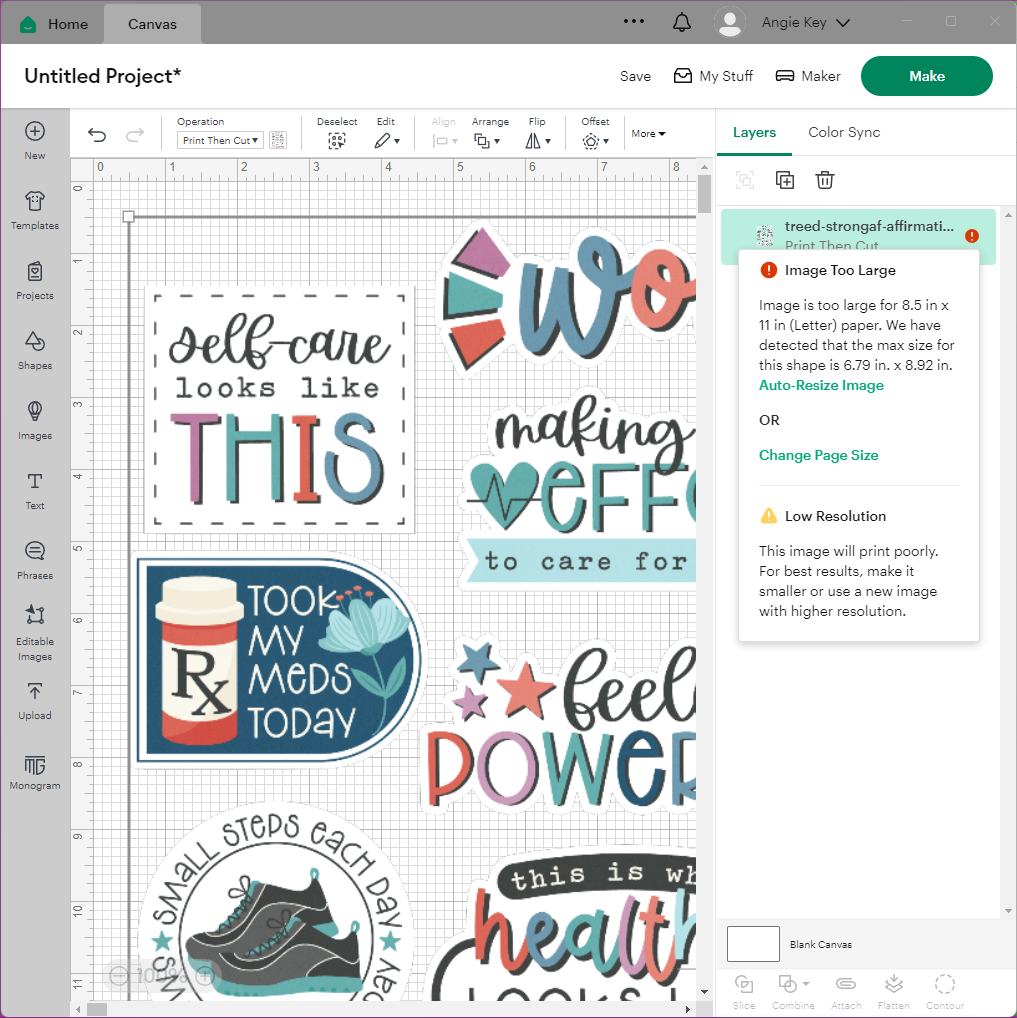
- Click Auto-Resize Image.The sticker sheet image will shrink to fit.
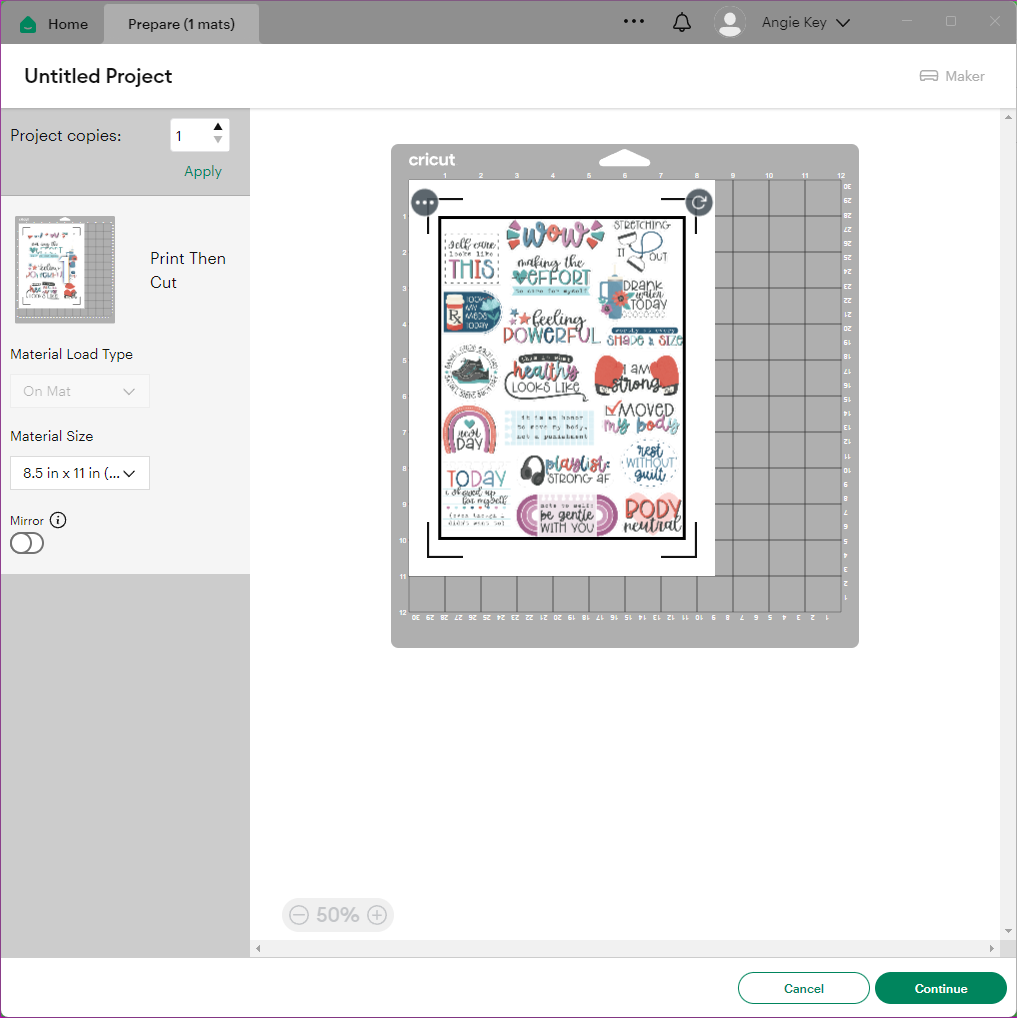
Now we’re ready to print and cut our stickers. - Make sure your printer is loaded up with a sheet of your sticker paper and click Make.The preview screen will appear. Notice the Cricut software has added lines around our stickers. These are registration marks that allow our Cricut machine to calibrate and know exactly where the edge of the stickers are … essentially, matching up our printout with what it’s going to cut.
- Click Continue.
- Under Step 1: Print on 8.5 in x 11 in (Letter) click Send to Printer.The Print Setup screen will appear.
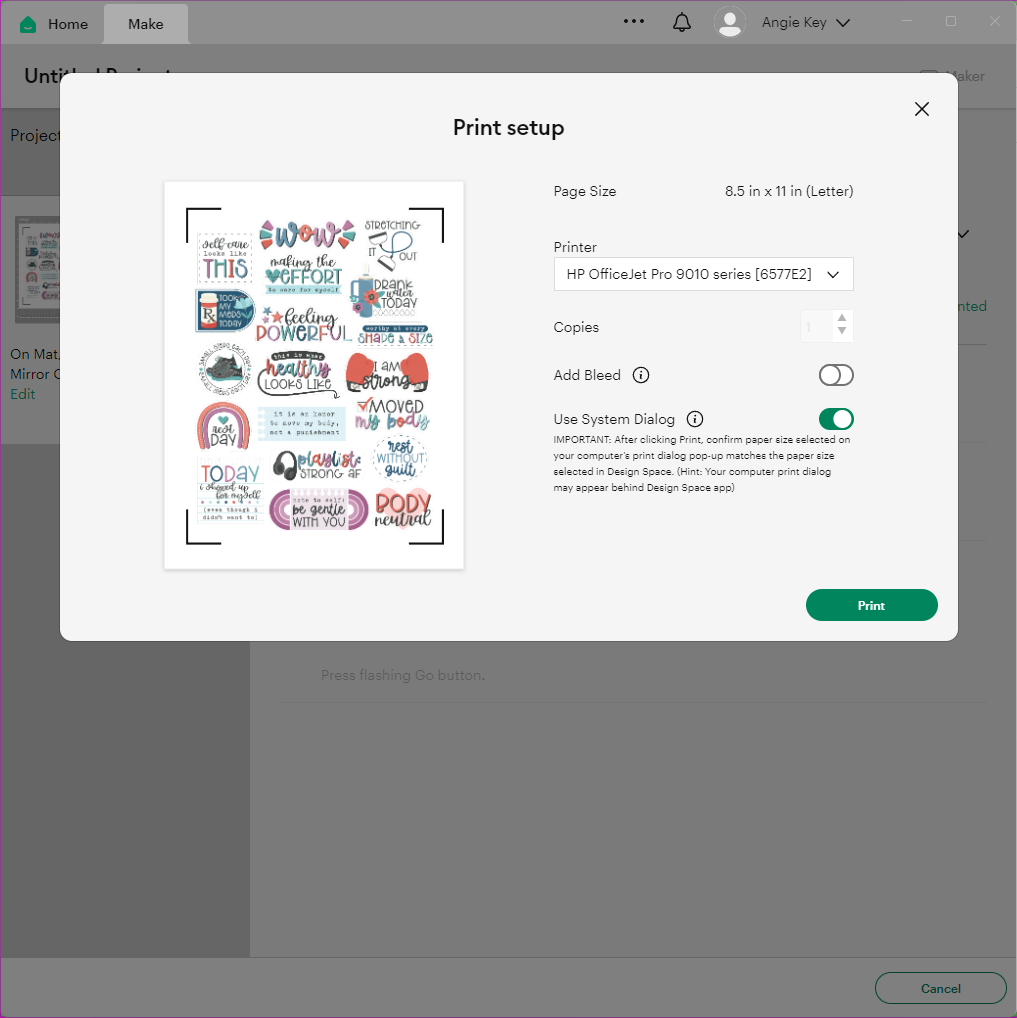
- Make sure your printer is selected and turn ON Use System Dialog. This allows you to configure your printer’s settings for print quality.The Print dialog box appears.
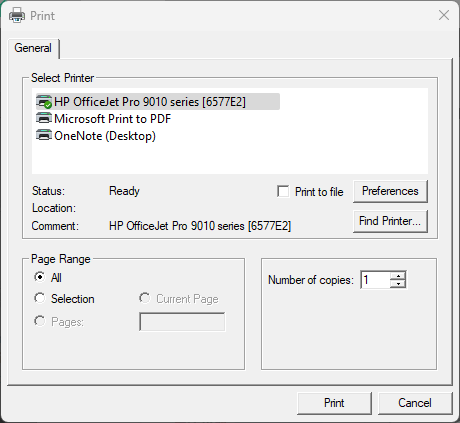
- With your printer selected, click Preferences. Click the Paper/Quality tab. Under Quality Settings, select Best and click OK.

- Then click Print.Grab your sticker sheet off the printer. Give it at least 5 minutes to dry before you move on to the next step! You don’t want the ink to smear.
Back in the Cricut Design Space, we’re on Step 2: Set Base Material.
- Click the link to Browse All Materials.
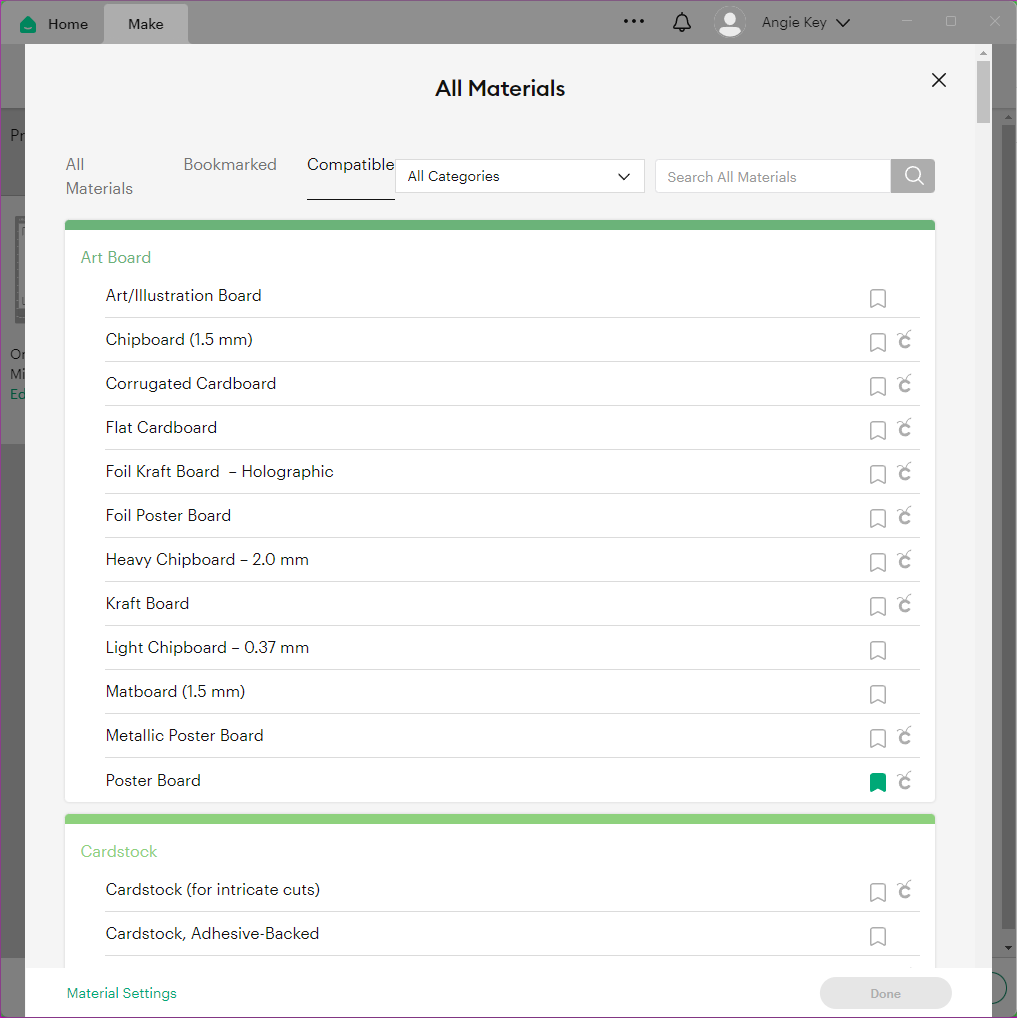
- In the Search box at the top, type Washi and hit Enter. Select Washi Sheet and click Done.
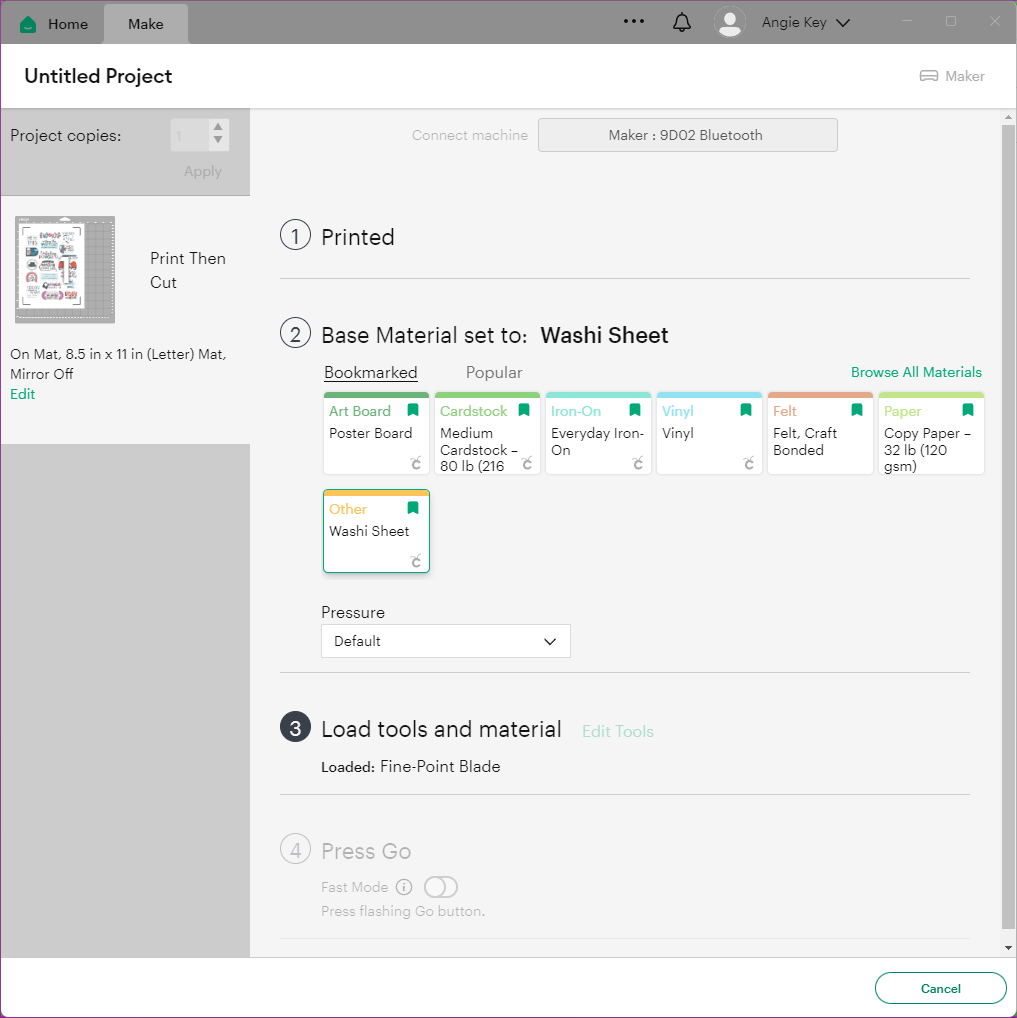
- Under Step 3: Load Tools and Material, follow the directions for which tools you’ll need in which clamp for your Cricut.
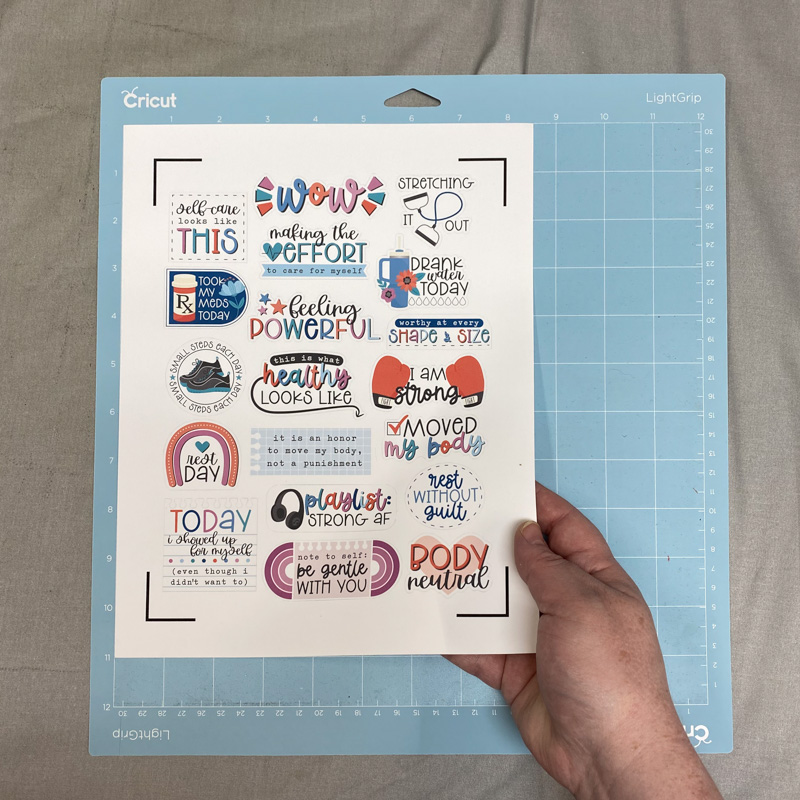
- Now that we’re sure our sticker sheet is dry, pull out your blue or green cutting mat and carefully place the sticker sheet on the mat so the edge is lined up with the grid in the upper left corner. Then smooth it out with your hands or roll over it with a brayer.
- Load the cutting mat into your Cricut.
- Then press the flashing Go button and let the magic happen…
- When your Cricut is done with the cut, it will return your mat to the starting position and the load/unload button will flash. Press the button to remove the mat from the machine.
- Peel the sticker sheet off the mat and you’re ready to go!
Example #2: Custom Sizing Individual Stickers
Whether you want to pick-and-choose exactly which stickers you print, or the designer didn’t provide a pre-made sticker sheet, or you want more control over the size of each sticker, you can easily add individual images from a kit to your Cricut Design Canvas.
For example: Erica Zane has an adorable new kit coming to the Sweet Shoppe this Friday, March 30th, and I’d like to print some of her elements and cards as stickers to use in my planner. So let’s start a new project in Cricut Design Space…
Go through the steps to Upload each image one-by-one (this goes pretty quickly):
- Click Upload Image
- Browse or drag-and-drop the image file
- Select Complex and click Continue.
- Confirm the background is transparent and click Apply & Continue.
- Select Print Then Cut Image and click Upload.
Rinse and repeat until you’ve uploaded all the images you want to print.
Then click to select each of them (under Recent Uploads) and click Add to Canvas.
Eventually, your Canvas will appear and all your new images will show up … stacked one on top of the other.
- First, resize them so they fit on the screen. Then click off the stack so nothing is selected.
- Now, one by one, you’ll resize each image until it’s the size you want in your printed sticker.
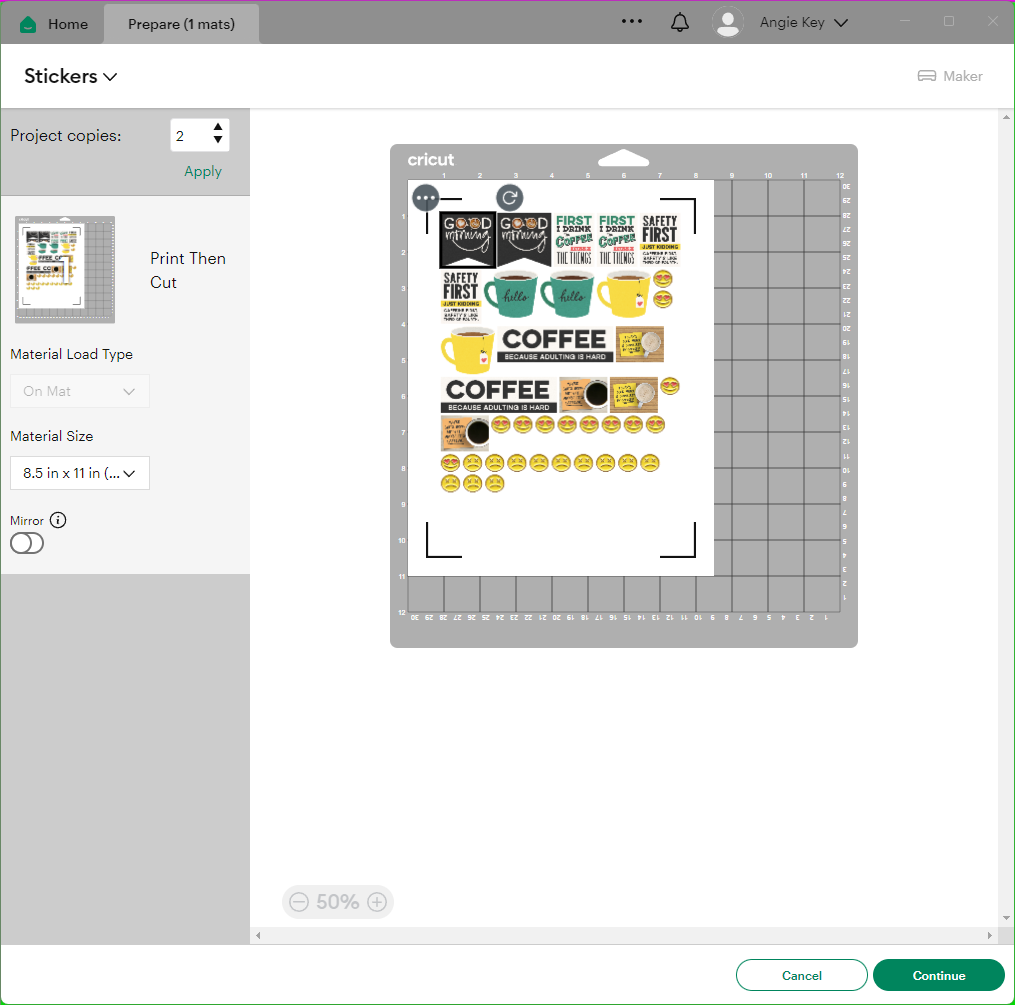
When you’re ready to create your stickers, click Make. The Cricut Design Space software will take care of laying out your sticker sheet for you.
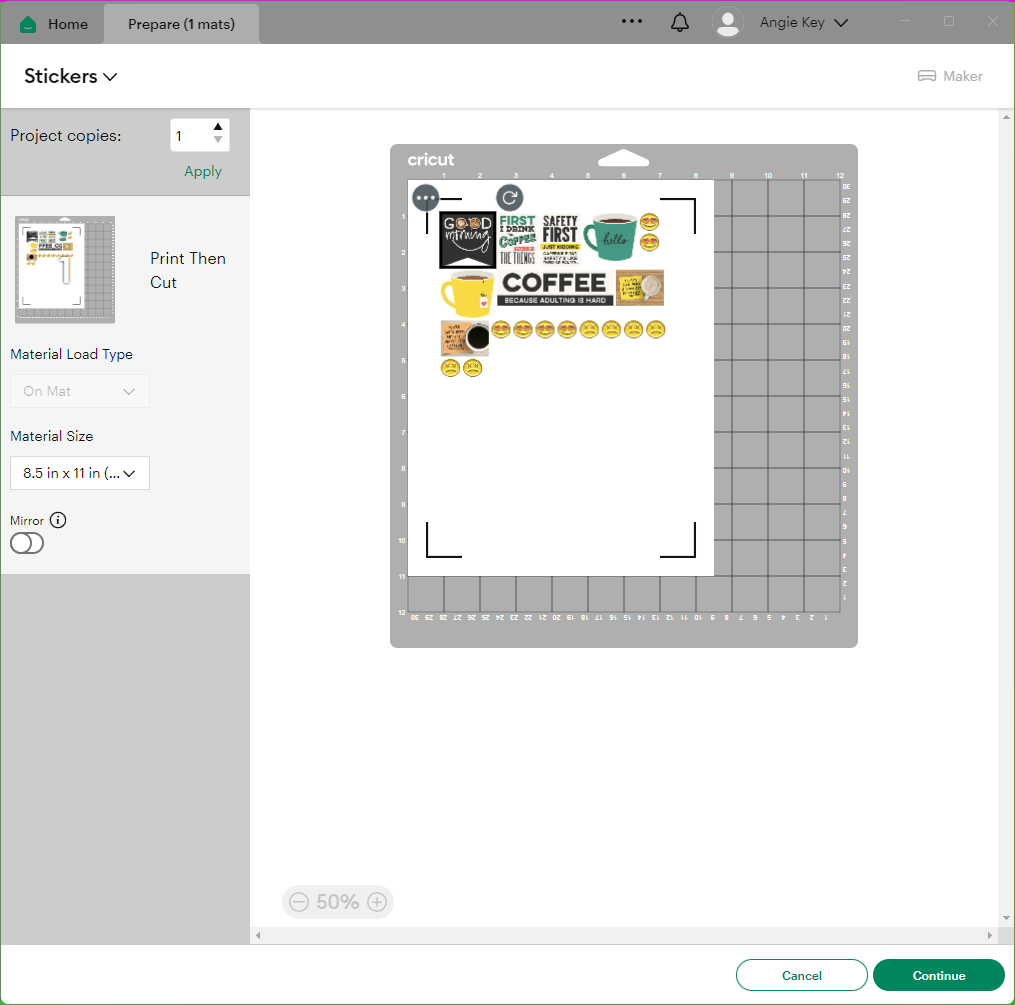
Want to make the most of your sticker paper? In the left-hand panel, change Project Copies to 2 and click Apply. The software will shuffle around your sticker layout to make the most of the printable space. Nice!
Now follow the same steps as we did before to print and cut your sticker sheet:
- Click Continue.
- Load your printer with a sheet of sticker paper and Send to Printer. (Remember to turn on Use System Dialog and choose Best for your print quality!)
- Set Base Material to Washi Sheet.
- Place your printed sticker paper on a blue or green cutting mat; smooth out any bubbles.
- Load your mat in your machine. Press the flashing Cricut button to cut.
- Press the button to unload your mat when the cutting is complete.
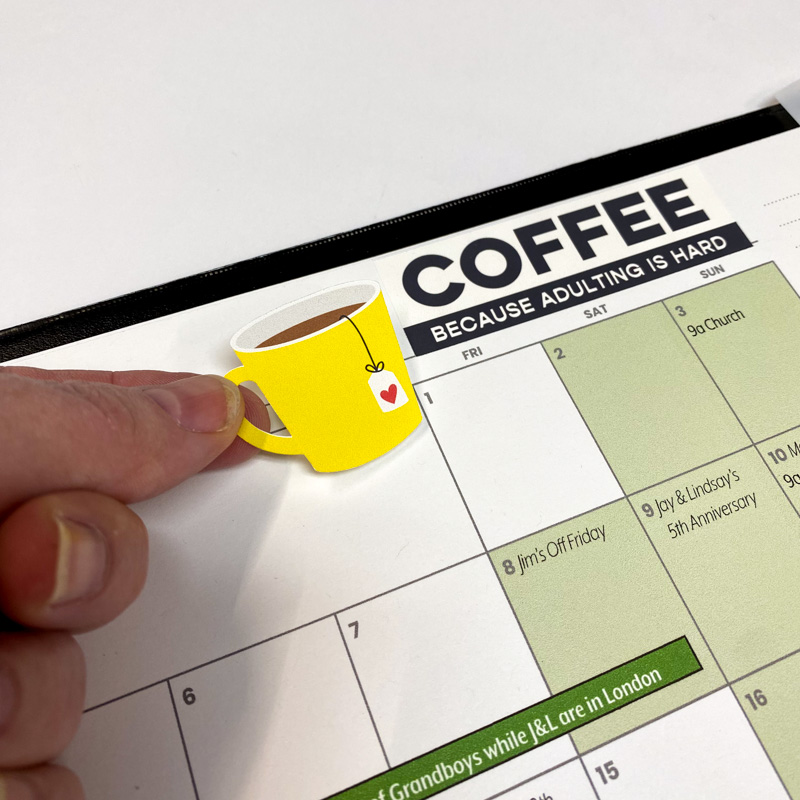
These stickers are so cute – I just had to include them in my planner for this month!
Example #3: Create your own sticker sheet layout in Photoshop
Sometimes you want a little more control than the Cricut Design Space software will allow you. But we are digital design divas, are we not? So launch your preferred design software and let’s make magic!
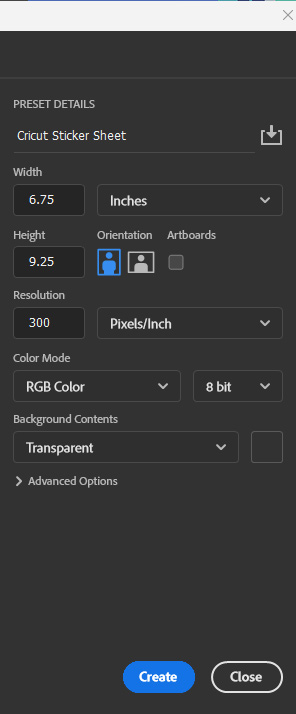
- Create a new document 6.75″ wide by 9.25″ high at 300dpi. (This is the maximum print-and-cut size for the Cricut on an 8.5×11 sheet of paper.) Set the background to Transparent.
- Drag-and-drop images from your favorite Sweet Shoppe digital scrapbooking kit and resize them to precisely the dimensions you want.
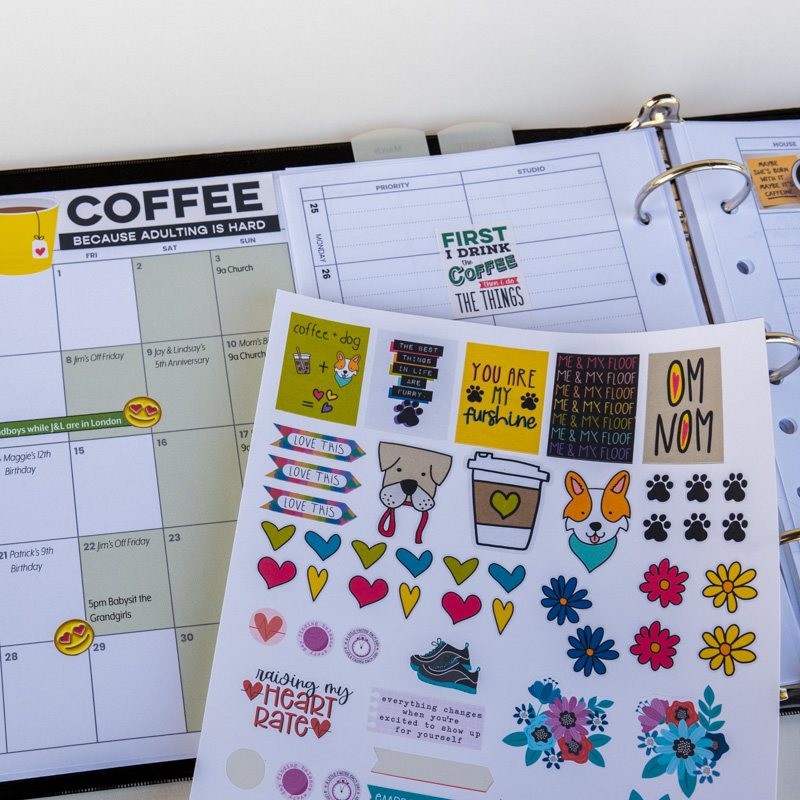
I’m working with this adorable kit from Amanda Yi called A Cup With My Pup.
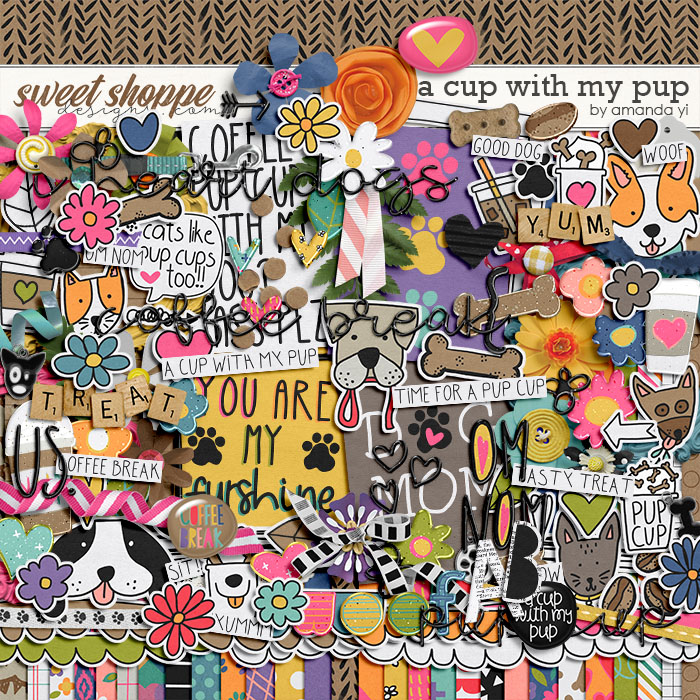
As I go through the cards and elements in the kit, I can pick and choose exactly what I want to turn into stickers.
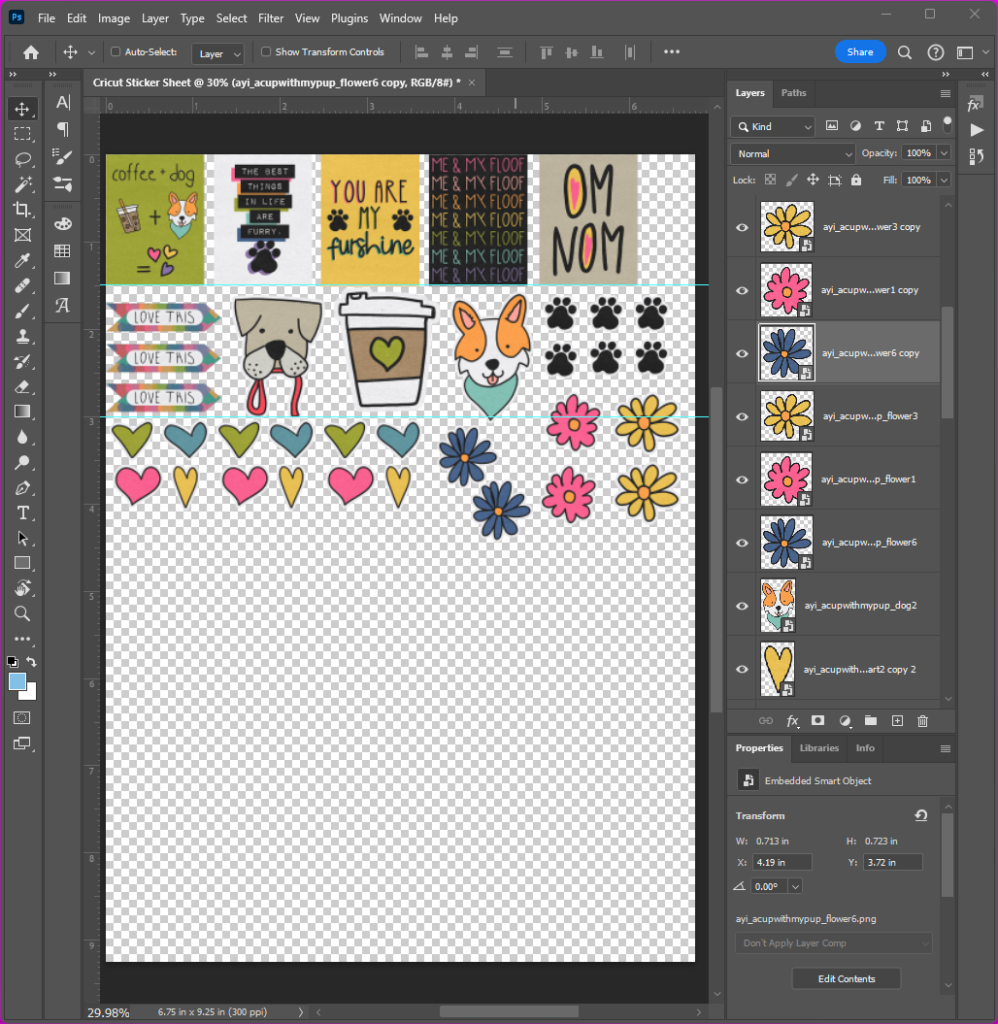
It’s especially nice because I can easily resize the images to precisely fit in the squares of my planner. I use a custom planner with unusual dimensions, so the fact I need them 1″ wide to fit? No sweat!
What if an element you want to turn into a sticker is a little too detailed around the edges to make a clean sticker cut?
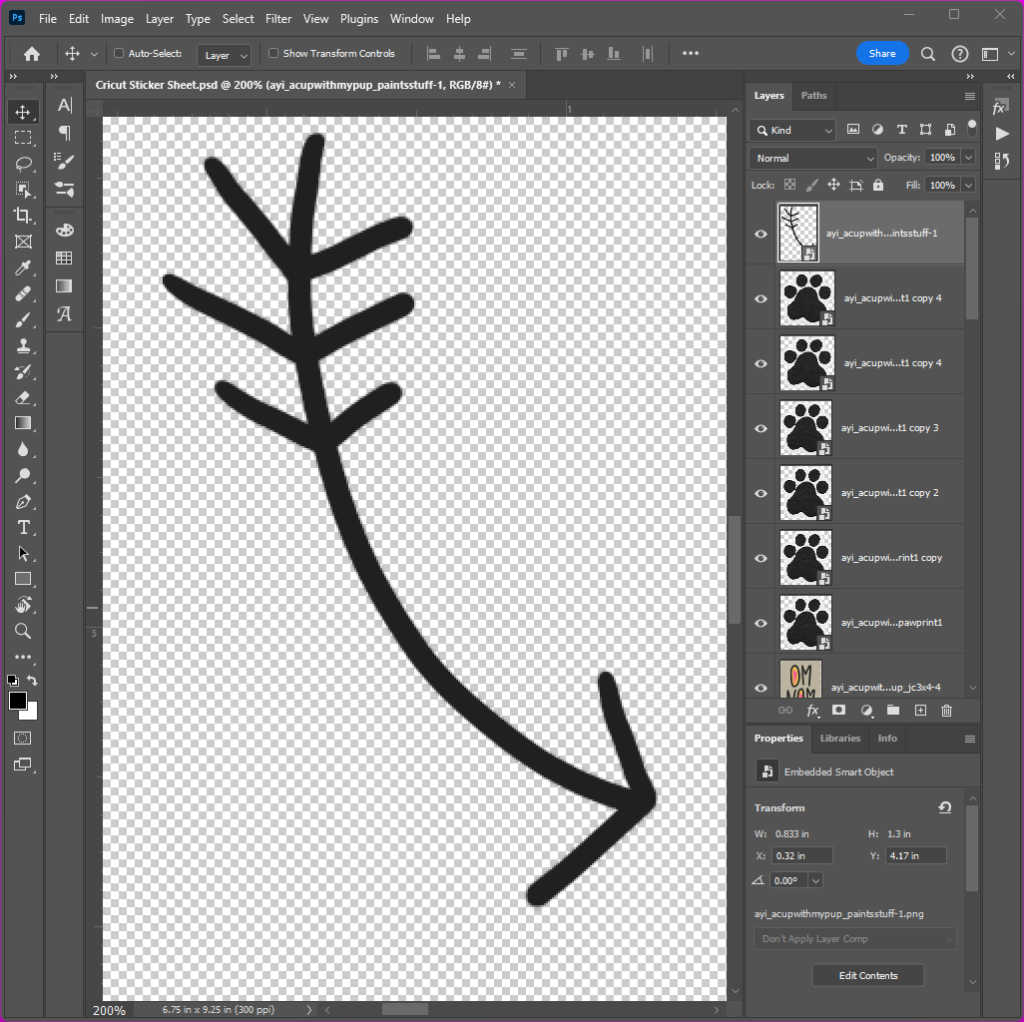
Simply add a white stroke around the outside of the image. Play with the width of the stroke until it fills all the cracks and crevices.
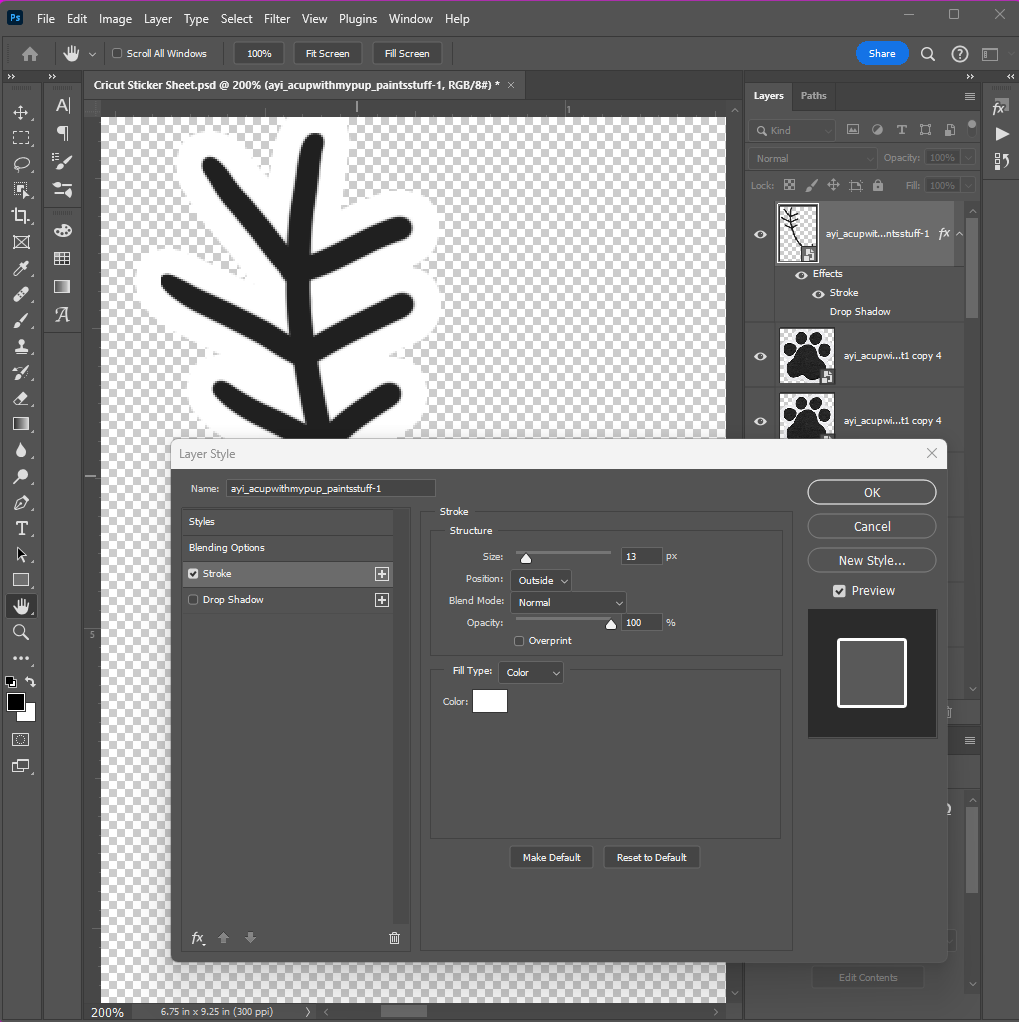
This outline is less detailed and easier for the machine to cut. Ta da!
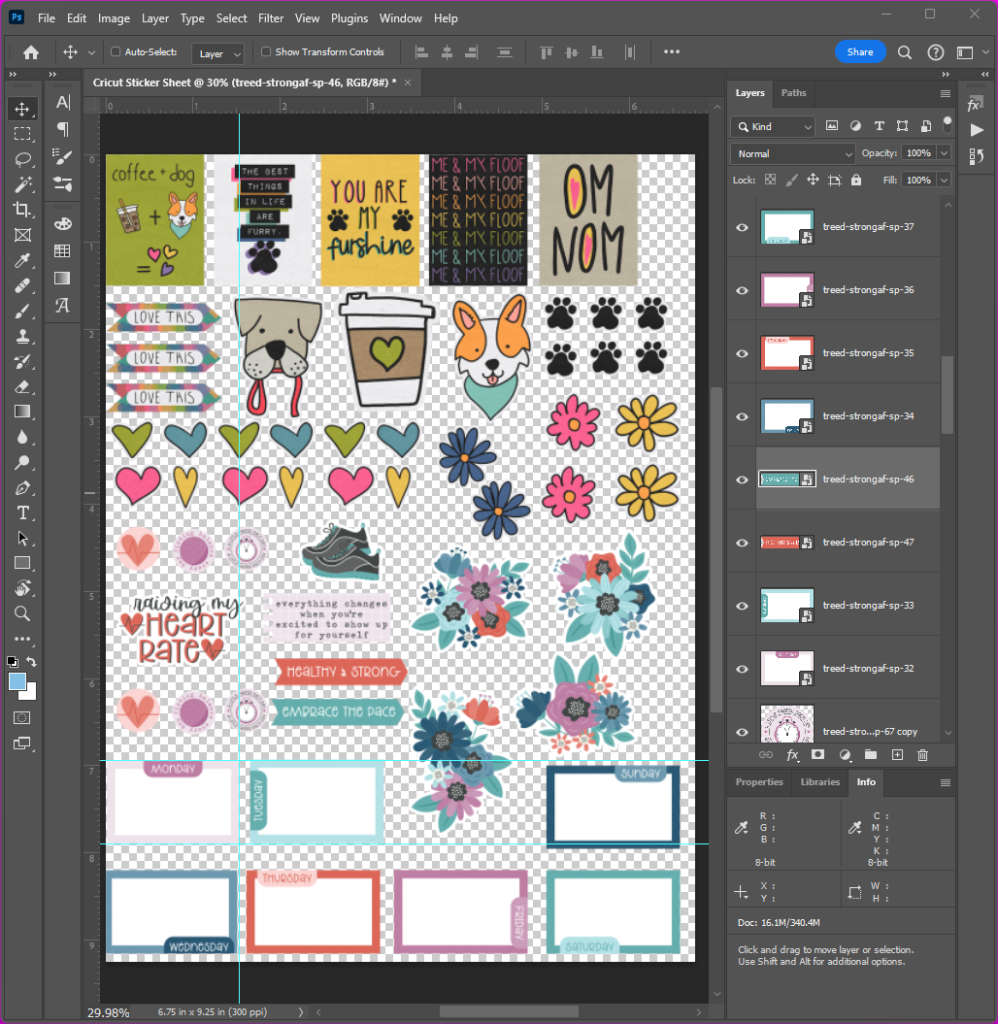
Another benefit to creating your own sticker sheet is how easy it is to mix-and-match elements from your favorite kits. I have plenty of extra space on this sheet, so I’m going to add in some more graphics from Traci Reed’s Strong AF:
Now that my sticker sheet is full, I’m going to export the whole page as a transparent PNG.
- Make sure any background layer in your layers panel is hidden. You want the background of your page to be transparent.
- Then choose File … Save a Copy and select PNG as the type.
Now you’re ready to launch Cricut Design Space and import your new sticker sheet. Follow the steps outlined above in Example 1 to upload, resize, print, and cut your stickers.
Example #4: Combine photos with your stickers
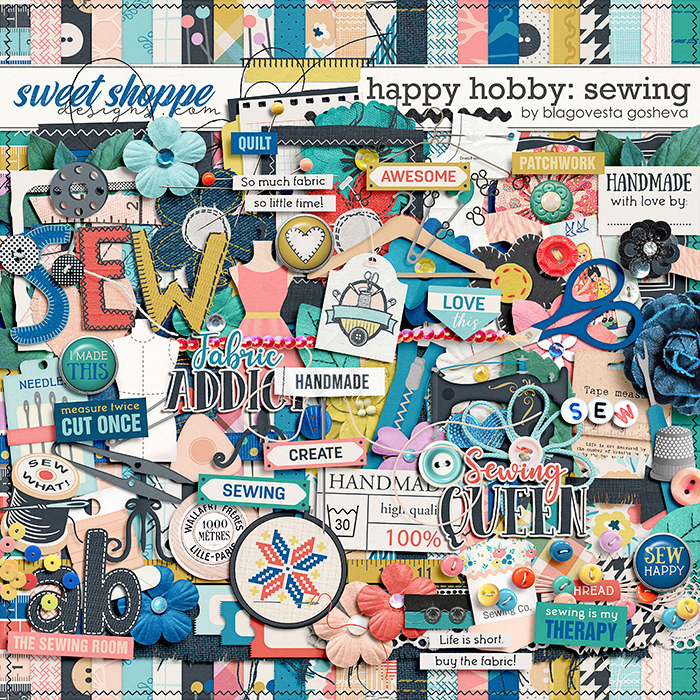
Now that you know how to create your own custom sticker sheet in Photoshop (or your preferred design software) the sky is the limit with what stickers you can create! For our fourth and final example, I’m going to show you how I combined Blagovesta’s sweet digital scrapbooking kit Happy Hobby: Sewing with some photos to create custom stickers for my sewing project journal.
I have a gorgeous LEUCHTTURM1917 large hardcover journal with dotted pages that I bought to use as a sewing project journal. But so much of what I wanted to include is photos of fabric and project sketches I’ve created digitally that I hadn’t really used it. …until now!
- Launch your preferred design software (I use Photoshop) and create a new document 6.75″ wide by 9.25″ high at 300dpi. Set the background to Transparent.
- Using your digital scrapbooking design skills, create customized images by combining elements from the digital kit, text boxes, and photographs.
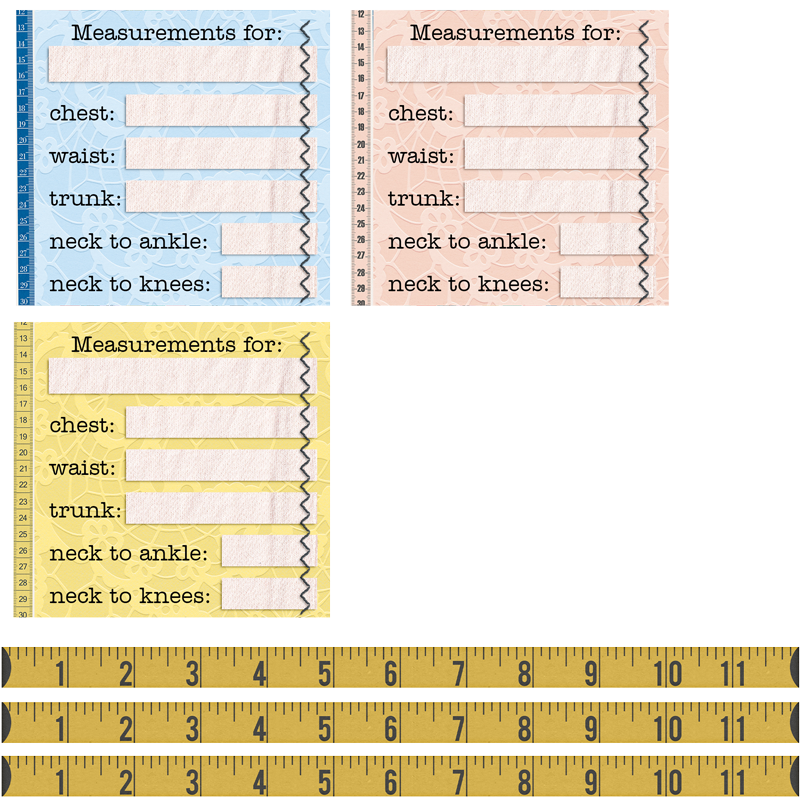
For example, I created these little blocks to record the measurements I take when sewing for my granddaughters:
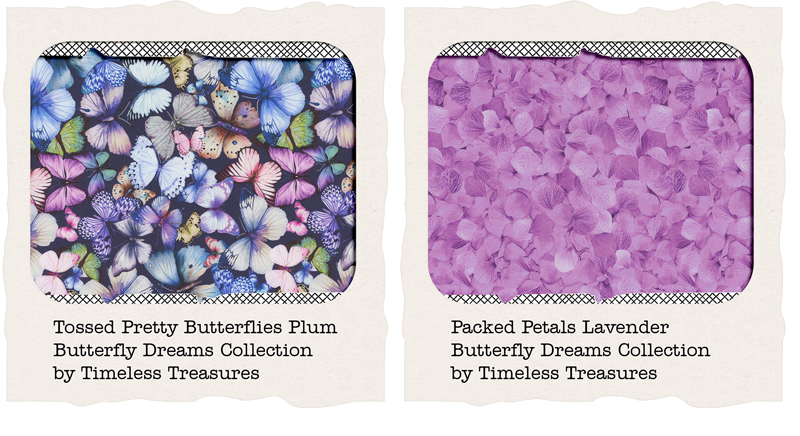
I also combined a frame from the kit with images of the fabric I found on the website for the store I’ll be ordering it from, and then added text to record the specific fabric name and manufacturer:
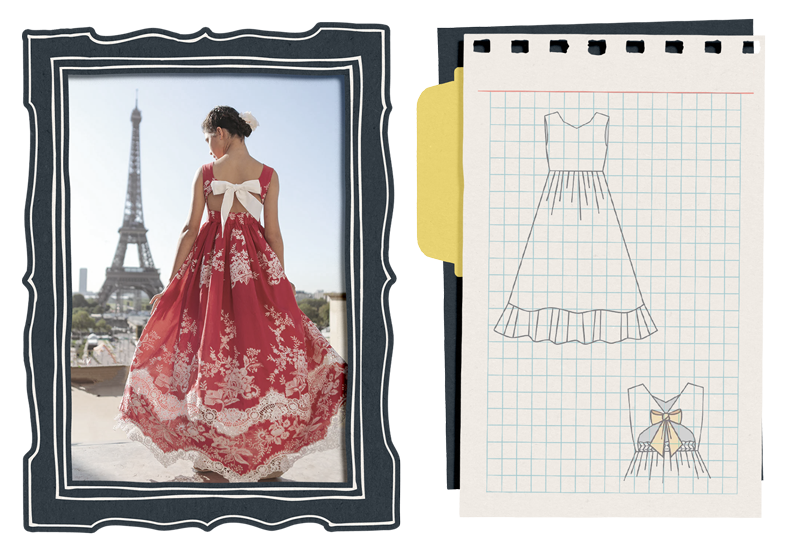
And finally, I combined line drawing images and a photograph of the dress pattern with another frame and a paper stack from the kit to create these stickers:
 Follow the instructions above to export the images as transparent PNGs, import them into Cricut Design Space, and click Make to Print & Cut them. And here’s the end result:
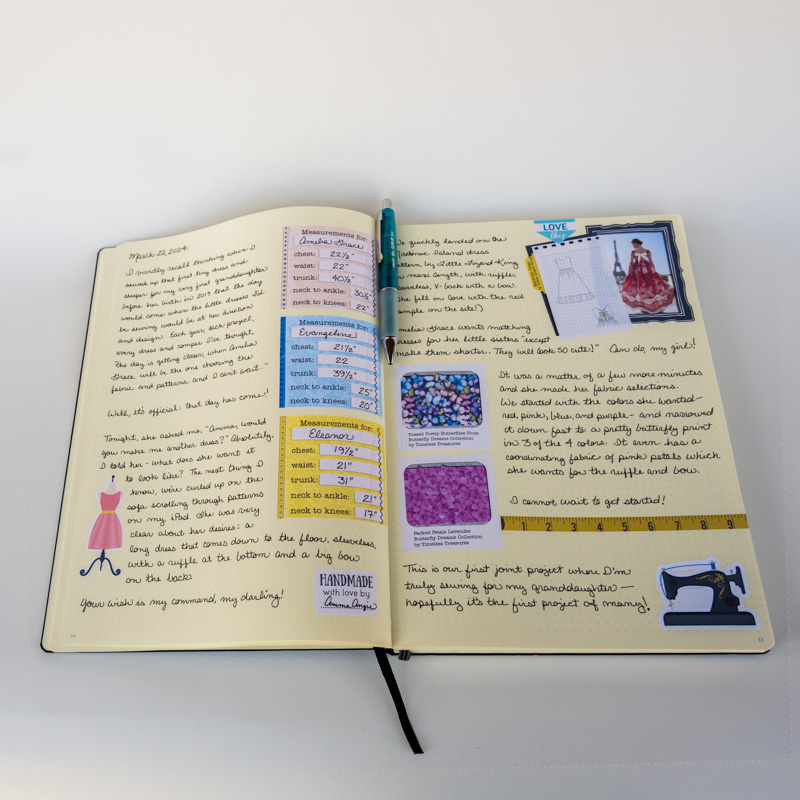


My sewing project journal is off to a great start!
Well, there you have it: four different approaches to creating stickers with your digital scrapbooking supplies. Whether you keep it simple by printing a pre-made sticker sheet or importing individual elements from the kit directly into Cricut Design Space, or get a little more detailed by creating your own sticker sheets in your favorite design software and exporting them as PNGs, or if you go fancy all the way and combine your digi-scrap supplies with photos and screen captures to create truly one-of-a-kind stickers, the only limit is your creativity (and how much ink is in your printer)!
How will you use your stickers? Will you add them to a bullet journal? Decorate your planner? Adhere them to your computer, phone, or water bottle? Or do you have other plans for these fun, easy-to-make stickers? Share your plans with me in the comments below.
And be sure to shoot a photo of your finished stickers and share it with us in the Gallery – because I can’t wait to see what you create when you Think Outside the Album!


