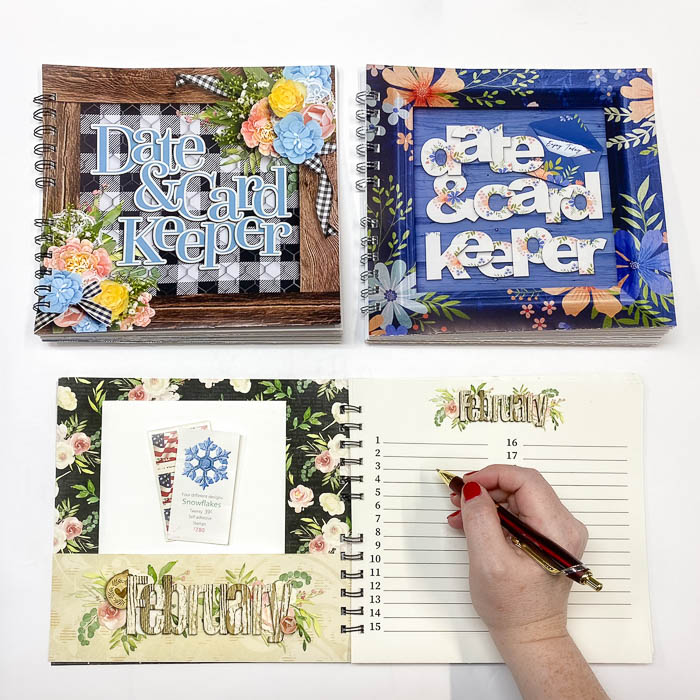
Think Outside the Album: Date Keeper & Greeting Card Organizer 12/10
Hello, my sweet scrapbooking and gift-giving friends! It’s time for the December 2023 installment of Think Outside the Album, where we look at different ways to take our digital supplies off the scrapbook page and instead, use them to make the rest of our world just a little bit sweeter. This month, I have a little DIY project for you that makes the perfect gift for the letter-writers and card-senders (and card-makers!) in your life. It’s a perpetual date keeper and greeting card organizer, and you’ll love just how perfectly customizable it is. If you want to keep it quick-and-simple, you can … or if you want to go all-out and totally zhuzh it up, you can do that, too! Let’s take a look:
What is a perpetual date keeper and greeting card organizer?
A perpetual calendar or date keeper is a document that lists all the numerical days of each month of the year without the day of the week. That allows you to list all your birthdays, anniversaries, and other special dates in one place, and use it year after year after year.
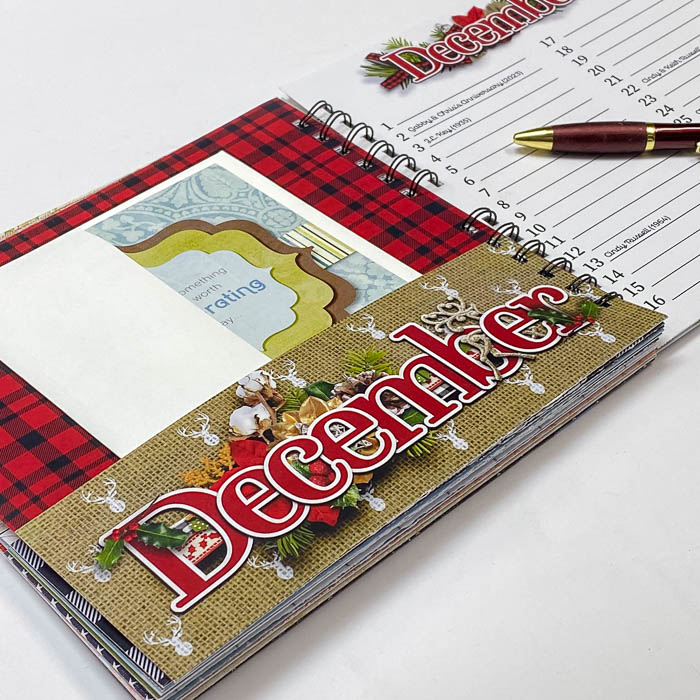
I’ve combined that concept with a pocket page for each month, creating an all-in-one organizer. Find a birthday card at the store that’s perfect for your brother, but his birthday isn’t for a couple months? Don’t lose it – simply slide it into the pocket for his birthday month, and it’ll be right there when you need it! Plan ahead for the cards you need to make or buy, and when you’re ready to write in them and mail them, everything’s together in one place.
What you’ll need:
A color printer
Either inkjet or laser is fine; I used my HP OfficeJet Pro 9010 All-In-One.
Thirteen (13) sheets of white cardstock or heavy-weight specialty printer paper
You’ll want to experiment with what cardstock looks best with your printer’s ink. I’m a fan of Epson’s 51lb Ultra Premium Presentation Paper and HP’s 48lb Professional Business Paper. For this project, I recommend using a paper that’s at least 48lb stock.
scoring tool or scoring blade for a paper trimmer
Getting a crisp fold is so much easier when you score the page first and then crease it with a bone folder!
rolling adhesive or double-sided tape
Each page will need one 3″ long swipe of double-sided adhesive. The stronger, the better!
one sheet heavy-weight cardboard
You’ll need this for the back cover, and the sturdier it is, the better. You can use anything from mat board (like for framing photos) to recycled cardboard from the back of old notepads or notebooks. I used one of these magazine backing boards since I had a bunch of them in my studio (I use them for rolling and storing fabric).
optional: one sheet of thin, clear acetate or transparency film
If you want to, you can use a sheet of clear plastic as the front cover of your date keeper.
binding tool and coil- or comb-binding supplies (or have your local office supply shop do it for you)
If you’ve got a binding tool at home (these were popular in the scrapbooking world not that long ago – I own a Bind-it-All by Zutter) you can put it to use on this project. If not, your local office supply store or teacher’s supply shop will be able to bind it for you.
… plus your favorite digital kits from the Sweet Shoppe and your preferred digital design software
I use Adobe Photoshop, but any graphics program will work when combined with the gorgeous digital scrapbooking designs available for sale in the Sweet Shoppe.
BONUS! As my holiday gift to you, I’ve created a set of layered templates you can use to quickly whip up your own date keeper & card organizer. They’re available in either PSD or TIF formats… but if that won’t work for your preferred digital design software, it’s pretty straight-forward to create your own.
Download the templates in PSD format
Download the templates in TIF format
Step 1: Design your pages
Probably the most complicated part of this project is wrapping your head around what pages should be printed front-to-back. It’s easiest to understand when you see the entire project laid out in two-page spreads like this:
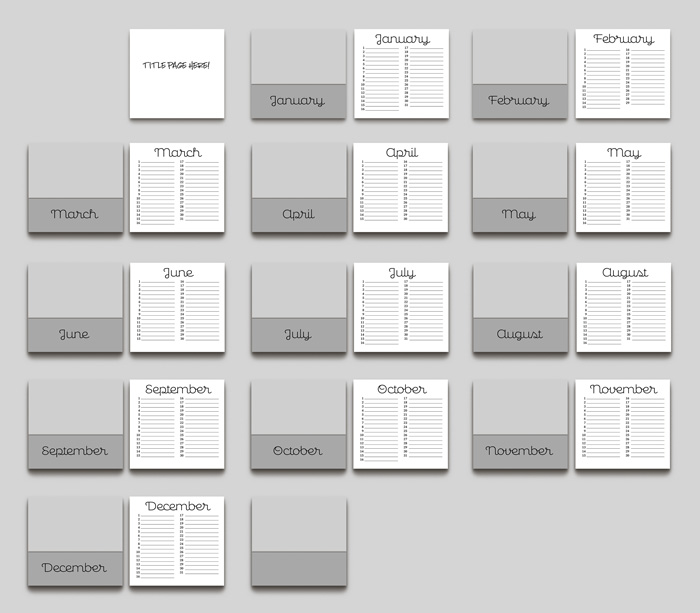
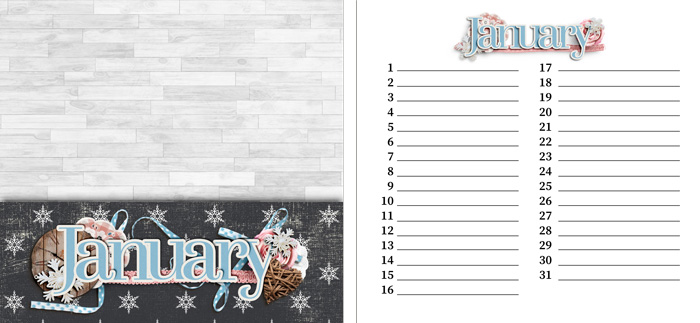
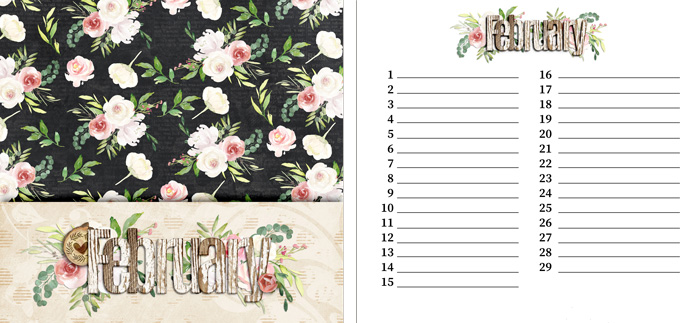
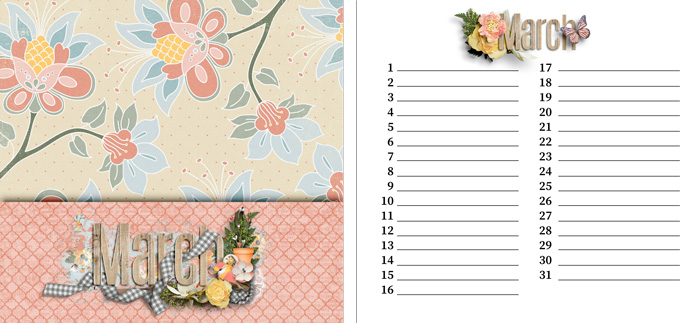
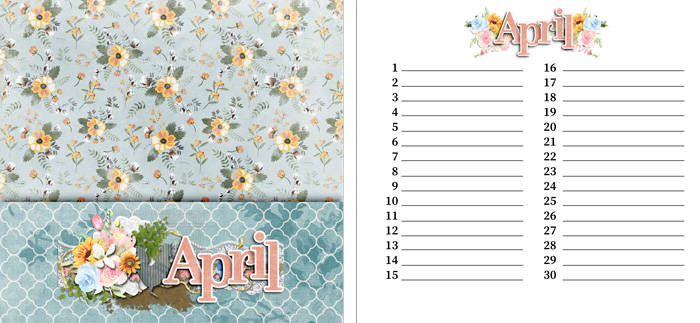
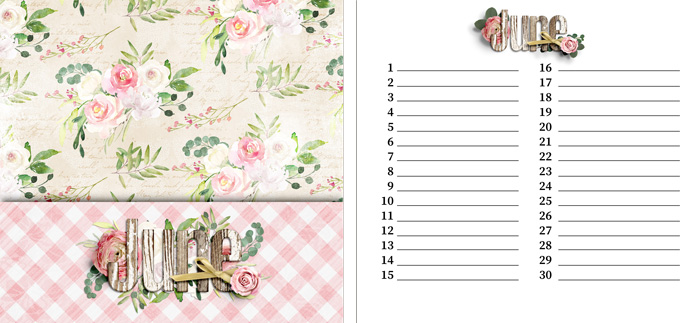
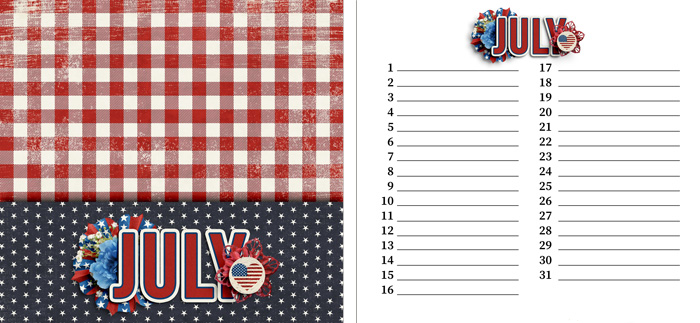
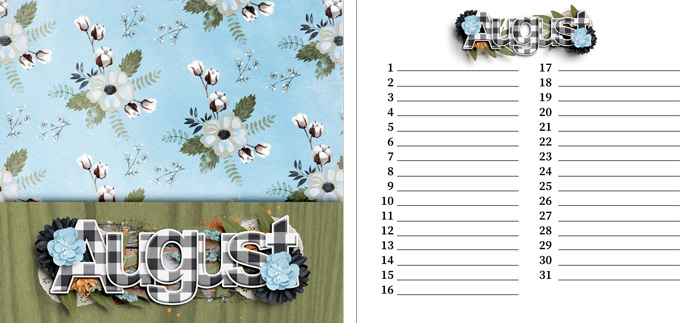
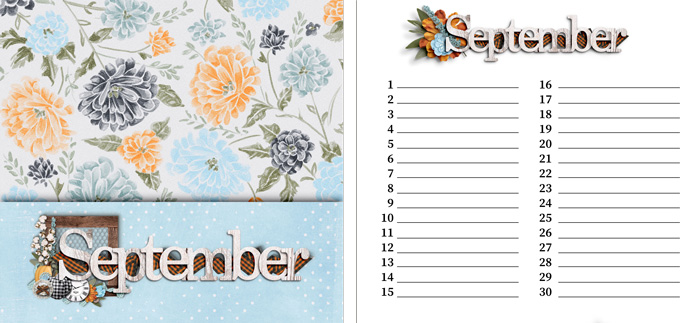
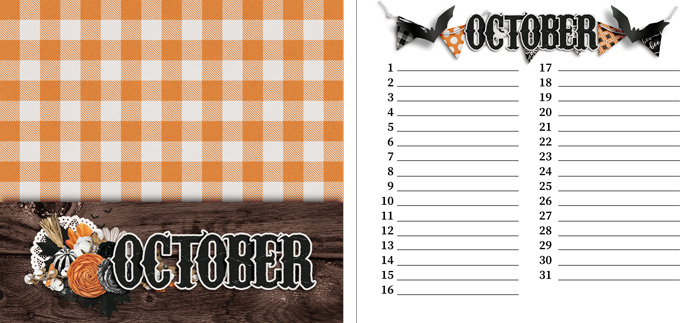
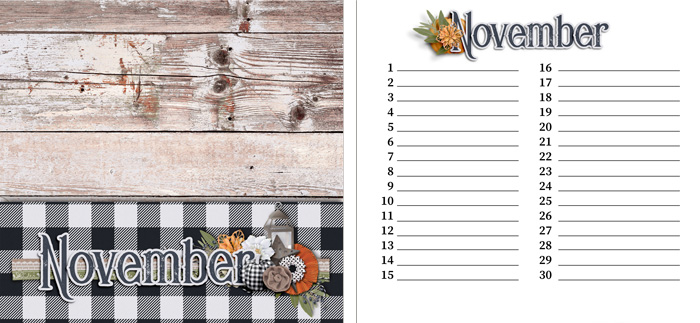
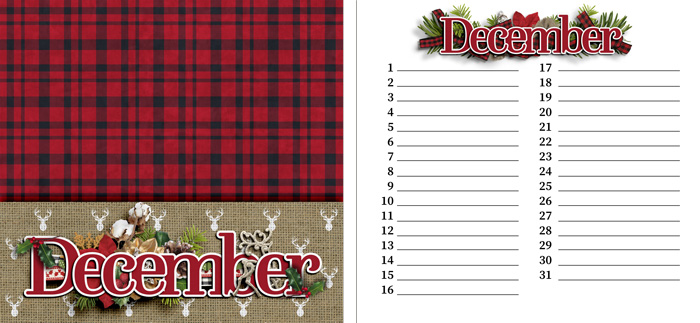
Each 2-page spread covers a single month: the pocket page is on the left and the perpetual date keeper is on the right. The title page is printed front-to-back with the January pocket page; the January date keeper is printed front-to-back with the February pocket page; and so on.
The template for the right-hand page looks like this:
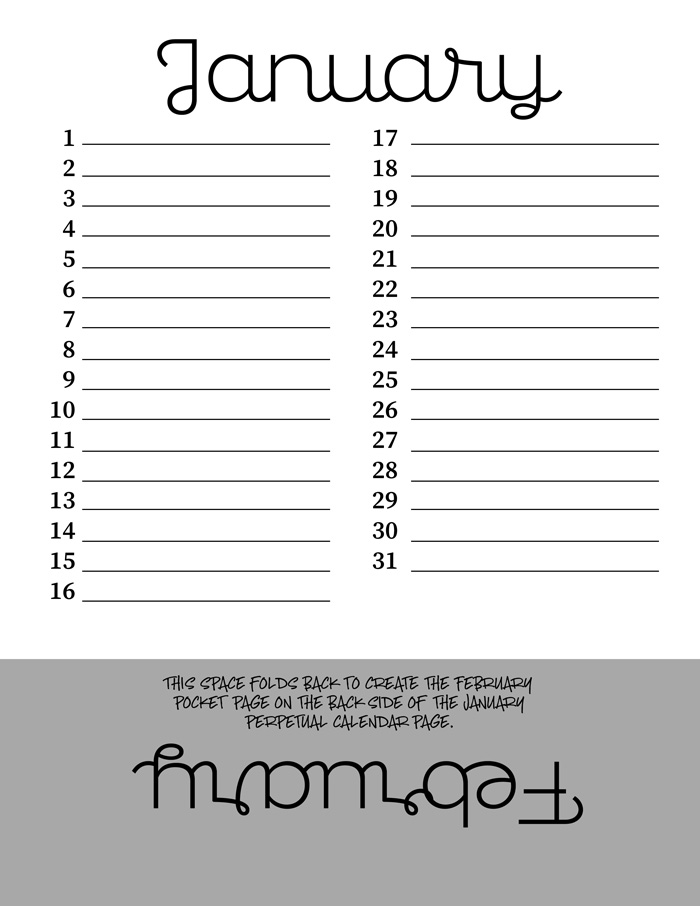
The bottom 3″ of the page will be folded back to create the pocket on the reverse side of the page. In order for the design to be right-side-up once folded, it’s printed here upside down. Make sense? You’ll print that design on one side of your cardstock, with this on the other side:
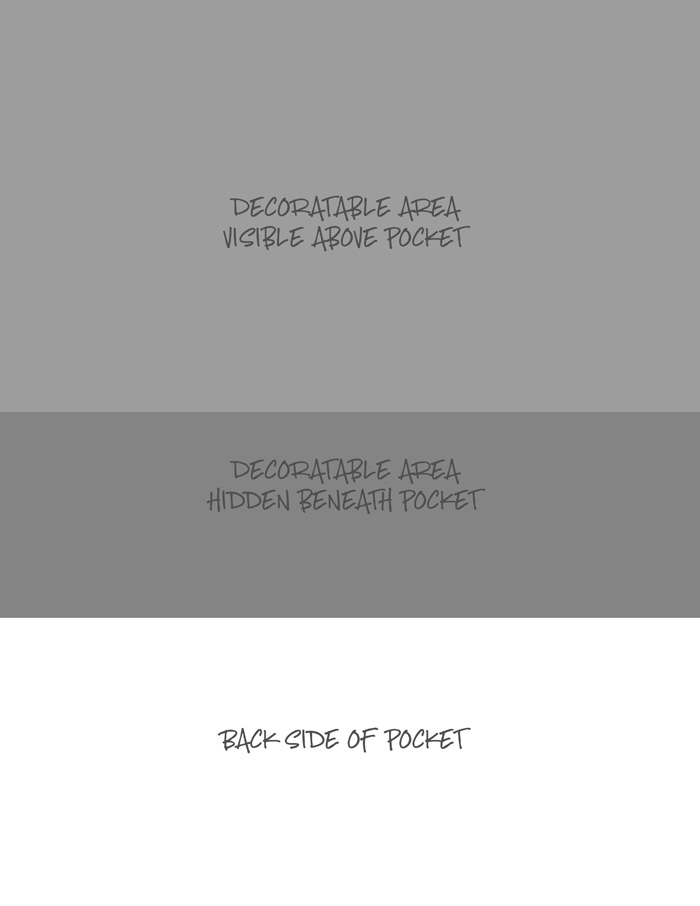
When the bottom 3″ is folded up to create that pocket, you’ll still see the top 5″ of the page above the pocket, with the next 3″ hidden by the pocket itself.
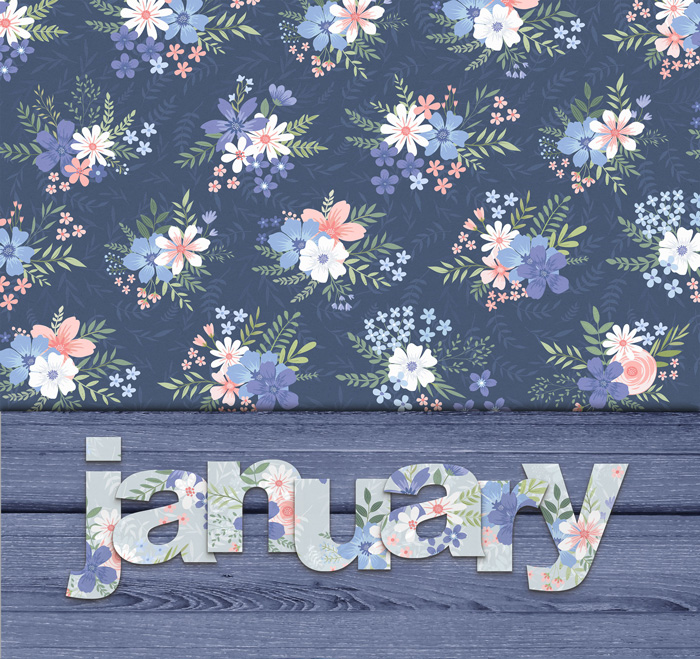
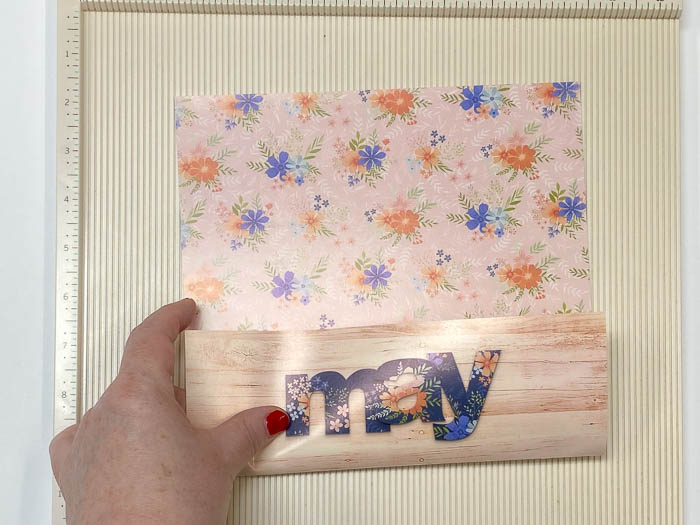
Now, pick out your favorite digital supplies and get to creating! If you want to keep it quick-and-simple, I suggest choosing a single kit or bundle and using it throughout all 26 sides of your 13 pages. I chose Kristin Cronin-Barrow’s Enjoy Today & Tomorrow bundles for my quick-and-simple version. I used a floral paper for the top part of my pocket pages, and a coordinating woodgrain paper for the part of the pocket that folds over it. I used a matching alphabet to create the name of the month, and made sure to shadow the letters so they’d stand out when printed.
My title page – with the January pocket – is printed front-to-back with the patterned part of the January pocket page.

Created using Enjoy Today: Bundle by Kristin Cronin-Barrow and Enjoy Today: And Tomorrow Add-On Collection by Kristin Cronin-Barrow
And this is what it will look like when folded up:
Created using Enjoy Today: Bundle by Kristin Cronin-Barrow and Enjoy Today: And Tomorrow Add-On Collection by Kristin Cronin-Barrow
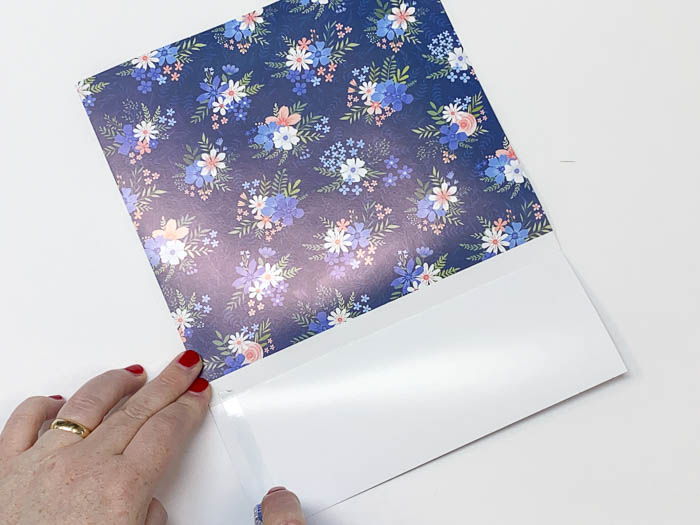
The next page is the January date keeper with the February pocket, printed double-sided with the patterned part of the February pocket page:
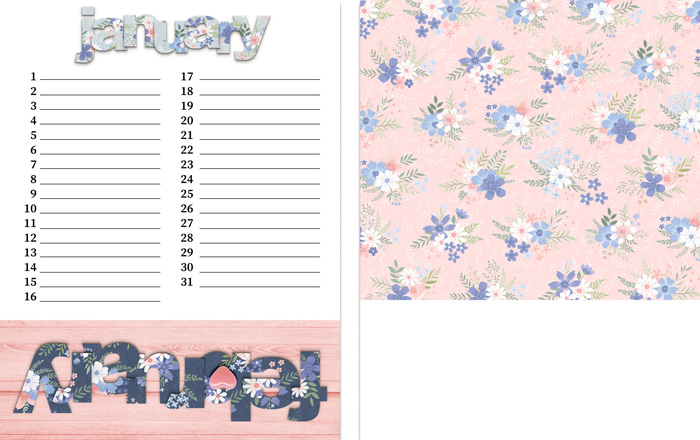
Created using Enjoy Today: Bundle by Kristin Cronin-Barrow and Enjoy Today: And Tomorrow Add-On Collection by Kristin Cronin-Barrow
And this is what it will look like when folded up:

Created using Enjoy Today: Bundle by Kristin Cronin-Barrow and Enjoy Today: And Tomorrow Add-On Collection by Kristin Cronin-Barrow
You get the idea! Keep working your way through all 12 months and you’ll wind up with something like this:
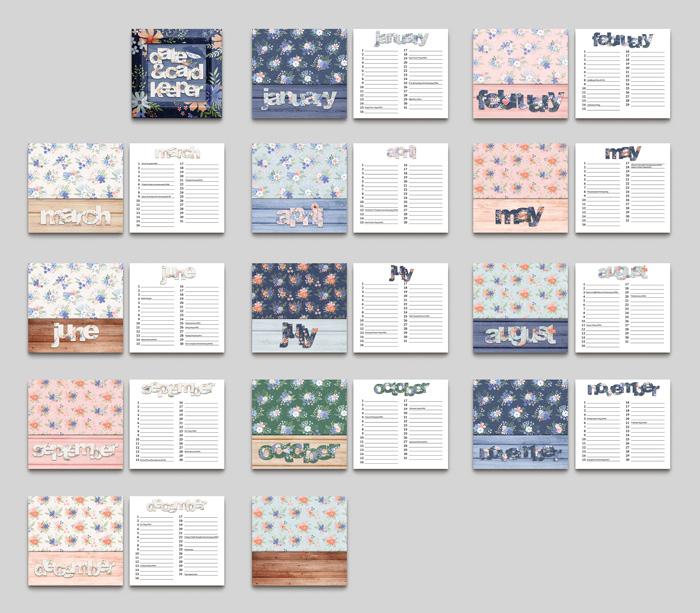
BONUS TIP: You might notice in those teeny tiny thumbnails that I filled in some of the dates with birthdays and anniversaries. This is a gift for my mother-in-law, so I pre-filled all the important dates for her children and their spouses, her grandchildren and their spouses, and her great-grandchildren as well. Now, if I want to print additional pre-filled copies for my sisters-in-law, I can – or I can hide those layers and print a blank version of this as gift for someone outside our family. I love being able to re-use design work I’ve already done!
Step 2: Print your pages
Now that your design work is done, you’ve got 26 pages to print front-and-back on 13 pieces of heavy-weight paper or cardstock.
You’ll know best how to do this with your specific printer. Although mine has an auto-duplexer function and can automatically print front-to-back, it won’t work if I want a borderless or edge-to-edge print. So here’s what I did:
1. I loaded my printer with 13 sheets of heavy-weight stock.
2. One-by-one, I printed each of the pages you see on the right hand side of each spread above:
- Title page
- January perpetual calendar
- February perpetual calendar
- March perpetual calendar
- April perpetual calendar
- May perpetual calendar
- June perpetual calendar
- July perpetual calendar
- August perpetual calendar
- September perpetual calendar
- October perpetual calendar
- November perpetual calendar
- December perpetual calendar
3. Then, I took the printed pages and stacked them in order so the title page was on the top and the December perpetual calendar was on the bottom. I re-loaded them into my printer so they’d print on the back (blank) side of each page.
4. One-by-one, I printed each of the pages you see on the left hand side of the spread above – in other words, the patterned paper portion of each pocket page:
- January’s pocket page
- February’s pocket page
- March’s pocket page
- April’s pocket page
- May’s pocket page
- June’s pocket page
- July’s pocket page
- August’s pocket page
- September’s pocket page
- October’s pocket page
- November’s pocket page
- December’s pocket page
- …and the back cover’s pocket page
In the end, you want to end up with all 26 pages printed front-to-back on your 13 sheets of heavy-weight paper or cardstock.
Step 3: Score, fold, and adhere your pockets
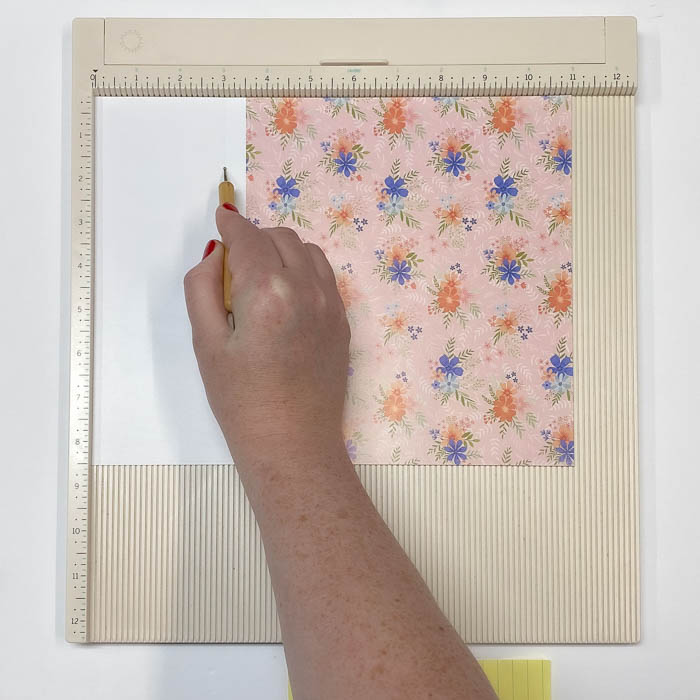
Once you’ve given your pages ample time to dry, you’ll want to break out your favorite scoring tool and double-sided adhesive. It’s time to create those pocket pages!
1. Score each page 3″ from the bottom (or 8″ from the top, whichever way you prefer). I recommend scoring on the back side – the one with your patterned paper – so the score will be on the inside of the pocket. That way if it catches and tears the top layer of the paper, it’ll be hidden inside the pocket.
2. Fold the pocket back and rub a bone folder or your fingernail along the fold to give it a nice crease.
3. Open the pocket up and apply double-sided adhesive to the left edge of the pocket ONLY. (The right edge will be caught by the binding so it doesn’t need adhesive.
4. Fold it back together and press the adhesive in place.
Voila! You now have 13 pocket pages, and you’re just one step away from a finished project!
Step 4: Bind it together
This is where it all comes together. Literally. (Ha!) If you’ve got access to your own binding tool, you can do this at home. If not, your local office supply store or teacher’s supply shop can do it for you for a nominal fee.
1. Make sure your pages are in order. (This is important! Nothing stinks more than discovering you’ve bound the months in the wrong order.)
2. Add a piece of heavyweight cardboard as a back cover. You can recycle the back of a notebook or notepad, or go a little fancy by using a solid sheet of photo mat board. Personally, I went with a piece of white magazine backing board, because it’s what I had on hand. Cut it to 8.5″ wide x 8″ high and place it at the back of your page stack.
3. OPTIONAL: If you want to protect the gorgeous title page you painstakingly designed, you can place a sheet of clear acetate/plastic on top of it as a front cover. Transparency film works well for this.
4. Following the instructions for your binding tool, carefully punch the holes in your pages and covers and bind it all together.
And now marvel at the organizational thing of beauty you have created!
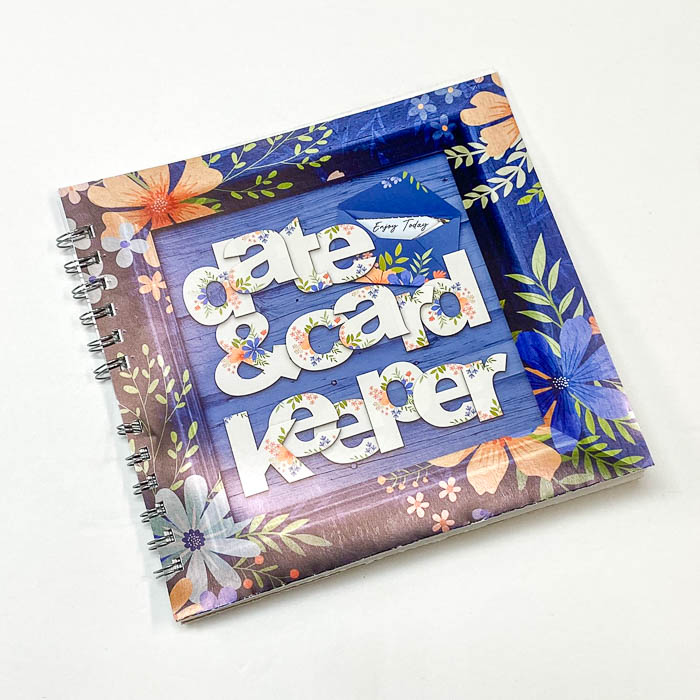
Next-level Design: Make Every Month Unique
If you’ve got more time to design – or, if quick-and-simple just isn’t your style – why not give every month in your date keeper a unique look?
I wanted to give my next date keeper & card organizer a truly next-level design, so I went with a series of collections by Meagan’s Creations that all coordinate. It’s her “Homestead” series, and with these seven kits, I was able to create this gorgeousness:

Created using the following, all by Meagan’s Creations:
Homestead Wedding
Spring Homestead
Summer Homestead
Americana Homestead
Fall Homestead
Halloween Homestead
Winter Homestead
I’m so, so happy with how it turned out!
Making a gift for someone who loves everything Disney? Why not make their date keeper with the Remember the Magic collection by Studio Flergs? Know someone who adores gnomes? WendyP Designs has the perfect collection for that. When you put your digital scrapbooking kits from the Sweet Shoppe to use with this project, the possibilities are endless!
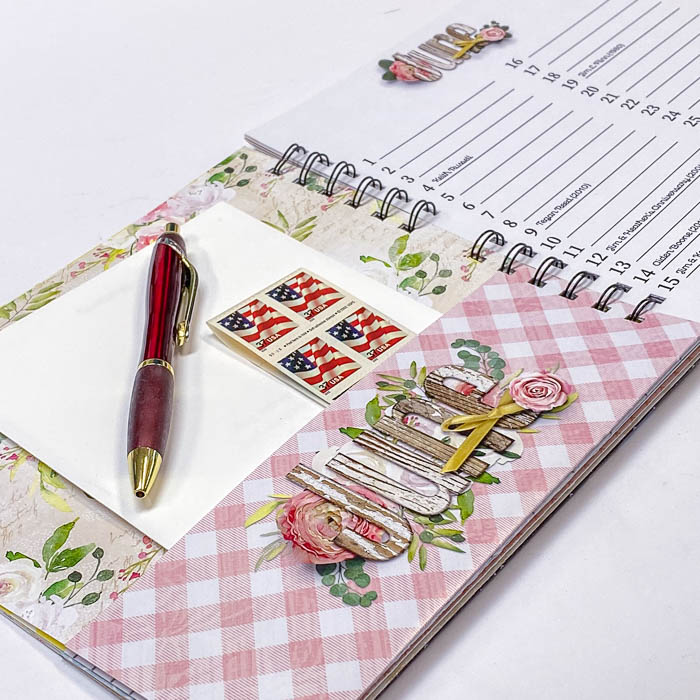
Gifting ideas for your Date & Card Keeper:
- Pre-fill the birthdays and anniversaries for all the family members of the recipient.
- Tuck a couple of greeting cards into the pockets before you wrap it. (Bonus points if you’ve made the cards yourself!)
- Tuck a book of stamps into the back pocket.
- Wrap it up together with a good-quality ink pen.
And that, my friends, brings us to the end of yet another edition of Think Outside the Album. It’s my hope that this project can be one you keep in your proverbial back pocket this holiday season. The next time you need a hostess gift? Whip up a quick Date & Card Keeper. Need a gift for the family member who has everything? Create a custom Date & Card Keeper. Forgot to buy a teacher appreciation gift until the night before? No sweat! Make them a Date & Card Keeper and send it off to school with pride! There’s so many possibilities, and when you use Sweet Shoppe digital scrapbooking supplies to decorate it, you can make them just as custom and cute as you want!
Of course, before you wrap them up, I hope you’ll take a few photos of your finished Date & Card Keeper and share it with us in the Gallery – because I can’t wait to see what you create when you Think Outside the Album!


AMIE said...
on December 11th, 2023 at 11:24 am
Angie- this is SO cool! I have zero time right now- but I think this is going to be a new year’s project! So great!
Ashley said...
on January 1st, 2024 at 1:21 pm
I love this idea. Is there a PNG version?