Think Outside the Album: Tiny Tissue Wallets
Welcome to the June 2024 installment of Think Outside the Album, where we look at different ways to take our digital supplies off the scrapbook page and, instead, use them to make the rest of our world just a little bit sweeter!
This month’s project is not only quick and easy to make, it’s super versatile, and best of all, it’s incredibly useful. We’re making tiny tissue wallets, and you’ll be amazed at how many uses you’ll find for these!
Much like the Post-It Note Wallet project I shared with you in August 2023, this project is one frequently done by rubber stampers, as it easily invites a design on the cover. But anything a rubber stamper can do, we can do faster with our digital scrapbooking supplies!
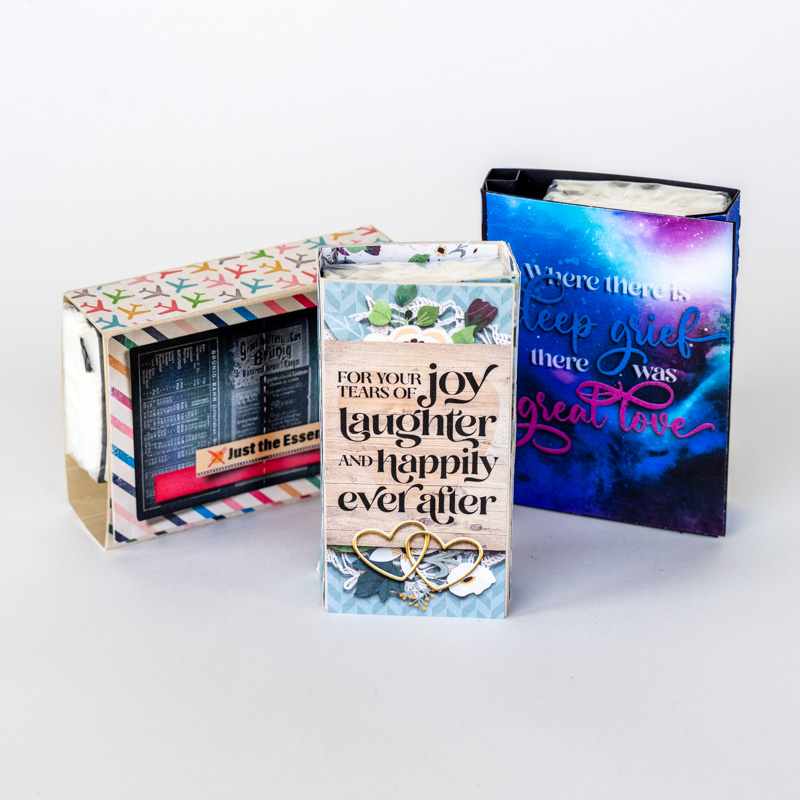
Today, I’ll teach you how to make a basic tiny tissue wallet. Then I’ll show you how to take it next-level with the addition of a chapstick holder. And finally, we’ll take it over the top by adding on a holder for a pack of chewing gum. Along the way, I’ll give you pattern diagrams for reference as well as lots of eye candy of our three finished tissue wallets. So let’s get started!
Project #1: The Basic Tissue Wallet
What You’ll Need:
Tiny packs of facial tissues
Whether you go with a brand name like Kleenex or a cost-effective generic, you’ll need individual packets of facial tissues. These are often found in the travel- or trial-size section of the drugstore and can be purchased individually or in a multi-pack.
One sheet of solid-colored cardstock
The heavier weight your cardstock, the better. You’ll want to choose a color that coordinates with the digital kit you plan to use to decorate your wallet.
One sheet of white cardstock or heavy-weight paper
I recommend 48lb and up, with the highest brightness rating you can find.
A color printer
Either inkjet or laser is fine; I used by HP OfficeJet Pro 9010 All-In-One.
Something to measure your tissue pack
A ruler or tape measure will work, but make sure it goes down to 1/8″ markings
Something to help you cut, score, and fold with precise measurements
A paper trimmer with cutting and scoring blades works well for this project.
Double-stick adhesive
You can use a tape runner, rolling adhesive, or standard double-stick tape to adhere your cover art.
Small piece of Velcro hook and loop tape
And by small, I mean about 1/4-1/2″ … just a tiny piece to fasten the wallet shut.
Step 1: Measure your tissue pack.
I used the Kleenex brand individual tissue packs, which measure 2 1/4″ wide by 4 1/2″ long by 1″ thick.
The templates I provide below are based on those measurements. If your tissue pack has different dimensions, you’ll want to adjust the templates accordingly.
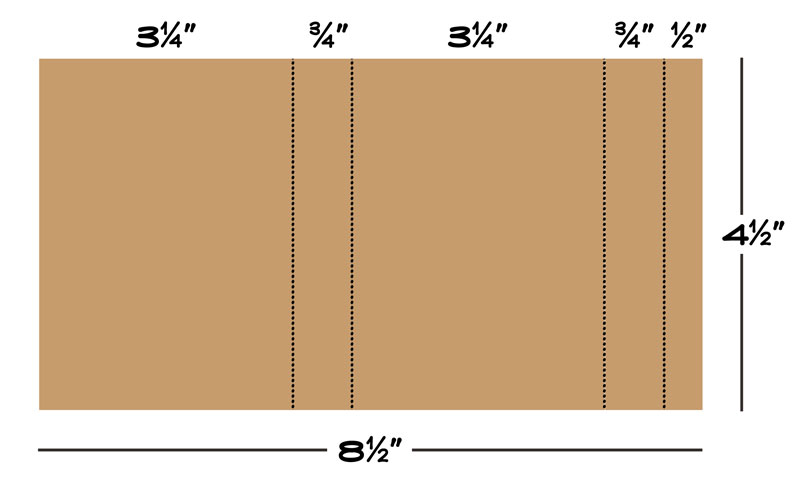
Step 2: Sketch out your template.
This is the template for a 2 1/4” wide by 4 1/2” long by 1” thick tissue pack. You’ll need a 7 1/2” x 4 1/2” rectangle of cardstock, scored for folding along the dotted lines:
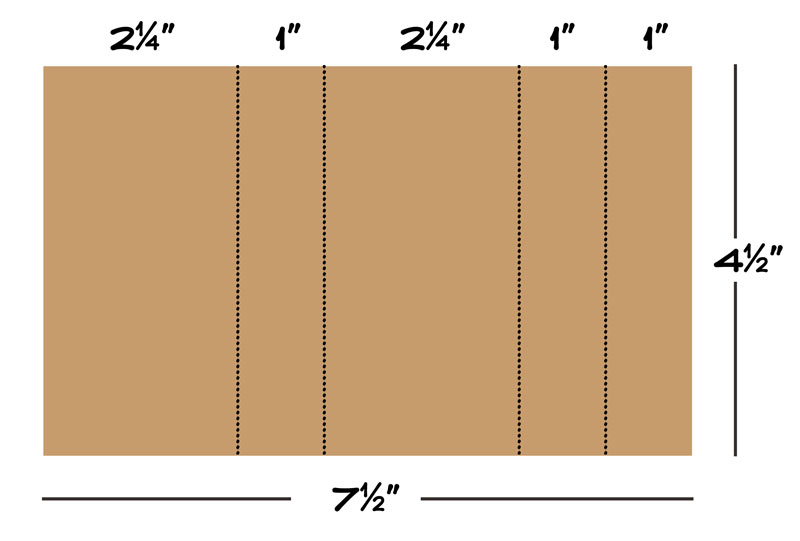
If your tissue pack is a different size, adjust the dimensions accordingly.
Step 3: Cut out the tissue wallet foundation.
Grab your cardstock and your paper trimmer and get to cutting and scoring! Then fold along the score lines until the cardstock wraps around the tissue pack to create a tiny wallet.
Step 4: Create your cover art.
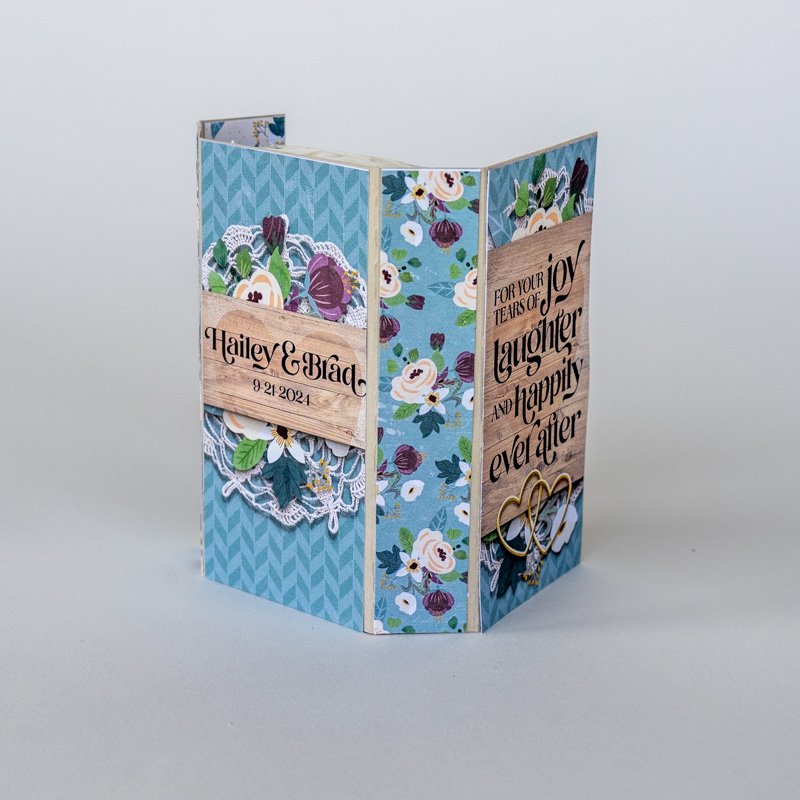
Now open your preferred design software, pull out your favorite digital scrapbooking kits from the Sweet Shoppe, and design your cover art! I used the Boho Wedding Bundle by Digital Scrapbook Ingredients & WendyP Designs to create this:
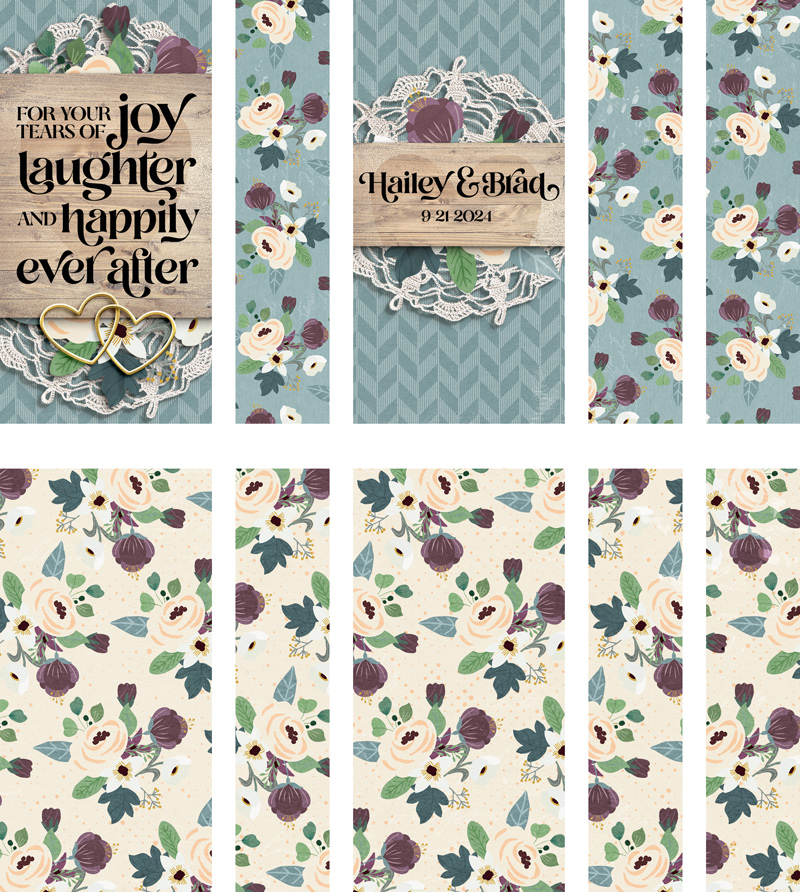
Created with Boho Wedding – bundle by Digital Scrapbook Ingredients & WendyP Designs
I love printing a coordinating patterned paper and using it to line the inside of my wallet – it makes it look so polished and pulled together!
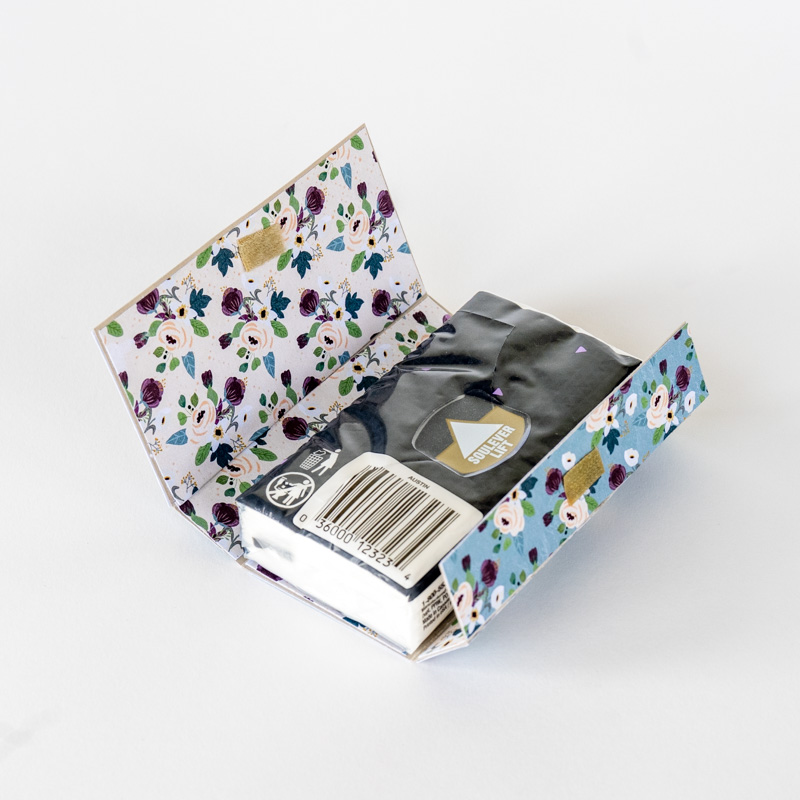
Step 5: Assemble your tissue wallet.
When you’re happy with your cover art, print a copy on bright white heavy-weight paper or cardstock. Give it a trim, and use double-stick adhesive to attach it to your cardstock base. I also like to use a swipe or two of adhesive to stick the tissue pack to the wallet so it doesn’t go anywhere. Just make sure you attach it with the opening side up so they can access the tissue without pulling the wallet apart.
Then use your tiny piece of Velcro hook-and-loop tape to hold the wallet shut (it only takes a little!) and you’re done!
Be sure to take a moment to marvel at the beauty you’ve created!

Created with Boho Wedding – bundle by Digital Scrapbook Ingredients & WendyP Designs
How sweet would these tiny tissue packs be to pass out at a wedding?
Created with Boho Wedding – bundle by Digital Scrapbook Ingredients & WendyP Designs
Created with Boho Wedding – bundle by Digital Scrapbook Ingredients & WendyP Designs
Project #2: The Next-Level Tissue & Chapstick Wallet
When you’re ready to take this project to the next level, why not upgrade your tissue wallet so it also holds a tube of chapstick or lip balm?
What You’ll Need:
In addition to the supplies listed for Project #1 above, you will also need:
A tube of chapstick or other lip balm
This project is designed for a basic cylindrical tube of lip balm. Other shapes (such as the triangular tube by Carmex) will not work.
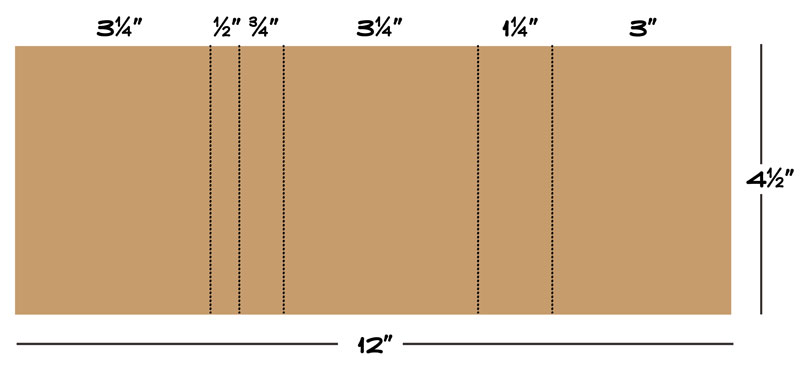
Template Sketch:
This is the template you’ll use for a standard-sized pack of tissue (2 1/4” wide by 4 1/2” long by 1” thick). Cut and score TWO (2) of these for your wallet:
Set aside one of the scored rectangles. This will be the outer shell of your wallet.
Take the second piece – which will be the inner shell of your wallet – and grab your ruler, pencil, and hobby knife or scissors. You need to make 4 cuts centered on the 2nd fold line from the left.

Finally, once those cuts are made, grab your scoring tool and score the fold lines shown in yellow:
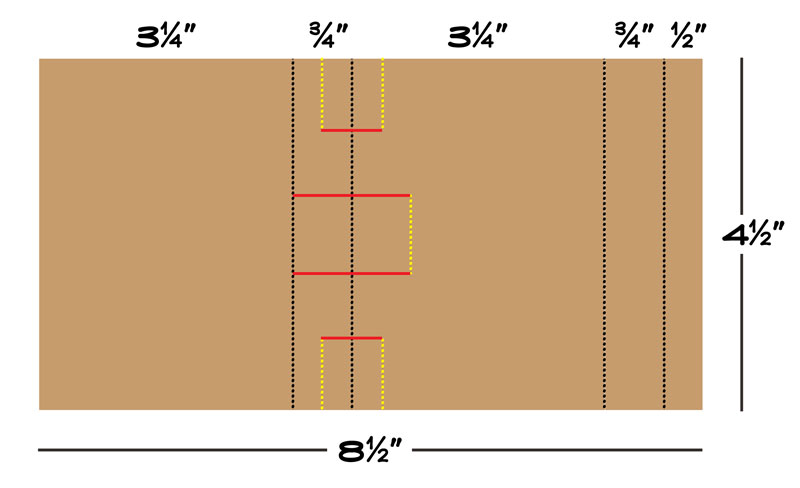
Fold along all the score lines, and carefully pop out the three sections of the Chapstick holder. This may take a little wiggling and finagling until you get it right the first time; just be gentle and go slowly.
Now all that’s left is to design your cover art, print it, and adhere everything together. This is what the finished wallet looks like:
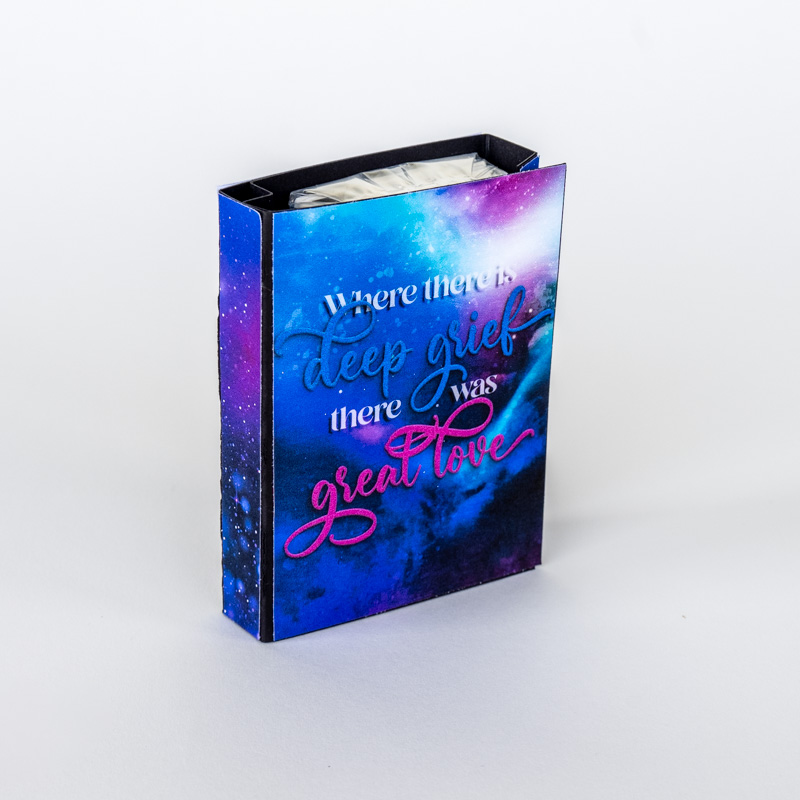
Created with Cosmic Bundle by Kristin Cronin-Barrow
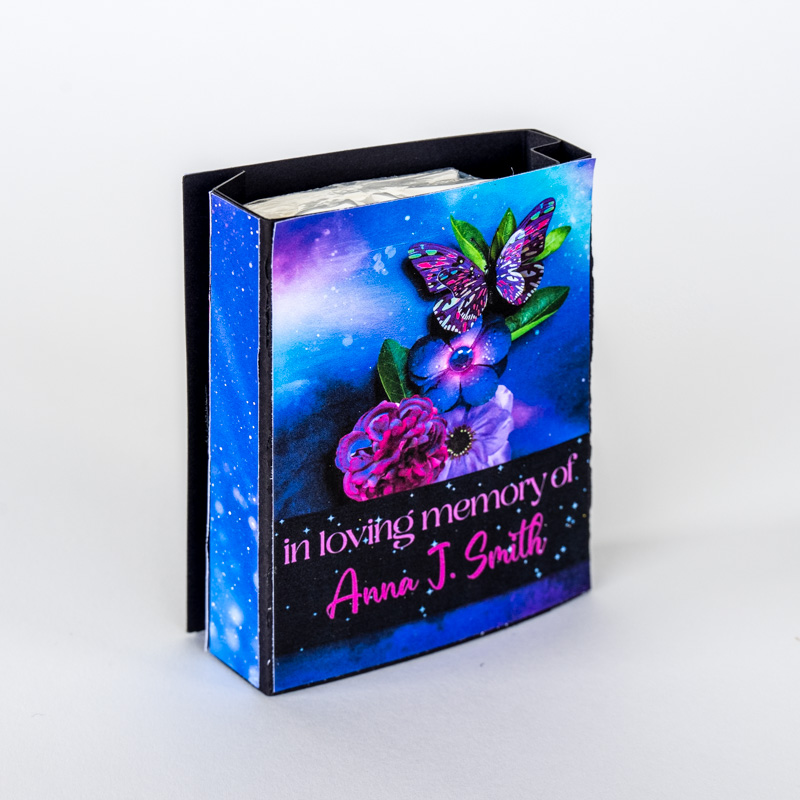
Created with Cosmic Bundle by Kristin Cronin-Barrow
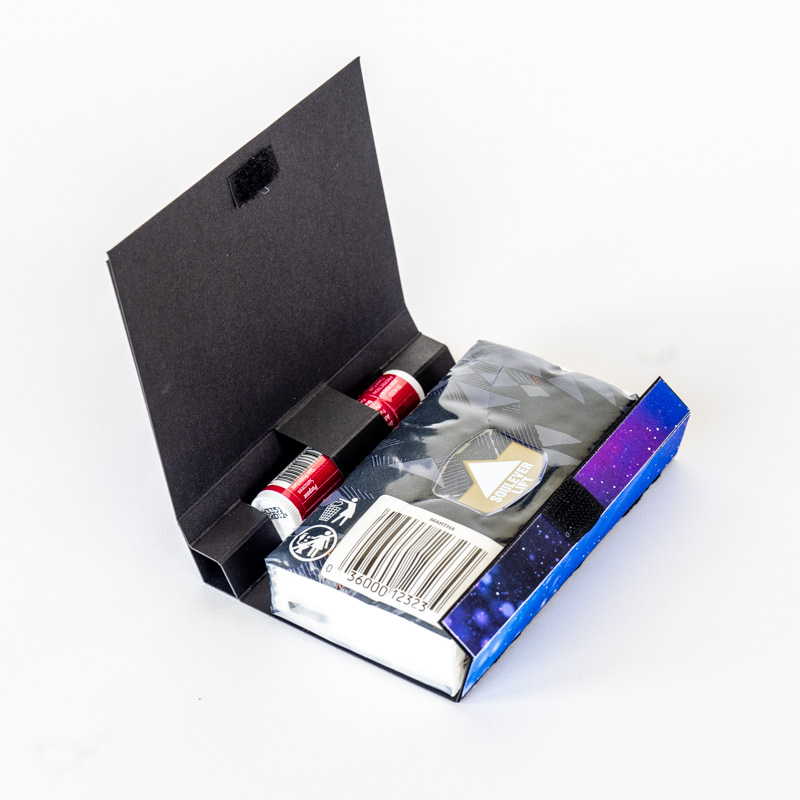
Created with Cosmic Bundle by Kristin Cronin-Barrow
These make for sweet, loving gifts to hand out at a funeral.
Project #3: The Totally Extra Tissue, Chapstick, and Gum Wallet
Why stop there? Let’s make our project totally extra by adding a gum wallet. It’s the ultimate in air travel essentials!
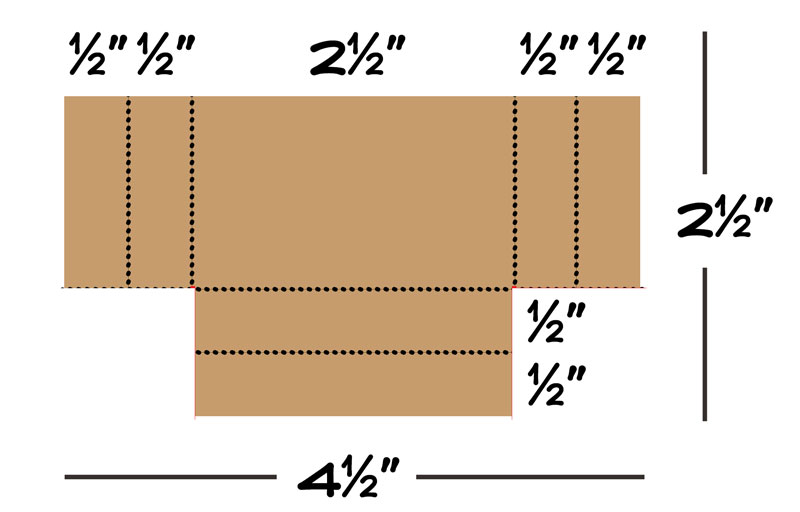
Here’s the template:

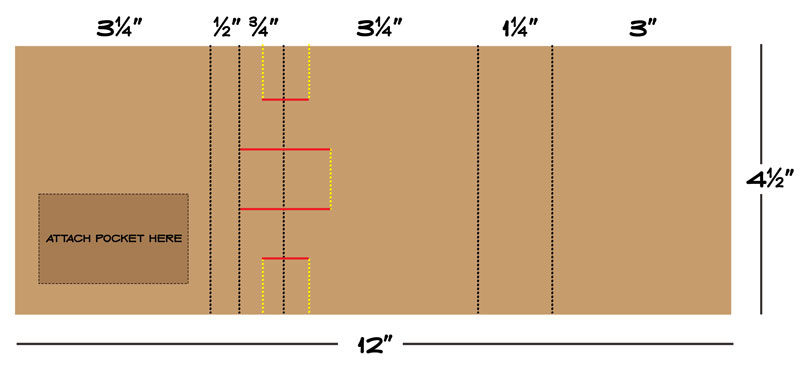
You’ll also need to cut out a rectangle of cardstock to create a pocket for your packet of gum. Your dimensions may vary depending on the brand of gum you use, so measure carefully and adjust accordingly:
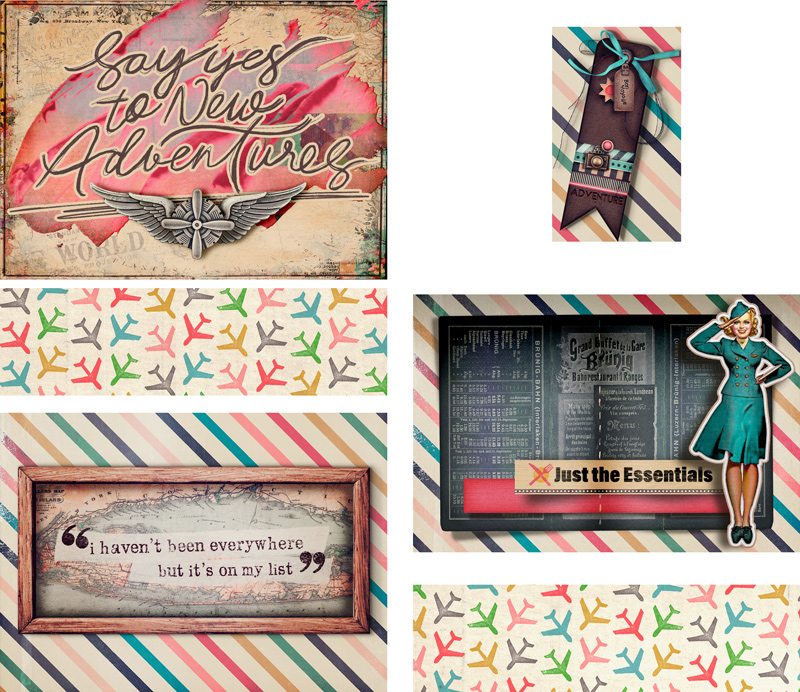
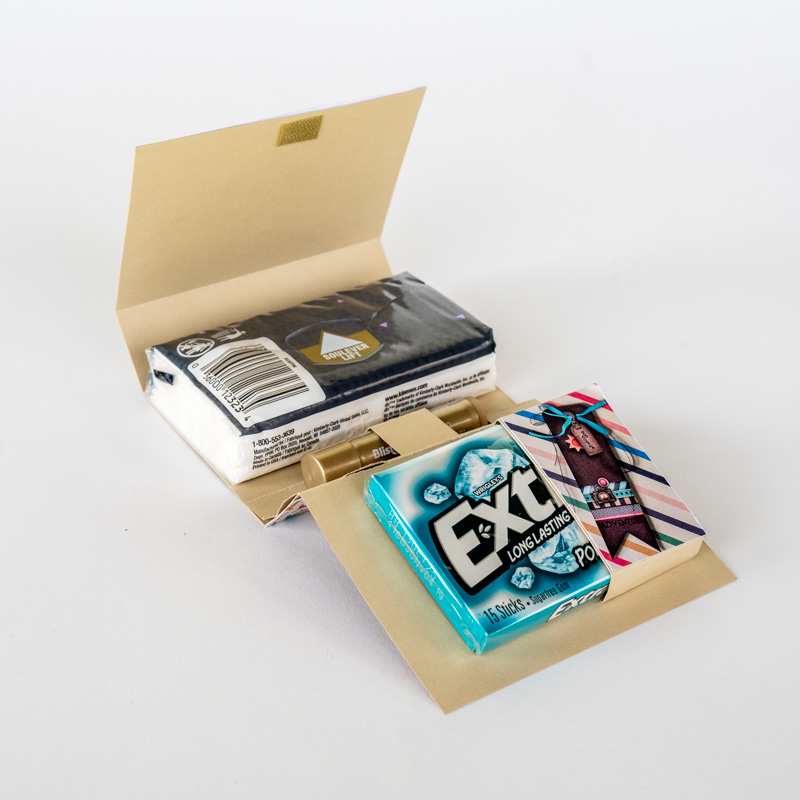
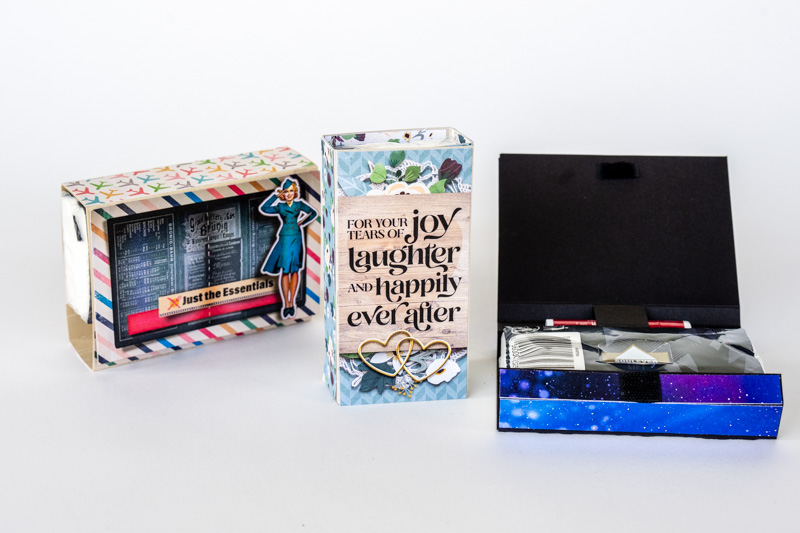
There’s lots of opportunities to decorate this wallet, both inside and out. Here’s what I created, using the explore+dream+discover bundle by simple pleasure designs by jennifer fehr:
Print, trim, and use your double-stick adhesive to pull it all together … and you’ll wind up with something like this:
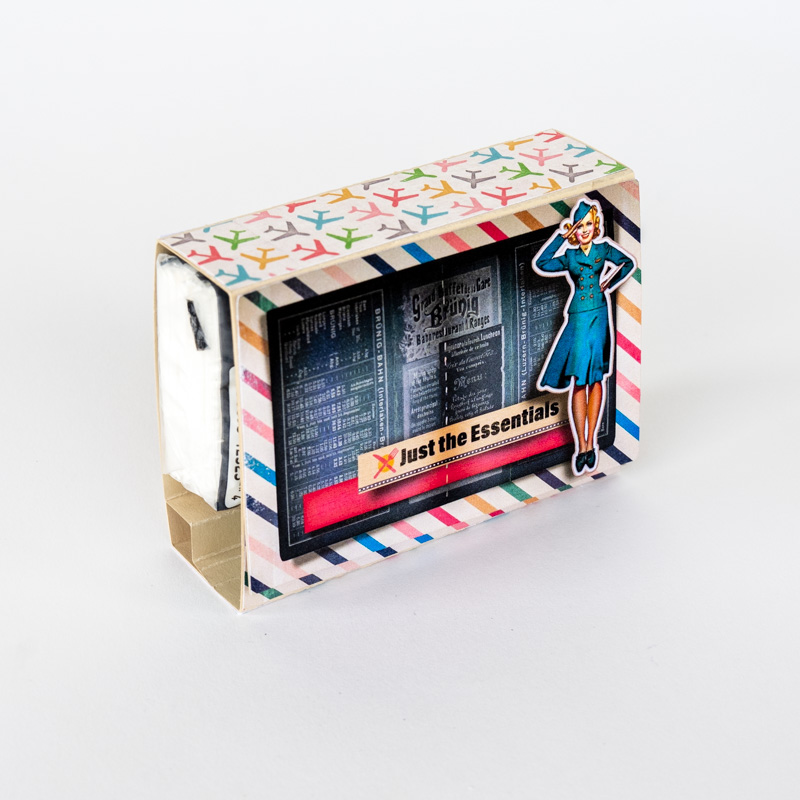
Created with the explore+dream+discover bundle by simple pleasure designs by jennifer fehr

Created with the explore+dream+discover bundle by simple pleasure designs by jennifer fehr
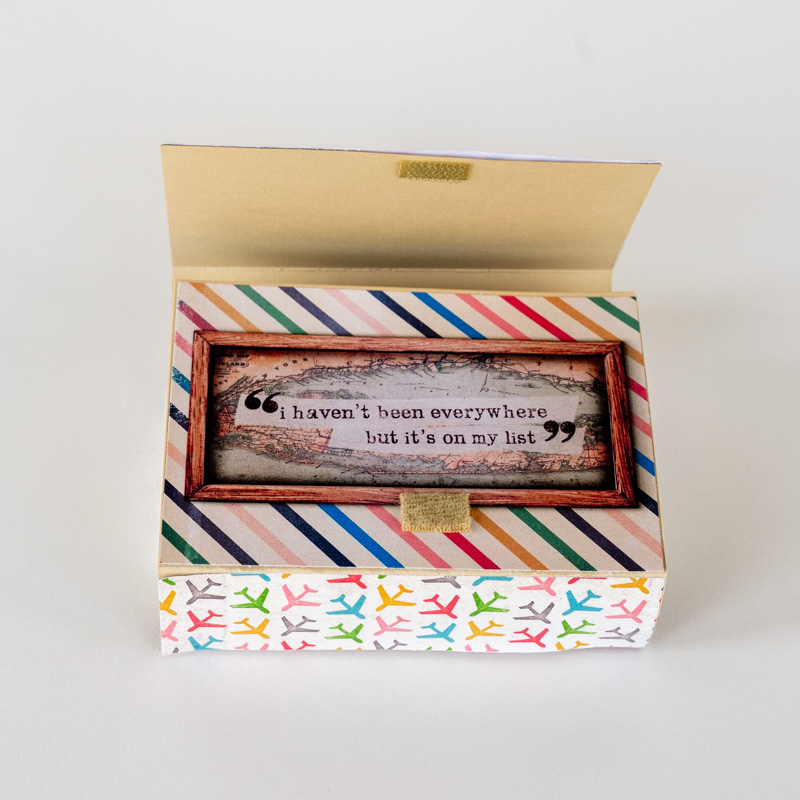
Created with the explore+dream+discover bundle by simple pleasure designs by jennifer fehr
Created with the explore+dream+discover bundle by simple pleasure designs by jennifer fehr

Created with the explore+dream+discover bundle by simple pleasure designs by jennifer fehr
There you have it: a project that can be as simple or as “extra” as you want, suitable for everything from weddings and graduations to funerals and times you just want to wish someone bon voyage.
I hope this has given you some ideas for your next hybrid project. Be sure to snap a few photos and post them in the Gallery so we can see what you’ve created when you Think Outside the Album!


