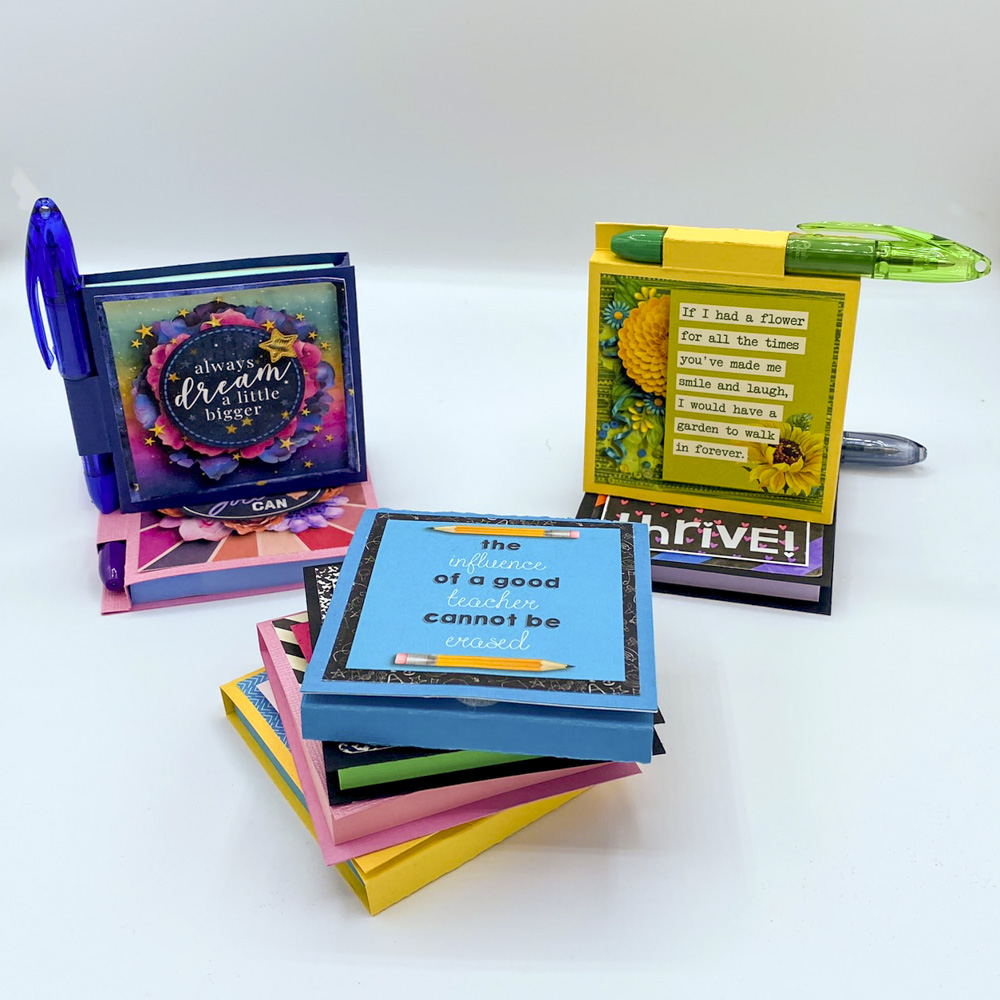
Think Outside the Album: Post-It Note Wallets
Welcome to the August 2023 installment of Think Outside the Album, where we look at different ways to take our digital supplies off the scrapbook page and instead, use them to make the rest of our world just a little bit sweeter!
As the summer winds down and kids head back to school, I thought we’d look at an easy- and quick-to-make project that’s perfect for teacher gifts, sliding into your child’s backpack, or mailing off in a care package for a college student. It’s super useful, fully customizable, and you can make it as simple or detailed as you like.
I’m talking about Post-It Note Wallets.
Personally, I use Post-It’s all the time, whether I’m working in my office, crafting, or making my way through a Bible study. But they’re not the easiest thing to carry in a purse or backpack, as they get caught on things and easily pull apart.
Years ago, someone got the idea to wrap a block of Post-It’s in a heavy-weight cardstock to protect it in transit, and the DIY Post-It Wallet was born. This project is one frequently done by rubber stampers, as it easily invites a design on the cover. But anything a rubber stamper can do, we can do faster with our digital scrapbooking supplies!
Today, I’ll teach you how to make a basic Post-It Wallet. Then I’ll show you how to take it next-level with a series of added features. And along the way, I’ll give you pattern diagrams for reference as well as lots of eye candy. So let’s get started!
Post-It Notes come in a variety of sizes. For this project, I’ll give you the pattern and show you how I calculated the dimensions to cover the basic 3”x3” Post-It pack. But once you understand how it comes together, you can easily adapt this project for any size Post-It.
What You’ll Need
A block of Post-It Notes
Brand-name or generic, in the size of your choice. For this project, I’m using 3″x3″ Post-Its.
One sheet of solid-colored cardstock
The heavier weight your cardstock, the better. You’ll want to choose a color that coordinates with the digital kit you plan to use to decorate your wallet.
One sheet of white cardstock or heavy-weight paper
I recommend 48lb and up, with the highest brightness rating you can find.
A color printer
Either inkjet or laser is fine; I used my HP OfficeJet Pro 9010 All-In-One.
Something to measure your Post-It note block
A ruler or tape measure will work, but make sure it goes down to 1/8″ markings (or mm for our metric friends).
Something to help you cut, score, and fold with precise measurements
A paper trimmer with cutting and scoring blades, a scoring board, or a ruler with an x-acto knife and bone folder.
Heavy-duty Double-stick adhesive
You need something really sticky/tacky to hold the Post-It block in place. Standard rolling adhesive won’t cut it. I used red-line tape, though a good quality glue would work as well.
Regular weight double-stick adhesive
You can use a tape runner, rolling adhesive, or standard double-stick tape to adhere your cover art. Or you can use the same heavy-weight adhesive you’ll use to stick the post-it block in place; your choice.
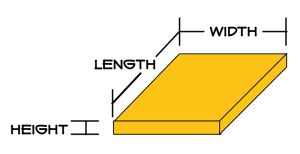
Step 1: Measure your Post-It stack.
Accuracy in this step is super important! Even though the package I bought indicated they were 3″ x 3″, my Post-Its actually measure a length of 3 1/8″ and a width of 3 1/8″. That will mean the difference between a cover that fits the Post-Its and one that almost fits them, so be precise. You’ll also need to measure how thick the stack is. Mine measured a height of 3/8″.
Write those 3 measurements down and keep them handy.
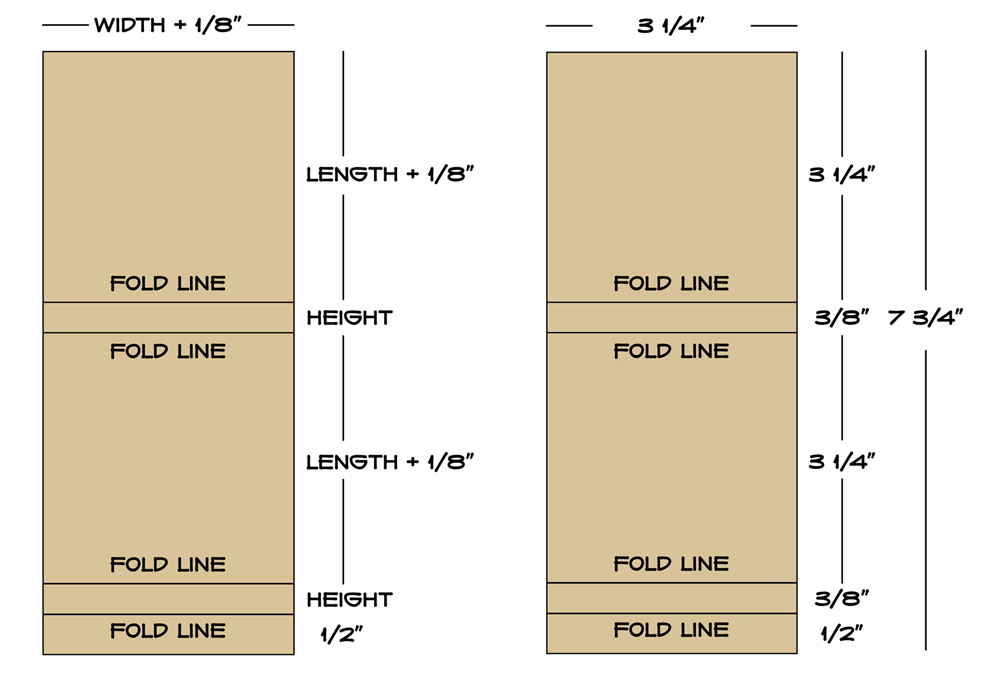
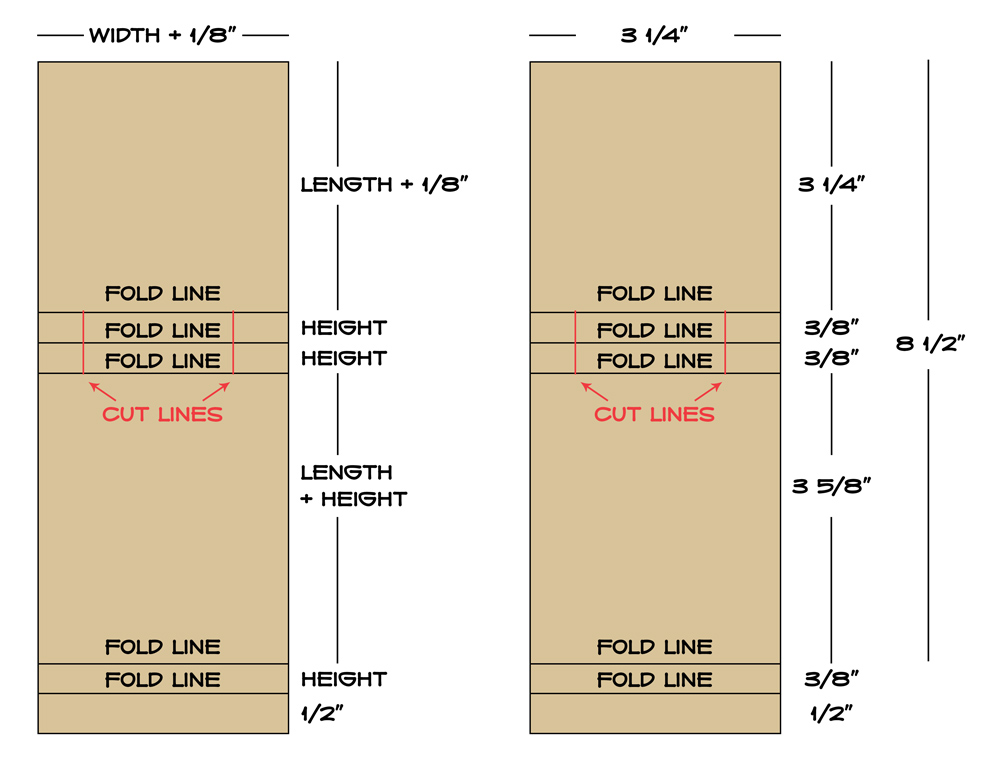
Step 2: Sketch out your template.
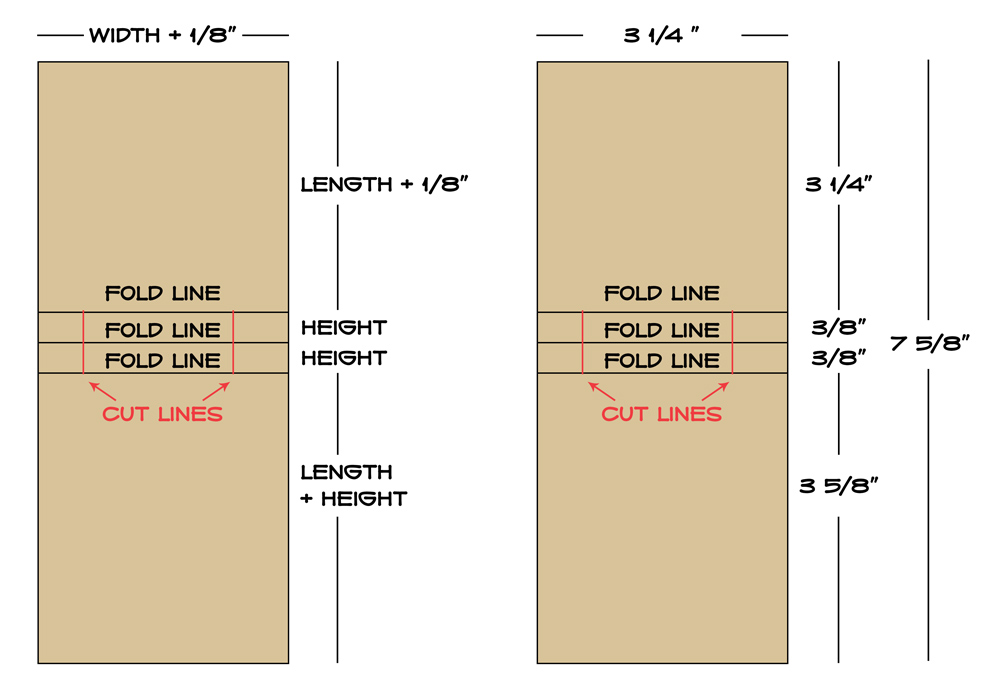
Don’t worry – I’ve provided you with the template sketches below. What you really need to do is a little bit of math.
Use the three measurements of your Post-It stack – the WIDTH, the LENGTH, and the HEIGHT – and this sketch to determine how big to cut your cardstock and where to score and fold it:
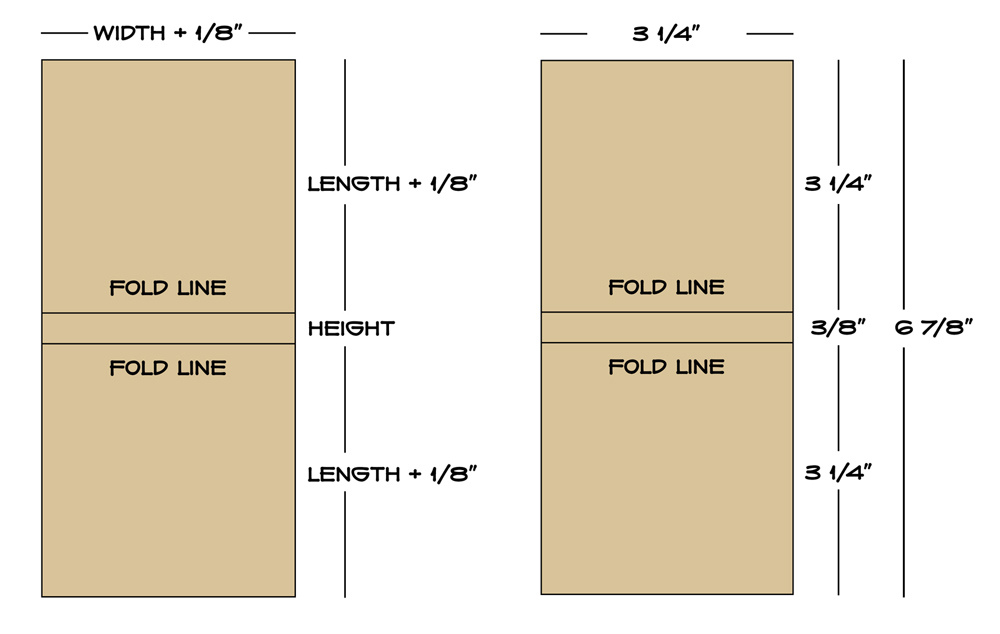
On the left, you can see the basic template for a Post-It wallet. My Post-Its measured with a WIDTH of 3 1/8″, a LENGTH of 3 1/8″, and a HEIGHT of 3/8″. I plugged those in and came up with the dimensions shown on the right.
I will cut my cardstock 3 1/4″ wide and 6 7/8″ long, and will score and fold it 3 1/4″ in from each end. Or, if you prefer to measure from the top, I’ll score it at 3 1/4″ and 3 5/8″.
Step 3: Cut out the wallet foundation.
Use your solid-colored cardstock to cut and score the wallet foundation with the dimensions you calculated in Step 2.
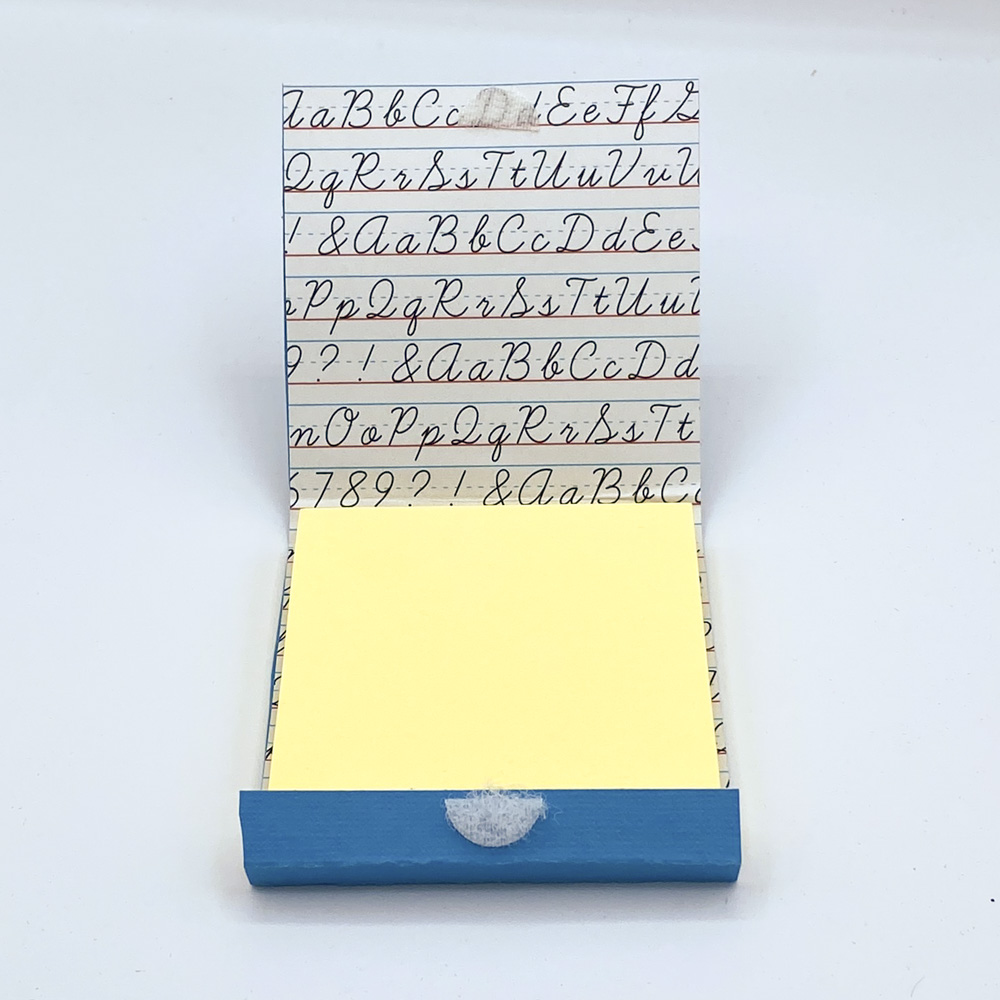
Fold it along the score lines to create what looks like the cover of a book. In the sketch above, you’ll fold the top down and the bottom up.
Put your Post-It notes inside the wallet and confirm it covers the block completely.
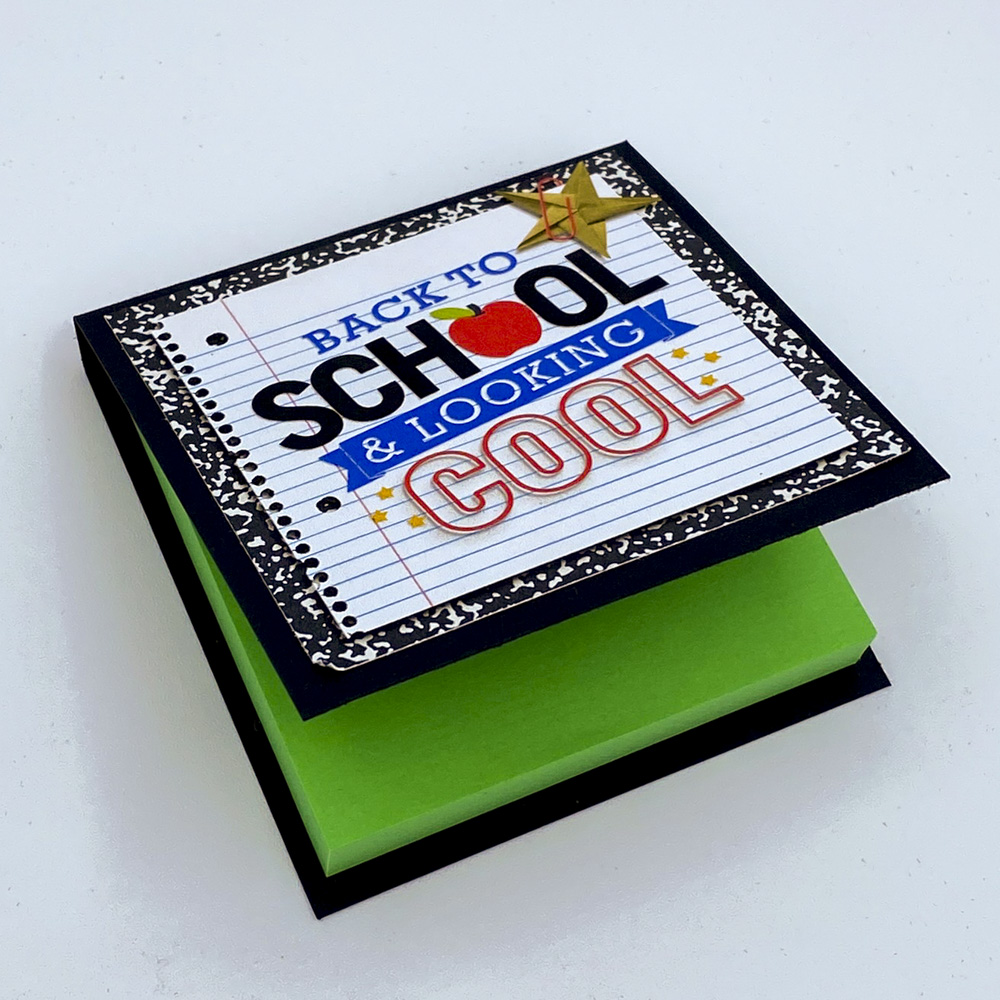
Step 4: Create your cover art.
Decide how big you want your cover art, based on the dimensions of your Post-Its. You’ll want it absolutely no bigger than WIDTH by LENGTH; that will give you a 1/8″ border where your cardstock will show around your artwork.
Launch your favorite digital design software and set up your canvas using the dimensions above. (In my case, I created a new document in Photoshop that was 3″ wide, 3″ high, and 300dpi.)
Design away! Use your favorite Sweet Shoppe digital scrapbooking supplies to create something beautiful.

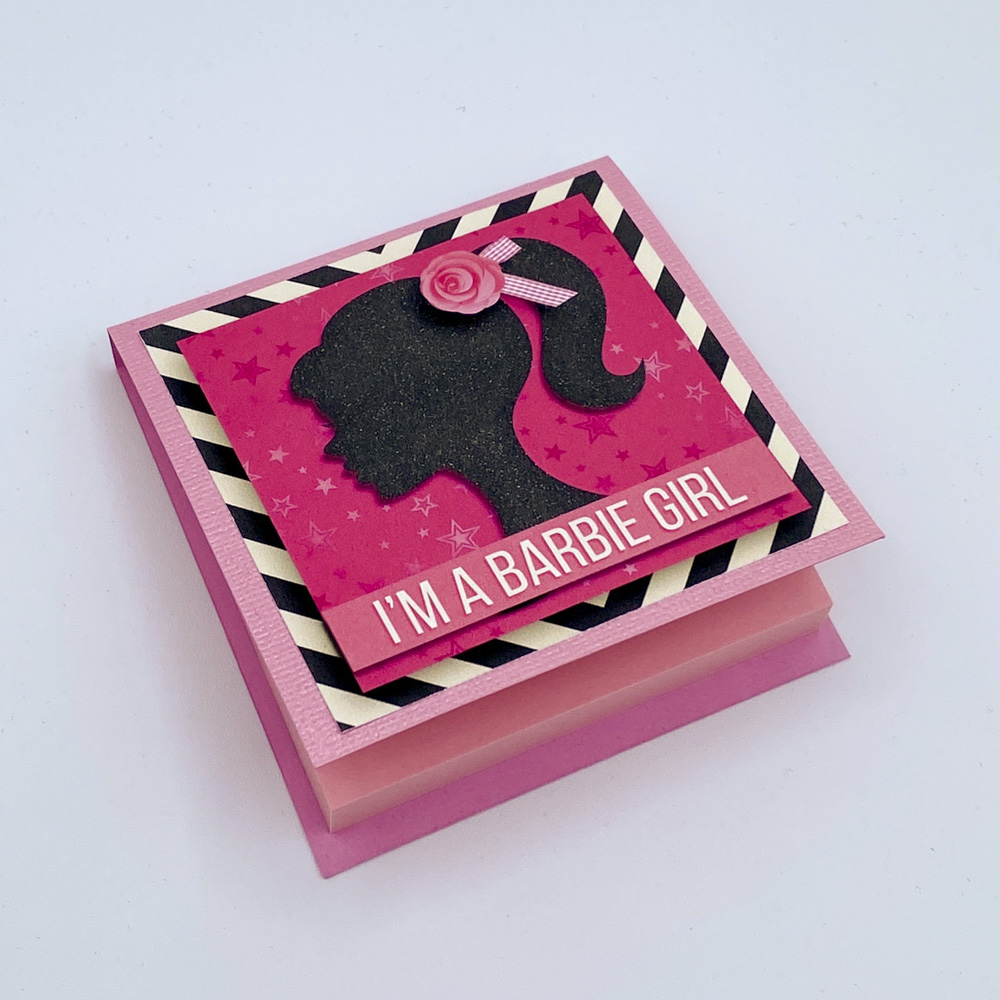
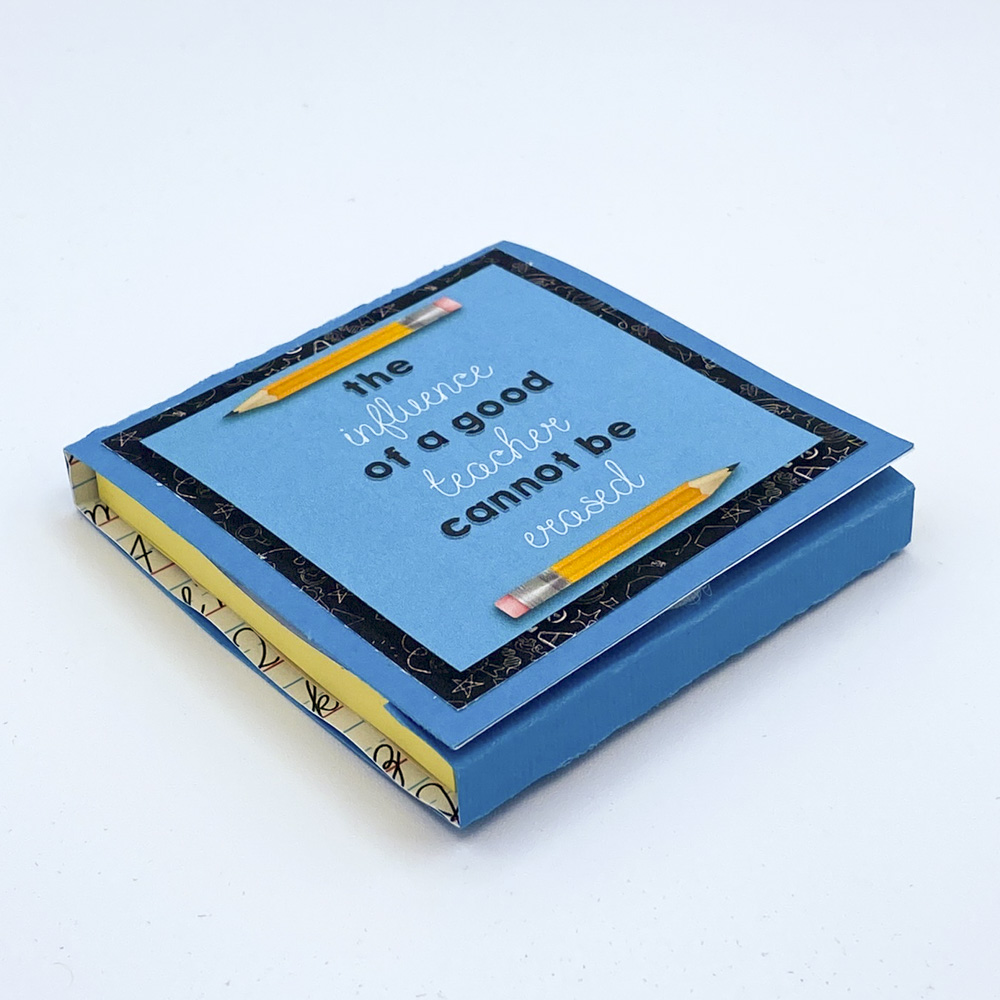
Created using Scholar: Teacher Appreciation by Megan’s Creations and Cindy’s Layered Stickers and Stamps: School Days by Cindy Schneider
When you’re done, print your cover art on bright white heavyweight paper or white cardstock.
Give it a chance to dry and then trim your cover art to size.
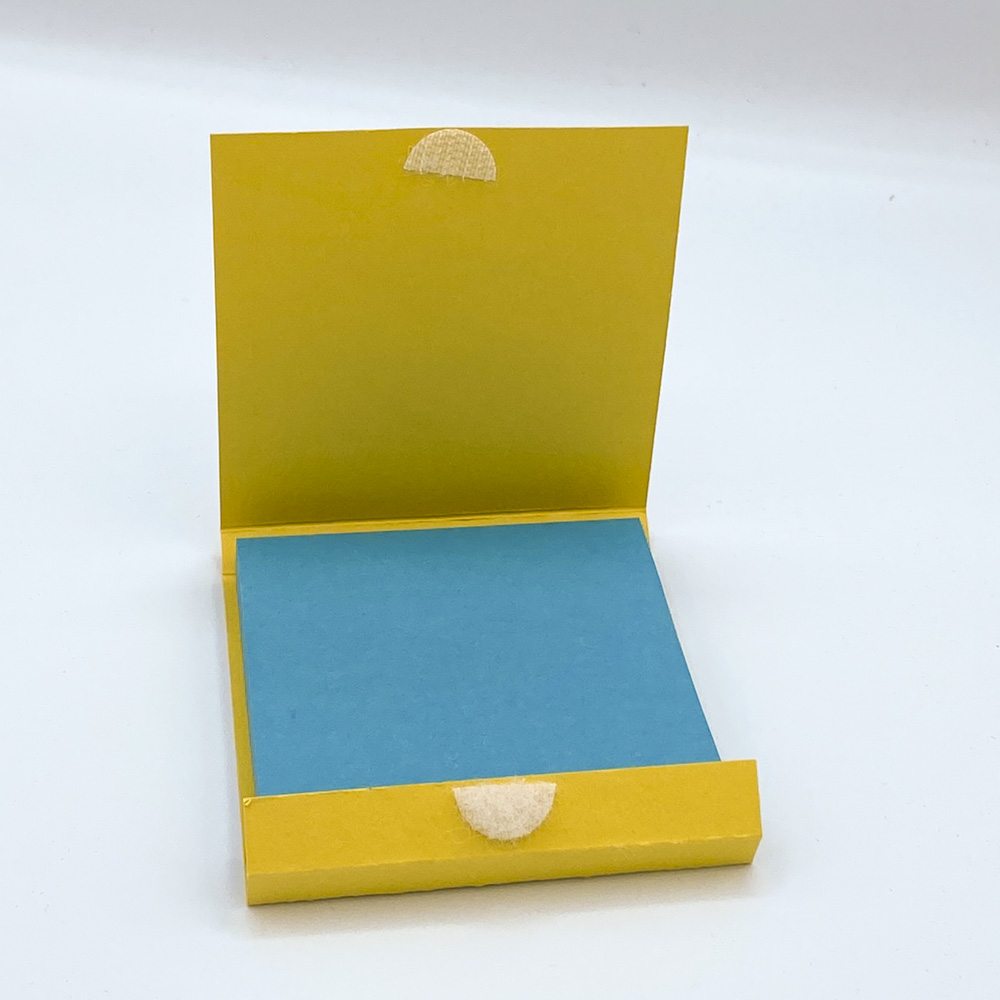
Step 5: Assemble your wallet.
Apply heavy-weight adhesive (like red line tape) to the back of your Post-It stack. Then place it inside your cardstock wallet so that the “bound” edge of the Post-It pad sits flush against the spine of your wallet sleeve.
Once it’s good and stuck in place, close the cover of your wallet. Use regular-weight double-stick adhesive to attach your printed cover art to the outside cover of your wallet.
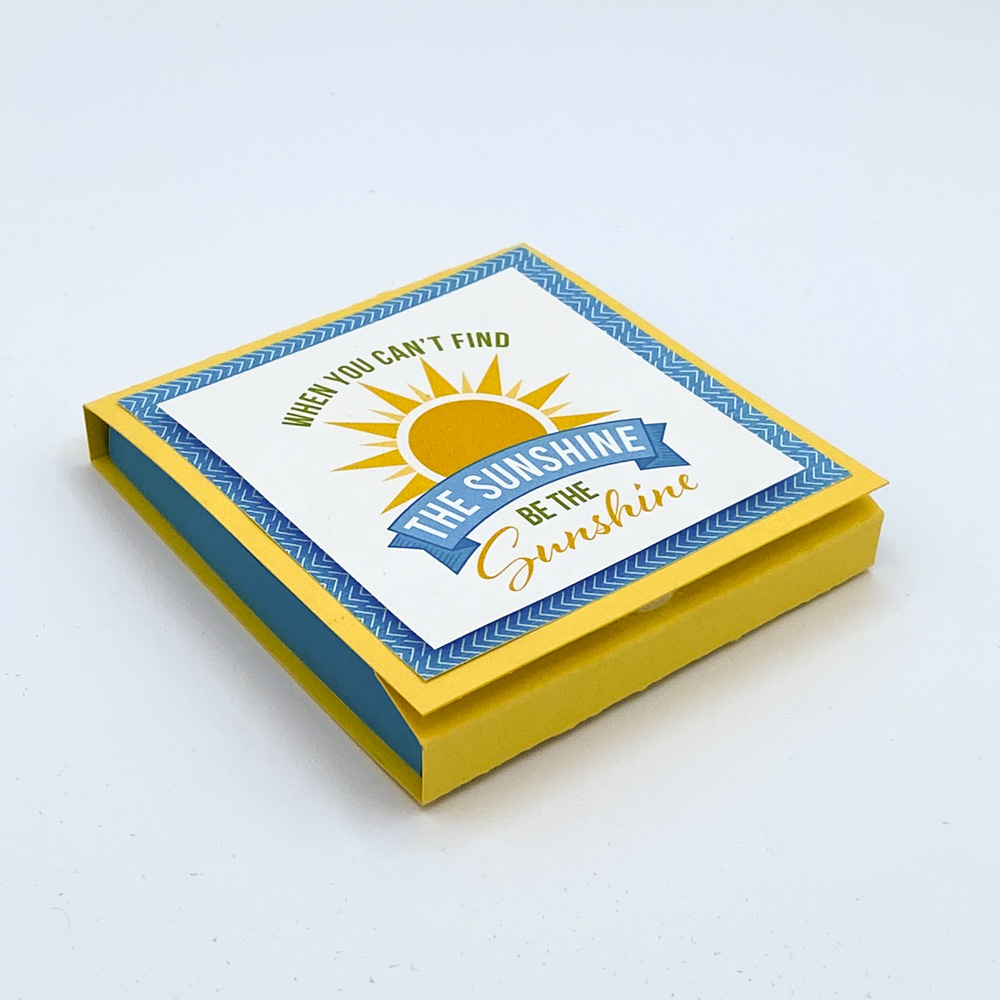
Ta-daaaaa! One custom-designed Post-It wallet ready for gifting!
Created using Scholar: Teacher Appreciation by Megan’s Creations and Cindy’s Layered Stickers and Stamps: School Days by Cindy Schneider
Now that you know how to create a basic Post-It Note wallet, let’s look at several different ways to really kick this project up a notch…
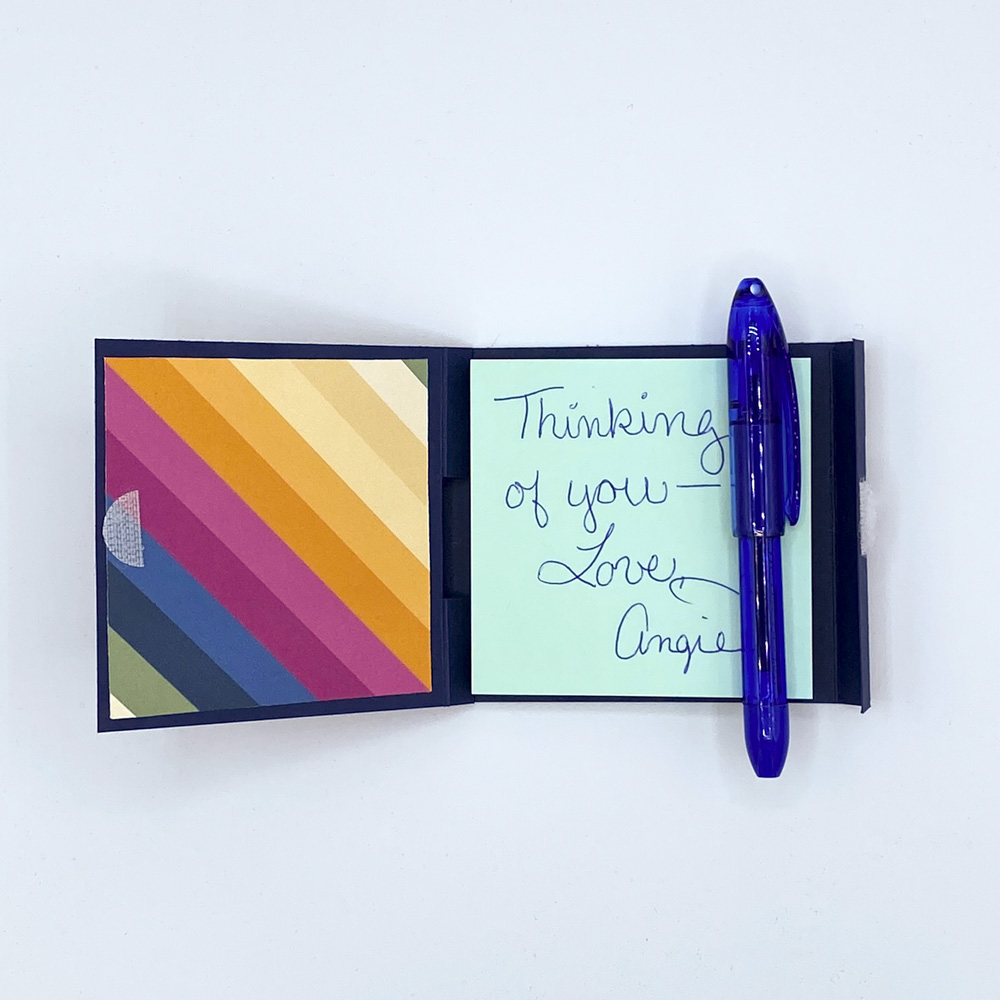
Next-level Option #1: Add patterned paper to the inside
Print out a sheet of coordinating digital patterned paper, trim it to size, and adhere it to the inside of your wallet before you tape down the Post-it pad.

Created using Life In Plastic by Studio Flergs
Next-level Option #2: Add a Velcro Closure
Want to ensure your Post-It wallet stays shut inside a backpack or purse? Velcro is the answer!
In addition to the basic project supplies, you’ll also need:
- a small piece of Velcro – both the scratchy side and the soft side. (I used these.)
Adding a Velcro closure requires an adjustment to your cardstock cutting and scoring template:
Once you’ve cut, scored, and folded your cardstock to create a sleeve, adhere your Post-It stack to the inside of the wallet. Adhere the Velcro as shown below; I recommend putting the soft side on the short flap and the scratchy side on the back of the cover. (That way, the scratchy part is as far away from your hand as you write on the notes as possible.)
Adhere your cover art and you’re done!
Created using Here Comes the Sun by LJS Designs
Why not get really fancy and add both patterned paper to the inside as well as a Velcro closure?
Created using Scholar: Teacher Appreciation by Megan’s Creations
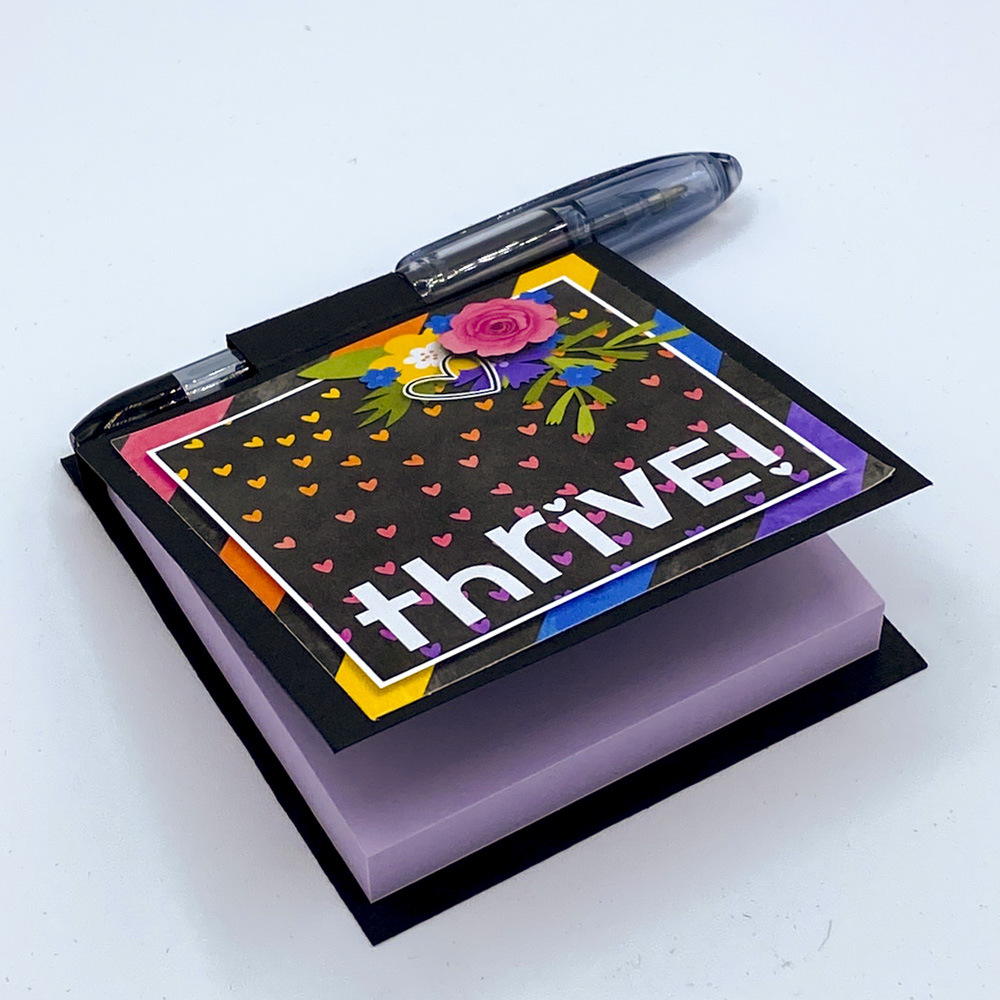
Next-level Option #3: Add a pen holder
In addition to the basic project supplies, you’ll also need:
- a mini pen like these – you can sometimes find a generic version of these at the Dollar Store and Party City.
Here’s the adjusted template for cutting and scoring your cardstock:
Notice on the spine of the wallet, you’re going to cut two vertical lines to create the pen loop. How far in you cut from the edge is up to you; I usually go for about 1 – 1 1/4″.
- After cutting and scoring your cardstock, fold it along each of the three score lines.
- Then open the cardstock completely and only fold it along the middle line.
- Use scissors to snip from the folded edge to the first score line, through both layers.
- Push the fold on the two outside segments of the spine to the inside and leave the center segment to the outside.
This is easiest to understand when you watch it done, rather than read about it. Check out this video on YouTube, and fast-forward to around the 2 minute mark.
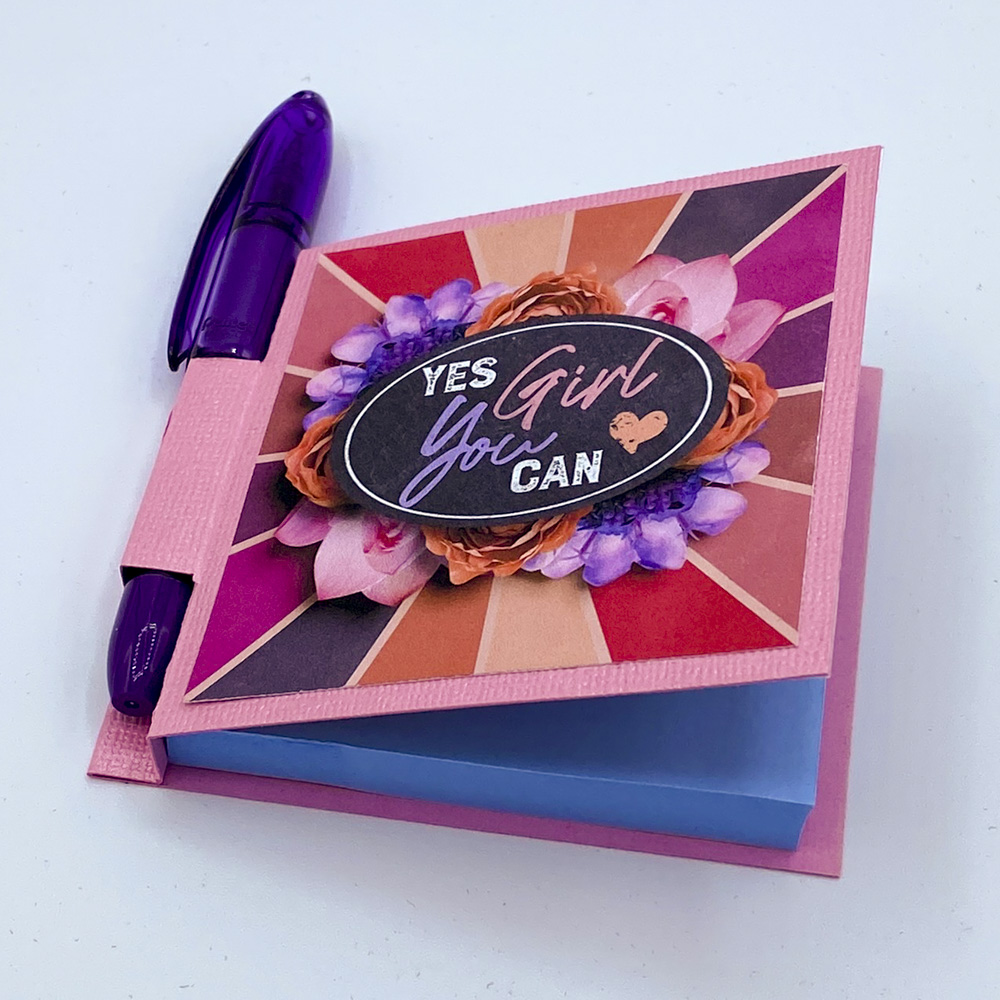
Created using Independent Gno-men by WendyP Designs
How adorable is that?!? I can’t wait to mail this to one of my nieces.
Created using Enjoy Every Moment by River Rose Designs
And here’s another one I made with a different digital kit. So fast!
Next-level Option #4: Add a pen holder and a Velcro closure
In addition to the basic project supplies, you’ll also need:
- a small piece of Velcro – both the scratchy side and the soft side. (I used these.)
- a mini pen like these– you can sometimes find a generic version of these at the Dollar Store and Party City.
Adding a Velcro closure and a pen holder requires this adjustment to your cardstock cutting and scoring template:
Follow the same steps to cut, score, fold, snip, and assemble your wallet (make sure you add the velcro!) and here’s what you’ll get:
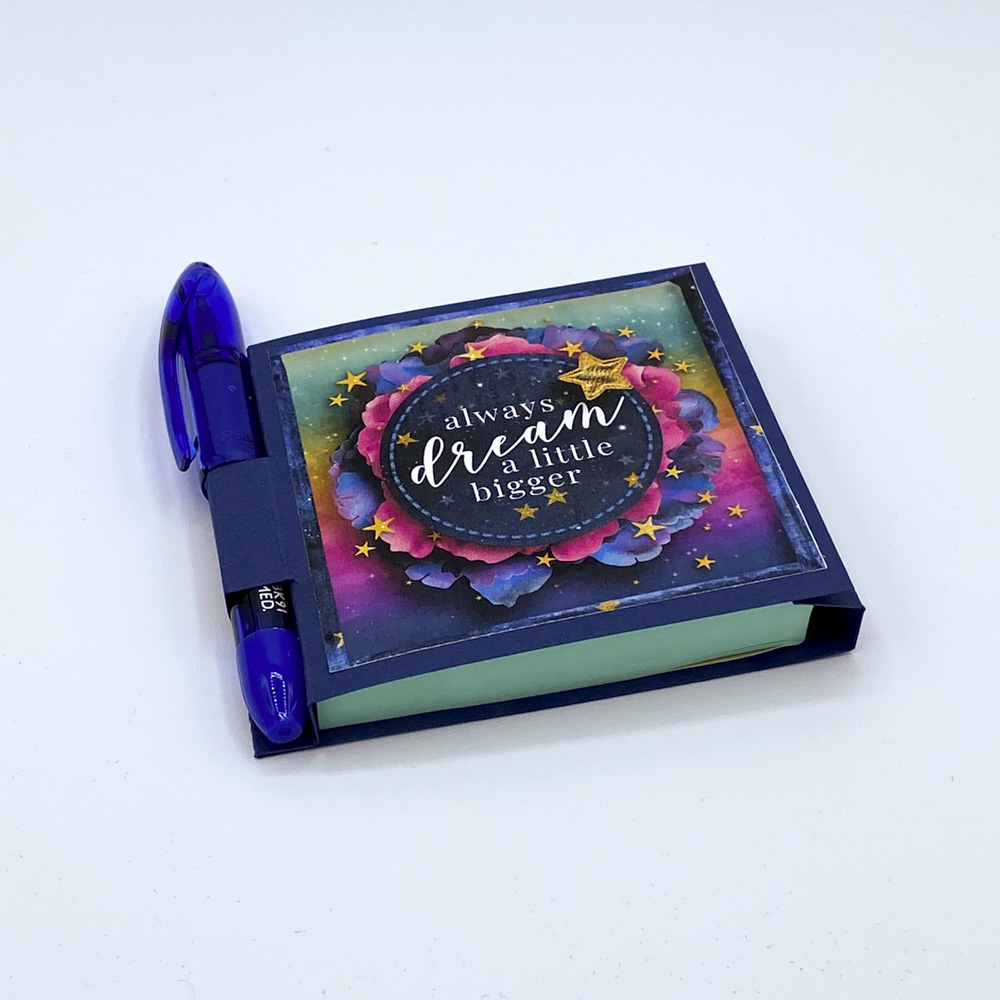
Created using Note to Self: Go After Your Dreams by Kristin Cronin-Barrow & Studio Basic Design
Created using Note to Self: Go After Your Dreams by Kristin Cronin-Barrow & Studio Basic Design
Next-level Option #5: Add magnets to the back
In addition to the basic project supplies, you’ll also need:
- thin magnets backed with adhesive
You can buy this in paper-sized sheets, as rolls of tape, or as pre-cut strips or squares. There are lots of brands available, and I don’t advocate any one over another.
Once you’ve created your Post-It wallet, why not add magnets to the back? When you hang one on a fridge or metal file cabinet, it becomes totally functional decor!
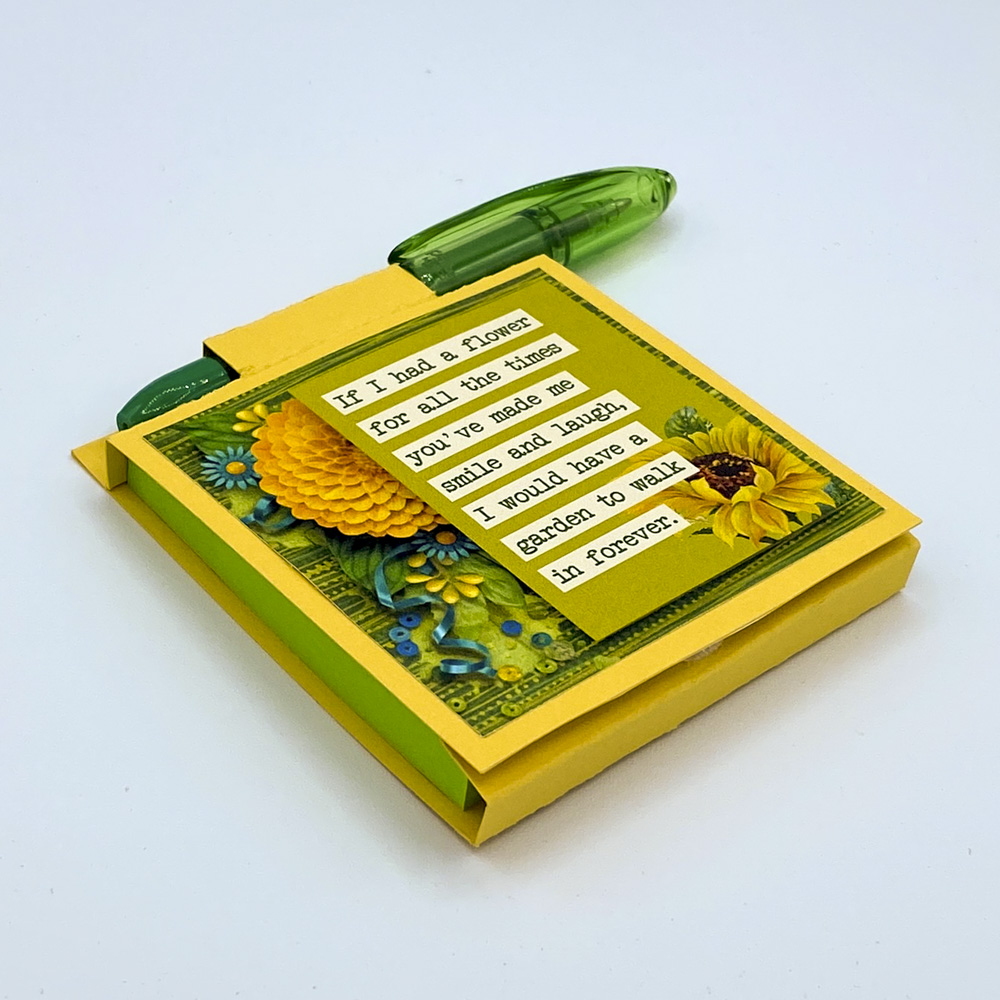
Created using Sunflower Sayings by Clever Monkey Graphics
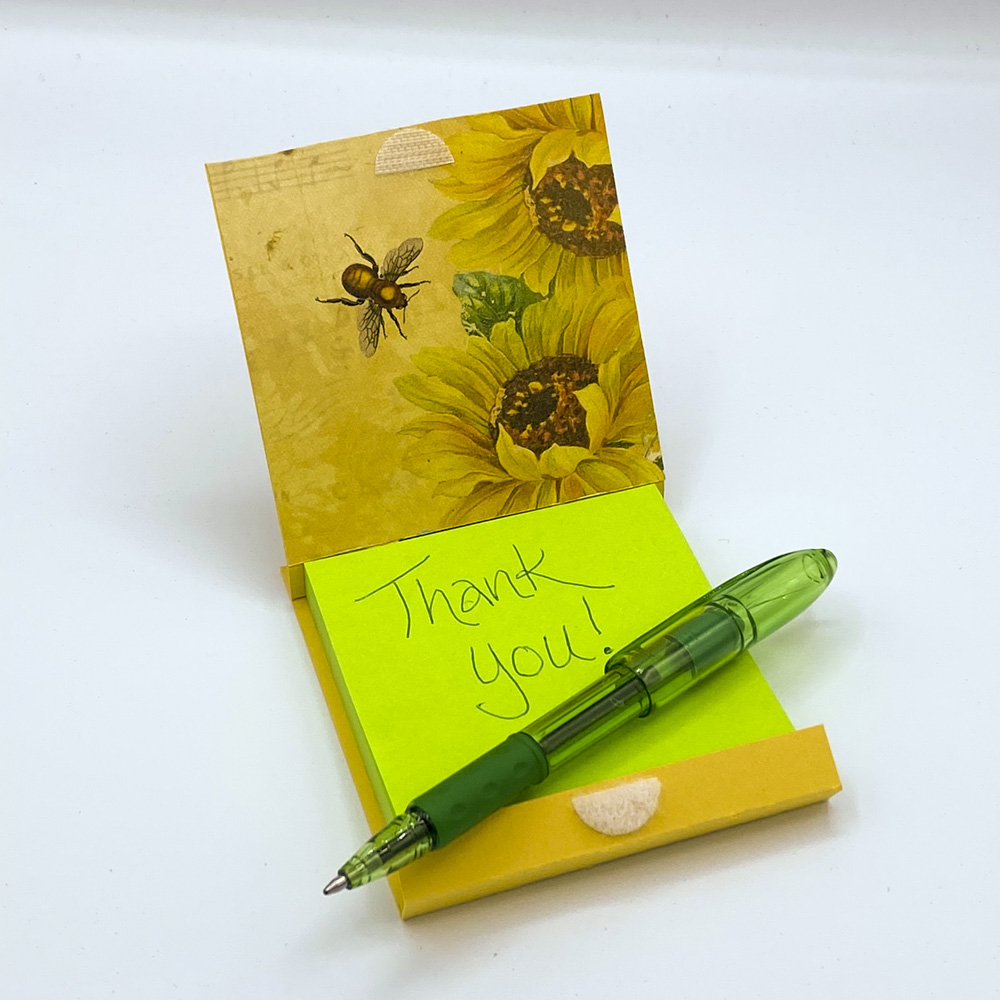
Created using Sunflower Sayings by Clever Monkey Graphics
Next-level Option #6: Make it dimensional
Adding dimensional elements to your cover art really ups the WOW! factor on a Post-It wallet that will sit on a desktop or hang on a fridge or magnet board. Be aware that dimensional decorations don’t work so well for post-it wallets being carried in a purse or backpack. It will get crushed or can get torn off as it rubs against everything else in the bag. But if it’s stationary stationery (see what I did there?) it’s absolutely gorgeous! Check out these stunning examples by Sugar Babe Esther:

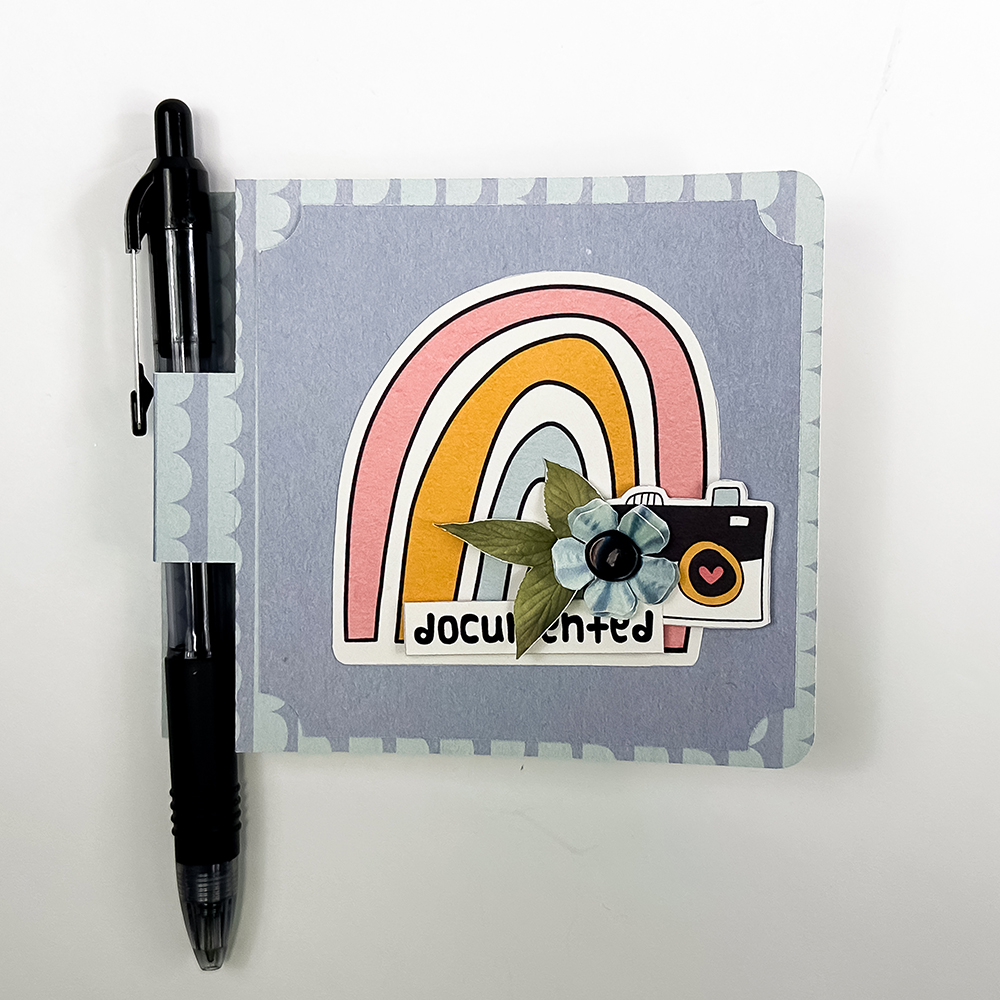
Created with Document All the Stuff by Amanda Yi
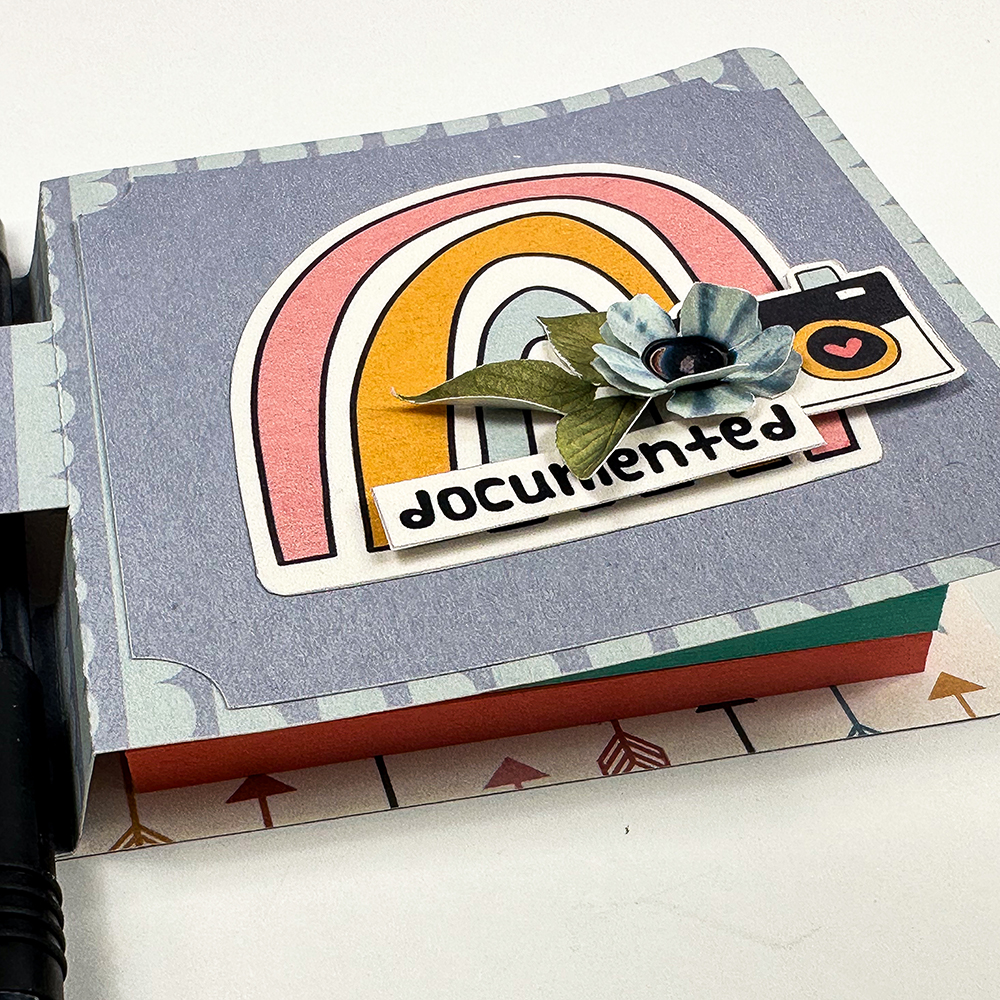
Created with Document All the Stuff by Amanda Yi
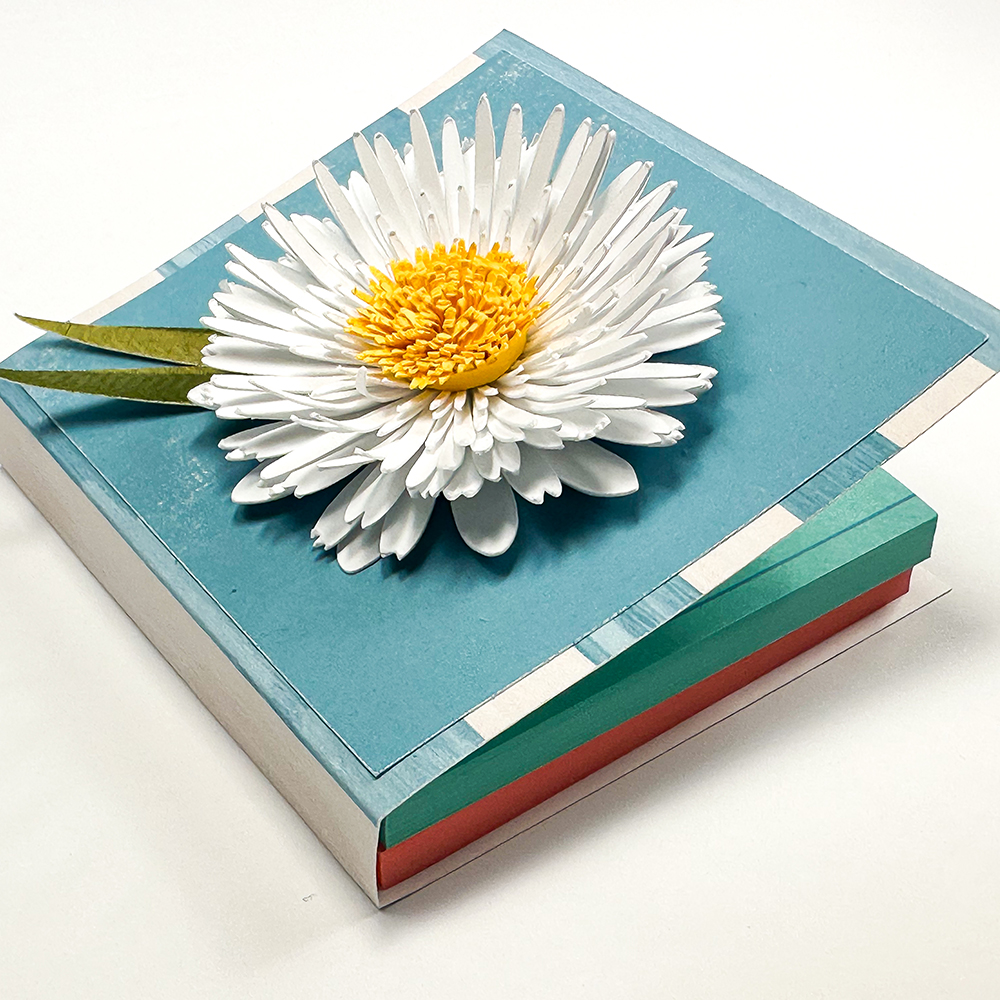
Created with Among the Wildflowers by Kristin Cronin-Barrow
Cricut cut files: Lori Whitlock 100 Sticky Note Holder (modified) and Maison Gregoria Crazy Daisy
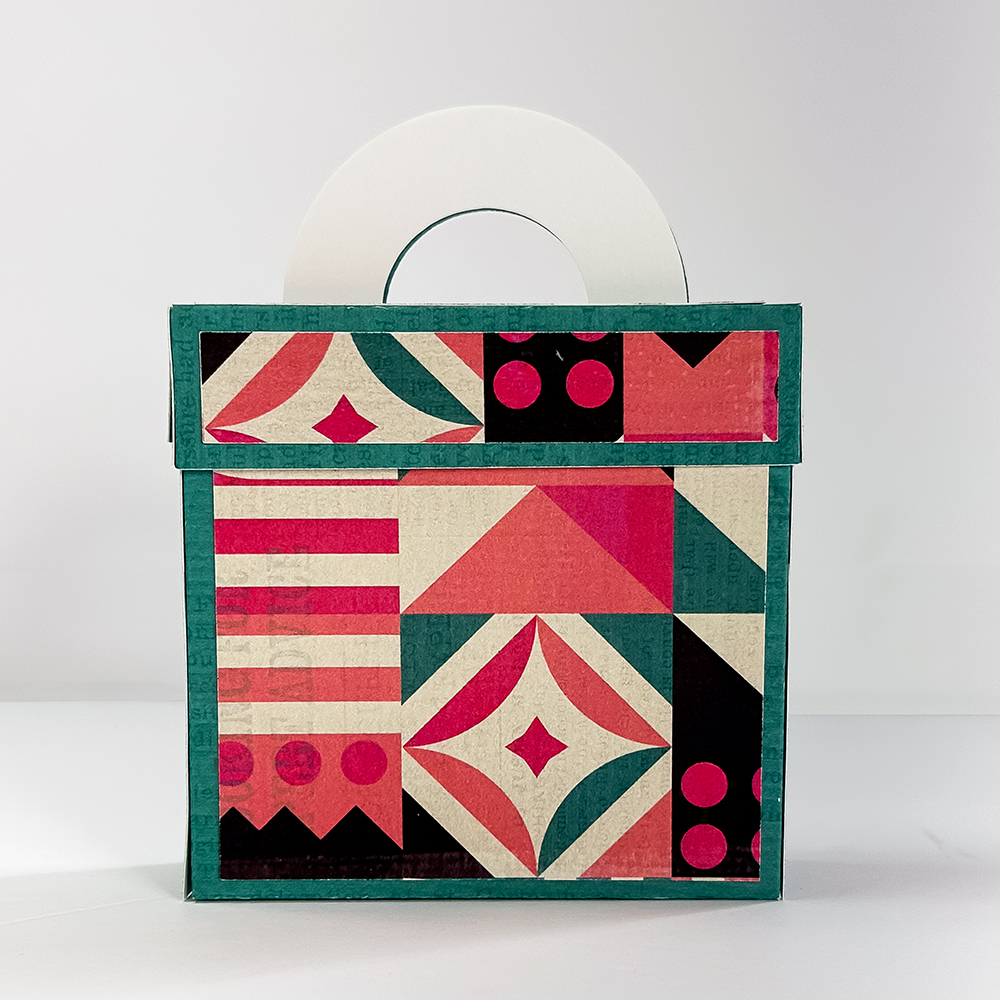
Next-level Option #7: Use a 3-D cut file
If you’re a Cricut or Silhouette maven like our own Sugar Babe Esther, skip the basic wallet design and instead search your design software cut-file library for the keyword “post it”. You’ll find options like this gorgeous box with a lid that Esther decorated using her Sweet Shoppe digi-supplies!
Created with #toomanytabs by Simple Pleasure Designs and Studio Basic
Cricut cut file: Lori Whitlock Sticky Note Tote
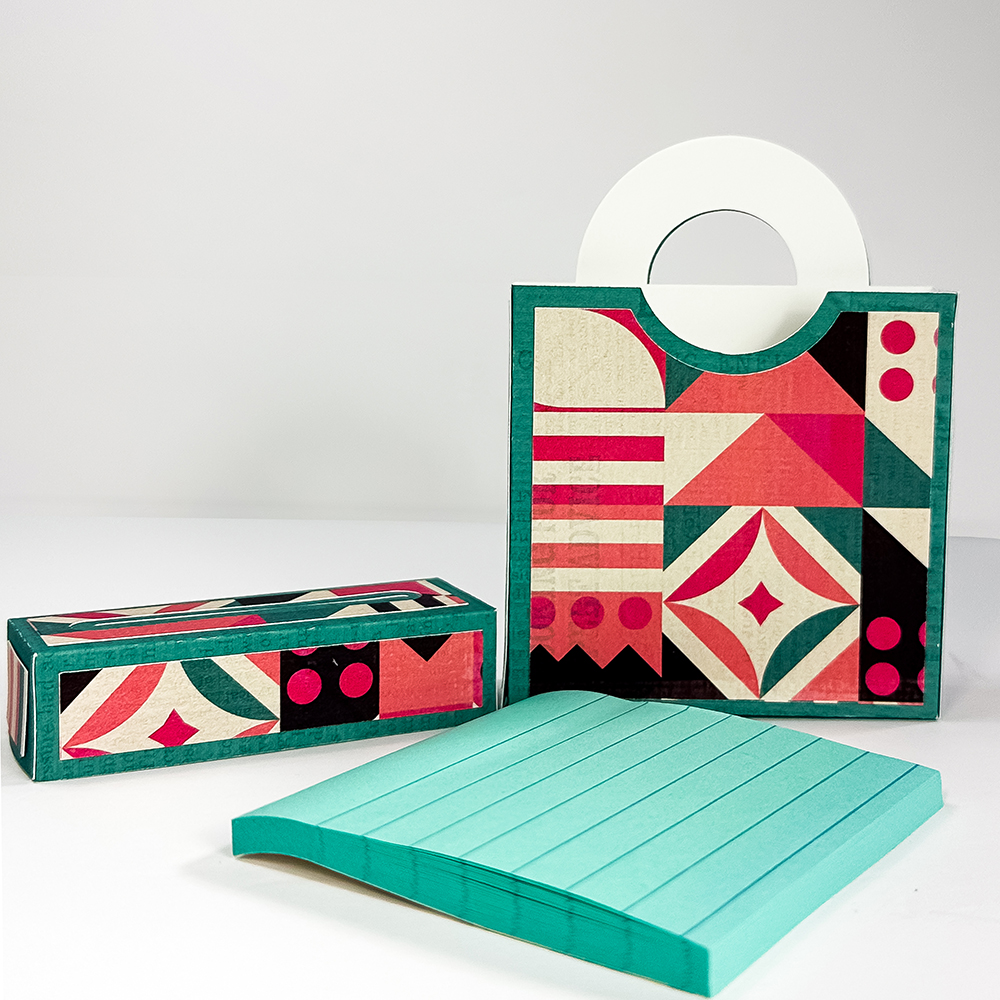
Created with #toomanytabs by Simple Pleasure Designs and Studio Basic
Cricut cut file: Lori Whitlock Sticky Note Tote
And there you have it; that’s everything you need to know to create your very own Post-It Note wallet, not only the basic version, but seven different variations.
What will you use this project for? I can think of so many opportunities to use custom Post-It Note wallets: from back-to-school and teacher appreciation gifts to party favors for baby and bridal showers, work- and team-appreciation thank-you’s, and sweet “thinking of you” gifts. Pop one of these in a clear cellophane bag, tie it with some ribbon, and you’ve got a quick and easy hostess gift. There’s so many possibilities, and when you use Sweet Shoppe digital scrapbooking supplies to decorate your Post-It wallets, you can make them as custom and cute as you want!
Before you give them away, be sure to shoot a photo of your finished Post-It Note wallet and share it with us in the Gallery – because I can’t wait to see what you create when you Think Outside the Album!


Lorie said...
on August 24th, 2023 at 11:06 am
I love these ideas, Angie. I think they would be great stocking stuffers for my family and can’t wait to give them a try.
Bienejen said...
on August 25th, 2023 at 3:46 pm
Great ideas!