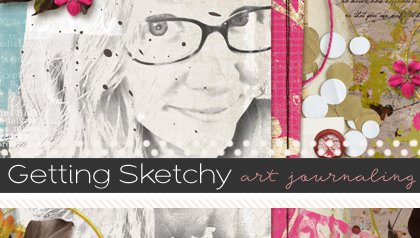
Using a template to create an art journal layout
I’ve noticed a huge trend in art journaling layouts recently and since I’m a template addict, I thought I’d try using a template to create an art journal page… I seriously LOVED the result and decided to share how to do it with you.
For my first layout, I used the bottom right corner template in this set by Darcy Baldwin…

and created this layout with Sugarplum Paperie’s Heart Art and a few other goodies from the shoppe (click image for credits)…
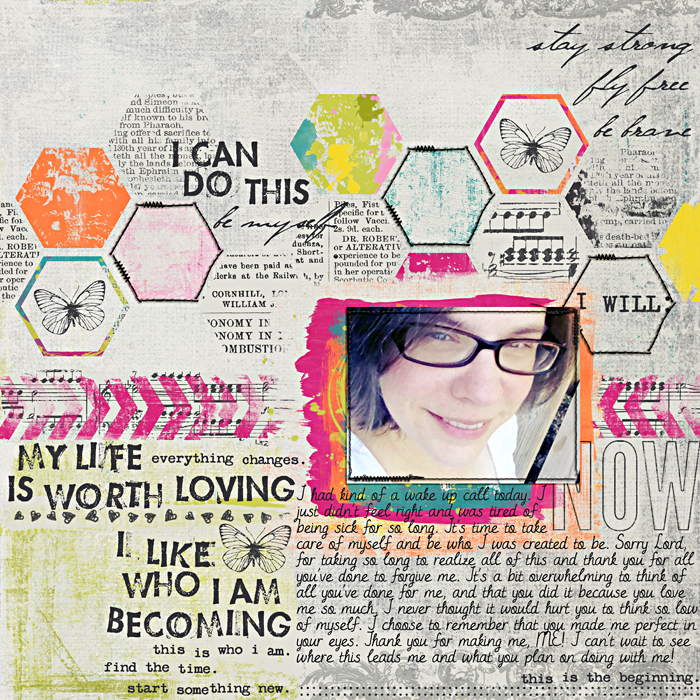
and now I’m going to show you how I used the bottom right corner template by Studio Basic Designs and use some techniques I used to create another art journaling page using a template…

1. Open your template in your program, I am using PSCS5 but you can do this with PSE also…

2. Just like a regular template I pick a paper for my background… most art journals use either a plain paper or notebook paper or newsprint or papers from an old book, but you can use whatever inspires you which is the joy of art journaling 

3. Since most art journals use a lot of paint I chose to replace the pretty scallop paper layer with something more “painty” looking… I placed the mask over the top of the scalloped paper for placement and once I liked the placement I hid the scalloped paper in my layers palette…

4. I then clipped a painty looking paper to the mask to make it look like I painted over the background…

5. In place of the top paper I put a really large stamp…
6. I also used stamps to place where the butterflies/element spots were…

7. The next thing I did was cover up the next “photo” layer with several “paint” patches… these just happen to be the printed paints from the Heart Art series to add a bit more contrast than just paint…
8. After covering up the “photo” area, I hid the “photo” in the layers palette…

9. Here’s where the fun begins… for the tree, I wanted it to look like I painted the tree instead of clipping paper to it…. Since paint usually have open parts to it and sheer parts I couldn’t just clip paint to the layer… So, I first covered up the tree layer with the paint I wanted to use…
10. holding down the CTRL (COMMAND) key, click your mouse on the thumbnail of the “tree” layer in the layers palette, this will give you marching ants around the shape you want to cut out of the paint (be sure you click on the thumbnail and not just anywhere in the layer to get the marching ants)
11. Once you have the marching ants, click on the paint layer in the layers palette that you want to cut out in the shape of the tree and press CTRL-J (COMMAND-J) (you will see a new layer above your paint layer) leave the new layer but hide the paint layer below and the “tree” layer below that in the layers palette…
(CTRL-J and COMMAND-J are the shortcuts to duplicate a layer or layers or part of a layer that’s been highlighted)

Repeat steps 9-11 again for each part you want to cut out paint to form the shape… I did it here for the top part of the tree… this first one shows the marching ants…

this one shows the top layer that was “cut” from the paint

this one shows after I’ve deleted the original paint layer below and hidden the paper part of the template in the layers palette…

continue to “cut” paint or even stamps using steps 9-11…


now here’s a really cool thing you can do too with this technique… you can use steps 9-11 to “cut” papers or elements with holes in them, like doilies or sheer elements where you don’t want to see the clipping mask behind it… I used steps 9-11 to “cut” doilies instead of clipping papers to the “photo corner” layers in the template…

I also added these cute chevron arrows by Julie to the edge to point to my picture and clipped a paper to the bottom layer but then “cut” paint to the top layer using steps 9-11 again…


12. Now to fill up my page I added a bunch of flat items like more stamps, some washi tape, ephemera, word strips and some stitching and staples. I also added a photo with a message to myself on the frame… to kinda “artsy” up the photo I added a couple of Penny’s Picture Plays and changed the blend mode to soft light so you can see a little bit of the design/texture over the photo but not totally cover up the photo…

Here’s my final layout for you to see after filling it all up…

The main key to the art journaling “style” is to use lots of flatter items with lots of textures, so paints and stamps and doodles, papers and ephemera, and attachments like stitches, staples and tape… and if you feel stuck in your creativity, you can easily use a template to make an art journal page… mostly be creative and have lots of fun with it… there are no rules to art journaling so they can be a total hot mess or something much simpler. Just put your personality and emotion into it… if you’re feeling dark than use dark colors and if you’re feeling cheerful, use cheerful and bright colors and don’t be afraid to “cut” your paint into fun shapes like hexagons or trees or hearts or whatever fun shape you’d like. I look forward to seeing your art journaling pages using a template.


Carrie said...
on September 7th, 2012 at 2:20 pm
Ah-mazing tutorial chickie! I’m definitely pinning this one for later usage.
I haven’t blogged my layouts for awhile | Dee Birks said...
on September 14th, 2012 at 1:14 pm
[…] last one is a little different. I was trying a more art journaly page, using this tutorial as […]
Dalis said...
on November 14th, 2012 at 3:33 am
heather, this is so cool. I love this page didn’t know there was a tutorial for it!
Tutorials by Sweet Shoppe Designs » Scrapping Outside Of The Kit – adding “extras” to your layouts said...
on December 13th, 2012 at 9:04 pm
[…] background for your layouts… You can see how I use a template to create an art journal page HERE, or Krystal has these great Mish Mash templates that are perfect for mixing up your background […]