Pucker Up – Hybrid Lip Balm Gifties
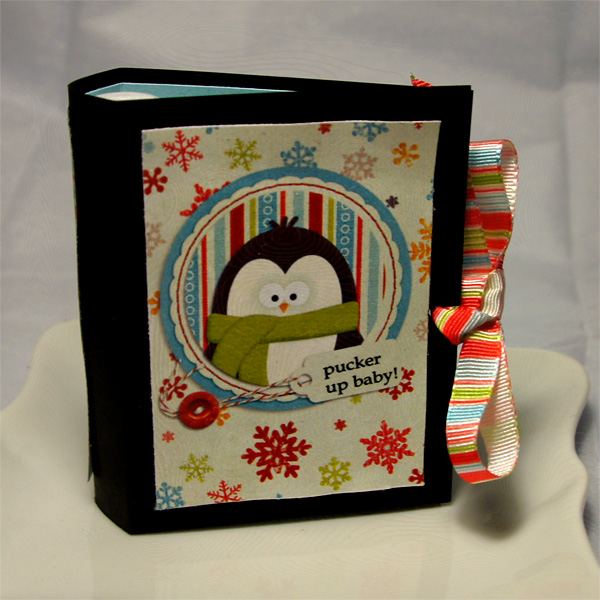
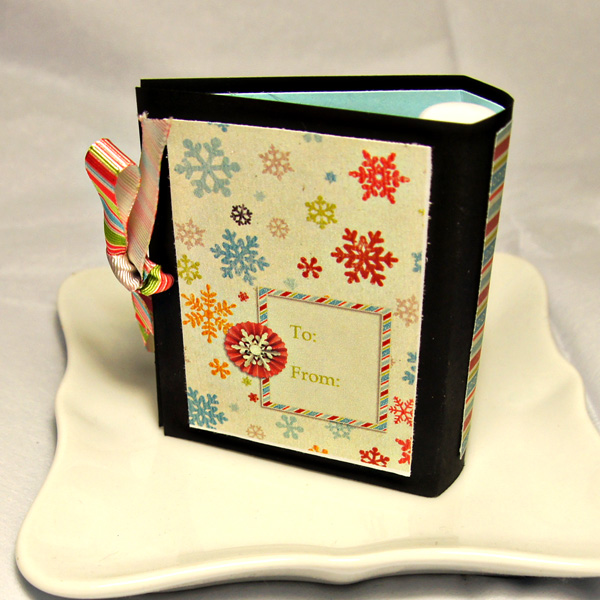
It’s Juli here with a fast little hybrid winter gift that is quick to make and oh so cute! I don’t know about all of you, but I love the after Christmas sales. Every year I pick up packs of lip balms to have on hand in my gift box not only for my family to use but also for little gifts to give friends, teachers, and well…just about anyone. This project gives me a fast way to personalize the lip balm before giving as a gift. What a great way to be able to say Happy Birthday, Hello, Thanks or Happy Valentine’s Day….the only limit to what you can do is your imagination!
Supplies:
Frosty Frolic by Julie Billingsley
Lip Balm
Cardstock
White Printer Paper
Paper Trimmer
Score board or ruler and bone tool
Scissors or Craft Knife
- Open Photoshop Elements.
- Create a new canvas the size of a standard sheet of paper (8.5 inches x 11 inches).
- Create two rectangles 2.5 inches wide x 3.25 inches tall using the rectangle tool – these will be the front and back decorative panels for the wrap.
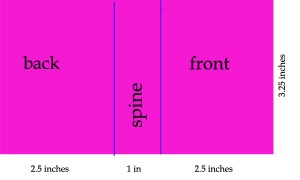
- Create one rectangle 1 inch wide by 3.25 inches tall using the rectangle tool – this will be the spine for the wrap.
- Use your favorite digital kit to decorate the front, back and spine of the wrap. I made my front and back designs 1/4 inch smaller on each side so that the cardstock wrap would show all around each panel.
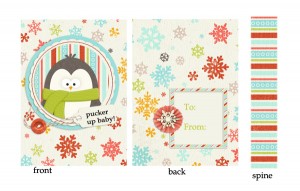
- Print the decorative pieces on printer paper.
- Cut the outside piece of colored card stock – 6.25 inches wide by 3.25 inches tall.
- Cut the inside piece of contrasting card stock – 5.75 inches wide by 3 inches tall.
- Score the outside card stock at 2.5 inches and 3.75 inches along the 6 inch side.
- Score the inside card stock at 2.5 inches and 3.75 inches along the 6 inch side.
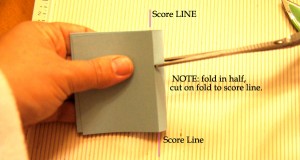
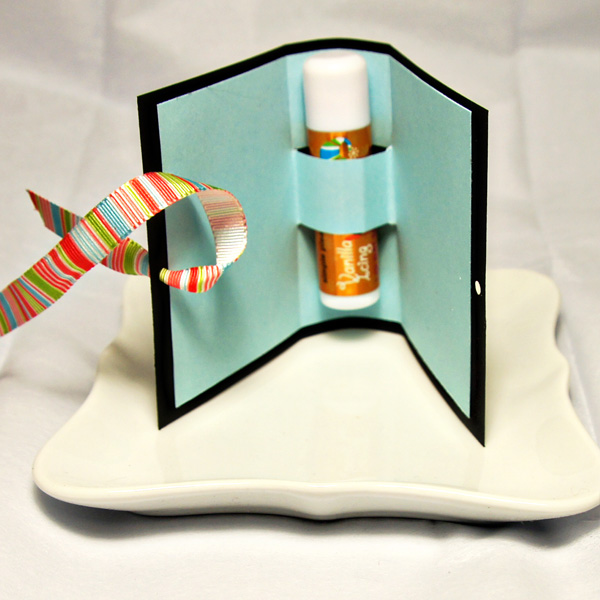
- Fold the inside card stock in half so the short sides meet each other. Use your scissors to cut two slits from the fold to your score line to hold the lip balm
 .
.
- Adhere the inside card stock to the outside card stock leaving equal amount of room around all sides. Use a strong adhesive – glue stick isn’t going to cut it here!
- Flip project over and adhere the decorative panels to the outside of the wrap.
- Slide in your lip balm.
Optional: Punch a hole through the front and back covers and tie the wrap shut with a decorative ribbon.
Please note: the dimensions of your project could be slightly different due to the size of your lip balm. You may need to alter the spine width to accommodate.
I hope you will give this little hybrid project a try! If you do please link me up in the comments so I can leave you some love!

Lydia said...
on January 4th, 2012 at 11:43 am
Juli – these are so, so cute! I’m definitely going to try my hand at these one of these days. 🙂
Trina H said...
on January 4th, 2012 at 4:53 pm
Such a great idea – will be making these for up coming Birthday cards.