Hot 4 Hybrid Wednesday
Hello, it’s Andrea here with another hybrid post. Today I want to share a card I made using a few of my favourite tools. We often share the basics of hybrid crafting on the blog here and in the Sweet Shoppe forum but what happens when you want to build on the basic supplies you have and step up your projects.
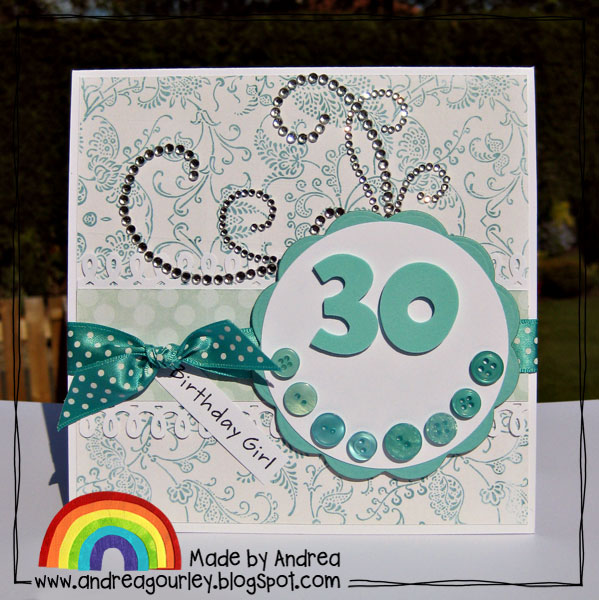
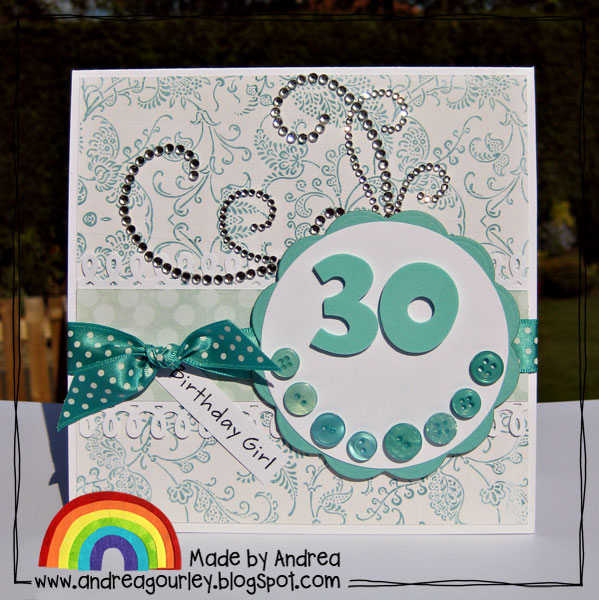
This is the card I made using Melissa Bennetts Love Blooms kit
As well as the digital kit and a few basic tools I used a couple of more advanced tools and I’ve done a few (okay I think I got trigger happy with my camera!!) photographs as I went through the process of making my card
First off gather your supplies – printed papers, buttons, ribbon, alphabets, a few paper punches and dies
Use a scoring board and tool to score and then fold a sheet of cardstock, you’ll get a really crisp fold if you flatten the folded cardstock along the crease with a bone folding tool

Next adhere the printed papers to your cardbase and then trim the folded card to size using a craft knife and metal ruler (it’s easier to adhere the paper first then trim so you don’t have to get your paper glued perfectly in the centre – lots more room for error doing it this way!)
Use a decorative border paper punch to cut two lengths of pretty trim from paper. Border punches have become enormously popular during the last few years and several manufacturers have developed a range of pretty punches that can enhance your projects. Check out Martha Stewart Crafts, EKSuccess, Fiskars and Stampin Up when you are next in your local craft store or search online
Trim a strip of coordinating patterned paper and adhere the pretty punches strips to each of the long sides and adhere it all to the cardbase
I used some of my more advanced tools for next section of my card. Whilst I say advanced I don’t mean they are difficult to use or that you need lots of skills and expertise to use them. I simply mean that these tools entail a financial outlay that you might only consider if you are serious about papercrafting and you want to expand the possibilities of using your digital kits to create hybrid and regular paper crafts.
Die cutting systems have been reducing in price since they were first introduced over a decade ago and there are several to choose from. I have a Bigshot machine from Sizzix (Ellison) it is versatile and hardwearing.
For this card I am also using some steel dies from Spellbinders called ‘Nestabilities’. These dies are very thin and come in a vast array of shapes. Each set nests inside itself so you get a set of different sizes in one pack. They are widely available from craft stores and online too. Although they are thin, as you can see from the second photograph they give a really clean cut even through my fairly thick cardstock.
I also used a regular 3 inch circle punch to create the white centre for my scalloped cirlce
Glue the two pieces together and then set aside for later
Next I tied a ribbon around the cardbase and fastened it with a simple knot. My ribbon was only patterned on one side so as I was tying the knot I pulled and twisted the ends slightly so that the pattern was on the front of both tails
Attach the self adhesive crystal swirls just behind the ribbon and then add the scalloped circle that you already created using foam pads to lift it off from the cardbase slightly
I adhered the numbers next – American Crafts Thickers alphabets are the greatest invention ever for quick cards, there are oodles of fonts, colours and materials and you simply peel them off the backing paper and stick them on – simple! I adhered mine to the scalloped circle and then glues a row of coordinating buttons around the edge
The final step to make the card was to stamp out a sentiment using a rubber stamp or you could print it on your computer, trim the sentiment and adhere it to your card just under the ribbon so it looks like you’ve tied it on.
And then your card is finished – Hurrah. It looks like a million steps but actually it all came together within 30 minutes and that included me making the design up as I went along and trying to take photographs with one hand as I tied ribbon and cut things out with the other 🙂
This is what I used for my card:
Love Blooms digital kit by Melissa Bennett at Sweet Shoppe Designs
Hawaiin Shores Ribbon and buttons – Papertrey Ink
Thickers – American Crafts
Crystal Swirl – Zva Creative
3inch circle punch – Woodware
Scalloped circle nestabilities die – Spellbinders
Loopy decorative border punch – Martha Stewart
Sentiment stamp – My Favorite Things
Cardstock – Stampin Up
I hope this post has inspired you to create a beautiful card, we would love to see your hybrid crafts in the gallery at the store. Happy crafting love Andrea x



Ebony said...
on May 19th, 2010 at 10:36 pm
This. Is. Amazing.
Thanks for also listing all the tools you used at the end, I was distracted by all the pretty photos during the bulk of the post.
I would love to get serious about my cardmaking so thanks for sharing this. You card turned out so beautiful!
Lori said...
on May 20th, 2010 at 9:14 am
That punch is fantastic, I love it!!! Great job on the card! It looks so fun to make! 🙂
bellbird said...
on May 21st, 2010 at 7:51 pm
you rock! this is absolutely awesome and u broke it down so well. man i love that martha stewart border punch!