Hot 4 Hybrid – Paper Flowers Galore!
Hey hey Sweet Shoppers! So sorry for the late post today. I have a good excuse though. I had so much fun making 2 of the flowers I’m going to show you, I simply *had* to make another one! 🙂
Ok, so you want a little peek at what I’m talking about?

3 different flowers, all SUPER CUTE and EASY PEASY! Now let’s get started.
First, print out some stuff. I used papers from Kristin Cronin-Barrow’s newest kit Over the Rainbow, and the actual flower shapes are from Fee Jardine’s super cute I Like Flowers element pack. I printed out one large block of paper, and another skinny strip of paper. You’ll see what we do with them next.

First, the skinny flower. That strip is too wide, so I trimmed it down to 2 different sized strips. (I realized afterwards, that the wider strip is too wide to make a flower out of just 1 strip – but it will make a really nice size flower if you use 2 of the wider strips.)

Take the strips and accordian fold them the full length, alternating front and back folds. This is what you’ll end up with:

Now apply adhesive to one end of the paper strip, and wrap it around and connect it to the other end. Grab some thick glue dots to use to hold the paper in the shape you want. This part can be a little tricky, but just push one side of the newly formed circle towards the center and kinda flatten it out. It’s not going to want to stay that way, so plop the center on the glue dot to hold it all in place. Here I placed another glue dot in the center on top. It helps hold it together even more, but I’m also gonna stick a button on it for the center, so it serves 2 purposes here.

I added a nice bright button to the center that I stitched up with some bakers twine from my stash.

All done! A cute little folded flower, perfect for sticking on a card to brighten someone’s day.
Flower #2! Here’s where the other block of paper comes into play. I am the world’s worst drawer of circles, but you need circles for this one. So, I took 4 different sized metal dies and traced them onto the back of the paper. You could just as easily use a few different sized paper punches. This one would work with flower shaped punches too! Naturally, I forgot to take a picture of the traced circles, but I think you can handle that yourselves right? 😉
So, cut or punch (or tear! tearing them would be very cute and offer even more texture!) your circles, and then crumple them up into little balls. Get them nice and distressed and rumpled. You can take an inkpad to them now too if you like, and add another layering of distressing to them.

Now take a paper piercer (or a sewing needle) and stick it in the center of each circle. This will make sticking a brad through all the layers a little easier. Now grab a brad, and layer those circles on it! I wasn’t planning on using all my circles, but I really liked the bulk of the flower with all of them together, so that’s what I went with. Just play it by ear, there’s no right or wrong way to do these! And there you have it:

Pretty right!?
And now for the last flower. This one is all about the layers too, but Fee has already done all the really hard work for you. you just have to cut and glue! So, print out a bunch of flower shapes. I like to print at least 2 of each shape that I want to use. If you don’t use them you can keep them for another project down the road.
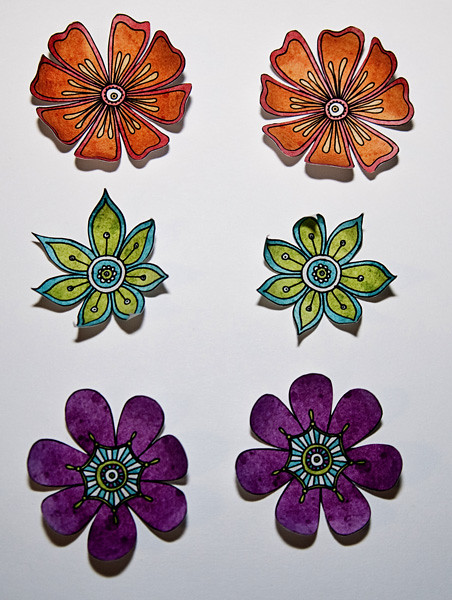
Looking at these all lined up, just using 1 of each on a flower would be super cute! I decided to use the 2 purple and 2 blue ones together. It’s a little hard to see here, but after I cut them out I rounded all the petals up a little bit. Just pinch the petal between your fingers and kinda roll it around. I’ve heard that a pencil works really well too. Just kinda curl away until you’re satisfied. Then place the like flowers on top of each other, offset from each other to make a more full looking flower. I was going to add a pretty rhinestone to the center, but the center of the blue flower was just too cute to cover up!
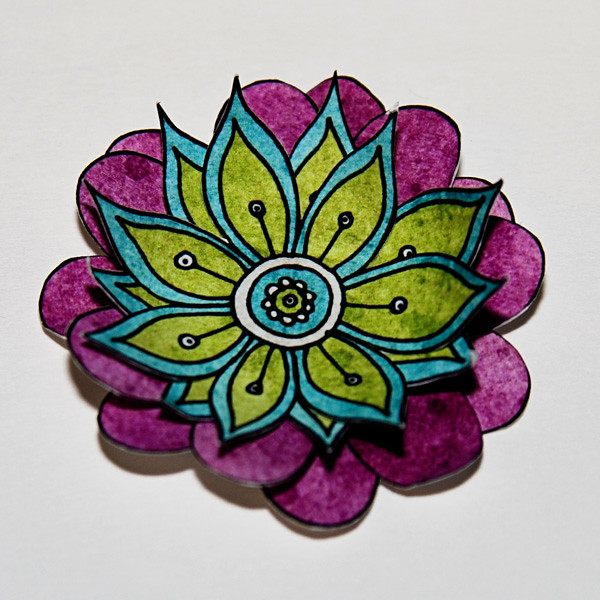
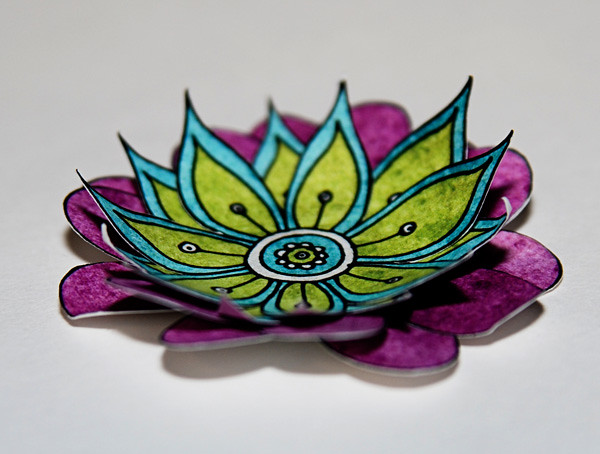

And that, is that! 3 different kinds of flowers, all easy as can be! It took me just minutes to make each of these flowers, and now I have 3 pretty flowers to add to future projects! So so simple! These look great on cards, on notebooks, sitting on the corners of altered frames, tons and tons of uses!!
I hope you enjoyed this little tutorial, and I hope you give it a shot! If you do, be sure to let us know in the comments or in the forum!
Have a great night!
~Colleen


aly321 said...
on June 24th, 2010 at 12:03 pm
Love this Col! So cute!
Corey said...
on June 24th, 2010 at 12:20 pm
very cute!
blurooferika said...
on June 29th, 2010 at 8:58 pm
Love your flower ideas. Thanks for sharing!