Think Outside the Album – Next-Level Photo Gifts
If you’ve ever looked at a DIY craft project and thought, “that’s cute, but I don’t like making things with my hands … that’s why I digi-scrap instead of paper scrap,” then this post is for you!
Welcome to the April installment of Think Outside the Album, where we look at different ways to take our digital supplies off the scrapbook page and instead, use them to make the rest of our world just a little bit sweeter!
Whether you don’t enjoy making physical crafts, you don’t have the time to make gifts by hand, or you just don’t want to invest in all the supplies, you can still create gorgeous gifts for family and friends that are unique and personalized without getting your hands messy.
If you can order it online, and they’ll let you upload a photo, you can make it amazing with SSD products!
I’m talking about photo gifts, the broad category of items you can order online and customize with a photograph. Companies like Shutterfly, Mpix, Snapfish, Photobook America, Persnickey Prints, and Vistaprint offer dozens of photo gifts to choose from. You’ll find lots of items for home decor, including prints on metal, canvas, and acrylic, ornaments to hang on a tree, clocks to hang on the wall, and coasters in both cork and ceramic. You’ll find plenty of options for drinkware like mugs, bottles, tumblers, and shot glasses. Soft goods are available like pillows, towels, placemats, tote bags, aprons, t-shirts, baby bibs, and other items of clothing. You can even order office and tech items like stationery, notebooks, planners and journals, mousepads, laptop sleeves, phone cases, keychains, and luggage tags.
The trick is to start looking at those items and thinking, “what would that look like with a digital design instead of a photograph?”
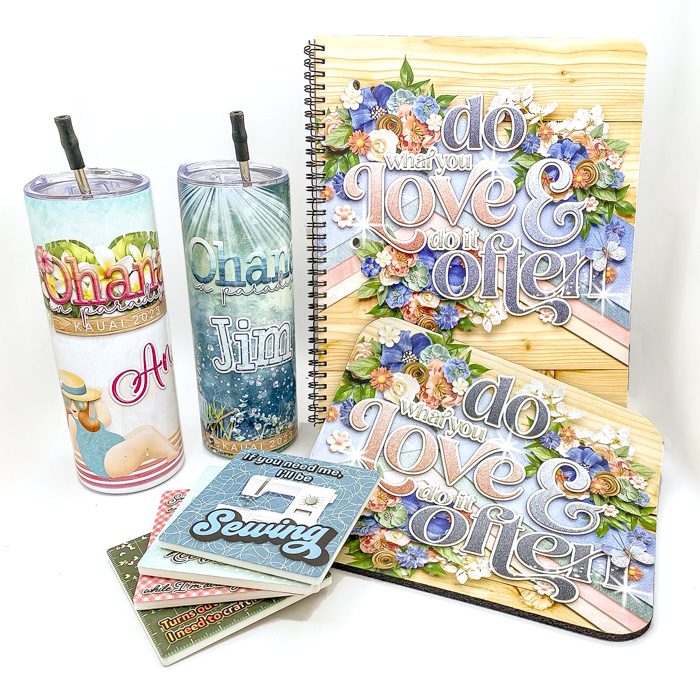
I recently created and ordered four different projects that I’ll share with you today to help you start thinking beyond “just a photo”. And I’ll share with you my step-by-step approach to creating and ordering a digi-customized photo gift you’ll love. Let’s get started!
Project #1: Custom tumblers to commemorate a vacation
Step 1: Decide what you’re going to make
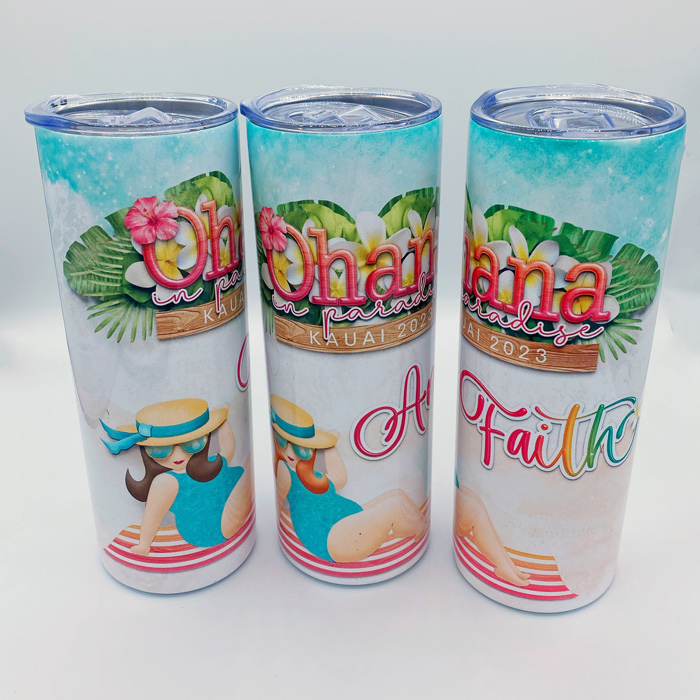
The idea for this post came about back in February when my husband and I joined a group of friends for a week on the island of Kauai in Hawaii. With six people sharing a house, keeping track of individual drink glasses can be a challenge; plus, it’s super important to stay hydrated in the tropics. So I thought, why not order a set of commemorative and customized stainless steel tumblers?
Step 2: Decide where you’re going to order it.
I found a company in Arizona – a family-owned small business, even! – that does custom-printed fabric as well as several sublimation print options. They now offer a 20 oz stainless steel tumbler that can be printed with the design of your choice.
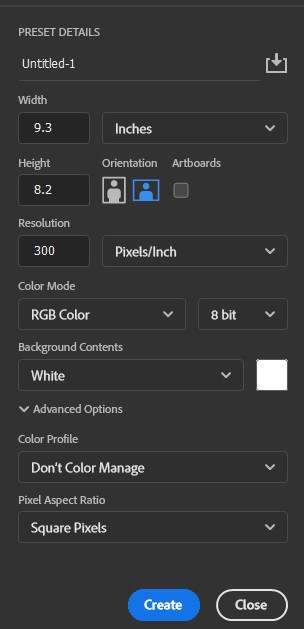
Step 3: Look at their website for details on file dimensions and resolution (DPI).
This is a super important step! You want to make sure your artwork is the exact size the printer needs to create your item without cutting anything off. In the listing on their website, it says “please make sure your file is sized 9.3″X 8.2″ 300 DPI.” That’s exactly the information I needed.
Step 4: Create your artwork.
I launched Photoshop and created a new canvas sized 9.3 inches wide by 8.2 inches high and a resolution of 300 pixels per inch. Then, it was just a matter of grabbing some fantastic digiscrap supplies from the Sweet Shoppe and starting to create!
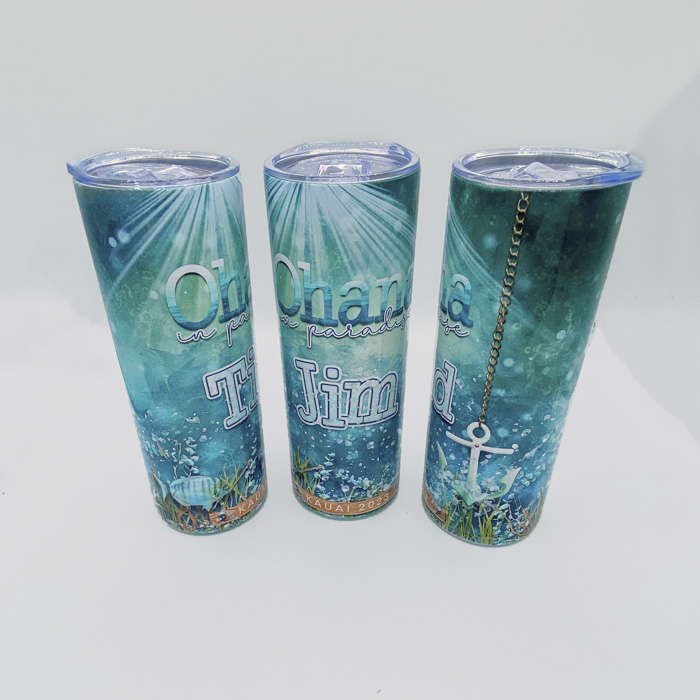
I set up one design for the men in our group – a more masculine design that made them happy – and a different design for the ladies. (That allowed me to indulge in all the tropical flowers I wanted without having to hear comments from the guys!)
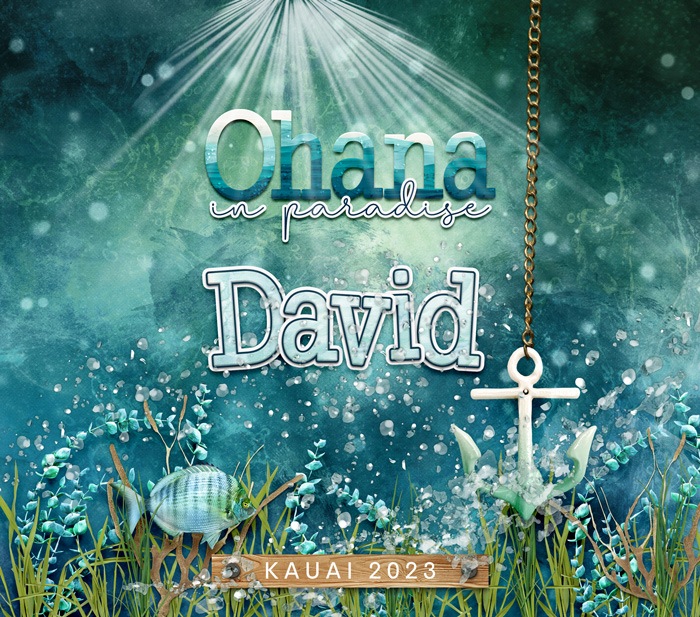
Created with Wanderer: Deep Blue Sea by Digital Scrapbook Ingredients, An Ocean Tale: Coastal Dreams by Kristin Cronin-Barrow, and An Ocean Tale: Into the Sea by Kristin Cronin-Barrow.

Created with Beachy Keen by JoCee Designs, A Beach Tale Collection by Kristin Cronin-Barrow, and An Ocean Tale Collection by Kristin Cronin-Barrow
Step 5: Export your finished artwork for print.
Once I had the tumbler design done, I saved 3 versions of each file – one with each person’s name. I saved them as high-quality JPGs and did not change the dimensions of the image, since I set up my canvas precisely in step 4.
Step 6: Upload & order your item.
After a final check of each file, I uploaded them to the printer and placed my order. When the box arrived on my doorstep, I was so excited to crack it open – and the results were just fantastic!

Project #2: Ceramic coasters
Step 1: Decide what you’re going to make
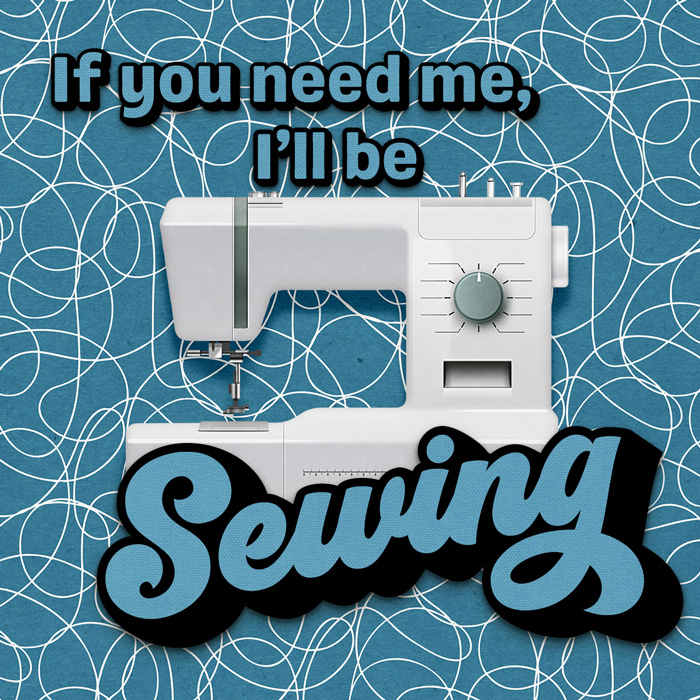
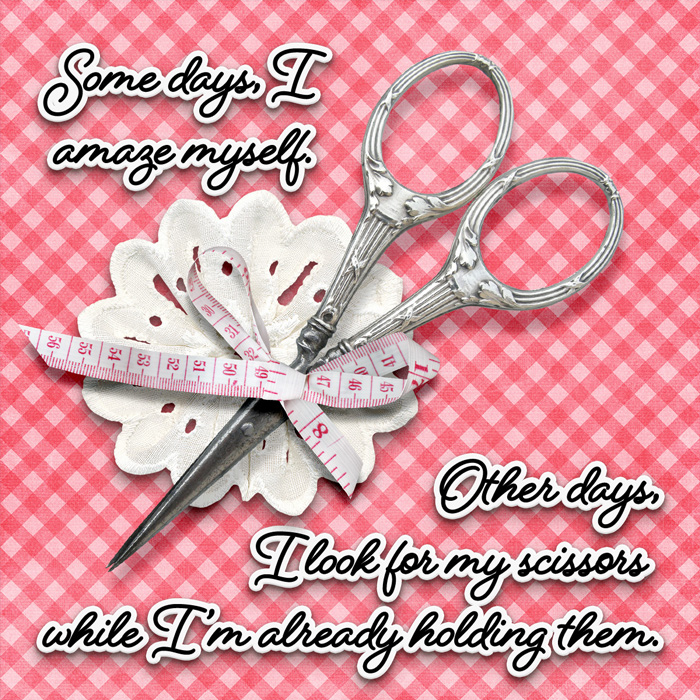
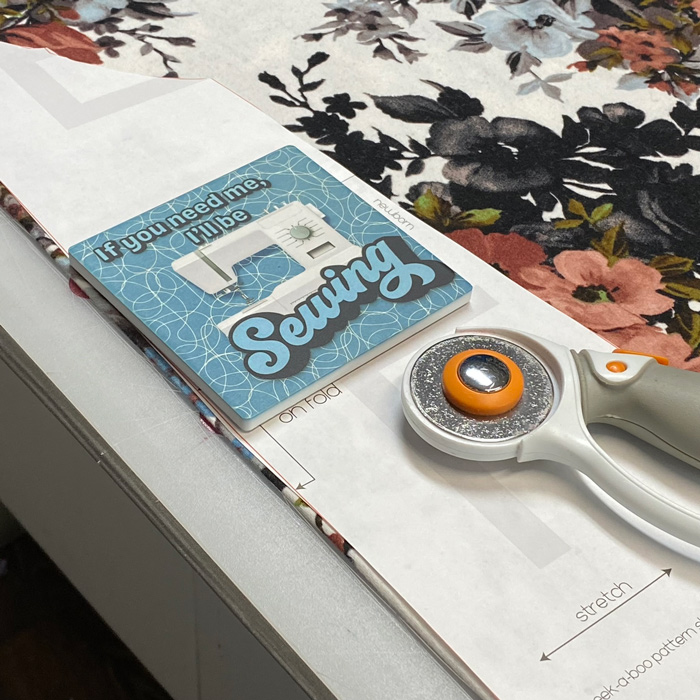
I use a variety of paperweights in my sewing studio, both when I’m drafting and adjusting patterns as well as when I cut a pattern out of fabric using a rotary cutter. I needed a few more, and why not make them cute?
A set of ceramic coasters would be perfect, and I knew just where I could order a set…
Step 2: Decide where you’re going to order it.
Shutterfly recently took over photo printing for members as Costco has removed their in-shop photo centers. As a Costco member, I can order anything from Shutterfly for 51% off and get free shipping… no coupon codes required. (If you’re a Costco member and you haven’t linked it to your Shutterfly account, do it now!)
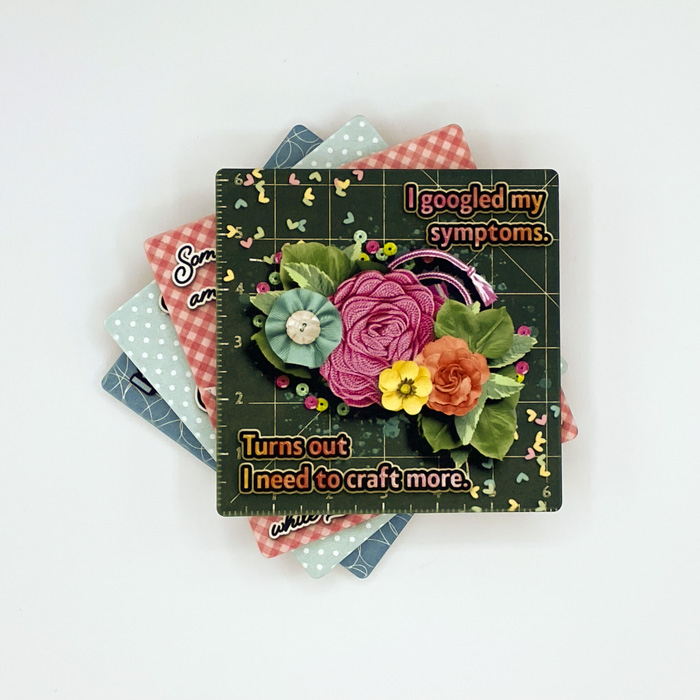
Shutterfly offers a set of 4 ceramic coasters and allows you to upload your own design.
Step 3: Look at their website for details on file dimensions and resolution (DPI).
On the product listing, Shutterfly specifies dimensions of 4 inch by 4 inch. They don’t list a specific resolution, so I went with a standard 300dpi.
Step 4: Create your artwork. Include lots of extra margin space!
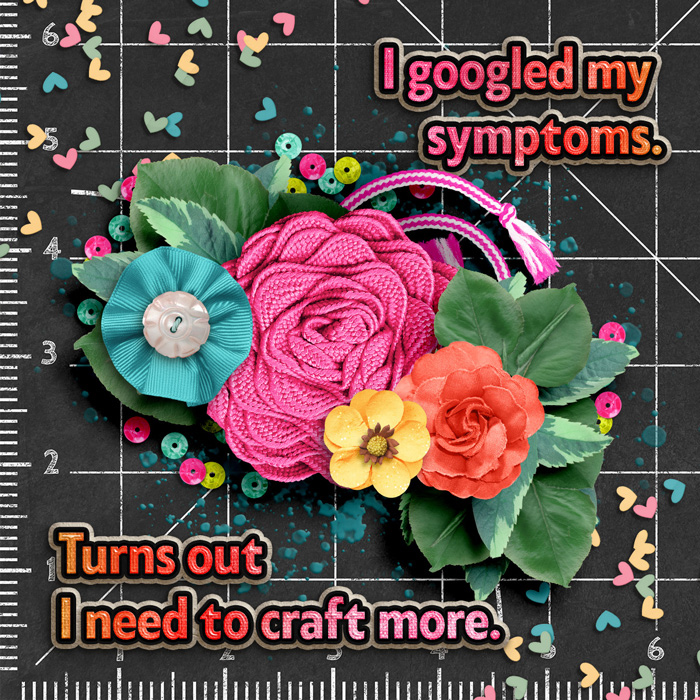
I set up my canvas in Photoshop at 4 inches wide by 4 inches high and 300 pixels per inch… and then I pulled out some of my favorite kits from the Sweet Shoppe as well as some silly quotes I found on Pinterest. I made sure to keep the important parts of my design – like any text – no closer than 0.25″ from the edge.
Created with Sew Crafty by JoCee Designs
Created with Sew Much Fun by Lliella Designs
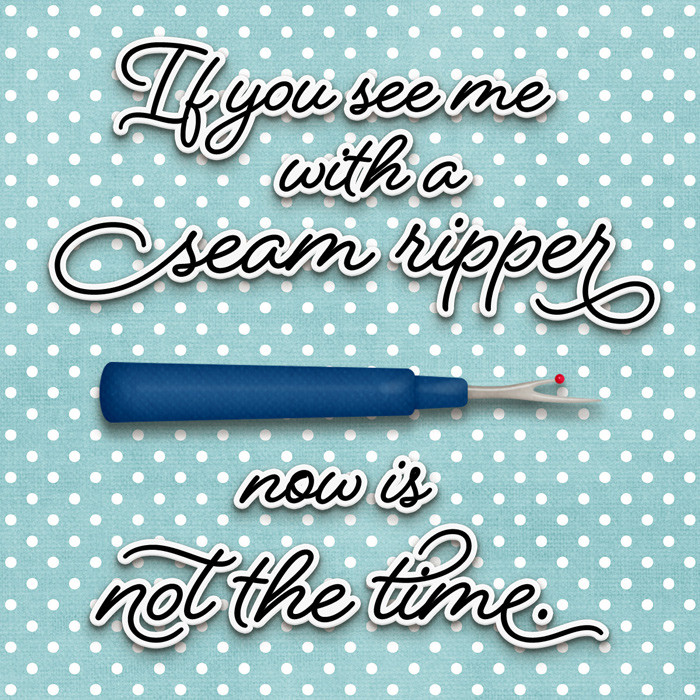
Created with Sew Much Fun by Lliella Designs
Step 5: Export your finished artwork for print.
I saved each design as a high-quality JPG and made no changes to the file dimensions.
Step 6: Upload & order your item.
Finally, I uploaded my completed images to Shutterfly and used their website to order my coasters.
I am beyond tickled with how these turned out! They give me a chuckle every time I use them in my studio.
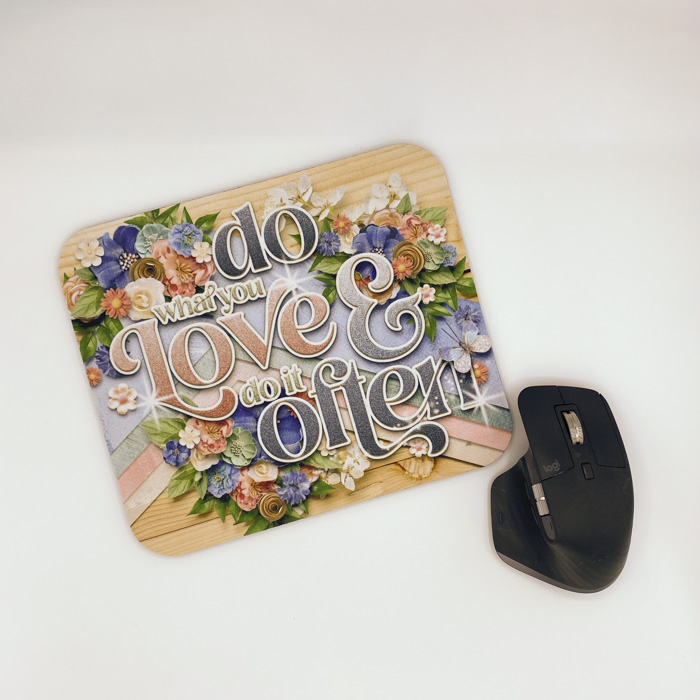
Project #3: Custom mousepad
Step 1: Decide what you’re going to make
While I was thinking about items in my studio, I realized I needed a new mousepad. Why not make a custom one? (I was on a bit of a roll here…)
Step 2: Decide where you’re going to order it.
I opted to make use of my discount and also order this item at Shutterfly.
Step 3: Look at their website for details on file dimensions and resolution (DPI).
On the product listing for their custom mouse pad, Shutterfly specifies dimensions of 7.75 inches by 9.25 inches. They don’t list a specific resolution, so I went with a standard 300dpi.
Step 4: Create your artwork. Include lots of extra margin space!
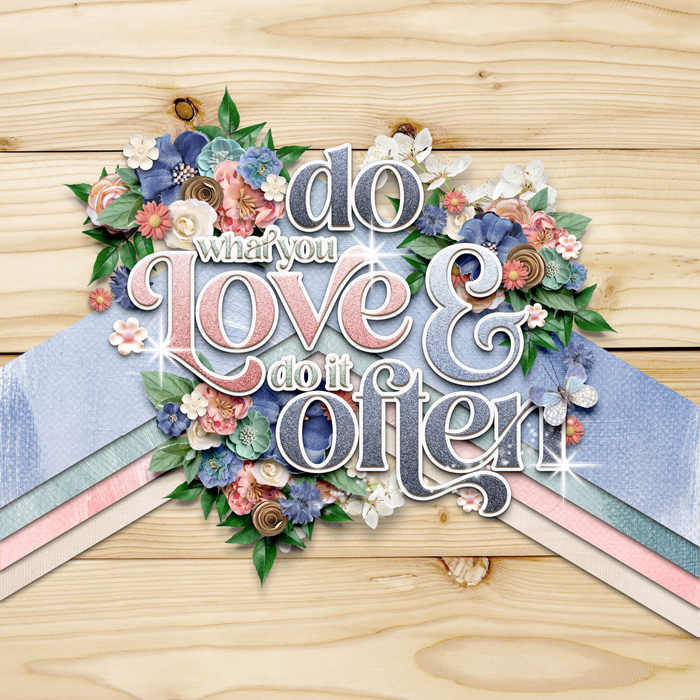
I set up my canvas in Photoshop at 9.25 inches wide by 7.75 inches high and 300 pixels per inch. Then the fun began! I started with the Retro Spring Add-On template by Alchemy Wild Studio (which, by the way, is available in the Shoppe for free!) and broke out some of my favorite kits by Kristin Cronin-Barrow to mix-and-match. I used the font Losta Masta to create the word art, and here are the results:
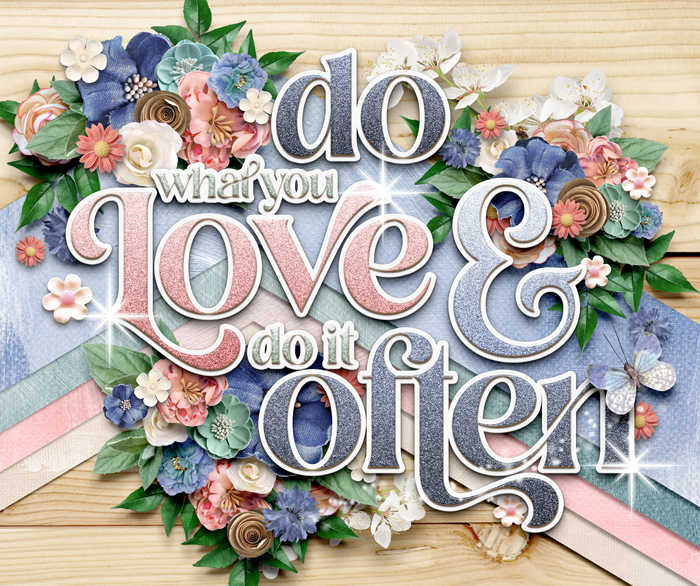
Created with Retro Spring Add-On by Alchemy Wild Studio, Begin Again: Relaxed and Refreshed Collection by Kristin Cronin-Barrow, Enjoy Today by Kristin Cronin-Barrow, and Enjoy Today and Tomorrow Add-On Collection by Kristin Cronin-Barrow.
Step 5: Export your finished artwork for print.
I saved my final design as a high-quality JPG and made no changes to the file dimensions.
Step 6: Upload & order your item.
Finally, I uploaded my completed images to Shutterfly and used their website to order my mousepad.
A week later, when this arrived to my house, I think you could hear my squeals of joy clear across the Metroplex!
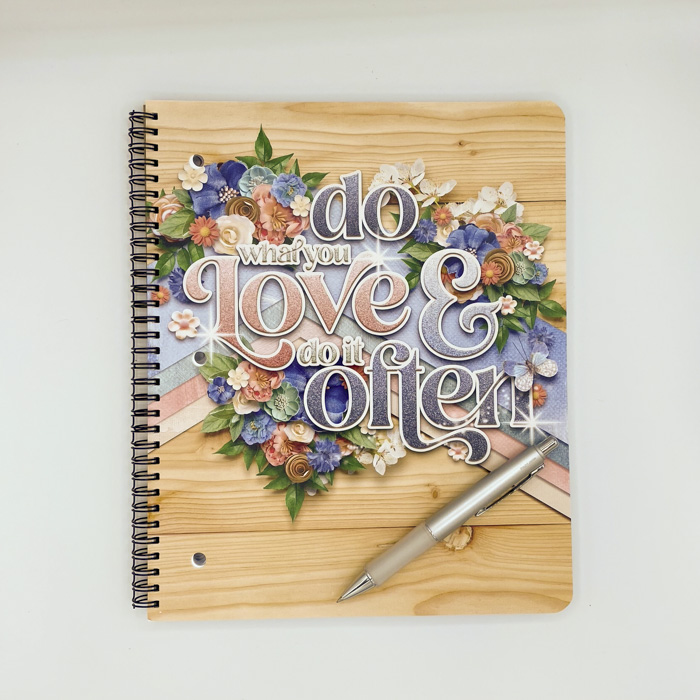
Project #4: Matching custom notebook
Step 1: Decide what you’re going to make
I had intended to stop at three projects, but I was so in love with my mousepad design that I decided I needed it on a notebook. I think this is one of the best things about ordering custom photo gift items … once you create your design, you can quickly and easily re-use it on other items.
Step 2: Decide where you’re going to order it.
Shutterfly (let’s really milk that discount for all it’s worth!) offers a spiral-bound notebook you can print with a custom design.
Step 3: Look at their website for details on file dimensions and resolution (DPI).
On the product listing for the large notebook, Shutterfly specifies dimensions of 8.5 inches by 11 inches. They don’t list a specific resolution, so once again I went with a standard 300dpi.
Step 4: Create your artwork. Include lots of extra margin space!
In this case, since I was re-using my existing design, I went back to my layered file in Photoshop and increased the canvas size to 12″x12″. I wanted to have a file that’s bigger than the notebook’s cover with plenty of margin space. It required me to adjust the background paper and expand the paper strips to the edge of the canvas, but that only took a couple minutes.
Created with Retro Spring Add-On by Alchemy Wild Studio, Begin Again: Relaxed and Refreshed Collection by Kristin Cronin-Barrow, Enjoy Today by Kristin Cronin-Barrow, and Enjoy Today and Tomorrow Add-On Collection by Kristin Cronin-Barrow.
Step 5: Export your finished artwork for print.
I saved my final design as a high-quality JPG, leaving the file dimensions as 3600×3600 pixels or 12″x12″ at 300ppi.
Step 6: Upload & order your item.
Final step: I uploaded my JPG to Shutterfly and used their system to slide my image around until I had it centered on the notebook cover exactly as I wanted it. Then I hit “add to cart” and placed my order.
The notebook I received in the mail makes me so happy! I’m using it to make notes on all my sewing and crafting projects.
And that, my friends, brings an end to another installment of Think Outside the Album. Remember, you don’t have to buy all sorts of supplies or get your hands all messy to create gorgeous, customized gifts for both yourself and others. If you can order it online and they’ll let you upload a photo, you can make it amazing with SSD products! Here’s those six steps once again:
Step 1: Decide what you’re going to make
Step 2: Decide where you’re going to order it.
Step 3: Look at their website for details on file dimensions and resolution (DPI).
Step 4: Create your artwork. Include lots of extra margin space!
Step 5: Export your finished artwork for print.
Step 6: Upload & order your item.
Have you done this before? Tell me about it in the comments! And the next time you need a gift – remember, Mother’s Day, Father’s Day, and end-of-school-year Teacher Appreciation are all coming up! – use your digiscrap supplies to create and order a one-of-a-kind photo gift. And be sure to share your finished design with us in the Gallery. I can’t wait to see what you create when you Think Outside the Album!


Charlene said...
on April 13th, 2023 at 9:15 am
I’m always so impressed with your scrappy crafts! Gorgeous!
StephC said...
on April 13th, 2023 at 11:52 am
So many adorable ideas! Love it – I’m thinking Mother’s Day or Father’s Day gifts here!
Lidia Gradzinski said...
on April 13th, 2023 at 1:44 pm
Oh wow, Angie these are all so beautiful and full of inspiration! Thank you for sharing!
Angie Key said...
on April 13th, 2023 at 5:54 pm
Scrappy crafts – I love that term!
Angie Key said...
on April 13th, 2023 at 5:55 pm
StephC, there’s so many options you can order that would make fantastic Mother’s and Father’s Day gifts! The only thing it requires is a little advanced planning so your order has plenty of time to get to you.
Angie Key said...
on April 13th, 2023 at 5:55 pm
Lidia, you are so welcome, and thank you for leaving a comment!
Julia Crider said...
on April 14th, 2023 at 2:48 pm
LOVE these ideas so much! Off to make cruise tumblers…