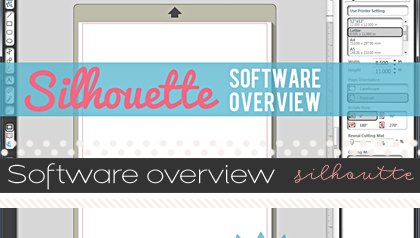
Save time by cutting out your digital embellishments using your Silhouette!
Previously, I taught you how to make your own print and cut sheets from Digital embellishments, now I’m teaching you how to make cut sheets for your Silhouette!

I don’t know about you, but I certainly get tired of cutting out all these intricate digital embellishments by hand, so give your scissor fingers a rest and use your silhouette! In this video tutorial, I will walk you through how to use your favorite digital embellishments on your die cutting machine.

Hanna said...
on November 14th, 2013 at 9:36 pm
I love the print and cut feature on the silhouette! Cutting with scissors is the worst, and you can save scraps of paper to use later to just cut shapes.
I also like to clip digitla papers onto shapes in silhouette studio and then print and cut. That way I don’t waste ANY toner on my printer but still get to use all the gorgeous digital papers I have.
Traci Reed said...
on November 14th, 2013 at 9:51 pm
Awesome Idea!
Mr. Frost Hybrid Card - KristinCB Designs said...
on November 19th, 2013 at 4:13 pm
[…] When I saw this collab I immediately thought of a creating a card. The colors were perfect for what I had in mind. The first thing I did was open up the Silhouette software and drag all of the goodies into the Silhouette Software. Once I placed everything where I wanted to save the most space, I followed the steps that Traci Reed provided in a video tutorial on the Sweet Shoppe blog. […]
Erica Bass said...
on November 21st, 2013 at 8:43 pm
Great tutorial!
Candie Schaal said...
on January 14th, 2014 at 3:43 pm
Thank you so much for posting this tutorial. I can’t way to try it!! I get so confused about using the trace feature and cut feature and this makes it seem easy. Some people say you have to trace it and then add cut lines. I noticed that you just traced it. When do I have to add cut lines?
Thanks,
Candie
Traci Reed said...
on January 17th, 2014 at 5:44 am
Hi Candie! When you trace, it automatically adds the cut lines, no further work necessary!
Violet said...
on February 3rd, 2014 at 9:52 pm
Thank you so much for this tutorial! Just got a Silhouette and am just starting to experiment with hybrid. Where are you dragging the elements from in order to put them onto the Silhouette page? That’s something I haven’t been able to figure out how to do, and in the video it looks like they are being pulled magically from offscreen. Thanks!
Traci Reed said...
on February 3rd, 2014 at 10:25 pm
I’m just pulling them from a windows explorer window on a PC or a finder window on a Mac
A New Source for Pocket Scrappers – The Pocket Source! | Lemon and Olive said...
on February 28th, 2014 at 1:41 pm
[…] right at my fingertips. And, after taking Lori’s class, and watching this tutorial from Traci Reed, I was all ready to cut my own embelishments from my digistash […]
Leslie Price said...
on March 1st, 2014 at 8:03 pm
Love your video, but have one quick question. I want to import a few digital elements onto my first cutting project, but don’t know how to add multiple elements at once. I’m an experienced PSE user, but stumped and want to start using your products!! Every time I add an element, a new cutting document is created and ending up with only 1 element on each page. Huge thanks!!!!
Traci Reed said...
on March 1st, 2014 at 8:05 pm
Hi Leslie! Open up a new silhouette document and drag and drop each png individually onto the canvas itself
jean said...
on March 30th, 2014 at 1:12 pm
Thank you Thank you Thank you for your tutorial I have been trying to do this for ages.I have watched several tutorials but yours was so easy to understand and follow.
Jean xxx
Rhonda said...
on February 22nd, 2015 at 10:17 pm
I’m looking into buying a cutting machine. Will this allow me to take a preprinted image and cut it? Would I have to have a digital copy?
Thanks in advance