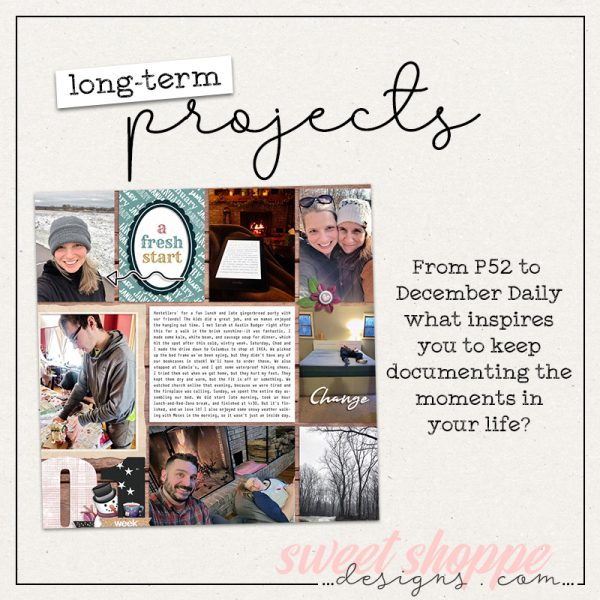
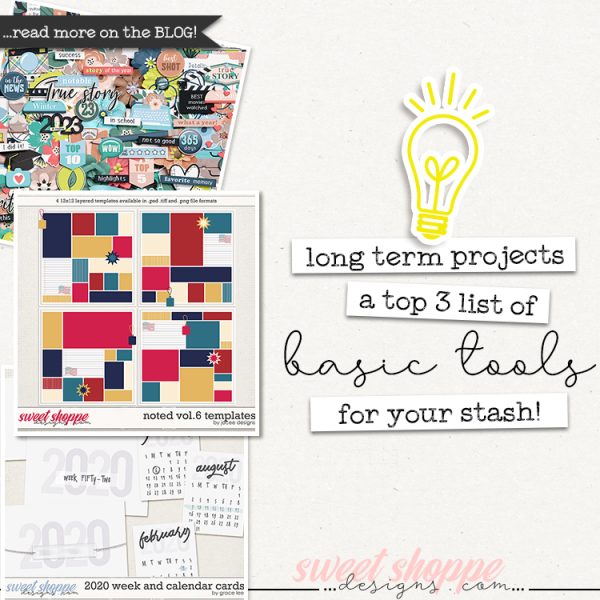
Sweet Shoppe Designs

Archive for the ‘How-Tos’ Category

Tutorial Roundup: April 2013

Darcy highlights all the amazing tutorials we’ve added to the site this month.


Check out the great tutorials we’ve added this month – there’s a little something for everyone!

April Tutorial Roundup from Sweet Shoppe Designs

Scrap Like a Sugarbabe with Lizzy

Our Sugarbabes are big inspirations for us all. Get to know Subarbabe Lizzy who shares some techniques that are the things so unique to her way of creating layouts. Get inspired here…

 Reflected Text or Photos by Lydia

Lydia shows you a really simple little trick to create reflected text on your layouts to make your titles POP! Try it on photos, too. Read more…

Turning  Your Text Fabulous by Sherri

Would you love to find a fabulous way to jazz up your text for titles or highlighted journaling? There are a lot of easy things you can do with layer styles and clipping masks to add a little bit of pizazz to your text! Read more…

Our Top Tips For Tracking Your Layout Ideas and Inspiration

Lynnette shares our team’s top tips for keeping track of your layout ideas and inspiration.

This month here on the Sweet Shoppe blog we’re talking all about organization so today I wanted to share a few ideas for keeping track of your scrapbooking story and layout design ideas.

I don’t consider myself the most organized person on the planet but these three things are my absolute must-haves when it comes to keeping track of my ideas and inspiration:

1) My sketchbook

I have a large 9×12-inch blank paper sketchbook I use for EVERYTHING: layout sketches, product ideas, future blog posts, random notes and thoughts. It’s awesome because not only can I just flip to a new page if I run out of space or need a clean slate but when I need to find inspiration later, I only have to look in one place. No more digging through piles to find that one random thing I know I wrote down at some point.

2) Pinterest

Pinterest can definitely be a huge time-suck if you let it but as a visual person I love it because all the eye-candy is just so inspiring. I keep boards for all kinds of ideas: design, photography, Project Life, scrapbooking. Whenever I need a fresh dose of inspiration, I know I can open up Pinterest and find what I need.

3) Evernote

Evernote is like my digital brain. I use it for keeping track of notes, story ideas, links, layout ideas and so much more. I especially love using it paired with the FastEver app on my iPhone – makes it so quick to jot down a spontaneous idea on the go.

Of course I also asked my awesome Creative Team and our amazing team of Babes and designers to share their tips. Here’s what they had to say:

Jen (NeverendingJen): Pinterest is good, but I get sucked in. I keep a running paper list of things I love, and include direct links in a word document when I can to inspiration. I also find it helpful to ask myself WHY this inspires me. Is it the color? The pattern? The white space? Typography?

Inga (Ginger_79): Some pinning, some keeping inspiring paper stuff I see, some noting it down, and a whole lot of mostly forgetting a lot of ideas I had. :)

Sherly (nietis): For me, it’s gallery favourite or sometimes just have the thought in my head. I have to immediately make it into a layout, though, otherwise, it’ll never get done & forgotten…

Aly (aly321): I still use the gallery favorites as one source. Sometimes I just save a page to a “Pages I Love” file to refer to later when I need some inspiration. Also, pinterest. :)

Brook (YepBrook): I sketch out layout ideas and quotes, etc. in a lined notebook or scrap pieces of paper on the desk. But, usually, I am scrapping without referring to any ideas or sketches. Sometimes I will type in a line of journaling to help me remember what happened in the notes or metadata of a photo ( in picassa). I also keep a document on my computer for journaling in progress.

Keely (Keely~B): I have a physical notebook but what I used most is Notes ( it syncs on my laptop and phone), it seems to be the most convenient.

Lydia (ltarbox): I’m not very good at doing this regularly, but I have done it, and I like it: I’ll open a blank layout, throw the photos on there, and save it with the name that I’ll give the layout. Then, if I have an idea of the kit that I’d like to use to scrap the photos, I open up the File Info and type the kit name in there. Then, when I’m in need of something to scrap, I have the file with the photos all ready to go, and I know what kit I’m going to use. This works great when you’re going to a crop and don’t want to spend your precious scrapping time searching for the perfect photos or kit.

Rebecca (MamaBee): Photos always trigger the story for me… those I will put into a folder in my Working file with a key word for kit theme, the date, title, and number of photos, if I decide to use a template. If it’s a silly thing that kiddo has said, usually I save the story or cute quote in my account at cozi.com… I do also jot them down on notepads, which I then promptly loose them to start another notepad for idea… hahaha… eh…

Sheri (SeattleSheri): File folder of magazine pages, Pinterest folder, Inspiration folder on my computer where I store images that I find intriguing, Folder of website favorites I can view for inspiration; some include techniques

Mari (Mari Koegelenberg): Notebook, Pinterest and a Smash book for collecting fun stuff.

Traci (Traci Reed): I have a notebook…or 30.

Lex (mrshobbes): I have a notebook for doodling layout designs when I’m about to scrap and a Pinterest board for layout designs. But I use Evernote to list down any actual page ideas, curate journal prompts, art journal looks/techniques, etc. I list down ideas in a checklist format so I mark which ones I’ve done. Sometimes I’ll include journaling, but it’s mostly stuff like “Mark finishing his first serial novel” etc etc. And yes, that is a little thumbnail of a layout Kimberly did! I love that layout and it made me cry and journal a hella lot of stuff, lol.

How do you keep track of your layout ideas and inspiration?

Tutorials to Help Your Digiscrap Process

Tracy points us to a few resources on the Sweet Shoppe Tutorial Blog to help us get organized

As digiscrappers, getting organized is always a topic that comes up in forums and FAQs. We end up downloading so many kits and fonts, and we have to figure out how to save those priceless layouts without chaos. Today I’m here to remind you of some of the informative tutorials we have here at SSD, written by designers and SugarBabes, that will help you become digi-organized.

Getting Started: How to Purchase, Download, and Unzip Sweet Shoppe Products

by Alyson

This is a great place to start if you’re new and just setting up your system of downloads.

Getting Started: Tracking Credits, Saving for Web, and Uploading to Galleries

by me (Tracy)

Scrappers are always asking about how to keep track of their credits for easy upload to the galleries, and here’s a great way to do that.

Digital Organization: So Many Methods, So Little Time!

by Traci

As a designer and scrapper, Traci Reed knows a thing or two about keeping everything in order.  She shares some great tips in this tutorial.

Scrap Like A Sugarbabe: Lydia Tarbox

Lydia’s claim to fame is efficiency.  She has several tips in her tutorial that are major time savers and ways to run your scrapping more smoothly.

I hope some of these articles will help you streamline your scrapping.   ~Tracy

Tutorial Round Up: February 2013

Erin highlights all the amazing tutorials that have been added to the site this month

Have you checked out the tutorial blog this month? The tutorial team has added some amazing tutorials that you don’t want to miss!

How To Make Your Own Brushes in Photoshop and PSE

Making your own brushes  has never been easier! Traci takes an element from her kit, Little Joys, and takes us step by step into making it a brush. It’s a super neat trick that I am sure we all will be adding to our pages!

Shadowing Alphas

One topic that pops up quite often in the forums is how to improve our shadows. Well, Tronesia has saved the day with a fantastic tut on how to shadow alphas in our titles. Her technique definitely makes the title pop and stand out!

Scrap Like a Sugarbabe: Jacinda Prattley

Jacinda is so inspirational in the things she scraps about. She scraps not only her family life, but she’s often writing letters of advice to her girls and telling her own story. I could get lost in Jacinda’s journaling! That’s why I’m so happy that she’s chosen to talk about how she journals for her Scrap Like a Sugarbabe tutorial!

Getting Sketchy: Art Journaling

Looking for a new technique to add to your art journaling pages? Brook shows us how she converted a photo of herself into a pencil sketch. And, then she shows us how she used this pencil sketch to create an amazing art journaling page!

Three Methods for Creating Cut Outs on your Layouts

Do you love that cut out look but have no clue how to achieve it on your own pages? Well Lydia has saved the day! She has highlighted three different methods for creating cut outs. Definitely check it out and give it a go on your next layout!

Scrap Like a Sugarbabe: Keely Bostick

Keely is not only an amazing scrapper but she is a fantastic photographer. She manages to capture her life (and then scrap it) with such beauty and realism—no canned smiles here!  Get inside her head with this fantastic tutorial on capturing the everyday!

Tutorial Round Up: January 2013

Brook give us a quick summary of all the amazing new tutorials here at Sweet Shoppe Designs!

There’s a wealth of knowledge on the Sweet Shoppe Tutorial Blog! Here’s a quick round up of the great stuff you might have missed this past month:

Using the Replace Color Tool in Photoshop

Matching your perfect photo with a non-perfect color to that perfect kit has never been more easy! Sheri teaches us the ultimate Scrapbookers dream: selectively changing colors in your photos! Sheri changes the navy blue in her son’s sweater to brown in a few simple steps. Now you have no excuse when you go shopping for kits to match that new outfit you bought your kiddo. Just kidding! You can still do that. . . . But, how cool it will be to know how to swap out a color that’s just not working in your layout. ;)

Art Journal Technique: Shapes on Paint

Lex translates fun, messy paper & paint Art Journaling techniques to digi-land for us! Her fantastic example layout uses the shape of a woman as a mask which she then digitally paints & splatters over. The finished page allows you to see the awesome layered papers revealed from underneath the shape. It’s a neat skill to add to your Art Journaling toolbox of ideas!

Dodge and Burn Basics

Dodge? What . . . dodge ball? Burn? As in, “Did I burn dinner (again)?” No, no, my friends! Dodge & burn–the fabulous duo of advanced digital scrapbooking wizardry–although, they’re not very advanced when you see how simple they are to use on a layout. Keely unveils the secret of magically realistic pins in paper, bright eyes in photos, and washi tape creases that look really REAL! Amazing stuff . . . check it out.

DIY Washi Tape

Heather breaks out the desktop printer and brings us an awesome tutorial on how to make your own washi tape from your stash of digi patterned papers! Who knew it could be done? Not I! If you’ve never thought of printing out your own tape before, now’s the time to think about it. Just think of all the patterned tape-y goodness you could be churning out for your hybrid projects, crafts, letters, packages, and anything else you can think of that needs a piece of tape stuck on it. Soooo fun!!!

Scrap Like a Sugarbabe: Tracy Ducar

Tracy is the queen of Project Life. She gives us a glimpse into her mostly-digi method of printed cards in a plastic page protector. She also shows us a bit how she plans out her cards for the week and then creats mini-layouts in the 3×4 & 4×6 slots. This *almost* made me want to try doing Project Life this year! Tracy makes it look so manageable and fun with her awesome use of color & details.

Adding a Vignette Using the Lens Correction Tool

A vignette? Say what? By definition (via Wikipedia): “Vignetting in photography, (is) any process by which there is loss in clarity towards the corners and sides of an image.” Aha! Sheri opened my eyes to a technique I never thought of trying before! Creating a vignette, dark or light, around the focal point is a simple technique that can add an extra oomph to your layouts. Distracting backgrounds begone!

Our tutorial team at SSD has gobs of scrapbooking tips and tricks to share! We hope you’ll visit these tutorials, give them a try, and share them with your friends.

Community Highlight: Tutorial Blog

Sheri here putting in a plug for our fantastic tutorial blog! Within our community there are always lots of inquiries about how to scrap, how to use features within certain programs or simply how to navigate the site.   With that said, I would like to take this opportunity to feature our tutorial blog and give you a quick peek into what’s available!


The tutorial blog can be found by clicking on the tutorials link at the top of the page.

Once you navigate to the tutorial blog, there is an index on the left side and the landing page features the most recently uploaded tutorials.

Tutorials have been categorized by type and range in complexity from beginning to advanced and cover a broad range in topics.  Each category hosts several tutorials.  Today I would like to focus on some of the wonderful tutorials our staff members have put together to help you showcase photos in your layouts in the photo editing category.

Photo Editing

As we are always looking to help the community in their quest to capture memories, we welcome requests for additional tutorials topics or techniques you are interested in seeing featured.

Thanks and happy scrapping!

Sheri (SeattleSheri)

Quick Tips to take Better Photos with Your Smartphone!

Hi everyone, it is me Darla with a fun post today about taking better photos with your smartphones. With everyone on the move these days, lugging around your real camera is not always the easiest thing to do. Most often, we opt to take photos with the next best thing – our smartphones! I won’t lie – my husband has some of the most stunning photos I have ever seen and all were taken with his Motorola Droid and edited with some basic Android apps. The photo below is an example of one of these moments he caught between our girls that would have been lost had he not pulled out that droid!

My photos never look like this and so I took to the web to see if I could get a few pointers on how to take better photos with my Iphone. Here are some tips I found that I thought would be helpful to share:

1. Turn Off the Flash, Turn On HDR Mode – if your smartphone has an HDR mode setting, choose this when taking photos instead of using the flash. I have found the flash on your phone can make anyone look scary and unfortunately, if you don’t have the option to take another – you are left with a sad photo of your daughter being asked to homecoming like this:

2. Avoid using digital zoom – Simply put – it doesn’t work. In essence, all digital zoom does is enlarge the image rather than zoom in, and so it immediately becomes pixelated like the example below. If you can, it’s best to avoid using it, and instead simply move closer to your subject.

3. Use the grid option to compose your photos. – Capturing a good photo isn’t merely about knowing the right settings. Compose your photos as the pros do. Divide the frame into thirds–imagine a tic-tac-toe board–and put your subject on one of those lines, rather than in the middle of the screen.

4. Optimize the settings: If your camera has a white balance control, you’ll often get the best results leaving it on automatic. But if the colors come out wrong, try setting the balance to reflect the light around you, such as fluorescent, daylight, or sunset. Just be sure to reset it to automatic when you’re done, or future photos will look weird. If the camera offers an ISO setting, take that off Auto. When you’re outdoors in daylight, set the ISO to its lowest value to minimize the digital noise in your picture. In low-light situations, bump the ISO up as high as it will go.

5. Edit your own photos. One of the best reasons to carry a smartphone is for the scores of apps you can install to enhance every aspect of the phone, and photography is no different. Check out your phone’s app store for programs that can improve the way the camera works, as well for apps that can enhance the photos you take. I like to use a variety of editing tools on my Iphone and some of my favorites are Photogene, Snapseed, Instagram and Be Funky. There is also Photoshop Express for those who like to use a platform that has many of the same features you have on your computer.

6. Practice, practice, practice. Use your camera anywhere you can to test out different settings and maybe even different camera apps other than the stock on that come pre-installed on your phone. I am not sure I will take stunning ones like my husband does but I am going to make it a goal to try and master this so that I can be sure I avoid anymore scary photos like the one above. :)

Happy scrapping!

Playing With Pictures

Hi, everyone! Penny here with a sneak peek at my new release for the week, Picture Play 3 and how I used it! If you haven’t used my Picture Play products before, you might wonder what they are and how you use them. First, Picture Play is a set of overlays for your photographs. These overlays will add texture, color and/or depth to your photographs. To use these overlays you play with your software’s different blend mode settings until you are happy with the end image. In fact, I named this series Picture Play because it is all about PLAYING with your pictures to find the look that’s just right for your photograph. Whether you need a subtle change or a dynamic difference Picture Play will work for you.

So, how do I use them? Well, I use them in a variety of ways, but really…I just play until something catches my fancy.  Like this…

Here is a picture of my son reading a book out on the patio one evening this summer. Now let’s have some fun….


Kabaam…That’s what I’m talking about…something a little different, a little fun….Now How did I do this? Well, I played until I  loved the end result.  I toggled through all the blend modes, adjusted the opacity, and moved each layer up and down until I got to something I thought was just right.

Here is a peek at my layers, blend modes, and opacity for this photograph.


Hmmm..that’s interesting isn’t it. My base layer isn’t the photograph but one of the textures! Honestly, this is the first time I tried using a texture as my base. I usually start with my photograph on the bottom as you can see here in this Picture Play write-up.   This time, however, I decided to play a little more and I think the end result is fabulous!

Sometimes when you use Picture Play, the overlay obscures part of the focal point of your image. When this happens simply erase or use a layer mask to remove part of the overlay that interferes with your image. For example, look at the blues layer above (third one down). See the white/black box to the right of the layer? This is a layer mask I used to erase part of that layer so my son’s face would shine through. You can easily use a soft eraser and end with the same result, but I like to use layer masks, so if I change my mind, I can easily go back and restore the image.

Well, that’s a sneak peek at Picture Play. I hope you enjoy using them!

15 ways to use Pinterest as a scrapbooker

Hi Sweet Shoppers! Kim here with my very first post!

I know many of you already use Pinterest. Personally, I use it on an almost-daily basis and I LOVE to use it for scrapbooking inspiration. Today I want to share a couple of the ways I use it for my scrapbooking needs and hopefully I can inspire you to start using it if you don’t already do, or to finetune the way you’re using it if you already have an account!

  1. Pin the layouts you love from the galleries.
    This one is pretty obvious and it’s something that most scrapbookers already do. Most of us have accounts at several galleries and adding all our favorite pages to the Gallery’s Favorites folder, results in favorites all over the place. With Pinterest you can keep all your favorite layouts by others (or by yourself!) to one board. Next time you’re looking for inspiration, you’ll only have one place left to visit!

    example of a page I scrapped inspired by a paper page I found on Pinterest. I used Blank Canvas and Countryroad by Kristin Cronin-Barrow. Click image to find a link to the original page.

  2. Follow others and repin, repin, repin!
    The more scrapbookers you follow, the more of their scrapbook related pins will show up in your feed. You can easily find other scrapbook boards using the seach box at Pinterest, or by digging in the repins your own layouts get. You can see who repins your pages and by visiting their boards, you can find more scrapbookers by seeing who repins their layouts! Follow them all and you’ll have to spend less time browsing the galleries for inspiration yourself. I have found many paper scrapbookers this way and since I usually don’t browse paper scrapbook galleries myself, I’ve found a great extra resource for inspiration for my pages.
  3. Use the description box to write down what you like about the layouts you pin.
    I have pinned certain layouts because I liked a particular idea I want to try myself. But with over 600 pins on my layouts board, it gets hard to remember all the reasons why I pinned them. Now I try to add a few words like: ‘composition’, ‘title work’, ‘colors’,… to make it easier for myself when I browse my board for inspiration.
  4. Pin tutorials you want to try.
    I used to pin scrapbook related tutorials to my scrapbook board, but they would easily get lost there. Now I save them all to one board I dedicated to tutorials. Most of them are Photoshop tutorials, but any kind of tutorial can go there.

    Photoshop tutorial: layer your child’s art over their photo.

  5. Pin great examples of typography to use as inspiration for your titles.
    I’m fascinated by typography! There’s lots of great examples to be found on Pinterest. It’s very interesting to see how (and which) fonts can be combined to make an eye-catching title for your pages.

    Great example of typography that can be adapted for your title work.

  6. Pin advertisements or other examples of graphic design to use as inspiration for your layouts.
    Personally I have made one board called ‘Graphic Design and Typography’ because often those two go hand in hand. Browsing that board always makes me happy. :)
  7. Pin quotes.
    One of my boards is just for quotes. I look in there when I can’t find the right words for my layout or when I need an idea for a subject to scrap about.

    Great quote to use on your scrapbook page!

  8. Pin photos to get inspiration for your own photos.
    We scrapbookers all take tons of photos, right? On my Photography board I pin photos that inspire me. Be it because of an interesting pose I want to try myself, a creative idea or a cute prop I’d like to try. I also pin photography related articles to that board. Those can contain tips for better photography, a list of the best lenses on the market and so on.

    Recreate the scene in an older photo and scrap both the new and old photo together.

  9. Pin the kits you want to buy to a digiscrap wishlist.
    If you shop at different places, a board like this is great to keep track of all your wishlists. And even if you only shop at SSD, it’s still a great way to share your interests with your scrapbooker friends! (for your next birthday you might even get a couple of long wanted items! ;) )
  10. Pin fonts.
    I probably have thousands of fonts on my computer. On my fonts board I like to keep visuals of interesting fonts. Even if I already have them, chances are high I forgot about them.   The next time I’m looking for the perfect font, I can take a peek at my board first before browsing through the huge stash on my computer. Timesaver!
  11. Follow InspiredbySSD to keep track of the challenges and repin the ones you would like to try.
    The staff team of SSD does a fabulous job gathering inspiration for your pages through challenges! And you can even gain great discounts if you complete them!
    Repin the challenges you want to try to your own SSD challenges board.  When a month is complete, you can either keep the board for further use, delete it, or you can re-assign the pins you want to keep to one of your other boards for future inspiration.
  12. Pin prompt for journaling.
    I have a separate board for scrapbooking prompts. It contains lists. Lists of questions to ask my kids, list of photos to take, lists of questions to help me with my Book of Me,… Again, there’s lots of those to find on Pinterest and it gives me ideas for pages to scrap.

    List of questions to get your child’s perspective of things in your pages.

  13. Make a separate board for photobook cover inspiration.
    This might not be relevant for everyone, but if you typically have your pages printed in bound books, it’s nice to have a place where you can easily find inspiration for your covers!
  14. Pin handmade cards and other paper/hybrid projects to a separate board.
    Just so inspiration is easy accessible when you try your hand at one of those!

    Card made by origami using Chemical Reaction by Melissa Bennett and All in One Card Templates Vol. 2 by Cindy Schneider.

  15. Pin your own pages if you want to inspire others.
    Lots of scrapbookers browse Pinterest for inspiration, so why not posting a couple of your own pages you’re proud of? :)

That’s it! I hope this list was helpful. After all the hard work you did by pinning stuff to your boards, don’t forget to browse your pins often and DO something with all the inspiration you gathered! If you want to follow me on Pinterest and take a peek at some of the boards I talked about, you can find me HERE. If you want to share any other tips about using Pinterest as a scrapbooker, let me know through the comment section!

Lighten up, baby!

Well hey there Sweet Shoppers! Jacinda here to share with you my secrets for shadowing lighter kits. Now I’m by no means a shadow guru, and I’m sure there are a hundred different ways to do it, but this is my way, and I thought I’d share.

I’ve lost count how many times I’ve seen a beautiful layout in the gallery that would look SO much better if only the shadows were lighter. Sometimes the shadows are so dark, they’re the only thing I can focus on, and the rest of the layout seems secondary. Today I’m going to share with you the shadow settings I use when working with lighter coloured papers/elements.

This is the layout I’ll use as an example. I’ve created the layout and applied my shadows as I do for every layout. As you’ll see, the shadows are quite dark. I’ve used my regular go-to shadow presets that normally look great on darker papers, but on the lighter colours, they are just too heavy.

Here is the layout with lighter shadows that I will show you how to get. (It is linked to the gallery for credits):

First I’ll change the shadows on the flowers and leaves. I find that black is just too dark for good looking shadows. Normal shadows pick up the colour of the item below it, so for this layout, with a pink background, I’m going to give my elements a slightly pink toned shadow. Click on a flower or leaf layer, open the shadow dialogue box and click on the colour picker. Now click somewhere on the background of your actual layout. Drag the cursor down the colour palette to get a darker colour then click OK. There’s no hard and fast setting, just go about half way down the palette.I settled on 845c53 for mine.


Next, I played with the shadow settings until I was happy, adjusting opacity, distance and size. I find linear burn is a nice blending mode to use as it picks up colour better. I have to say it felt strange the first time to have a really light shadow. It’s often not until several elements are lightly shadowed that the look comes together. These are the settings I decided on:

Click OK when you’re happy, then copy this shadow setting on to all other leaves and flowers. (Right click in the layers palette, select ‘copy layer style’. Then right click on other elements and select ‘paste layer style’).

Next I lightened the shadows on my title. I forgot to change the colour on this one, so you can see how much I had to lower the opacity to compensate:

The background paper.  I also added a very light outer glow to the opposite edges so they don’t look so flat.:

And lastly, the stitching. I kept this really light:

Here’s the end result. I think the layout as a whole looks so much better. The flowers look softer, and the shadows don’t overpower the feel of the layout.

Here’s a side by side comparison.

So what do you think? Ready to try lightening your shadows a little? Have a go and see what you come up with. The lovely Krystal Hartley also has a tutorial and some free shadow styles available on her blog for those of you who would like a starting point. Remember that all preset shadow styles can still be tweaked to suit your layout.

Link to Krystal’s tutorial and free shadow styles: Scrap Happiness Inside