Think Outside the Album: Treat Bag Toppers 10/27
Spooky salutations and welcome to the October installment of Think Outside the Album, where we look at different ways to take our digital supplies off the scrapbook page and instead, use them to make the rest of our world just a little bit sweeter!
I don’t know about you, but I really love this blog series! It’s a chance for me to reach back to my paper crafting days and re-think the digital way to approach many of those projects. So far, we’ve covered custom candy bar wrappers, double-walled tumblers, magnetic bookmarks, iron-ons for t-shirts & kitchen towels, custom fabric for creating apparel and accessories, and seasonal wall decor for fall.
This month’s project is just as sweet as it can be, and perfectly timed for the holidays. Let’s make some treat bag toppers!
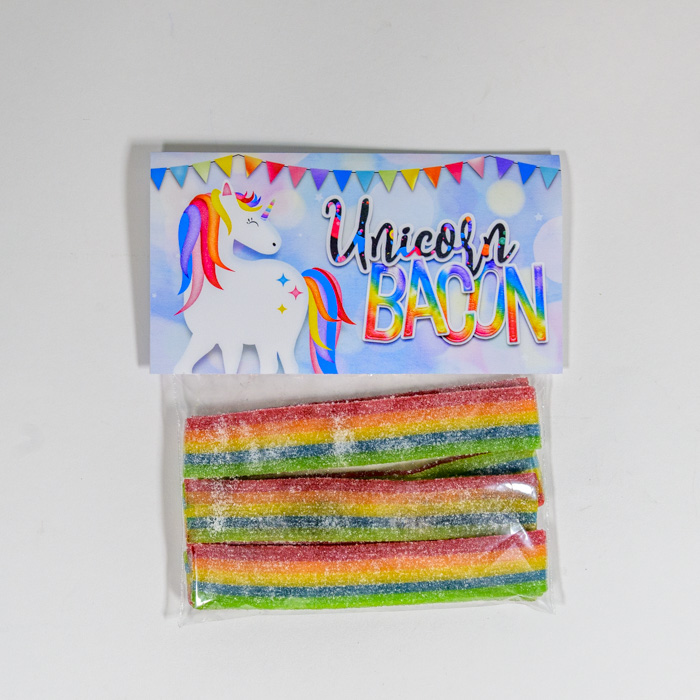
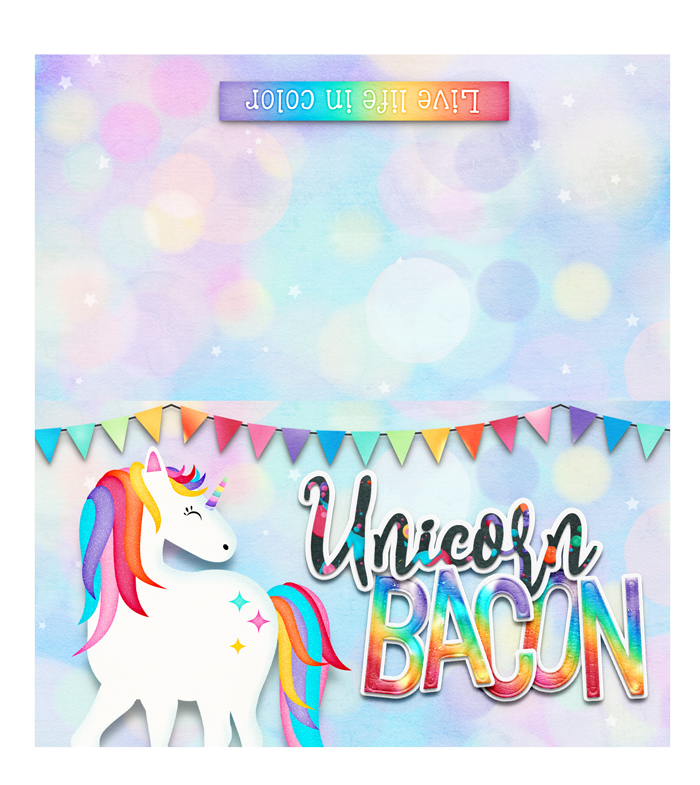
Made with Over the Rainbow by Blagovesta Gosheva
If you’re looking for a quick way to jazz up some store-bought goodies, nothing beats a custom treat bag topper. They’re perfect for small “thank you” or “thinking of you” gifts. They look fantastic with party favors and other goodie bags. And if you want to knock their socks off at the Halloween party this weekend, treat bag toppers are the way to go!
What you’ll need:
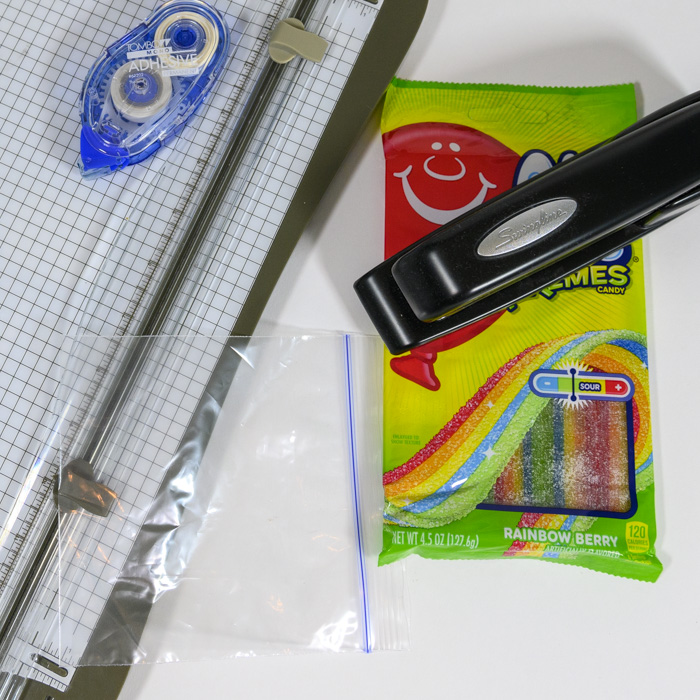
Color printer
Either inkjet or laser is fine; I used my HP OfficeJet Pro 9010 All-In-One
White cardstock or heavy-weight paper
I recommend 48lb and up
Clear plastic bags
I used ziploc-style snack- and sandwich-sized bags for these projects. Slider bags are NOT recommended.
A way to measure the width of your bag
I used a ruler or tape measure, depending on which was closest to me at the time.
Something to help you cut & fold
Scissors or paper trimmer, scoring blade or scoring board, bone folder or your thumbnail.
A way to stick the topper to your bag
Staples & and stapler are most secure but will be visible.
Double-stick rolling adhesive is invisible but less secure.
And a treat to put inside the bag
Candy. Cookies. Pretzels. Marshmallows. Popcorn. Kleenex. Hand sanitizer. Small toys.
Your imagination is the only limit. For ideas, search Pinterest or your favorite search engine for “treat bag ideas”.
Step 1: Create your Treat Bag Topper’s design
Open your favorite digital design software and start with a blank canvas the same size as the cardstock you’ll be printing on (in my case, that’s 8.5″ x 11″).
Measure your plastic bag to determine its width across the zipper. You want your treat bag topper to be a bit wider than this measurement so it overhangs each side.
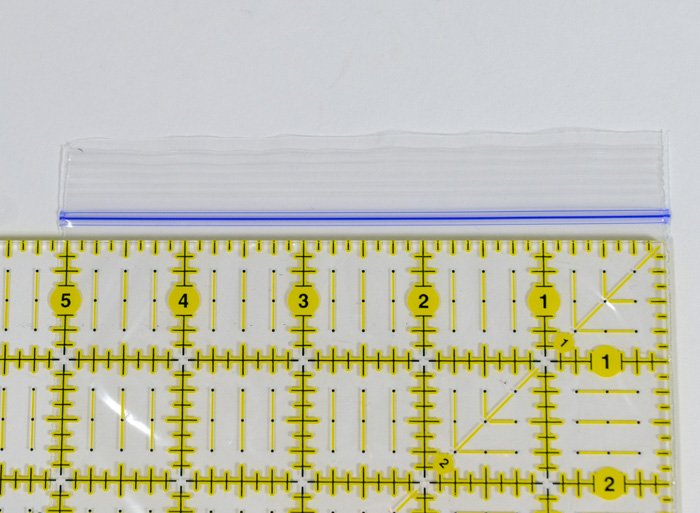
The snack-size bags I used are 5″ wide, so I went with 5.5″ wide for my topper.
Next, decide how tall you want your topper to be. I want enough space to really play with the design, so I chose a 3″ tall topper.
Here is what my template looks like:
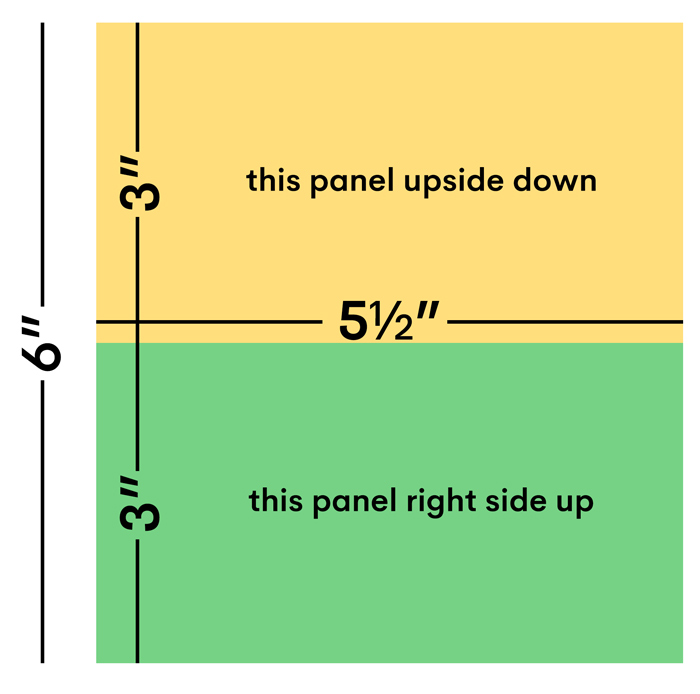
WARNING: It’s important to note that the top half of your design must be upside down and the bottom half must be right side up in order to have the correct orientation once printed and folded. This is a common thing to mix up and you wind up wasting cardstock when you have to fix and re-print it. Ask me how I know… Learn from my mistakes – save yourself the frustration and double-check before you hit Print!
Once your template is set up for sizing, you can pull out all those gorgeous digital scrapbook supplies from the Sweet Shoppe and make some magic!
Made with Over the Rainbow by Blagovesta Gosheva
Step 2: Print your Treat Bag Topper
When you’re happy with your design, it’s time to take it off the screen and get it onto some paper! This is pretty straightforward: load up your printer with cardstock or heavy-weight paper and hit “print”. Glossy or matte, it’s your choice … you can also give photo paper a try if you’d like.
WARNING: Allow plenty of time for the ink to dry before you move on to the next step. Nothing is more frustrating than smudging an almost dry printout when you put it through your paper trimmer. Specialty paper is expensive! So be patient and give it a little extra time to dry.
Step 3: Assemble your Treat Bag & Topper
Fill the plastic bag with treats, leaving some room at the top of the bag. Remove the excess air from the bag and zip it shut.
Adding on the topper is as easy as 1-2-3: 1 – cut it out, 2 – score and fold it, and 3 – attach it to the bag.
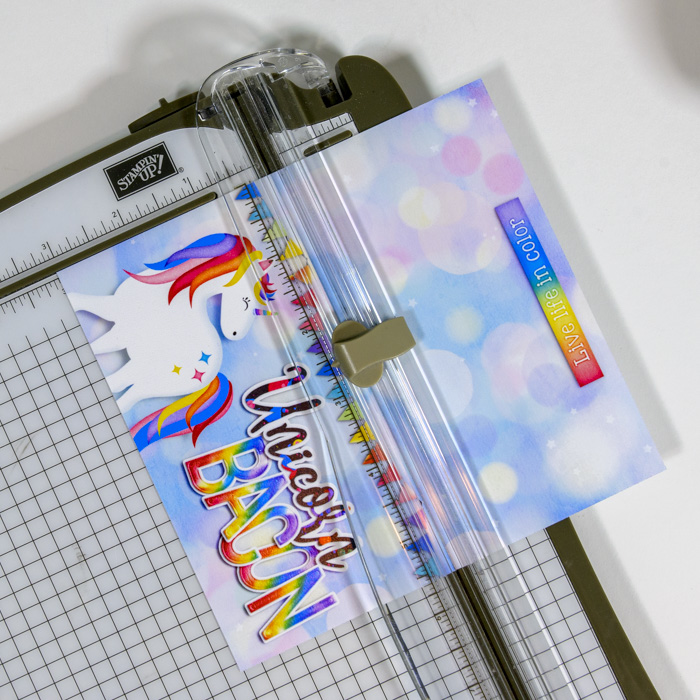
- Cut out your Topper. My trusty paper trimmer did the job quickly and easily, but a pair of scissors or a rotary cutter and ruler will work just as well.
- Score and fold your Topper. If you have a scoring blade for your trimmer or a scoring board, use it. It will give your finished topper a crisp, professional look. If you don’t have one of these tools, don’t worry. Simply fold the topper in half, wrong sides together, matching the long ends. Do this slowly and carefully to make sure you get an accurate fold.
- Attach your Topper to the Treat Bag. Slide the topper over the zippered end of the bag and attach it with double-stick adhesive or a couple staples.
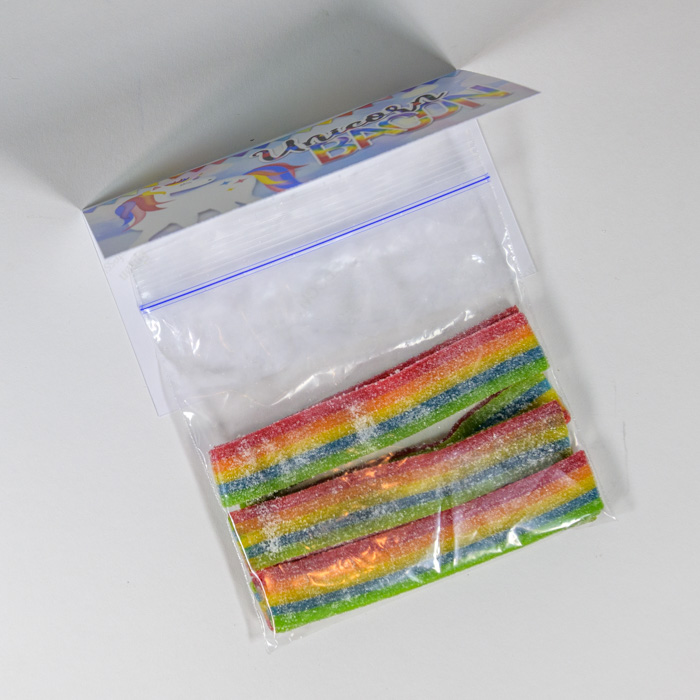
Made with Over the Rainbow by Blagovesta Gosheva
That’s all it takes! There’s so many things you can do with Treat Bag Toppers; read on for more project ideas.
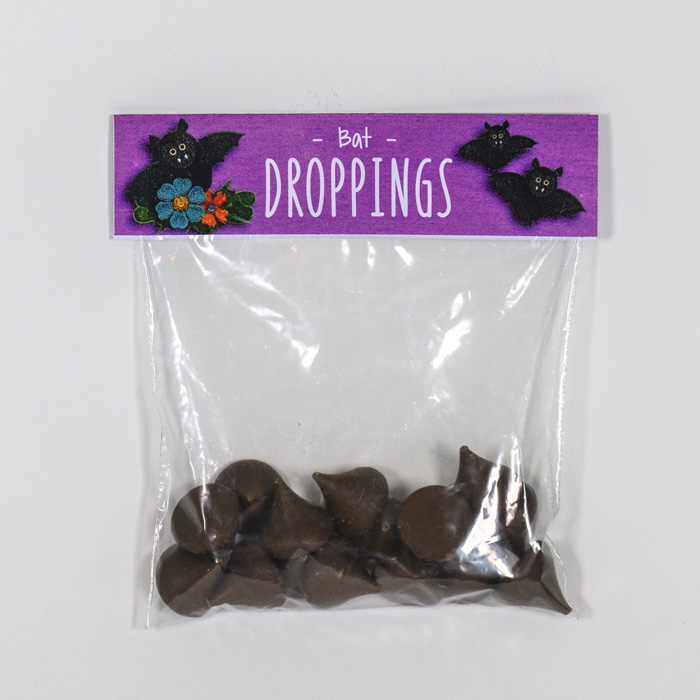
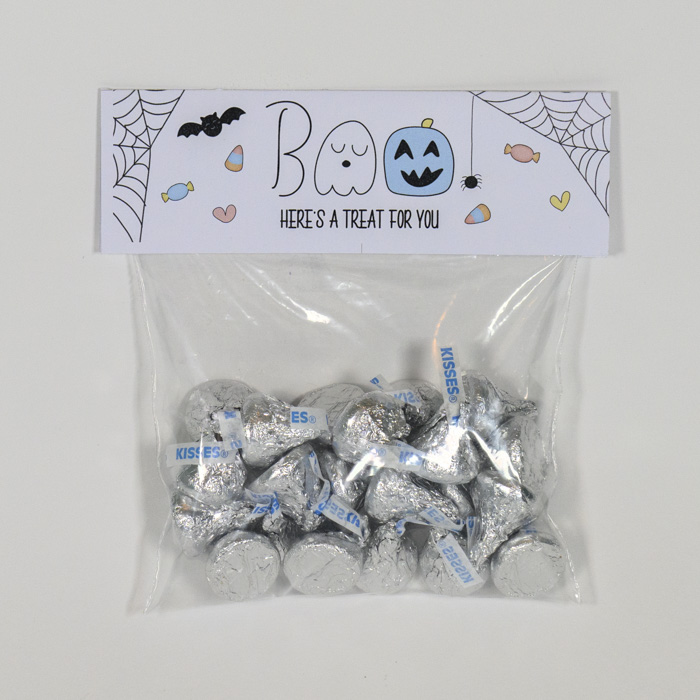
Project #1: Halloween Treat Bag Toppers
SugarBabe Jacinda came up with an adorable trio of spooky-but-cute treat bags that are perfect for Halloween.

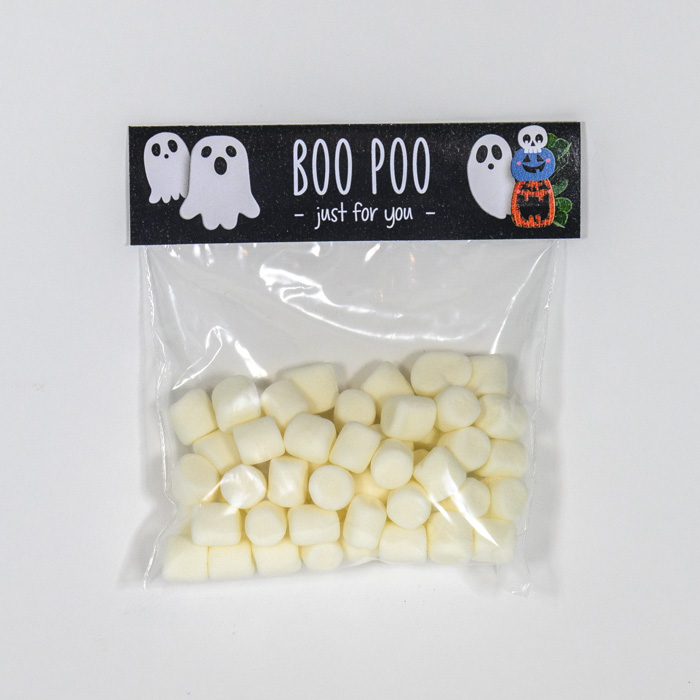
Made with Hello Halloween Bundle by Clever Monkey Graphics
Made with Hello Halloween Bundle by Clever Monkey Graphics

Made with Hello Halloween Bundle by Clever Monkey Graphics
SugarBabe Cassie got in on the Halloween fun and created this adorable topper suitable to top any treat you choose.

Made with So Cute It’s Scary by Amanda Yi Designs & Meghan Mullens
Project #2: Adult Treat Bag Topper
Customized Treat Bag Toppers aren’t just appropriate for gifts for kids. Why not put together an adult goodie bag for the guys’ camping trip or a Bachelorette weekend?

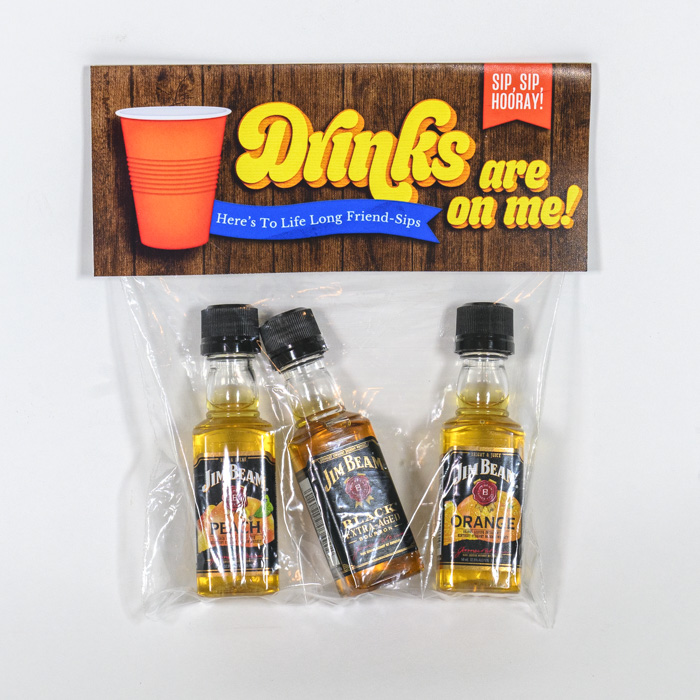
Made with Kick Back and Relax Bundle by LJS Designs
Project #3: “Just Because” Treat Bag Topper
It’s fun to stick a surprise in a lunch box or work bag… something silly like a bag of “donut seeds” would make an awesome snack.
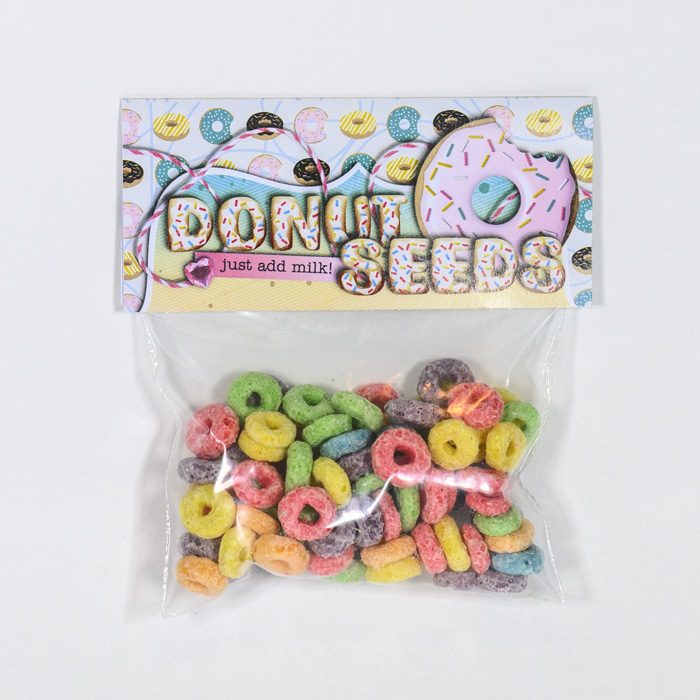
Made with Donut Worry by Meagan’s Creations & WendyP Designs
Project #4: “Make Your Own Monster” Treat Bag Topper
Not all treats have to be edible! SugarBabe Jacinda created an adorable and ingenious treat bag that would make a perfect party favor. Combine a small container of Play-Doh with pipe cleaners, pom-poms, googly-eyes, and other bric-a-brac, and you’ve got an instant “Make Your Own Monster” kit. Check it out!
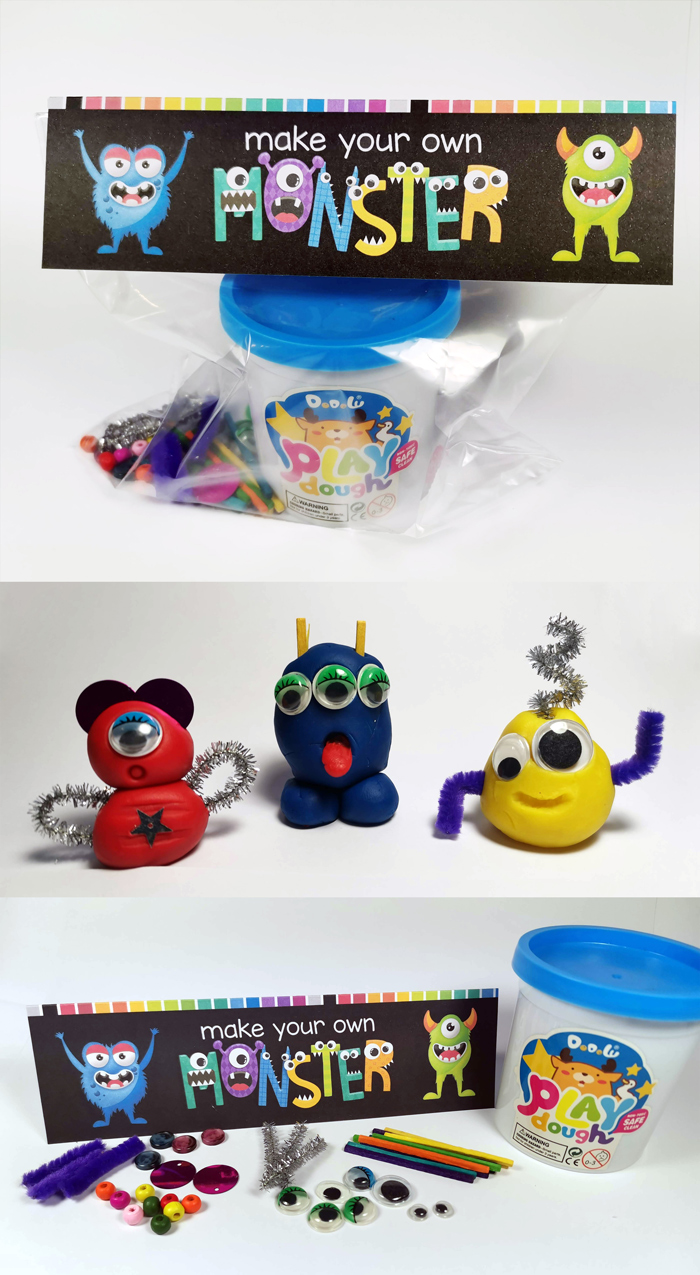
Made with Monsterriffic Bundle by Jocee Designs and Meghan Mullens
And as we move from fall to winter, this idea easily adapts into a “Colorful Snowman Kit”:

Project #5: Employee Appreciation Treat Bag Topper
With Thanksgiving just around the corner, it’s the perfect time to tell your employees or teammates you’re grateful for them. Store-bought cookies go from impersonal “meh” to personalized “wow!” when you create a custom treat bag topper.
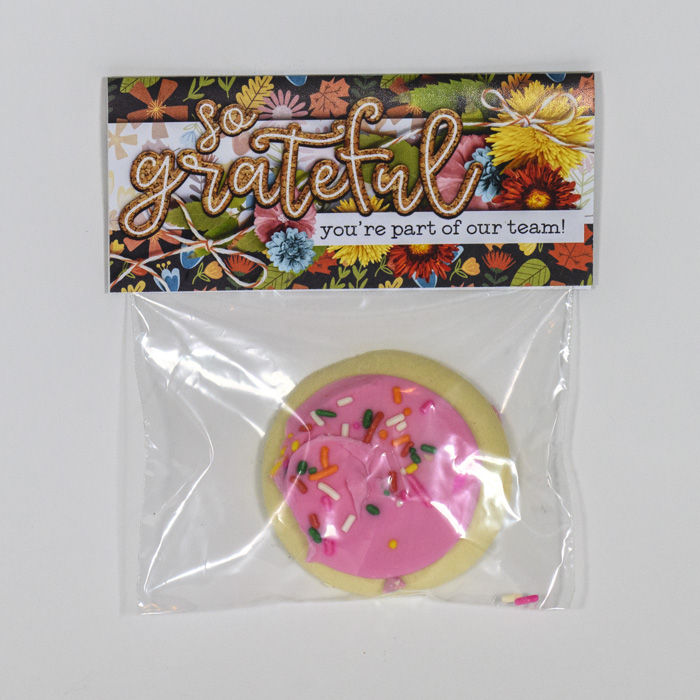
Made with a new collection from Traci Reed making its debut in the Shoppe 29 October
And that’ll wrap up this edition of Think Outside the Album!
From seasonal goodie bags for kids and adults to thank-you and “thinking of you” gifts, employee appreciation giveaways, teacher gifts, love mail for college students, and party favors for every theme under the sun, treat bags with custom toppers are quick to make but make a big impact!
What other ideas do you have for Treat Bag Toppers? Tell me in the comment section below and be sure to snap a few pics of your next project to share in the Gallery. I can’t wait to see what you create when you Think Outside the Album!


